DIY Guide to Replace Taptic Engine in iPhone 8 Plus
Duration: 60 min.
Steps: 16 Steps
In this guide, we’ll walk you through the process of swapping out a faulty Taptic Engine in your iPhone 8 Plus. If your phone is feeling a bit quiet and doesn’t vibrate, this repair is just what you need! Before diving in, make sure to back up all your important data and give yourself a little zap-free boost by touching something like a radiator. Let’s get your phone buzzing again!
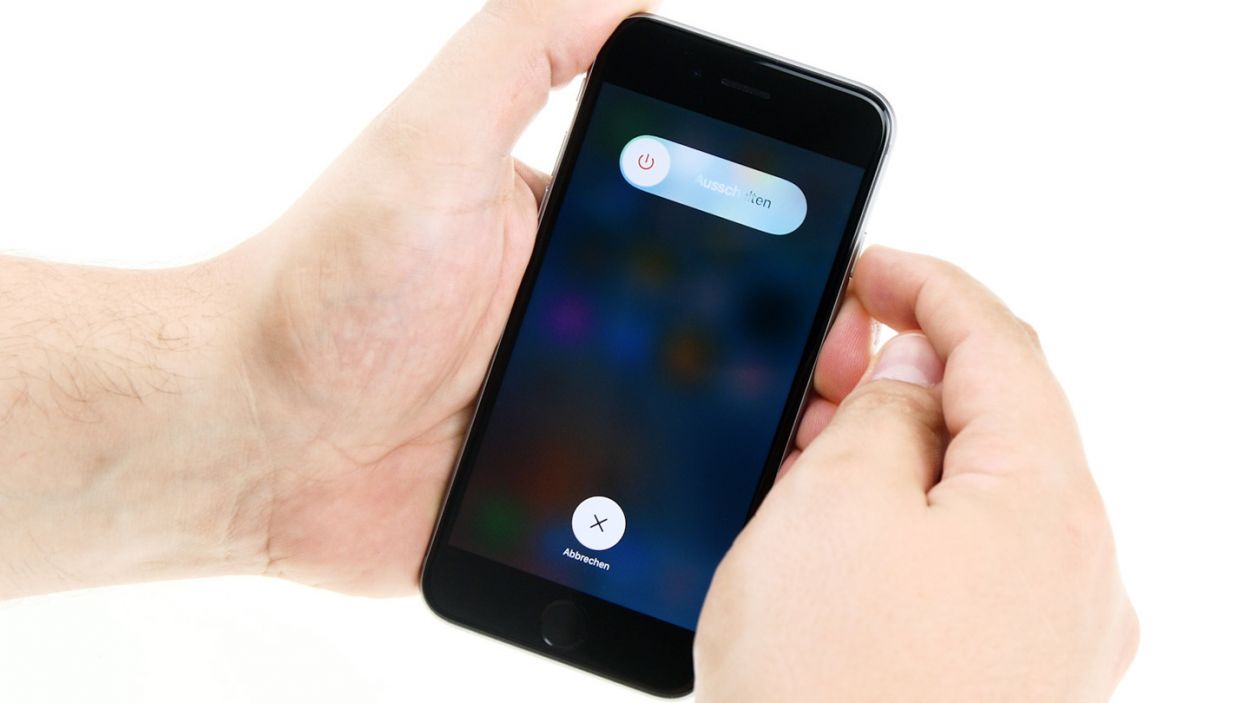
Step 1


– First things first, let’s power down your iPhone completely so we can work without any mishaps. Press that Sleep/Wake button for about three seconds until you see the ‘power off’ slider pop up.
– Now, give that slider a gentle swipe from left to right. Your iPhone will take a little moment, around ten seconds, to shut down completely. Hang tight!
Step 2

2 × 3,4mm Pentalob
– Remove the two pentalobe screws at the bottom of the enclosure. They’re to the right and left of the Lightning connector. Store the screws in the same section of your magnetic pad, so they don’t get mixed up with other small parts.
Step 3


If you find it necessary, warm up the outer edges of the display a few times. Just a friendly reminder: the flex cables for the display are hanging out on the side of the Sleep/Wake button. And hey, keep in mind that once you pop open that iPhone 8, it waves goodbye to its warranty for dust and splash protection (IP 67 rating).
– First, let’s set your iPhone 8 Plus down on a soft, clean surface to keep that shiny back from getting scratched.
– To lift the front panel, grab a suction cup, a hard plastic pick, and a heat gun. If your screen is looking a bit like a jigsaw puzzle, cover it with packing tape before moving on.
– The screen is glued to the frame, so let’s warm it up! Use that heat gun to heat the outer edges of the display to around 60°C (140°F).
– Place the suction cup over the Home button (if you can) or right next to it. While you gently lift the screen with the suction cup, slide the hard plastic pick between the aluminum frame and the display frame, pressing down on the aluminum frame as you go. Since it’s glued on, you’ll need to slide the pick all around the iPhone. Just a tip: don’t slide the pick too far near the Sleep/Wake button to avoid any damage to those delicate flex cables.
– Now, use the pick to gently lever the display so the tabs pop out of the aluminum frame. You can then fold the display to the side.
– Lean the display against something stable to avoid bending those sensitive flex cables too much.
Step 4


2 × 1,2 mm Phillips
1 × 1,4 mm Phillips
1 × 2,6 mm Phillips
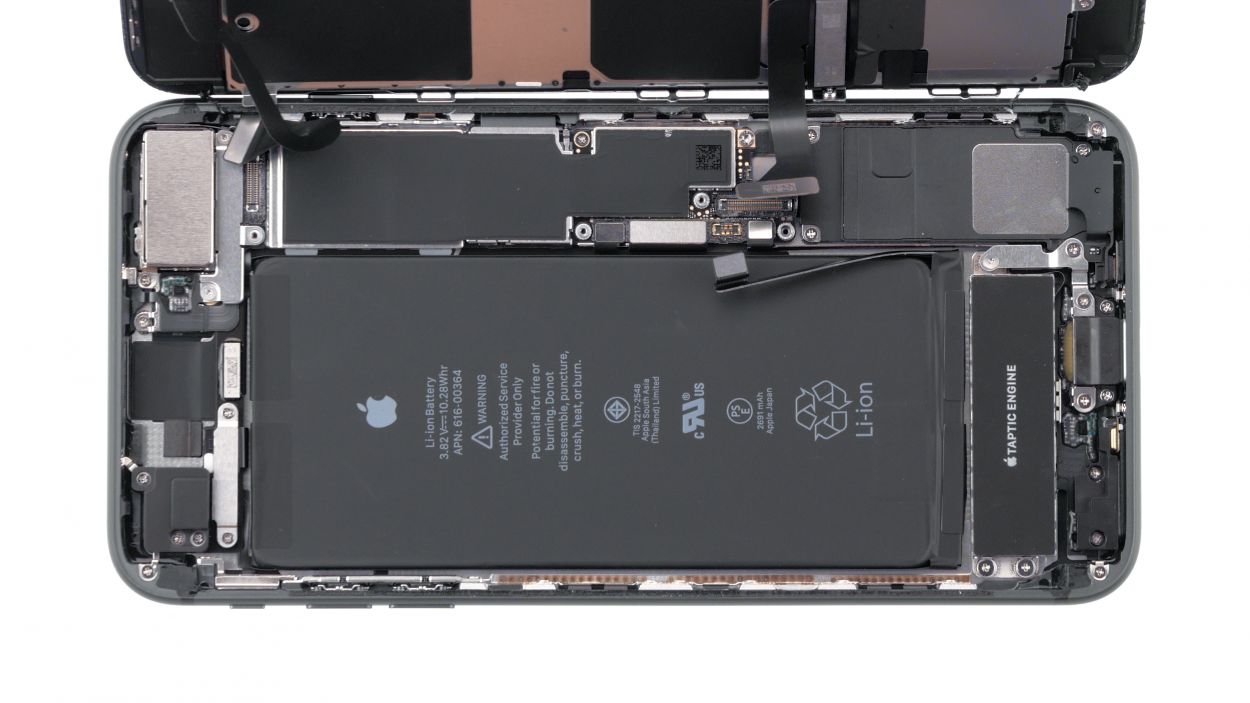
Before you jump into this repair adventure, let’s make sure your battery is disconnected! This little step will help keep short circuits at bay and ensure your device doesn’t accidentally power up while you’re working. Safety first, right?
– Grab your trusty Phillips screwdriver (Ph00) and let’s tackle those Phillips screws! Once they’re out, gently remove the cover and make sure to keep all the parts cozy in the same section of your magnetic pad.
– Now, with a little finesse, use a plastic spudger to carefully lift off the battery contact. Just slide it in gently below the connector and you’re all set!
Step 5


Display Connector
Home Button Connector
Step 6


1 × 1,1 mm Y-Type
1 × 0,9 mm Y-Type
– Grab your Y-Type screwdriver (Y000) and let’s get those two Y-Type screws out of the way! Once they’re gone, gently lift off the cover. Don’t forget to keep all those little parts cozy in one spot on your magnetic pad.
– With a spudger in hand, carefully disconnect the FaceTime contact from the PCB. You’re doing great!
– Now, it’s time to fully remove the display. You’ve got this!
Step 7


1 × 1,1 mm Y-Type-Schraube
1 × 3,3 mm Phillips-Schraube
1 × 2,5 mm Phillips-Schraube
2 × 1,2 mm Phillips-Schraube
1 × 2,3 mm Phillips-Schraube
Antenna Connector
– First up, let’s tackle that Y-type screw and the two Phillips screws holding down the silver antenna cover. Once they’re out, you can easily lift off the cover like a pro!
– With the cover off, it’s time to gently disconnect the coaxial antenna flex cable using your trusty spudger. Take it slow and steady!
– Next, let’s get those Phillips screws securing the speaker out of the way. Remember, these screws come in different lengths, so keep them organized to avoid any mix-ups when you put everything back together.
– Now, carefully lift the contact off the PCB by sliding a plastic spudger just below the connector. You’re doing great!
– Finally, you can remove the speaker and the antenna flex cable. Almost there!
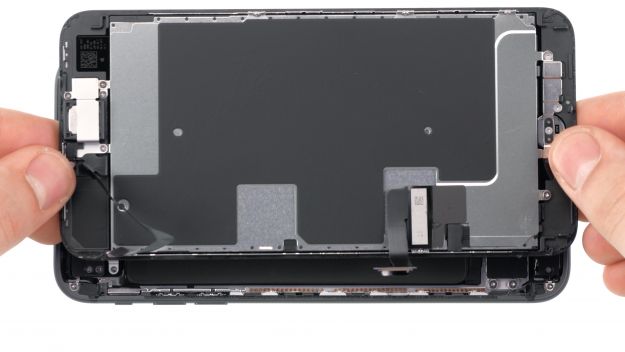
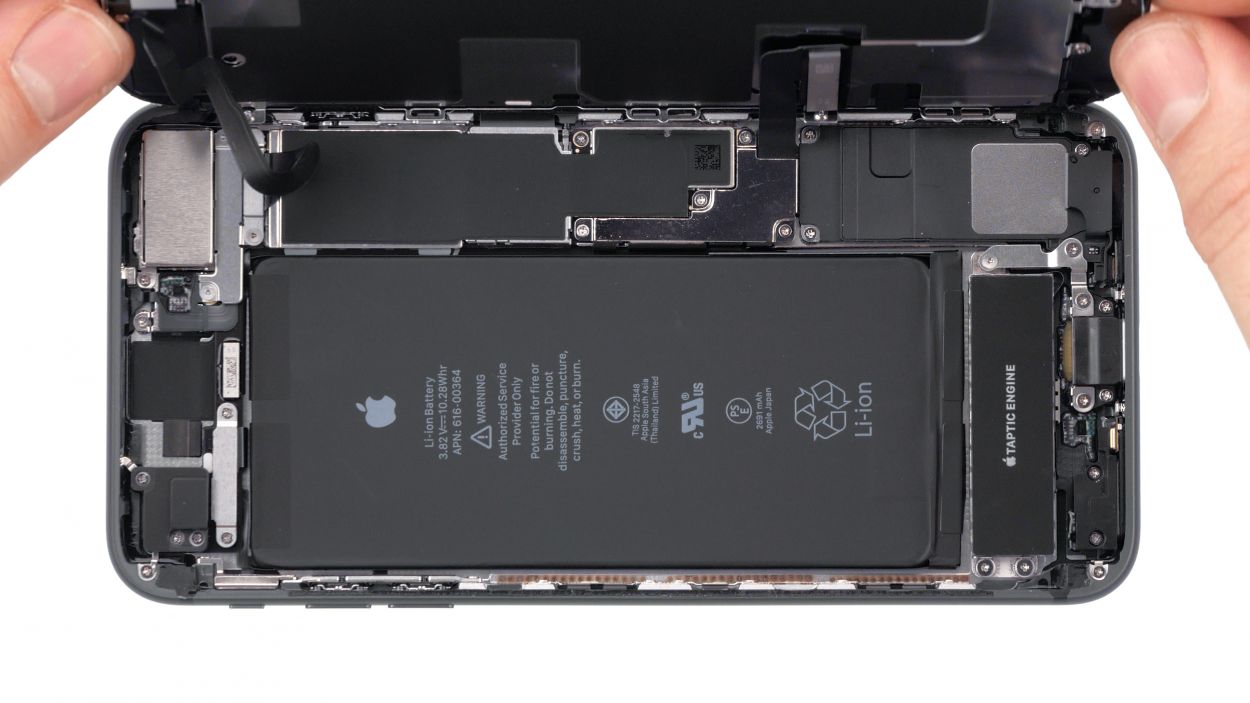
Step 8
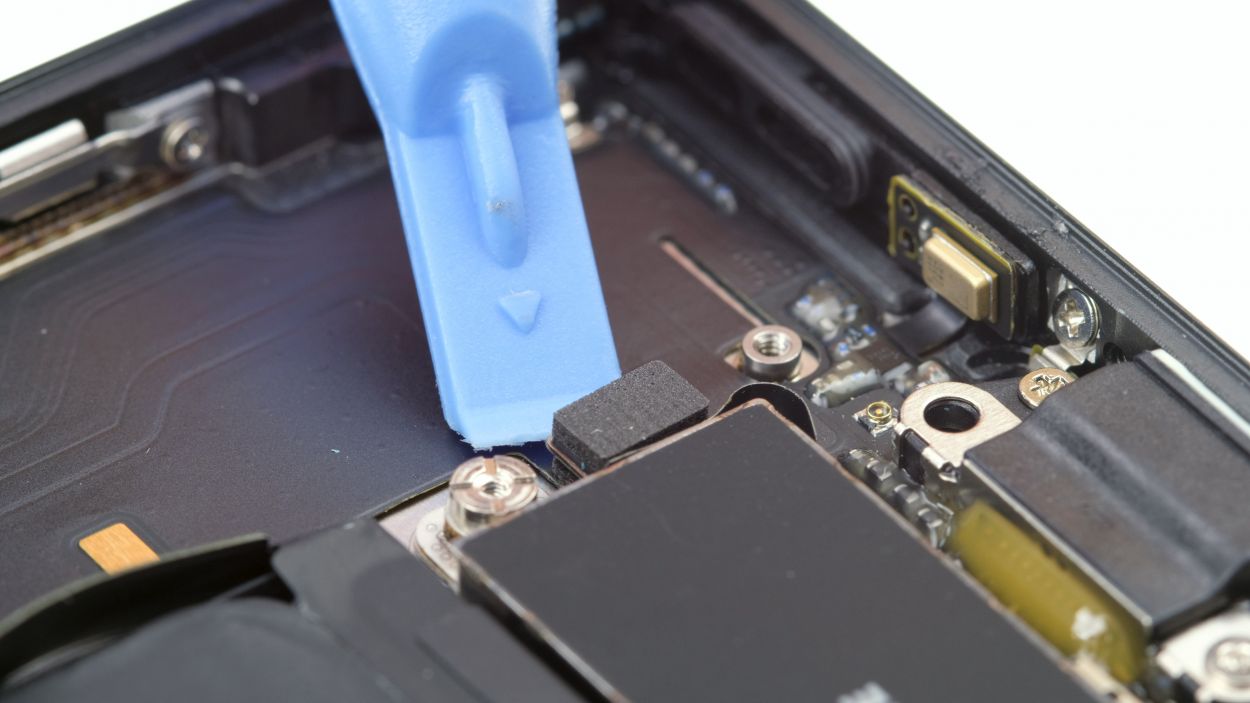
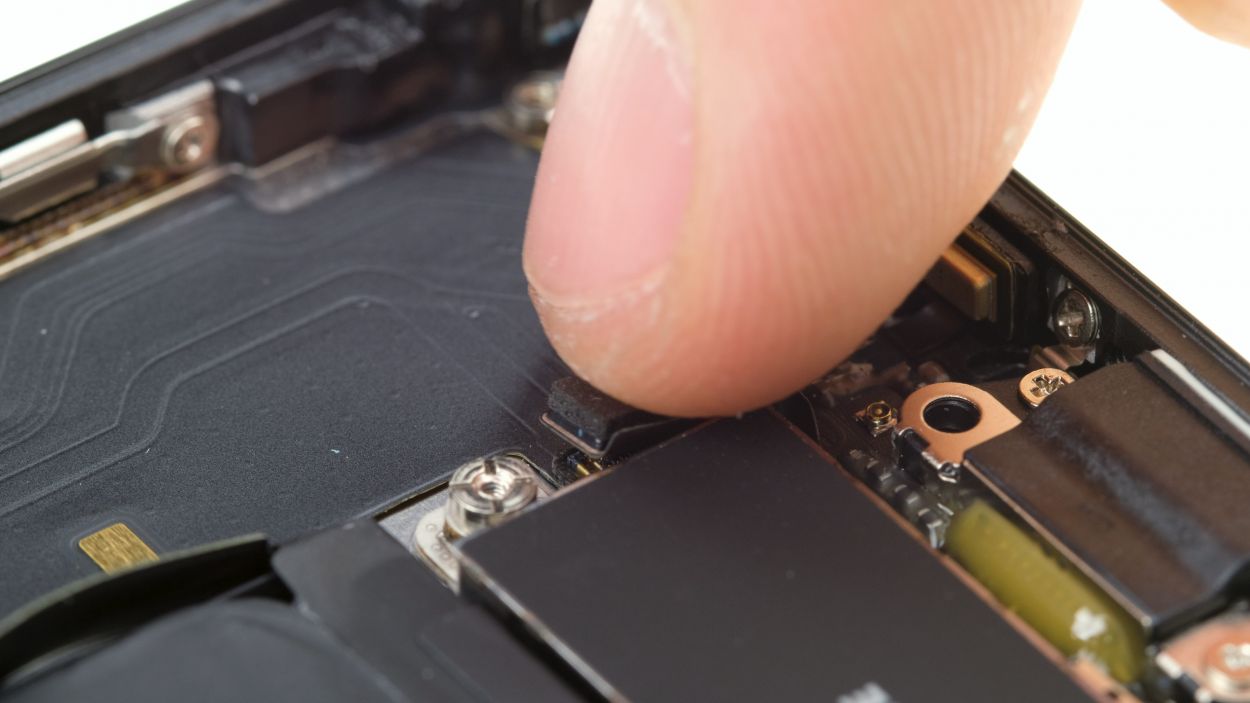
– Grab your trusty spudger and gently disconnect the Taptic Engine’s contact. You’re on a roll!
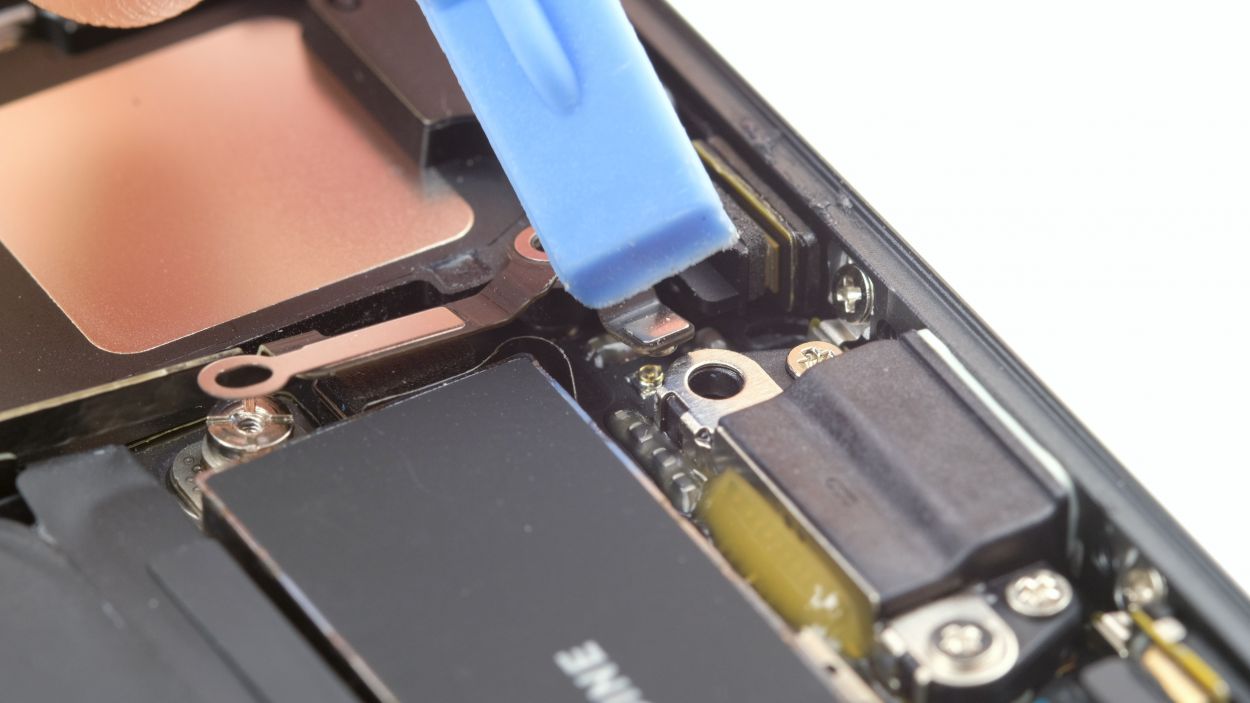
– Next up, let’s tackle that internal thread screw along with the Phillips screws holding the Taptic Engine in place. You’ve got this!
– And now, it’s time to carefully lift out the Taptic Engine. Almost there!
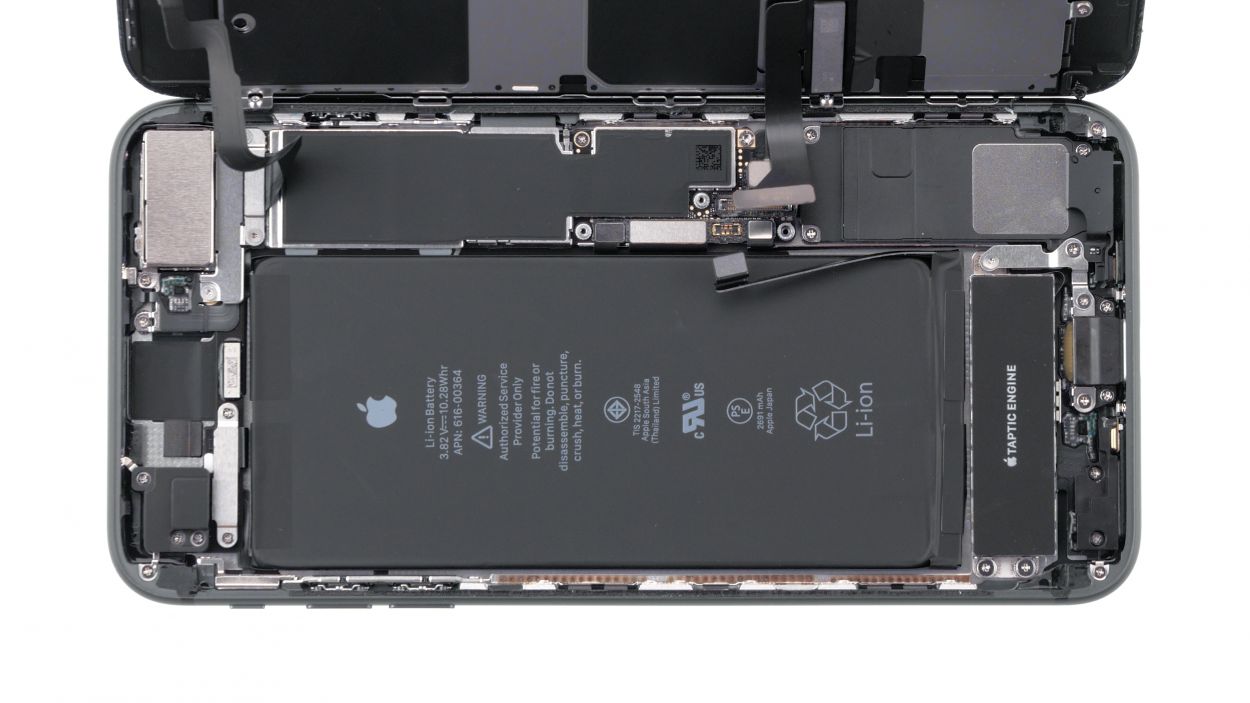
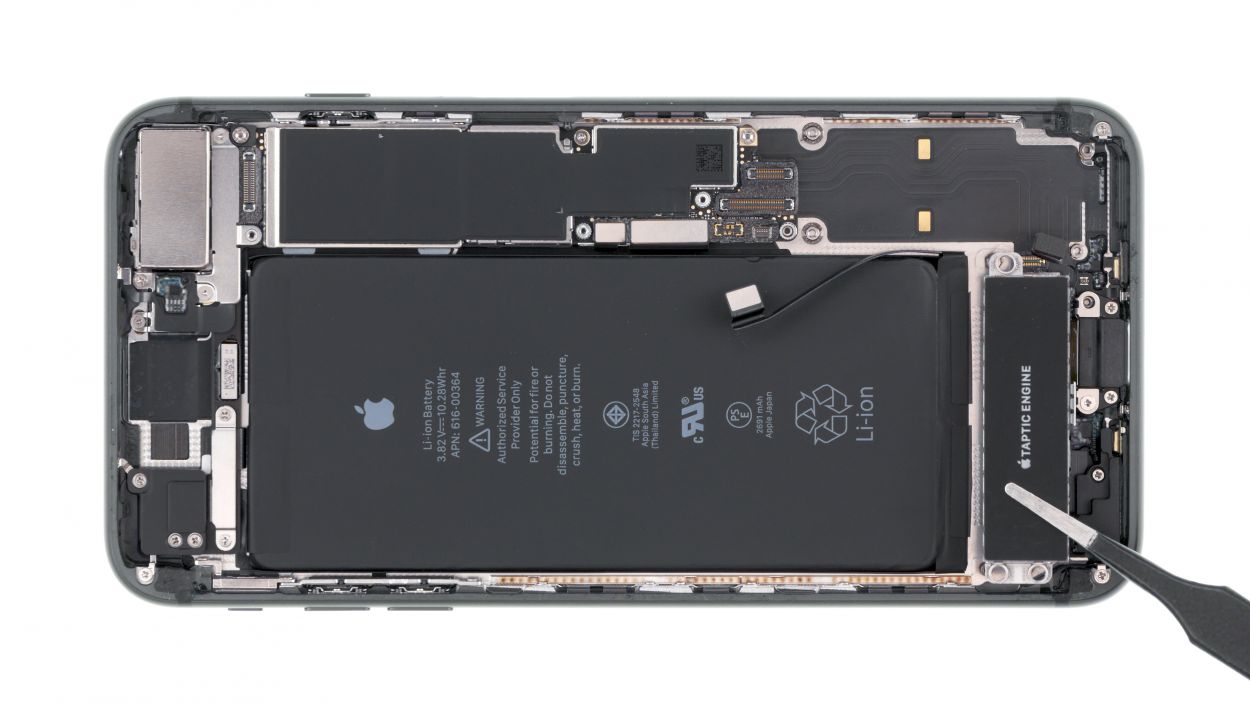
Step 9
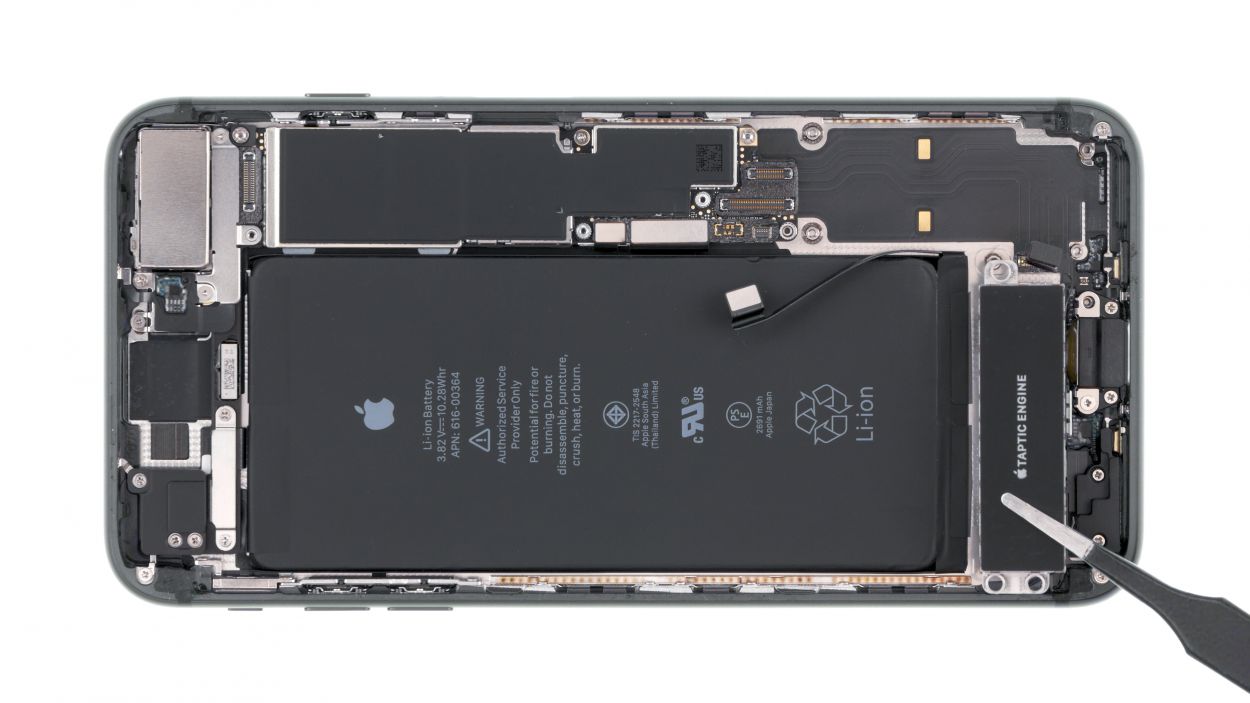
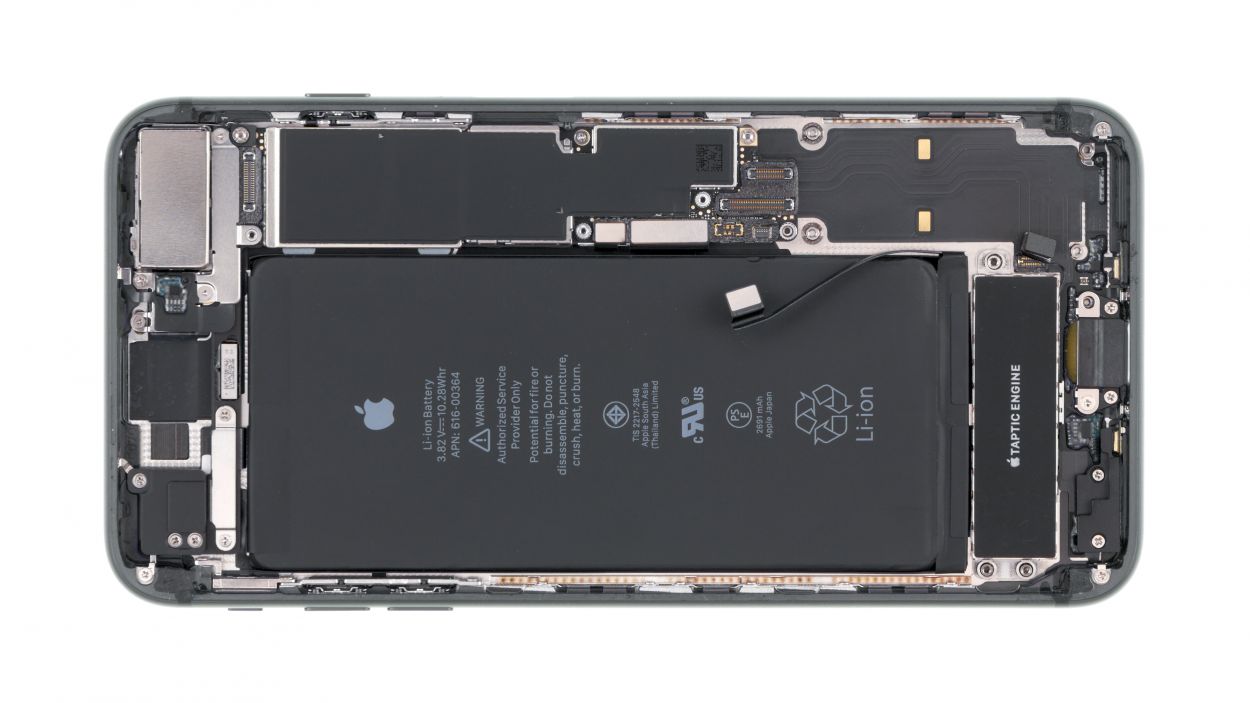
– Nestle the Taptic Engine snugly back between the battery and the Lightning connector. It’s like tucking it in for a cozy nap!
– Secure the Taptic Engine in place with those trusty screws, just like putting the finishing touches on a masterpiece.
– Reconnect the Taptic Engine’s contact to the Lightning connector, ensuring it’s all set to make your phone vibrate like never before!
Step 10


2 × 1,2 mm Phillips-Schraube
1 × 2,3 mm Phillips-Schraube
Antenna Connectors
1 × 1,1 mm Y-Type-Schraube
1 × 3,3 mm Phillips-Schraube
1 × 2,5 mm Phillips-Schraube
– Alright, let’s get that speaker back in its cozy spot! Gently press it down towards the lower edge of your iPhone.
– Don’t forget to tuck that antenna flex cable snugly between the battery and the speaker—it’s got to fit just right!
– Now, grab those Phillips screws and secure the speaker in place. You’re doing awesome!
– Next up, position the coaxial antenna connector over its socket and give it a gentle press to snap it into place.
– Finally, reinsert the silver plate and tighten it down with the Y-type screw and those two Phillips screws. Almost there!
Step 11


While a frame sticker on your iPhone gives it a solid defense against dust and a splash of water, don’t forget—it’s not a full-on waterproof suit!
Double-check that the frame sticker is lined up just right! Each corner has its own unique shape, so use that to guide you along the way.
– To ensure that the new frame sticker sticks like it means it, wipe away any leftover glue and dirt. We want a clean slate!
– Peel off the first layer of protective film from the frame sticker. It’s like unwrapping a gift!
– Carefully align the frame sticker on one edge and press it down gradually. Make sure it’s even as you go—no one likes a crooked sticker!
– Finally, take off the remaining layers of film. You’re almost there!
Step 12


Facetime connector
1 × 1,1 mm Y-Type
1 × 0,9 mm Y-Type
– Gently rest the display on the frame and connect the FaceTime contact to the logic board. You’re almost there!
– Now, pop the cover for the FaceTime contact back into the iPhone and secure it with those three Phillips screws. You’ve got this!
Step 13


Display Connector
Home Button Connector
– Alright, let’s connect those two buddies—the Home button and the display—right to the logic board. They’ll be best friends in no time!
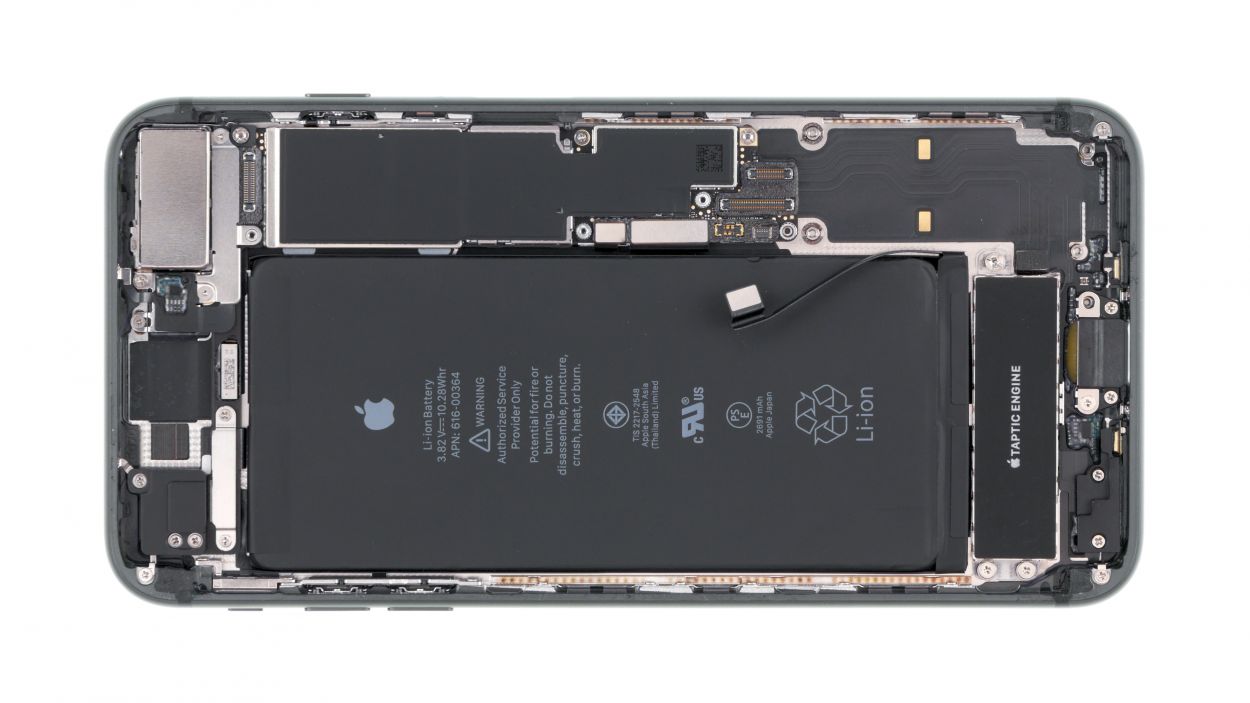
Step 14


Battery Connector
2 × 1,2 mm Phillips
1 × 1,3 mm Phillips
1 × 2,6 mm Phillips
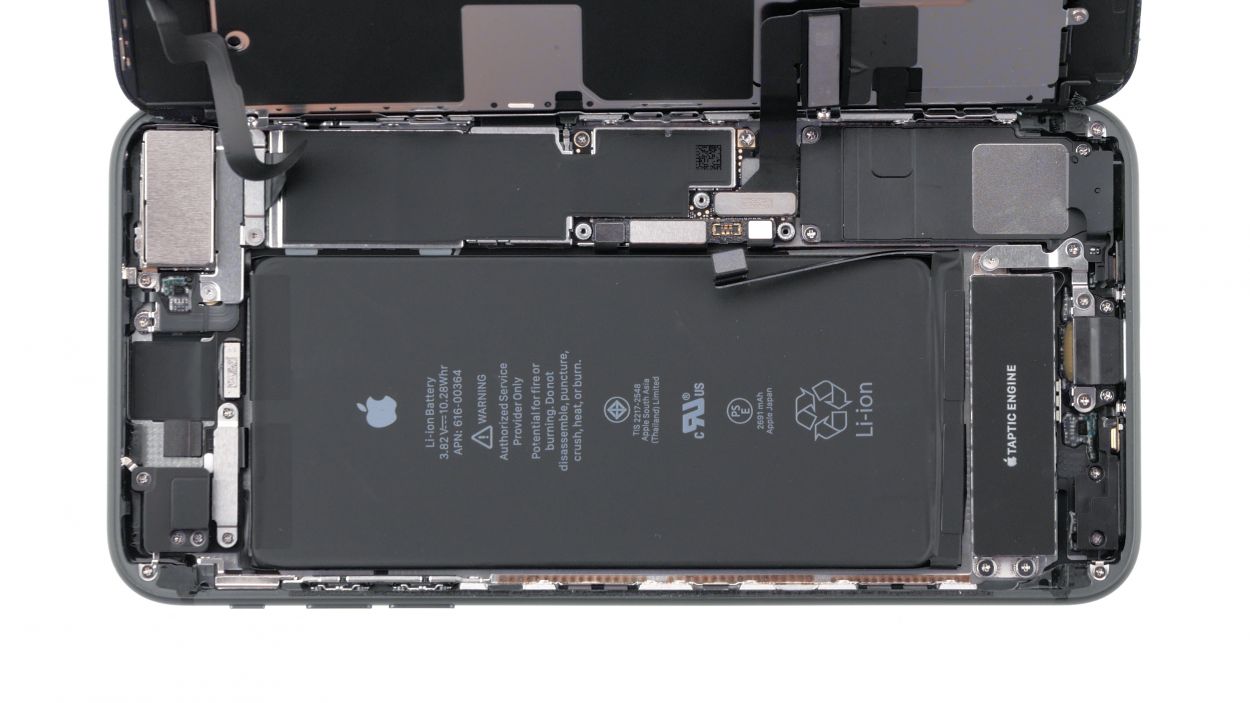
– Reconnect the battery contact like a pro! It’s time to bring that power back to life.
– Now, gently place the metal cover back onto your iPhone and fasten it down with those screws. You’ve got this!
Step 15

For a little extra help in making that glue stick like it means business, try using some plastic clamps or simply sandwich your device between two books. It’s all about giving that glue the best chance to bond!
Step 16

2 × 3,4mm Pentalobe
– Time to give those two pentalobe screws a cozy home! Screw them into the enclosure, right to the left and right of the Lightning connector. You’re almost done!