DIY Guide to Replace Wi-Fi Antenna on Galaxy S3
Duration: 30 min.
Steps: 17 Steps
In this handy guide, we’ll walk you through the steps to swap out the Wi-Fi/GSM antenna on your Samsung Galaxy S3 all by yourself. If you’re having trouble with your Wi-Fi or GSM signal, this fix might just do the trick. And remember, if you need help, you can always schedule a repair.
Step 1
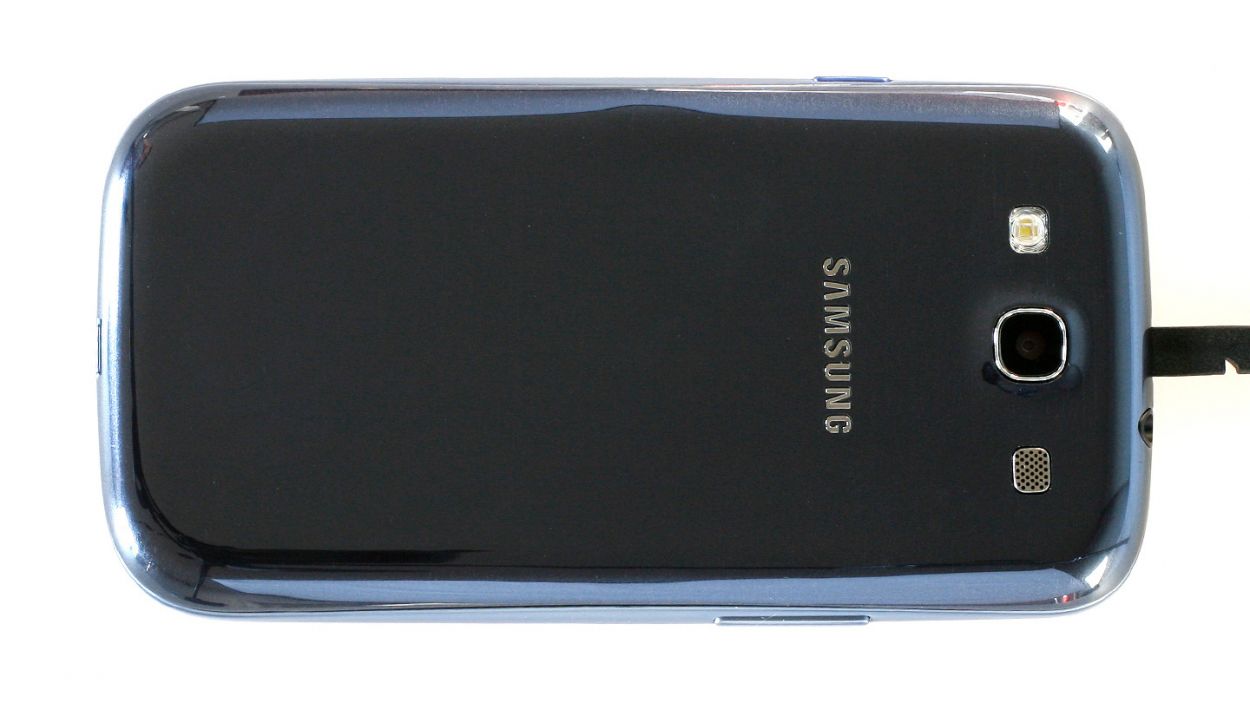

– Let’s get this party started! Gently slide your spudger into the headphone jack area and pop open the back cover. There are 16 little clips holding it on – think of them as tiny, stubborn friends. Give them a little nudge with the spudger all the way around. Or, if you’re feeling brave (and have strong nails!), try prying it open with your fingertips.
– Great work! Now you can remove the back cover. High five!
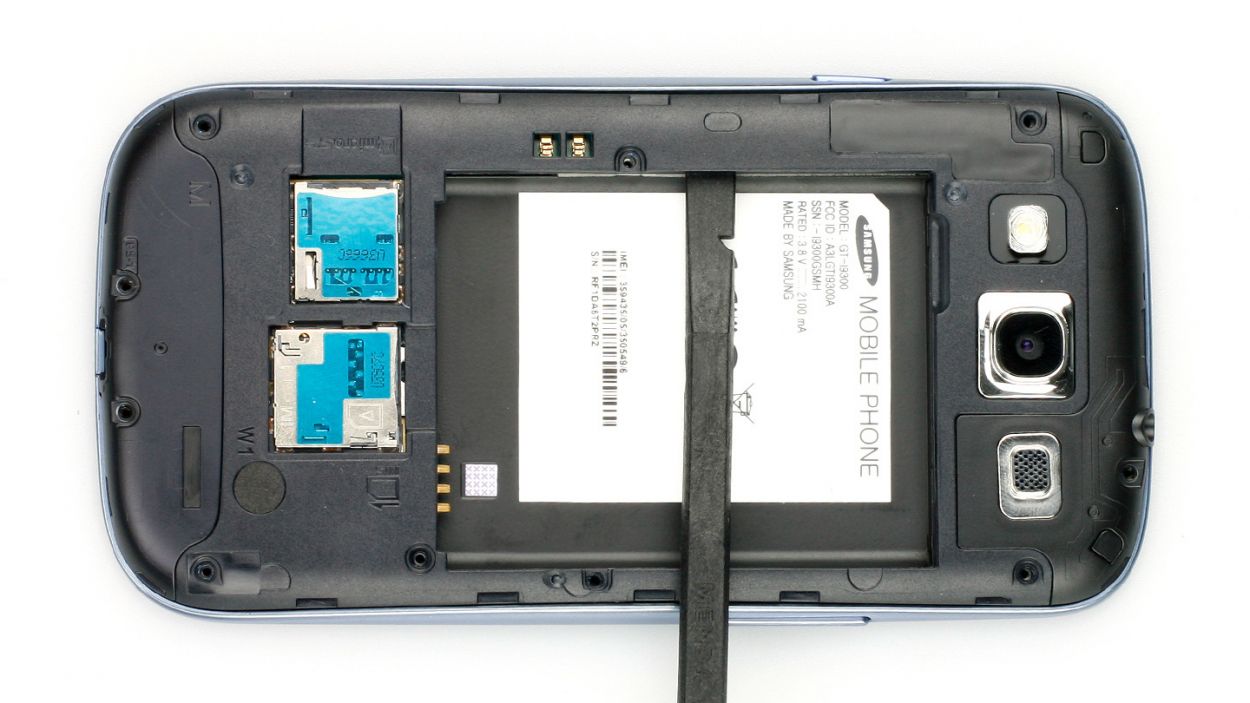
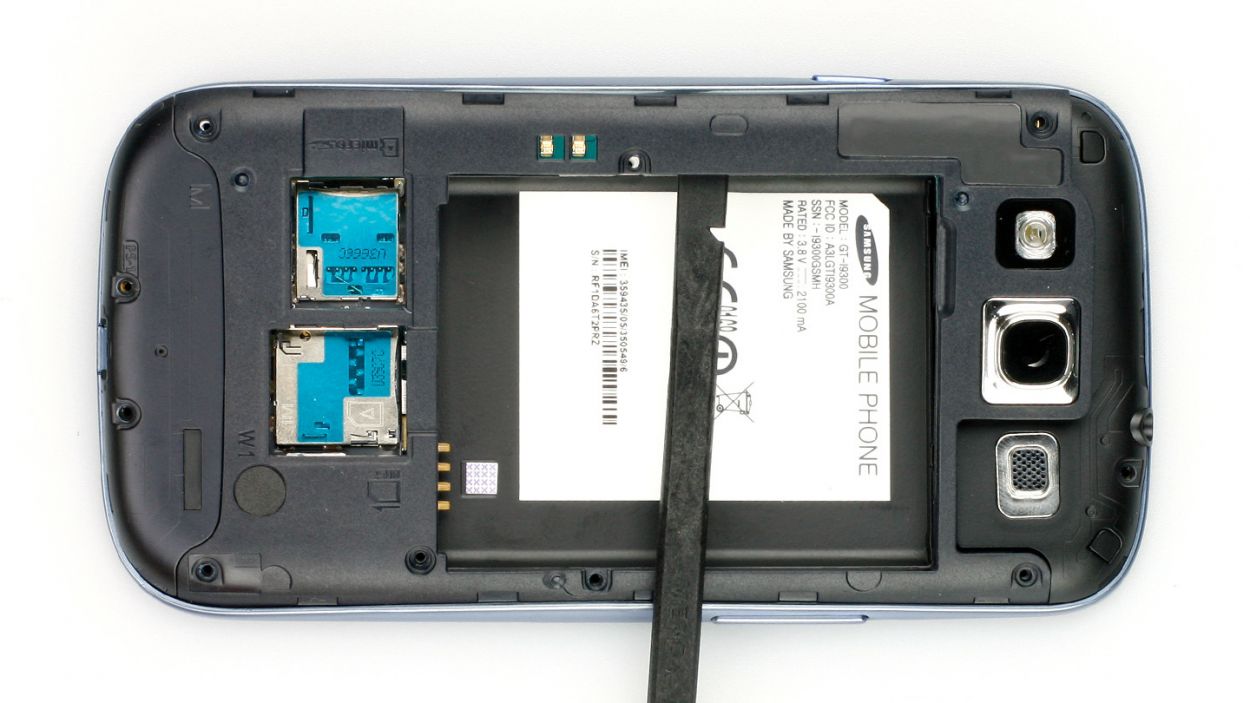
Step 2
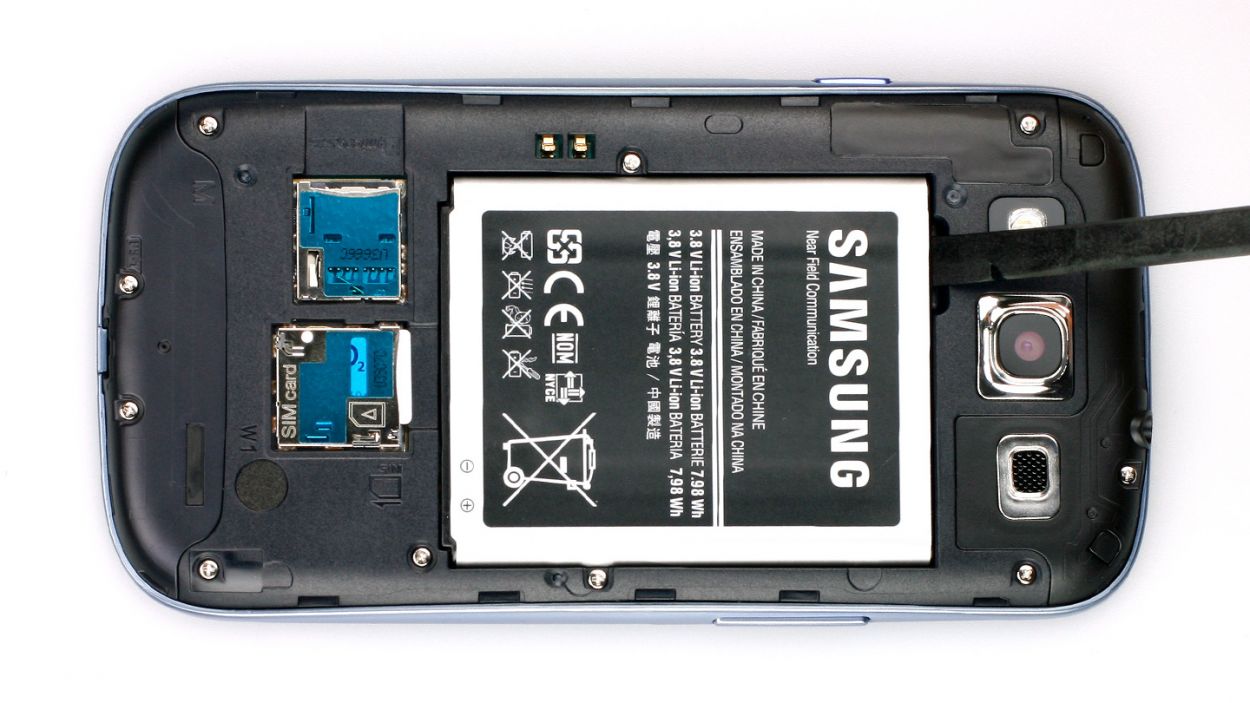
– Alright, champ! First things first, let’s power down your Samsung Galaxy. Hold that standby button for about 3 seconds – easy peasy! Follow the on-screen prompts to shut it down.
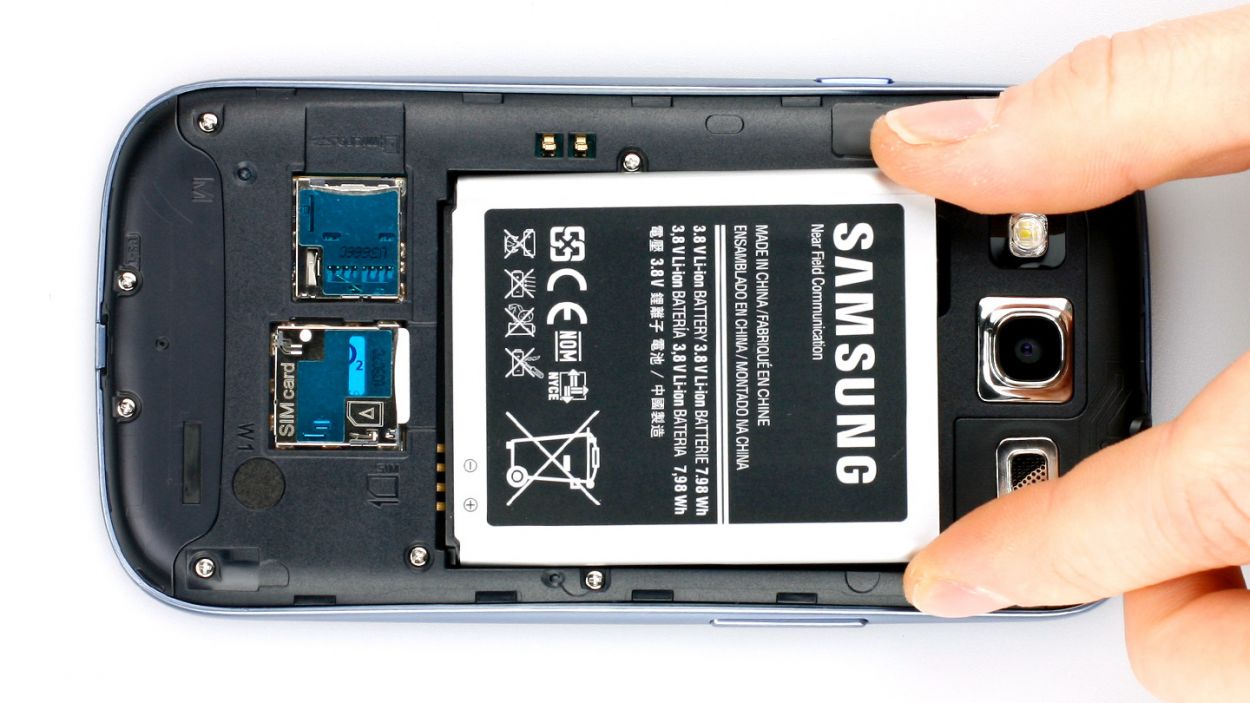
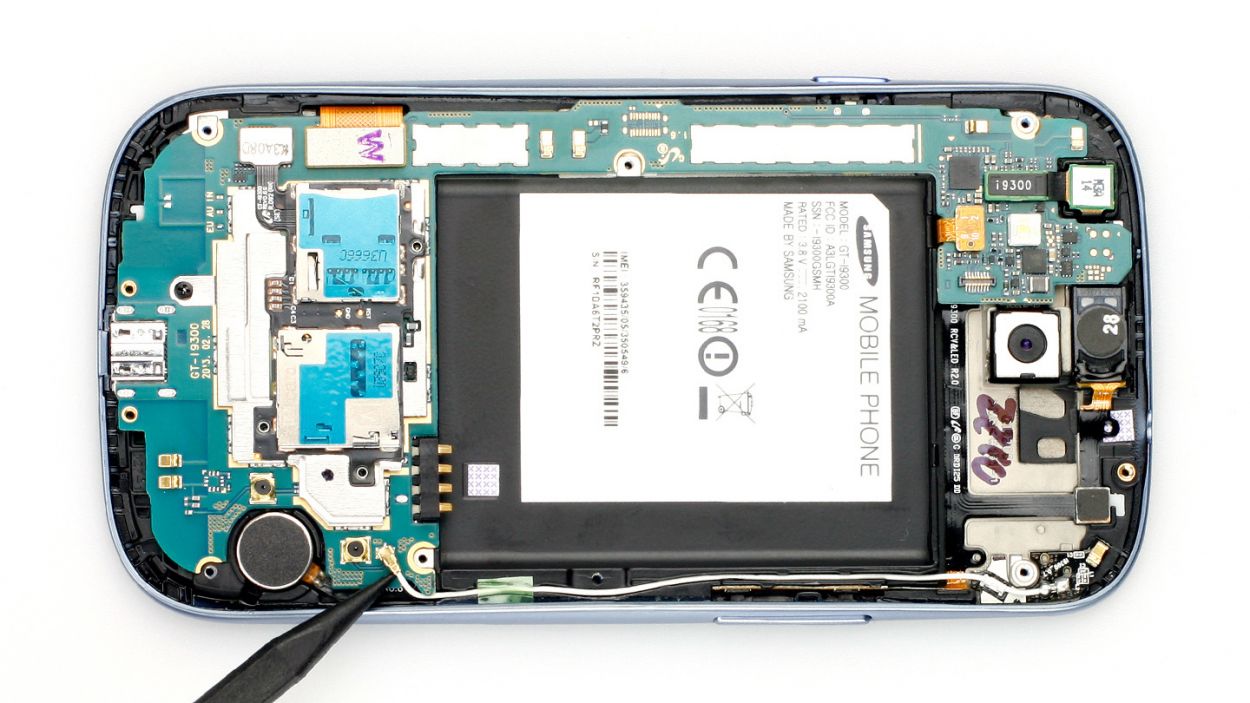
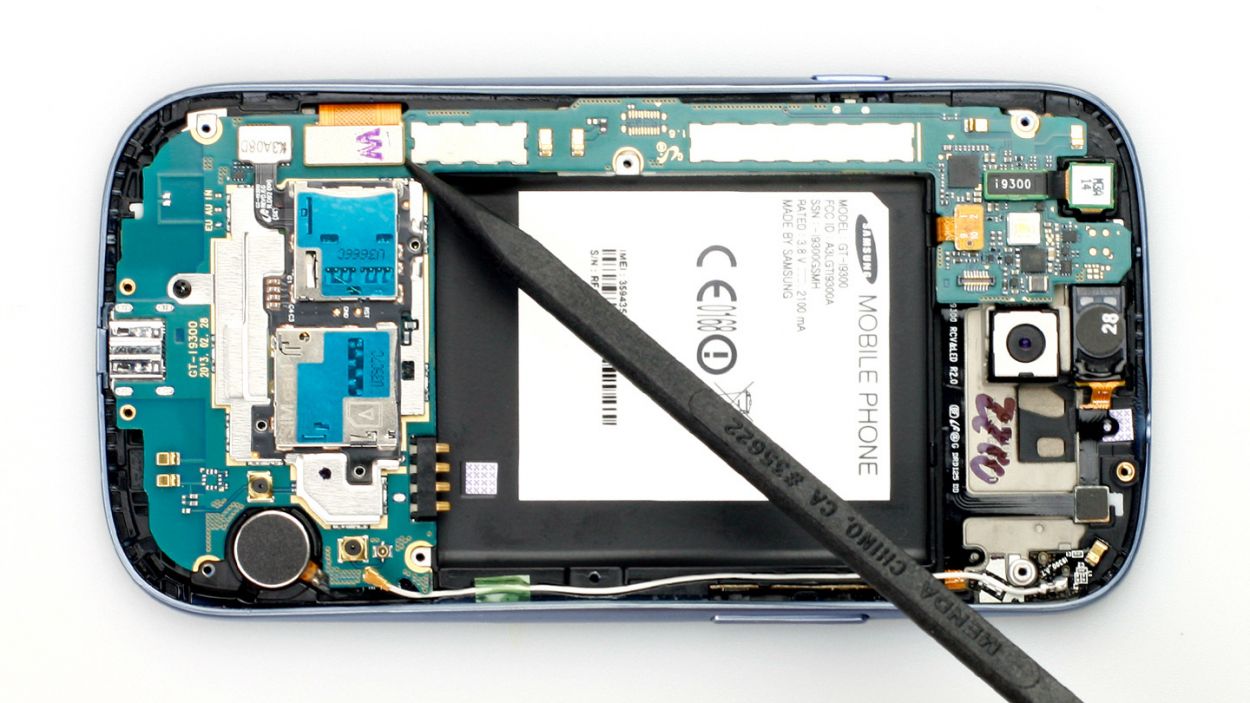
– Now, grab your spudger (or even your trusty fingertip!) and gently lift that battery (check out Figure 1 for a visual!). Then, pop it right out (see Figure 2). You’re doing great!
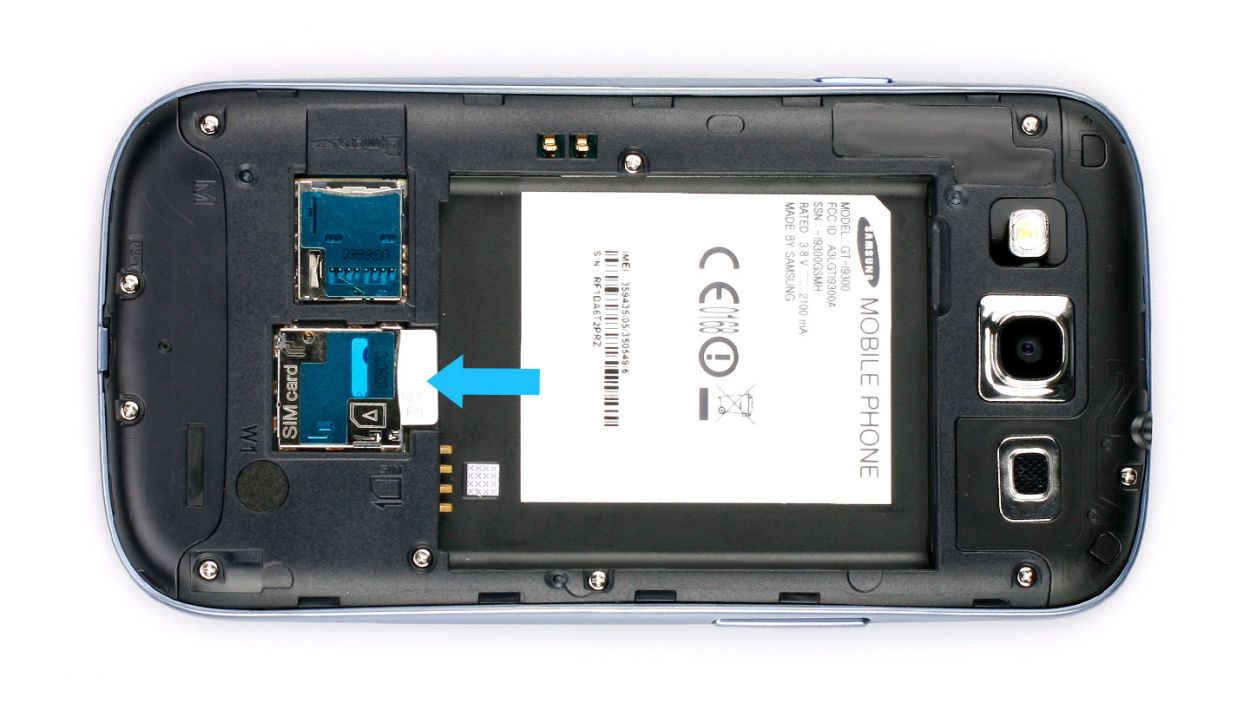
Step 3
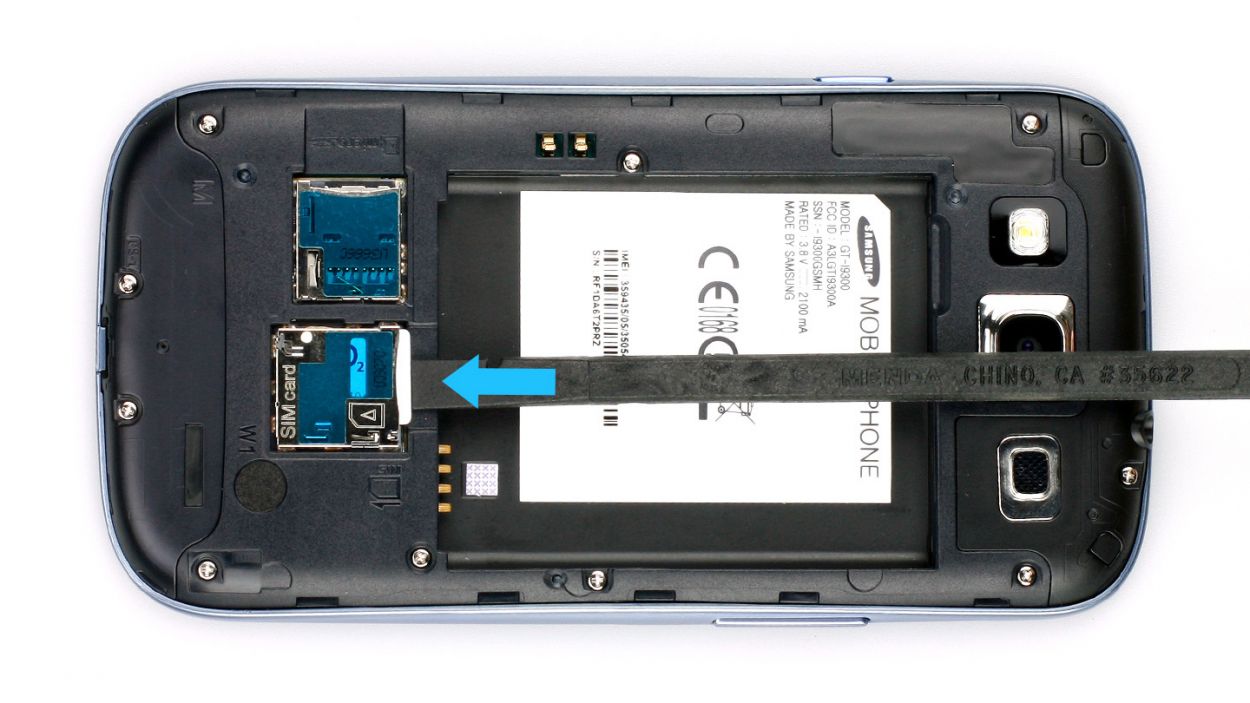
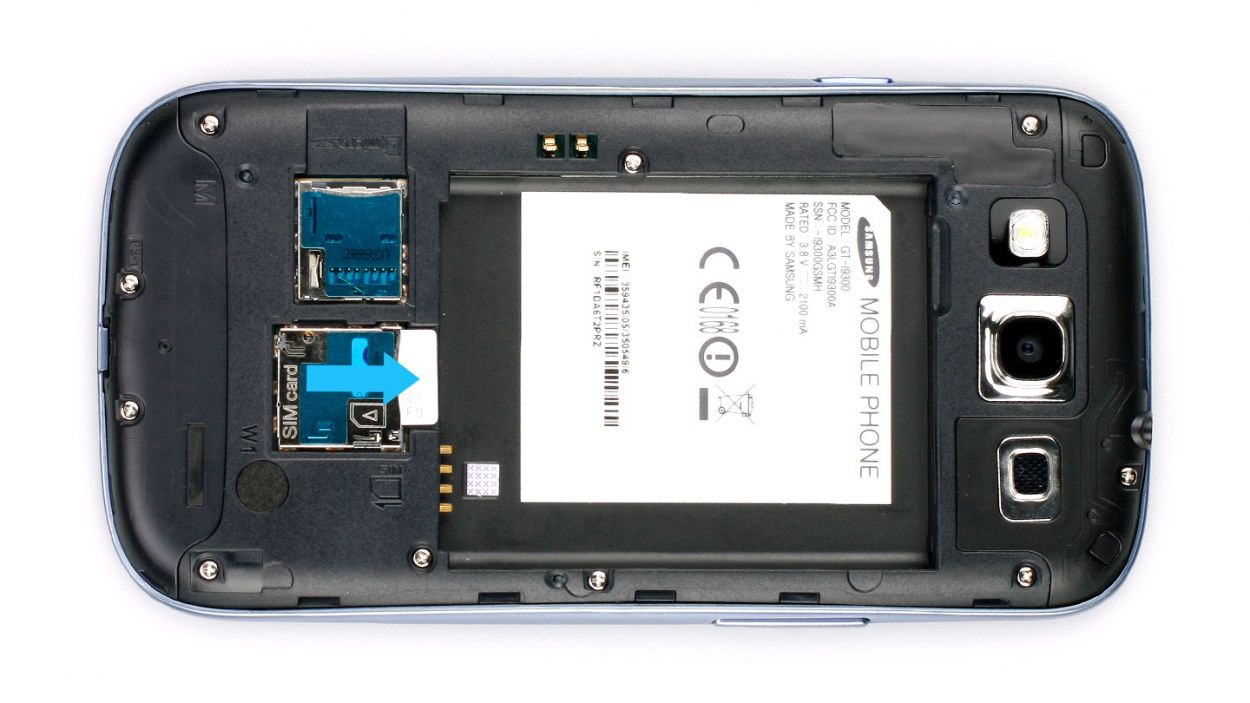
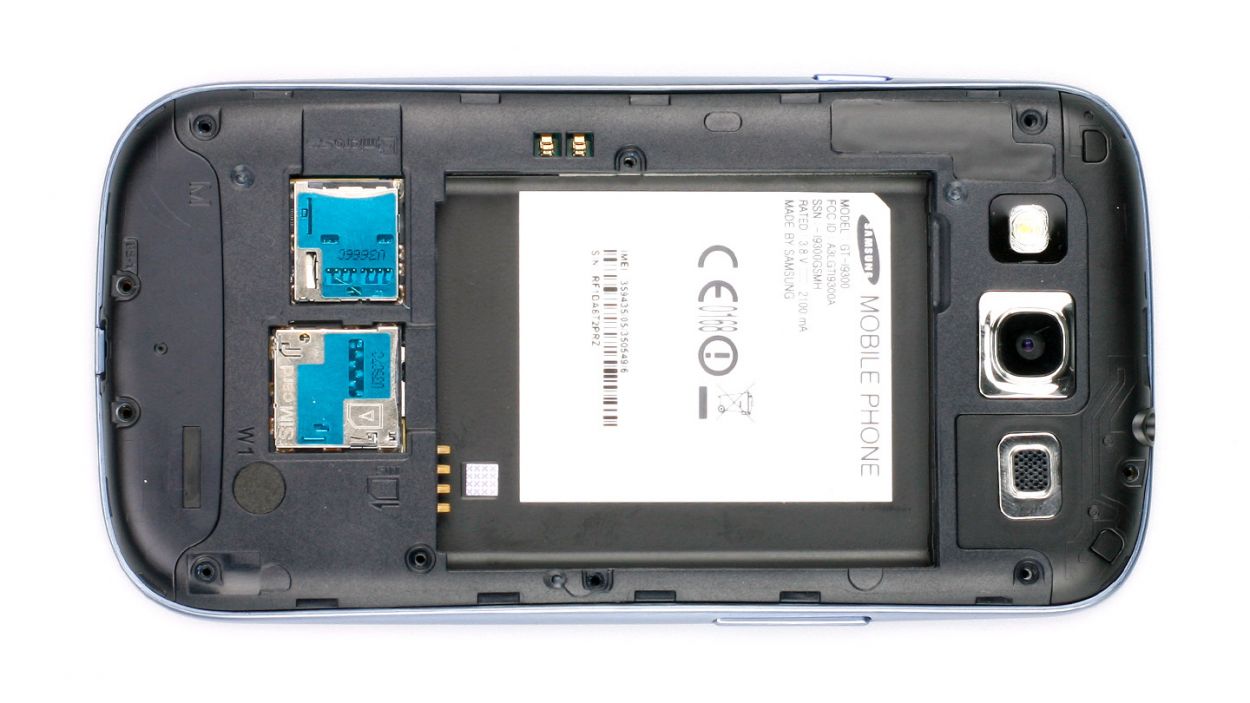
– Give that SIM card a little nudge with your spudger or even your finger, and push it all the way into the slot (check out figure 1 for guidance). Once you hear a delightful click, the SIM card will pop right out (figure 2 is your friend here).
– Now, simply grab it with your fingers and pull it out like a pro.
– If you’ve got a microSD card in there, just rinse and repeat this process!
Step 4
Be careful not to knock off those little resistors soldered to the logic board! They’re like tiny superheroes holding everything together.
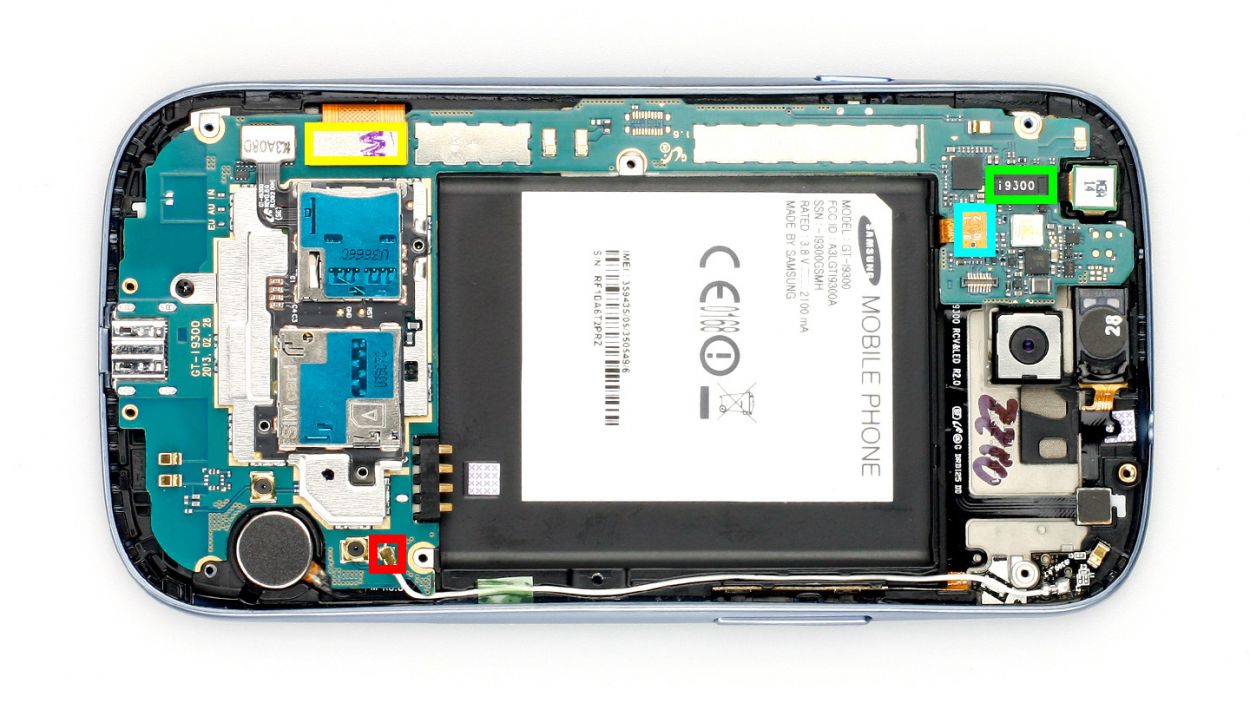
– To kick things off, gently unplug the connector from the speaker/headphone output cable. Just a friendly reminder: be careful not to knock off those little resistors that are happily soldered onto the logic board!
– Next up, grab your trusty spudger and position its pointed tip just below the contact. Give it a gentle lift (check out figure 1 for guidance).
– Now, with that same spudger, carefully lift the speaker from the side. Easy does it! (See figure 2 for a visual aid.)
Step 5


Be super careful not to accidentally snap off those little resistors glued to the logic board. They’re more fragile than they look!
– Alright, it’s time to gently disconnect those four connectors! Just a heads up, be super careful while doing this (check out figure 1 for a visual guide). The connectors are: LCD, Volume controller/earpiece, Front camera, and Wi-Fi. And remember, watch out for those tiny resistors soldered onto the logic board—let’s keep them safe!
– Next up, grab your trusty spudger! Place the pointed tip just a smidge below the contact and give it a little lift (figures 2 to 5 will show you how it’s done). You’ve got this!
Step 6

Hey there! Just a heads up, the rear camera might be a bit stubborn at times. Handle with care!
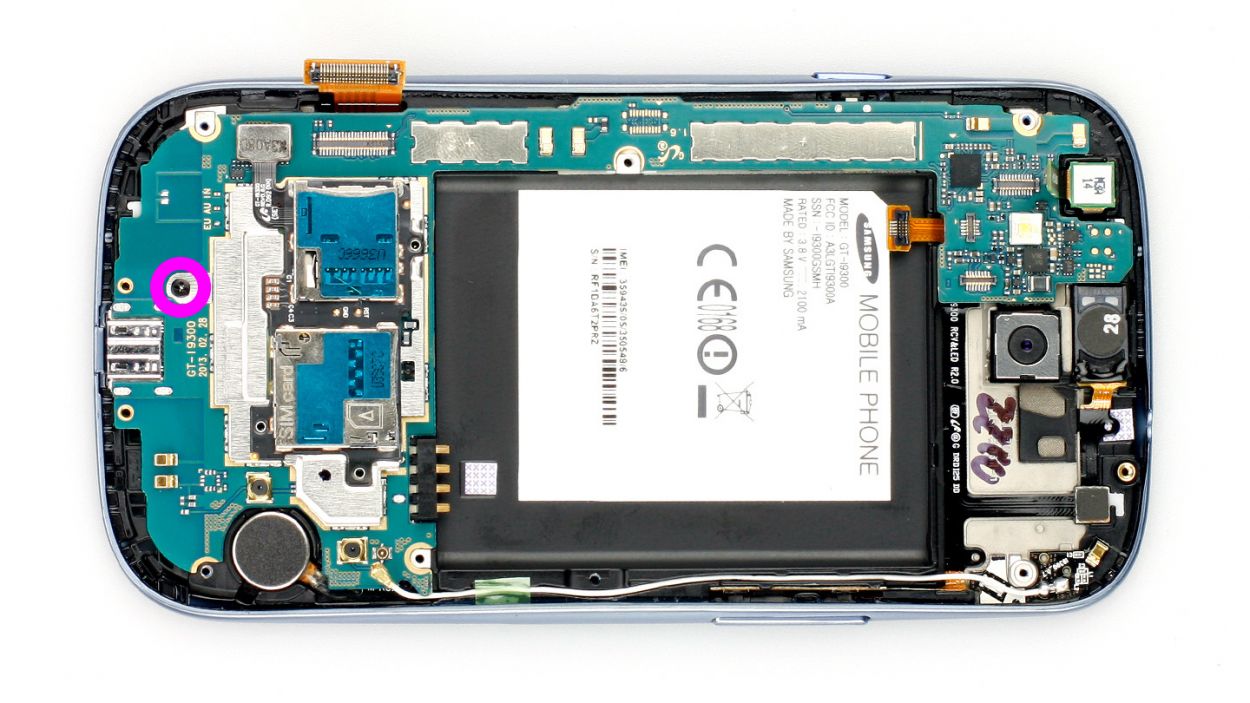
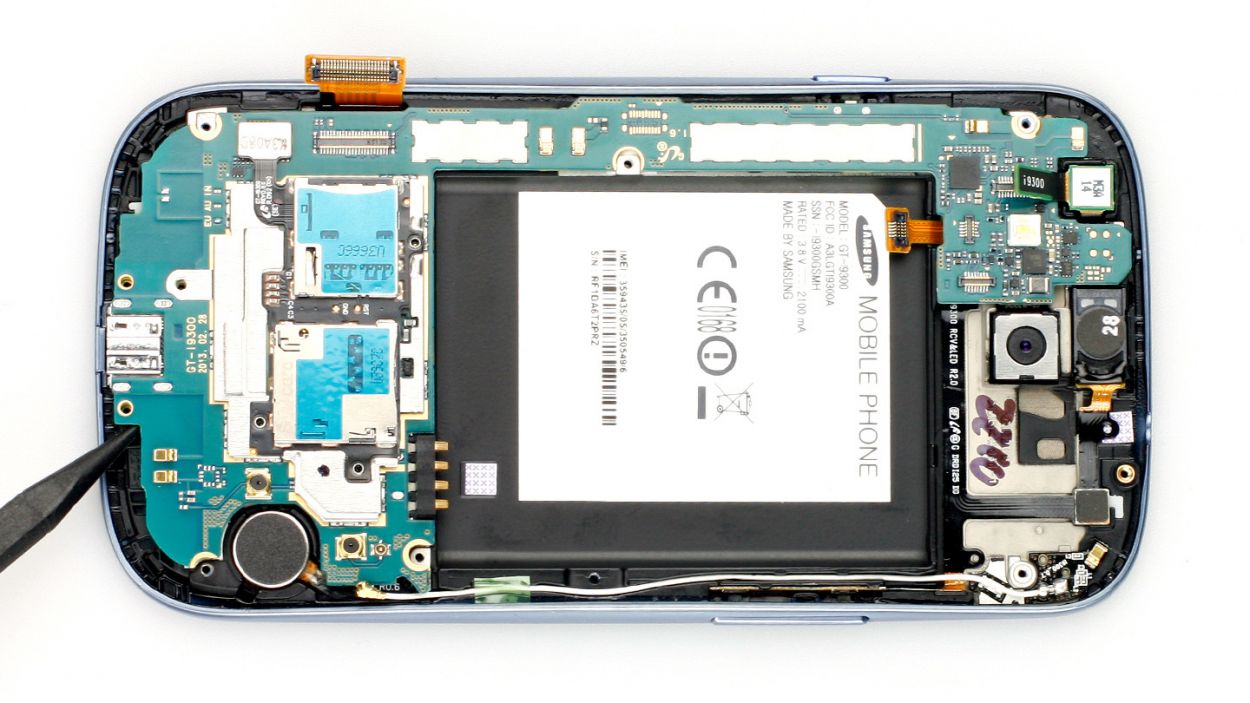
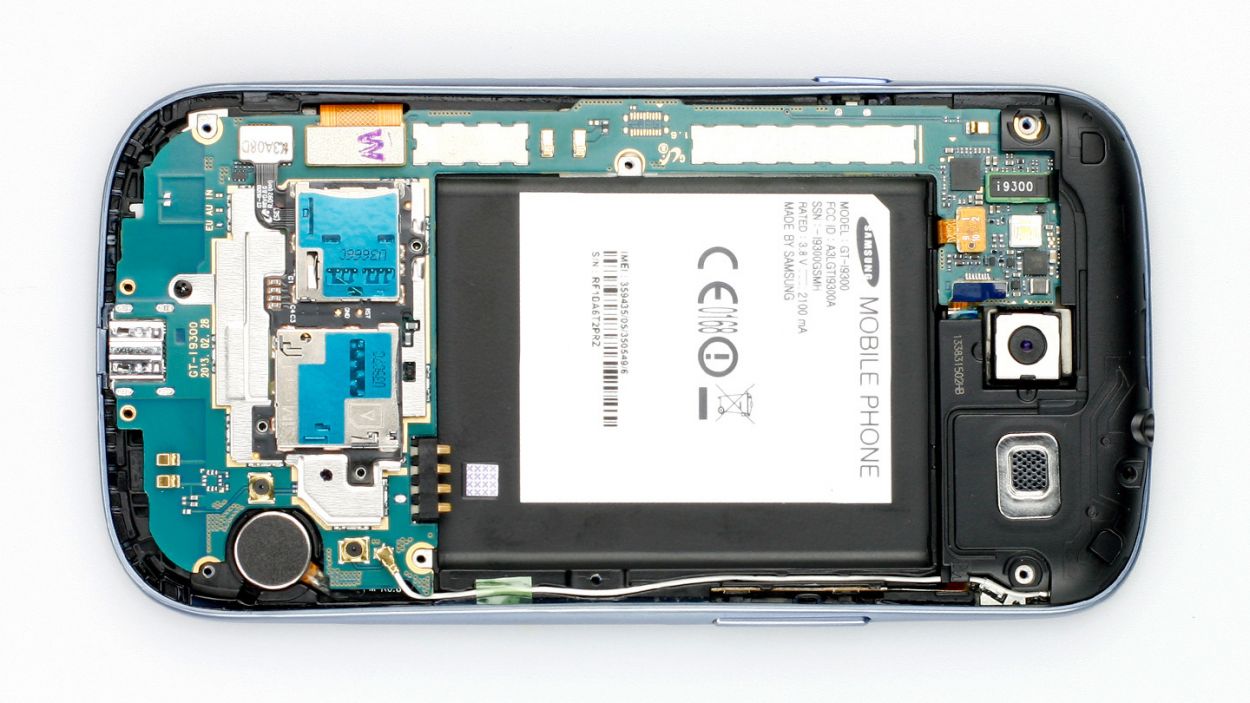
– Time to tackle that pesky screw keeping the logic board snug as a bug! Grab your trusty screwdriver and unscrew that 1 x 3.0 mm Phillips screw (check out figure 1 for a visual aid).
– Now, let’s gently lift the logic board with your spudger (see figure 2) and wiggle it out by hand (figure 3 is your friend here). Just a heads up, the rear camera might be a bit clingy, so handle it with care!
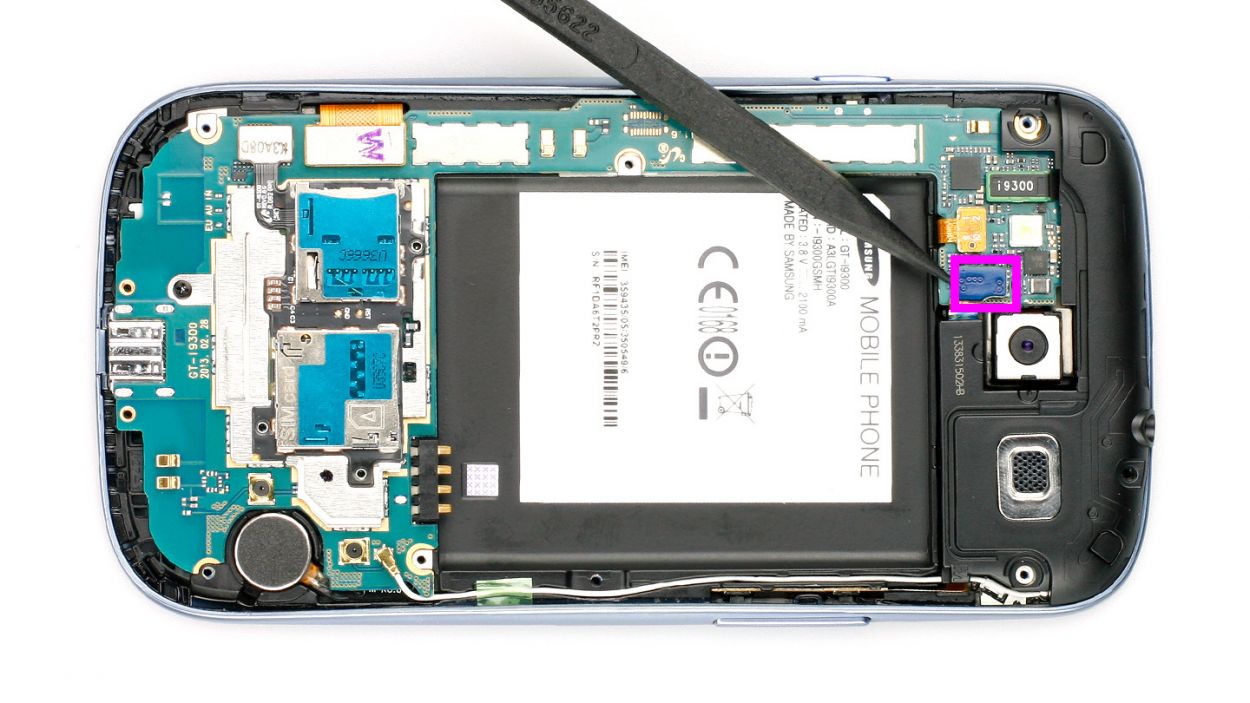
Step 7
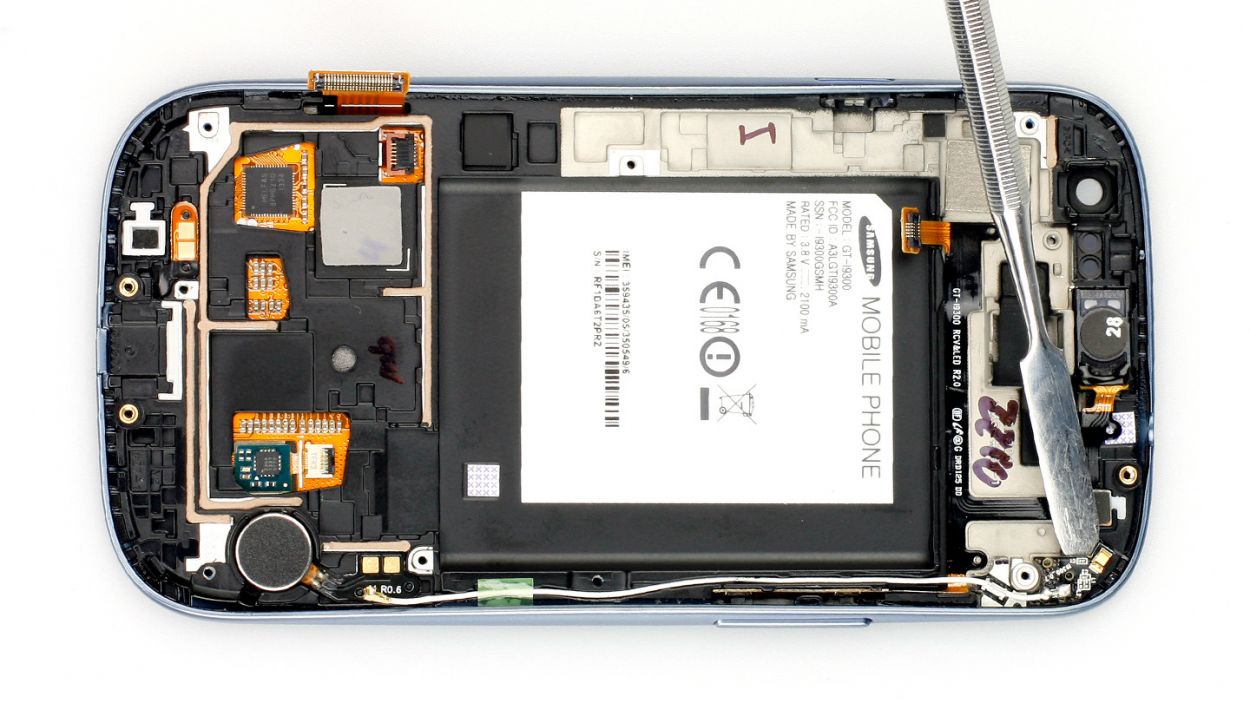
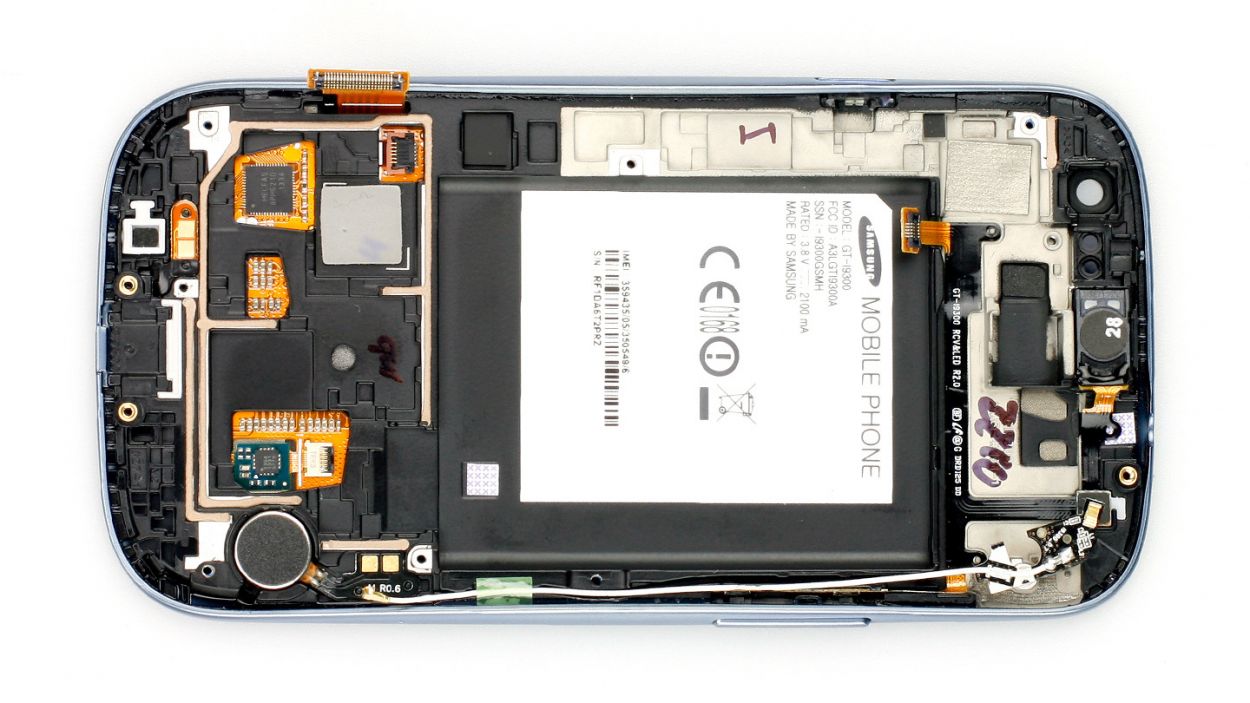
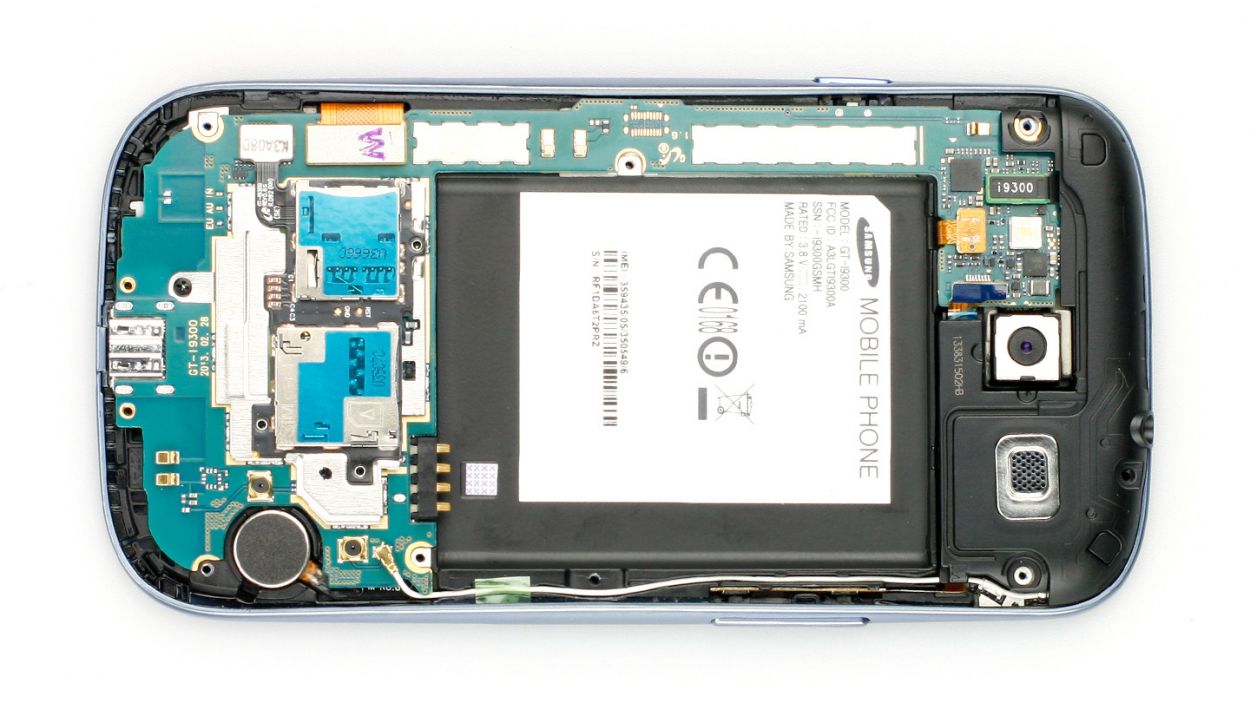
– Gently slide the sharp end of your trusty lab spatula under the Wi-Fi antenna. Take your time and lift it a little bit at a time (check out figure 1 for guidance!).
– Once the antenna is completely free, feel free to peel off that little green sticker from one side (see figure 2 for a visual).
– Now it’s time to say goodbye to the entire cable set!
Step 8

– Time to get your Wi-Fi up and running! Install the Wi-Fi antenna and carefully route the cable into its designated duct.
– Next, grab that transparent green sticker and stick it on the cable – you’re doing great!
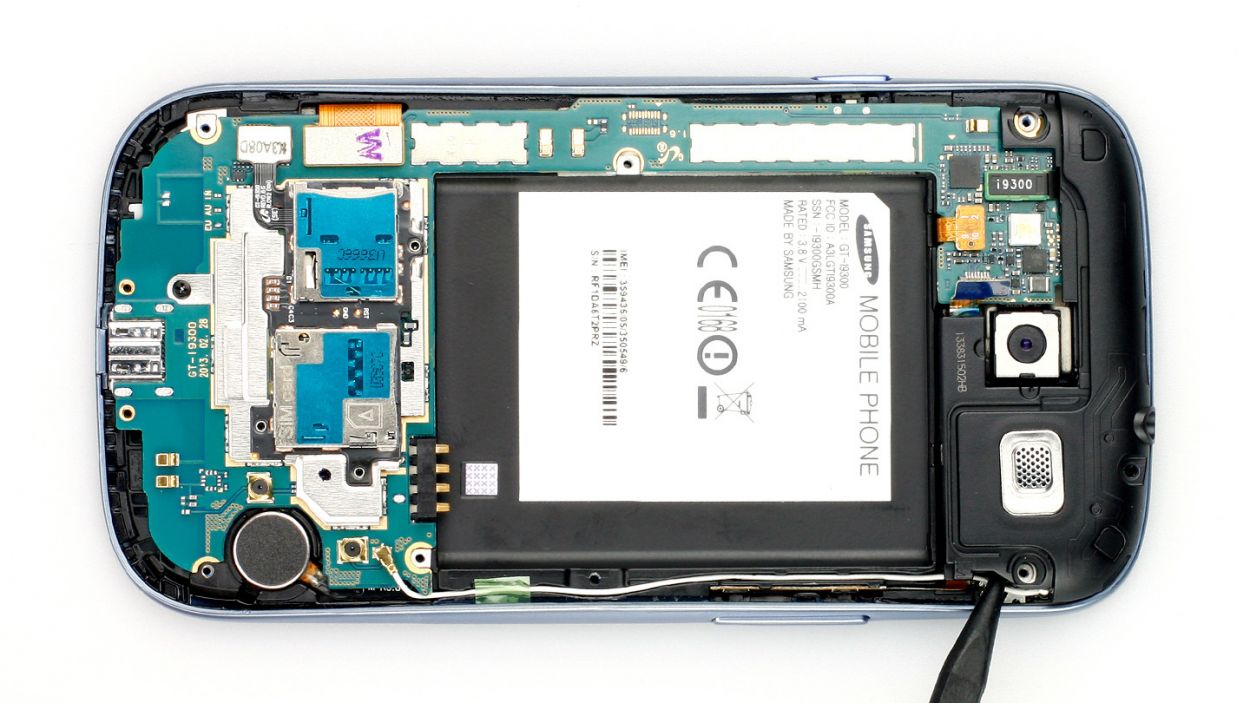
Step 9
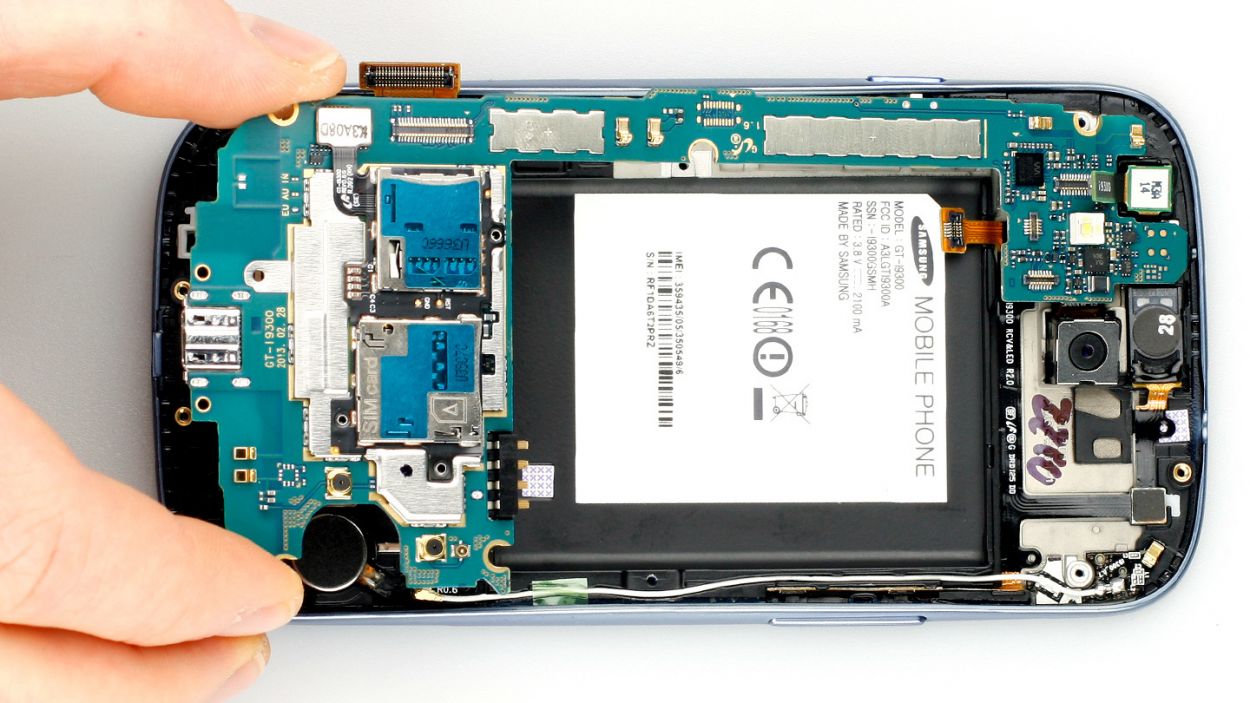

– Now put the logic board back in the frame. Start with the rear camera connected to the logic board. Once it’s fitted correctly, you can install the rest of the logic board (see figure 1).
– Make sure the LCD cable and front camera cable don’t get under the logic board.
– Use the picture to check whether your logic board is aligned correctly (see figure 2).
– Now fasten the screw for the logic board (see figure 2).1 x 3.0 mm Phillips screw
Step 10
– Now it’s time to connect the dots. Take the following four connectors and gently press them into their corresponding homes. Don’t force it – just use enough pressure for the contacts to click into place. You’ve got this!LCDVolume controller/earpieceFront cameraWi-Fi
Step 11
– Alright, superstars! It’s time to put the speaker back in its rightful place. Take a peek at figure 1 for visual guidance.
– If everything fits together like a glove, you’re ready to rock – plug in the connector (check out figure 2 for confidence).
Step 12

– Alright, folks! Time to pop that plastic cover on – give it a good push until you hear that satisfying click (check out figure 1 for guidance)!
– Next up, grab those screws and tighten it down, making sure it’s nice and secure (figure 2 has your back). You’ll be using 10 x 4.0 mm Phillips screws for this part.
Step 13
– Now slide the SIM card and the microSD card, if you have one, back into the corresponding slots.
Step 14

– Slide that battery back into place! Just make sure the +/- symbols are cozying up to the contact point.
Step 15

– Putting the back cover on is a breeze! Just align it properly and give it a gentle press all around the phone until you hear those satisfying clicks from the clips locking into place. Easy peasy!
Step 16
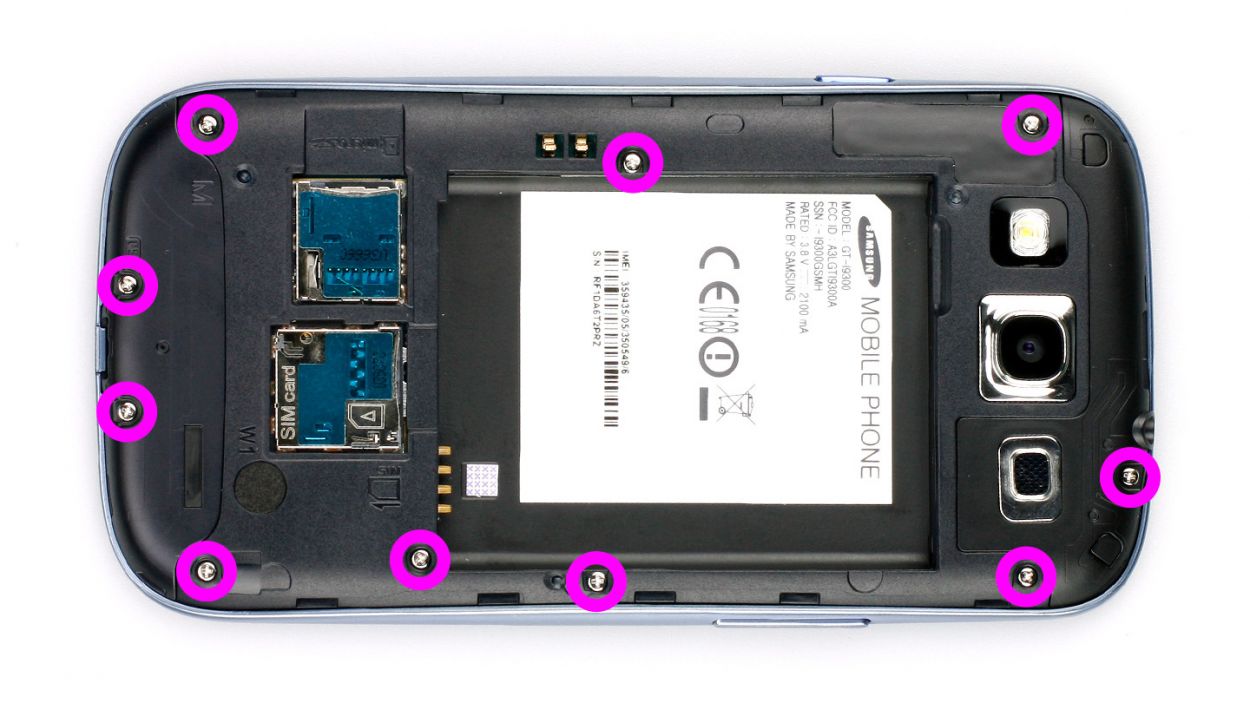
– First up, let’s tackle those pesky 10 Phillips screws holding the plastic cover snugly in place (check out figure 1 for a visual!). Grab your 10 x 4.0 mm Phillips screwdriver and get to unscrewing!
– Next, it’s time to gently pry off the cover. Use a spudger or your trusty fingernails to lift it from the inside. Just slide the spudger in about 2 millimeters (figure 2 has your back) and carefully lift until the cover pops off (figure 3 shows you how it’s done).
Step 17
– Fire up your Samsung Galaxy S4 and punch in this magical combo: *#0*#.
– Next, hit that call button like a pro.
– Now, let’s check out all the cool functions together!