DIY Guide to Replace Wi-Fi Cover on iPhone
Duration: 30 min.
Steps: 10 Steps
Welcome to your guide on swapping out that Wi-Fi cover on your iPhone! If your Wi-Fi signal is acting a bit shy or just not playing nice, this repair is just what you need. Stick with us, and we’ll walk you through the steps to get that Wi-Fi back up and running smoothly.
Step 1

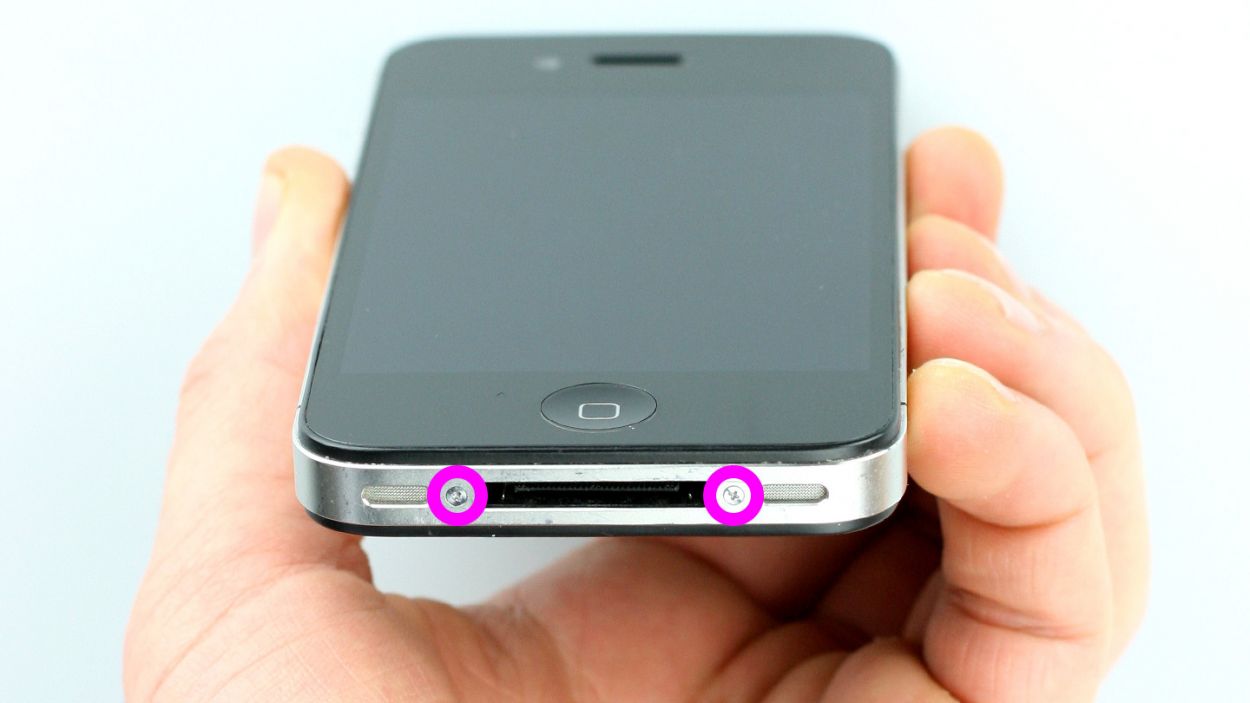
– Depending on your iPhone’s production date, grab either a Phillips screwdriver or a pentalobe screwdriver to pop open your phone.
– These little screws are hanging out right next to the dock connector, so keep an eye out! Make sure to stash them in the same section of your organizer tray. You’ll need 2 x 3.6 mm pentalobe/Phillips screws for this adventure!
Step 2

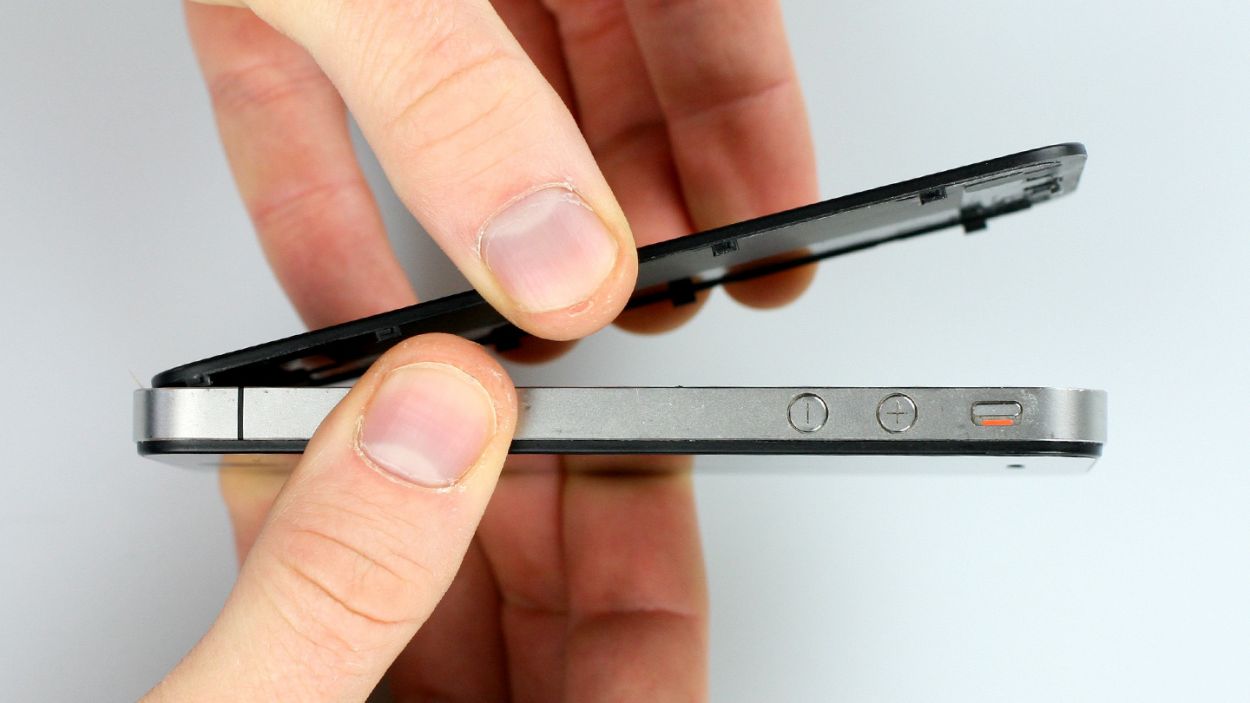
– Give that back cover a gentle nudge with your thumbs or the palm of your hand, pushing it about 4 mm away from the bottom where the dock connector is (check out figure 1).
– Once you’ve got it popped out a bit, feel free to lift the back cover from the end that’s now sticking out (see figure 2).
Step 3
Heads up! The battery contact point on the logic board might decide to take a little vacation. If it happens to break off but the soldering points are still in good shape, no worries! You can easily solder that contact point back on and keep the party going.
– First things first, if your iPhone is still awake, let’s put it to sleep! Hold down that standby button for about five seconds and follow the on-screen instructions.
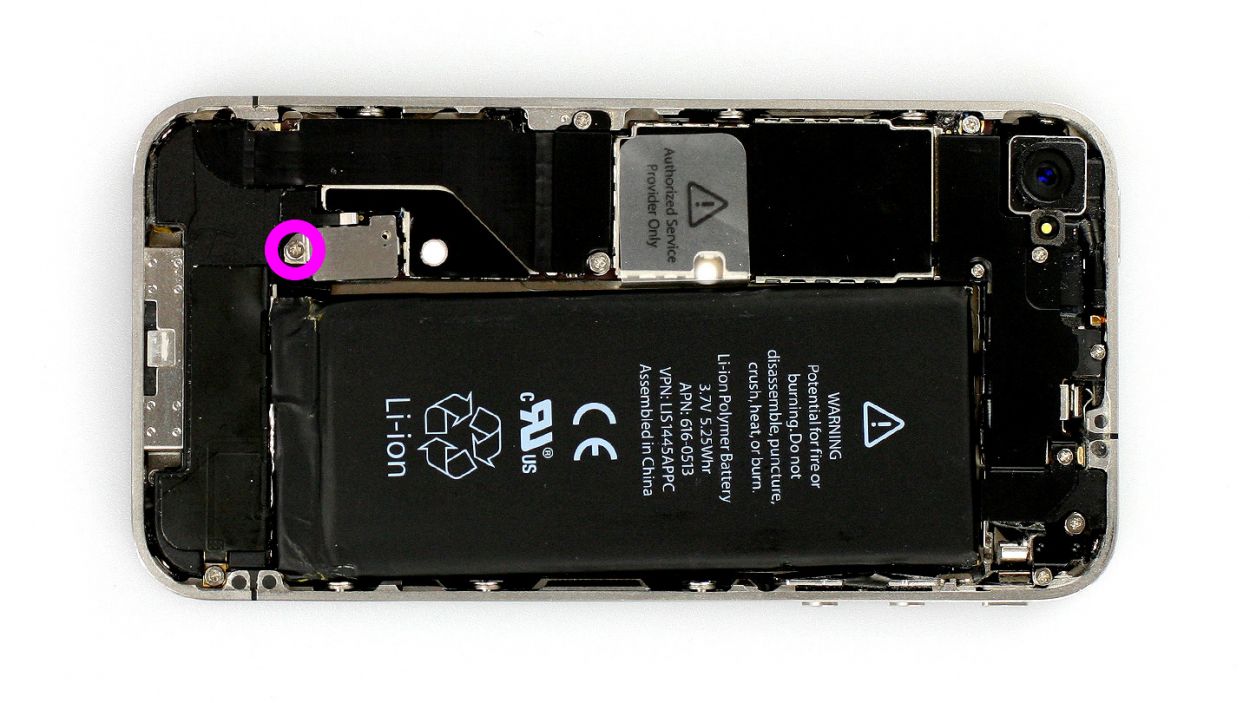
– Next up, grab your trusty Phillips screwdriver and remove the screw on the battery connector (check out figure 1). Make sure to tuck that screw away in a separate section of your organizer tray. Just a heads up, you might encounter a 1 x 2.6 mm Phillips screw. If the battery contact point on the logic board decides to take a little trip, don’t panic! If it breaks off but the soldering points are still intact, you can totally solder it back on.
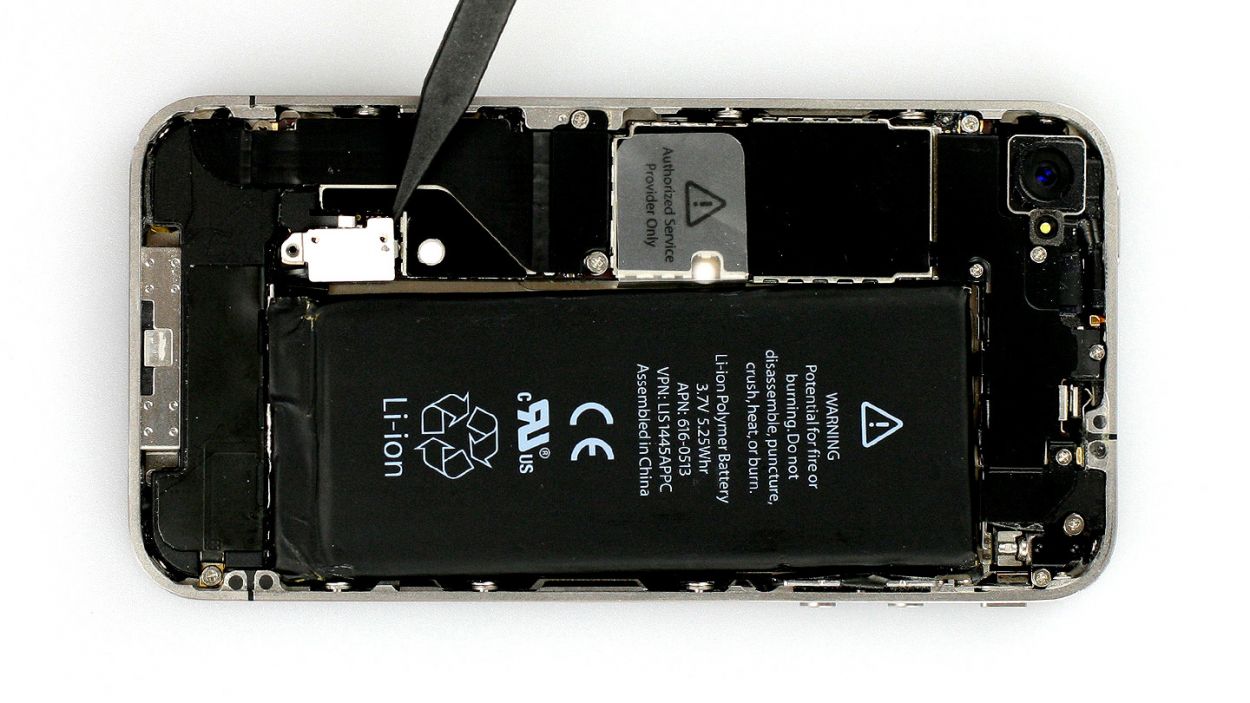
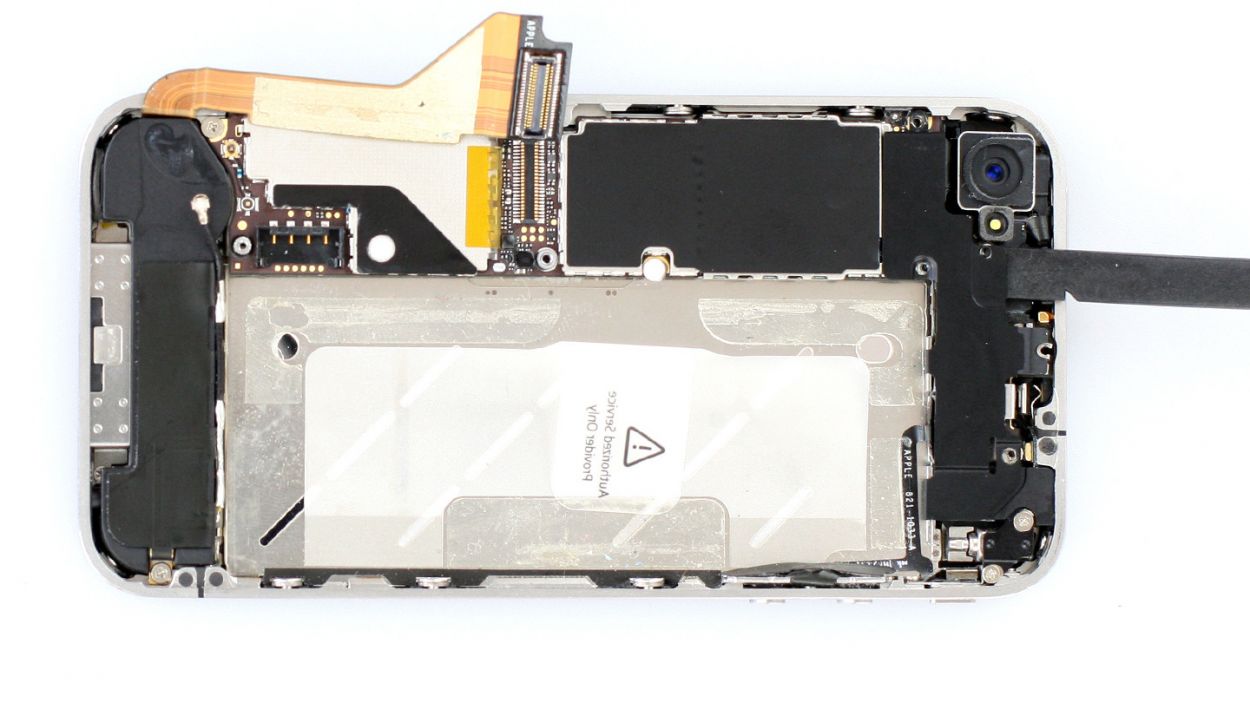
– Now, it’s time to delicately lift off the battery connector. Use the pointed end of your ESD spudger and slide it gently below the silver cover plate (see figure 2). No spudger? No problem! Your fingernail can step in as a backup.
– And remember, if you find yourself needing to pry things apart, a metal laboratory spatula can also do the trick instead of the spudger. It might make some steps a bit easier, but we still recommend sticking with that ESD spudger designed for precision electronics.
Step 4

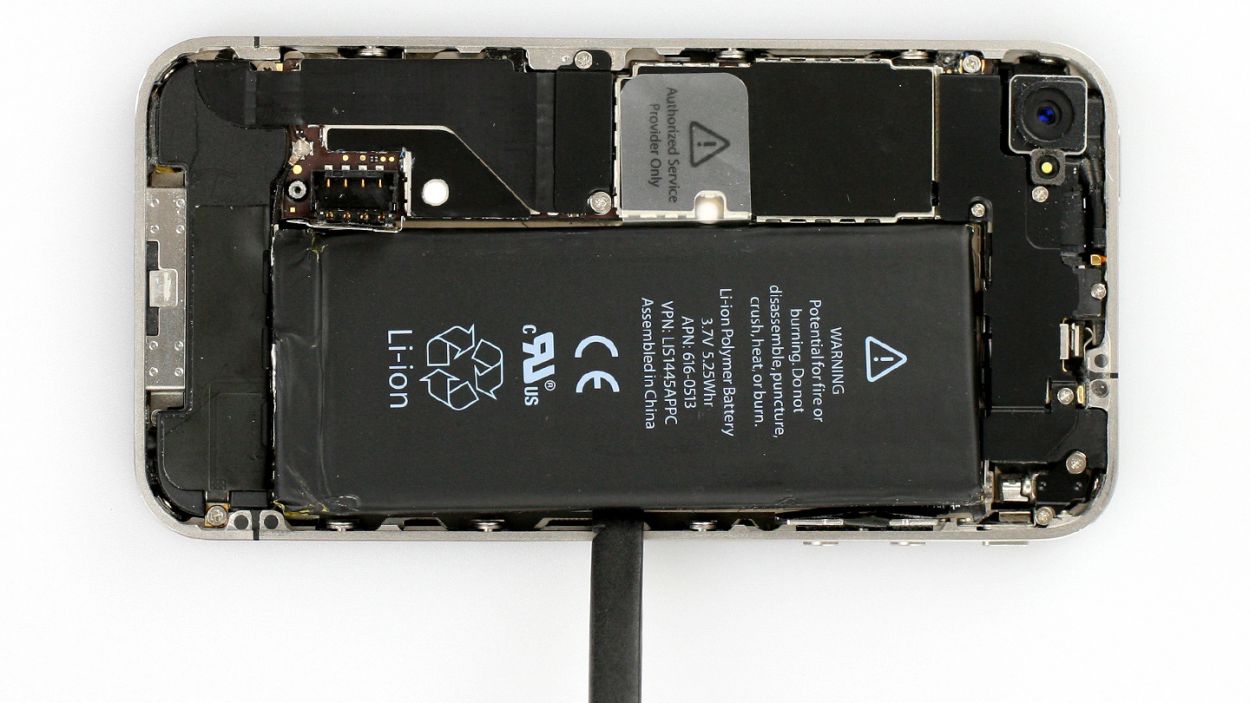
– The antenna cover is hiding under the battery connector. Go ahead and lift that cover off, and make sure to tuck it into the same section of your organizer tray where you stashed that Phillips screw earlier. (Check out figure 1 for a visual!).
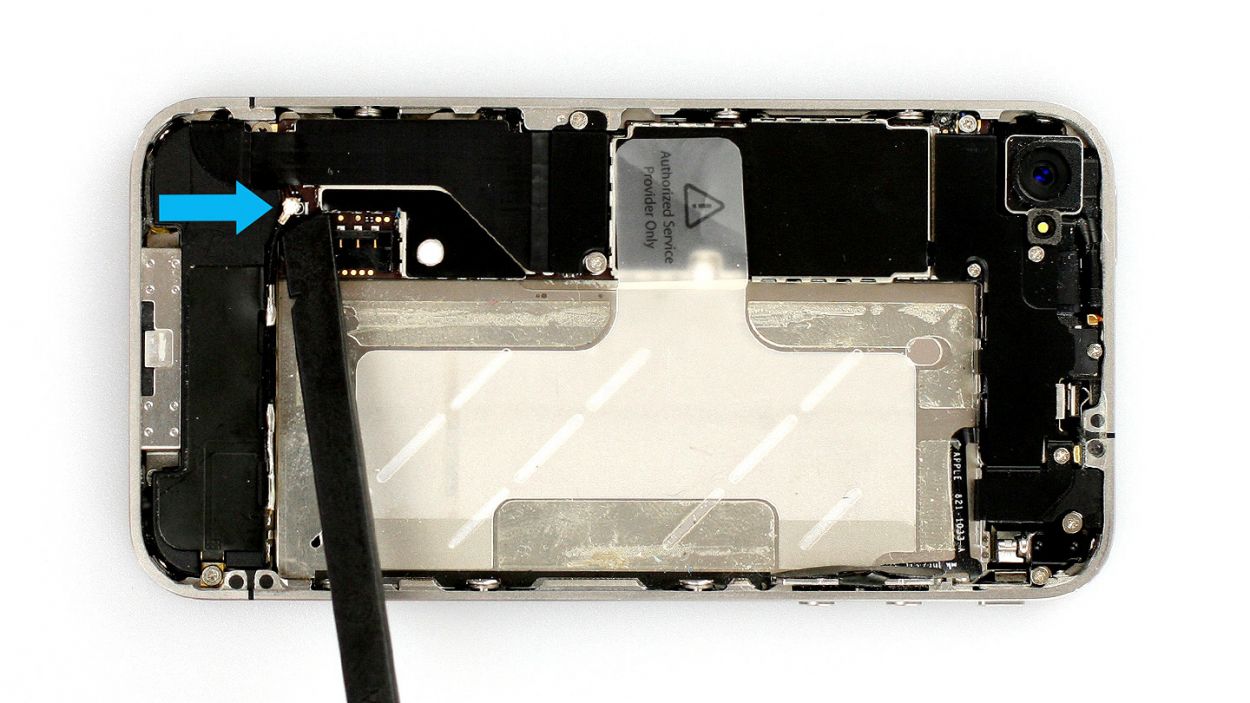
– Next up, it’s time to take out the battery. Sometimes it likes to play hard to get! Insert the flat end of your spudger into the little gap (about 1 cm to the left of the volume down button) between the battery and the outer frame, and gently lift it out (see figure 2). If it’s really stuck, try using leverage points on either side to pry it loose. Still having trouble? A little warmth from a heat gun can help loosen that glue up a bit.
– And don’t forget, you can also disconnect the antenna connector by carefully pulling it off the plug head with your spudger (see figure 3).
Step 5

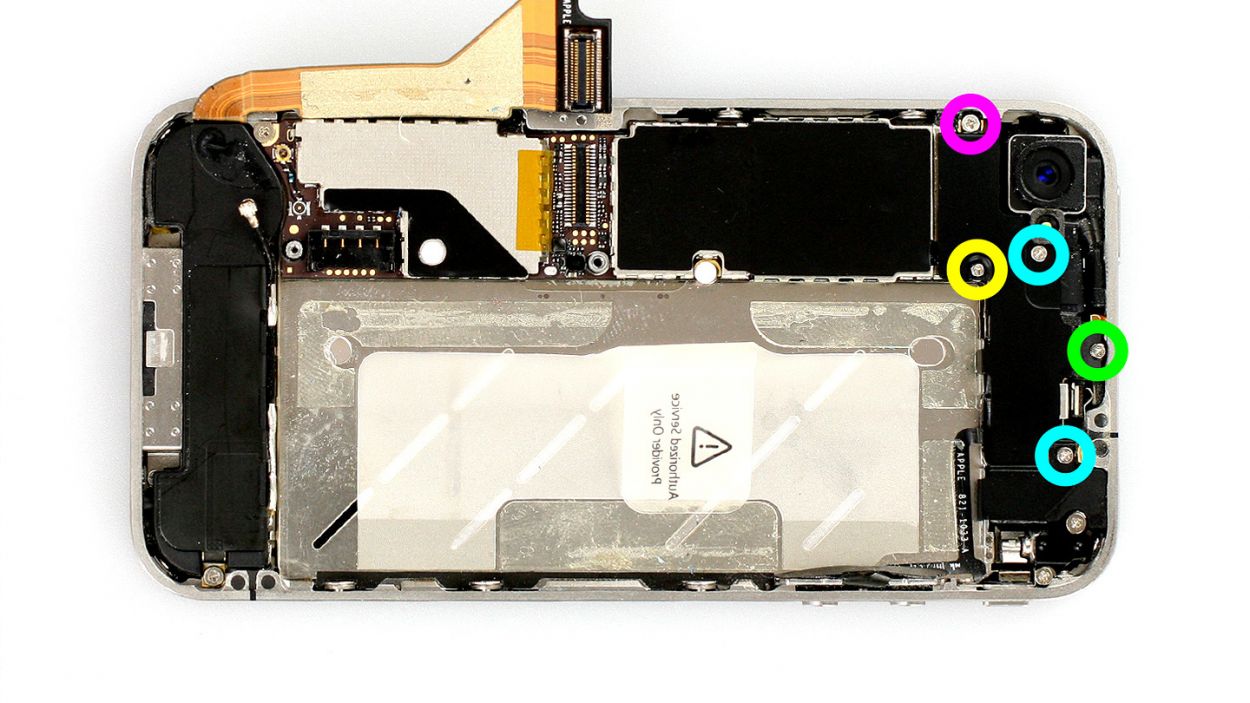
– Time to tackle those five pesky Phillips screws! Grab your trusty screwdriver and get ready to unscrew. (Check out figure 1 for guidance). You’ll need: 1 x 2.3 mm Phillips screw, 2 x 1.6 mm Phillips screws, 1 x 4.8 mm Phillips Wi-Fi screw, and 1 x 1.3 mm Phillips screw.
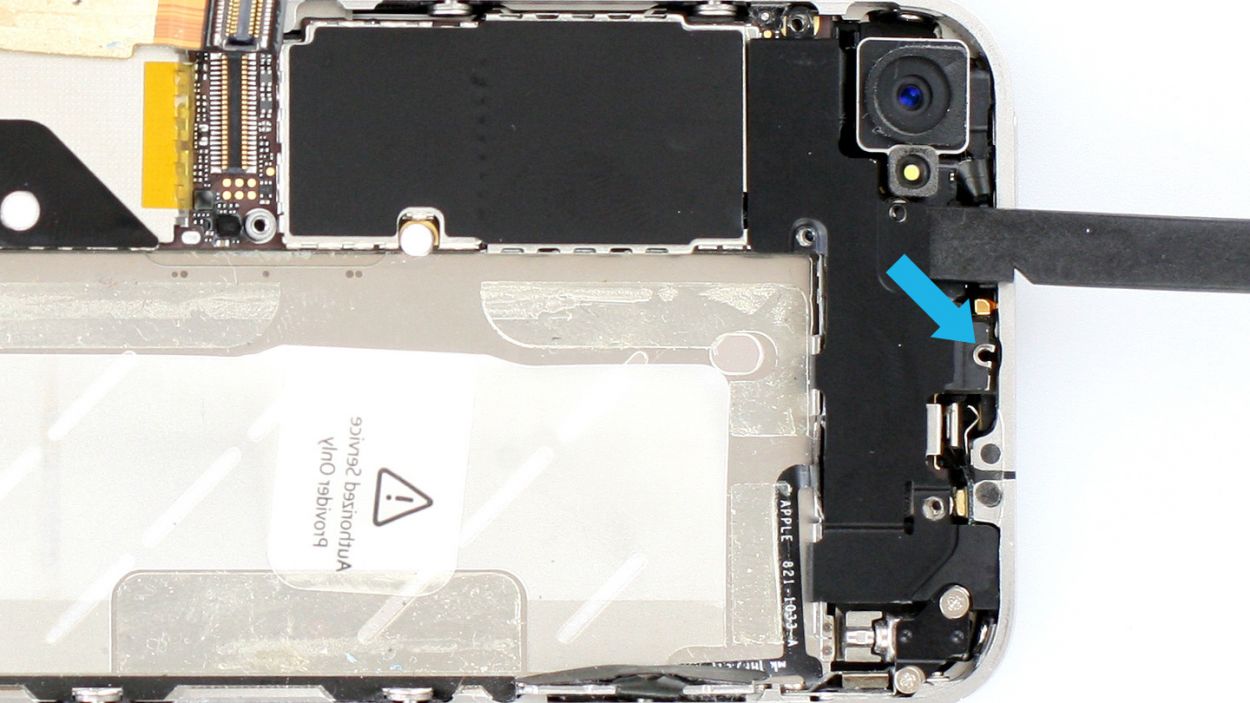
– Now, take the flat end of your spudger and gently pry off the cover. (See figure 2 for a little visual help).
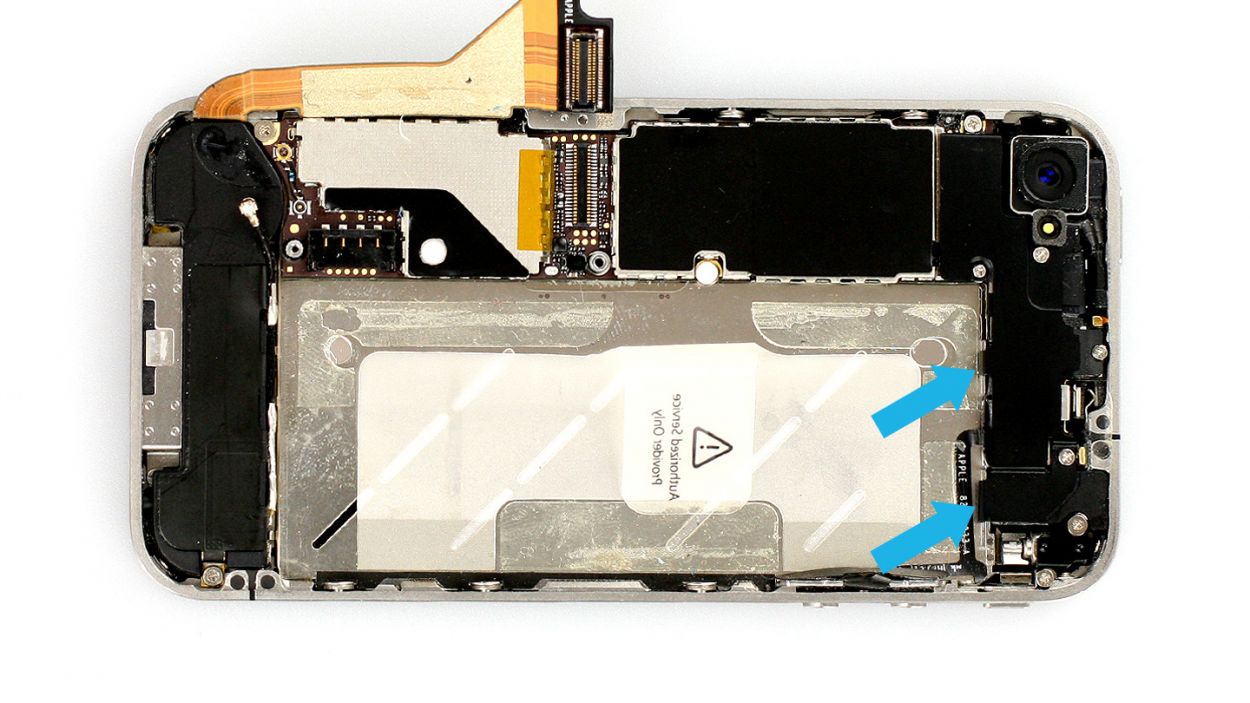
– Lift the cover out of the phone with care! Just a heads-up, it’s hooked on in two spots, so keep an eye on that. (Figure 3 will show you what to look for).
Step 6
– Pop that cover onto the logic board and make sure it’s snugly hooked on, just like a cozy blanket!
– Next, grab your Phillips screwdriver and fasten it down with those five little screws (check out figure 1 for a visual!). You’ll need: 1 x 2.3 mm Phillips screw, 2 x 1.6 mm Phillips screws, 1 x 4.8 mm Phillips Wi-Fi screw, and 1 x 1.3 mm Phillips screw.
– If you find yourself having Wi-Fi signal issues later on, it could be that the Wi-Fi screw is feeling a bit off. Also, take a moment to check if the Wi-Fi contact point is snugly fitted on the cover (see figure 2).
Step 7


– Time to slide that battery back into your iPhone like a pro!
– Next up, let’s get that antenna cover back on (check out figure 1 for guidance).
– Finally, snap the battery connector back into its cozy spot and secure it with a screw (see figure 2). You’ll need 1 x 2.6 mm Phillips screw for this little task!
Step 8

– Place the back cover back on and gently nudge it the final few millimeters towards the dock connector.
Step 9
– Alright, time to get those two screws at the bottom of the enclosure all snug and secure! You’ll need 2 x 3.6 mm pentalobe/Phillips screws for this part.
– Once you’ve got those in, just give the SIM card tray a gentle push to seat it back in place. Easy peasy!
Step 10

Just a heads-up! When you pop that battery out, your iPhone might decide to hit the reset button on time and show 1:00 a.m. on 1/1/1970. If that happens, you might find it a bit tricky to connect to the cellular network until you set the time right.
– Let’s get that iPhone back on track! Connect it to iTunes or hop onto a WLAN network and just chill until the time gets sorted out.
– Time to give that SIM tray a little love! Pop it out with the SIM card and then slide it back in.
– Turn on airplane mode for a quick moment and then switch it off again. It’s like giving your device a little refresh!