DIY iPhone 16 Pro Max Screen Replacement Guide
Duration: 45 minutes
Steps: 20 Steps
Heads up! Make sure to double-check everything before you dive in. A little precaution goes a long way in keeping things smooth and hassle-free. If you need help, you can always schedule a repair.
Follow this guide to swap out a broken, cracked, or unresponsive screen on your iPhone 16 Pro Max. Grab some replacement screen adhesive to get the job done right. Note: Since you can’t disconnect the battery for this repair, avoid using metal prying tools or touching any exposed contacts in your iPhone. After you’re done, calibrate an authentic screen using Apple’s Repair Assistant. If you need help, you can always schedule a repair.
Step 1


Let your iPhone’s battery dip below 25%. A fully charged lithium-ion battery can be a bit of a drama queen when it comes to safety!
– First things first, let’s disconnect any cables from your iPhone. Time to set it free!
– Now, press and hold the power button along with either volume button, then slide to power it down. Easy peasy, right?
Step 2


Ensure there’s a nice, flat spot near the bottom edge that’s large enough for your suction cup to grab onto.
– If your screen or back glass is looking like it survived a rock concert, grab some packing tape and lay down some overlapping strips over the glass. This will keep your fingers safe and make the disassembly process a breeze!
Tools Used

Step 3


– Grab your trusty P2 pentalobe driver and get ready to tackle those two 7.4 mm-long screws flanking the charging port. You’ve got this!
Step 4


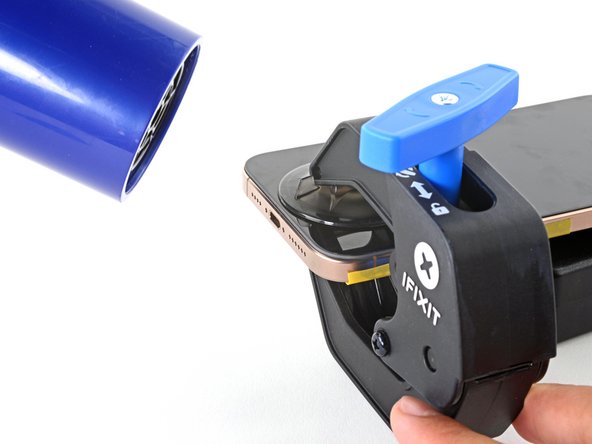
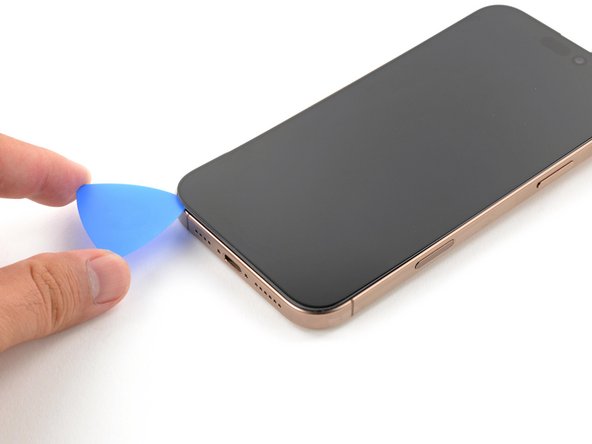
Be careful not to insert your opening pick too far or you might damage your device. To avoid this, mark your pick for depth guidance.
You can also add different measurements on the other corners of the pick for more options.
Or, tape a coin to the pick about 3mm from the tip for a quick depth stop.
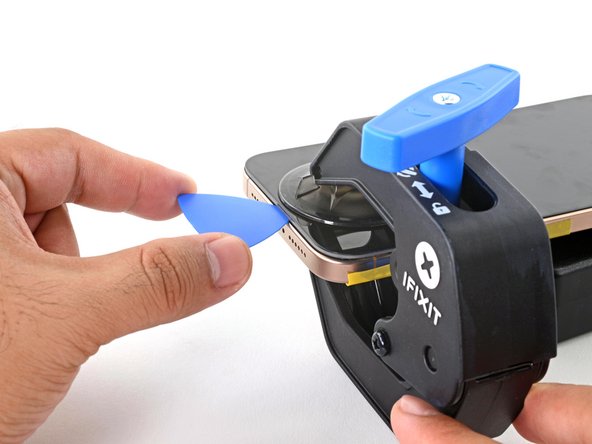
– Grab your trusty opening pick and measure about 3 mm from the tip. Give it a little mark with a permanent marker so you know just where to go!
Step 5
The next four steps show off the Anti-Clamp, a nifty tool we came up with to make opening your device a breeze. If you’re not using the Anti-Clamp, just skip ahead four steps for a different method.
The Anti-Clamp applies suction to both the screen and the back glass. To open the screen, you need to secure the back glass with tape. Full instructions on how to use this tape are available.
For complete instructions on how to use the Anti-Clamp, check out this guide.
Make sure the tape is only securing the back glass and not the screen.
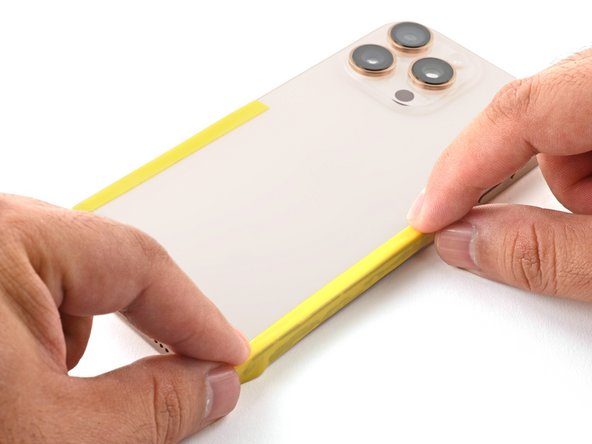
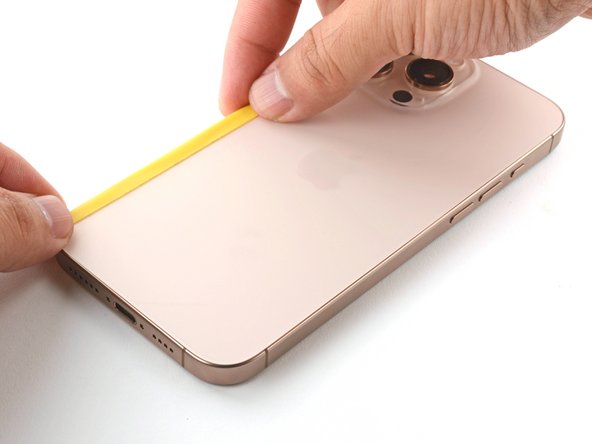
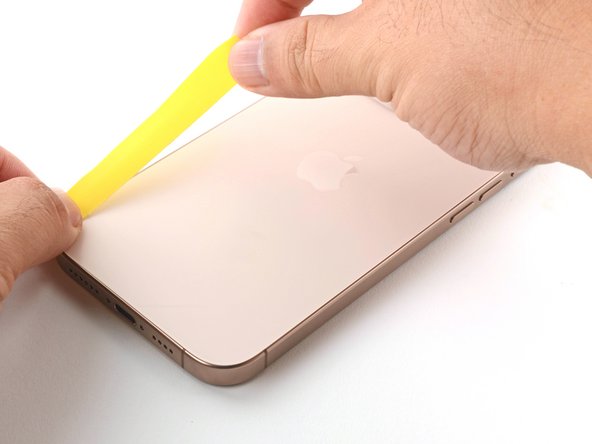
– Grab two strips of tape, and lay them along the long edges of your phone. Then, fold them over to the back glass to keep everything nice and snug. You’ve got this!
Step 6

If your iPhone’s surface feels like it’s auditioning for a slip-and-slide competition, just grab some tape and give it a little extra grip. Easy peasy!
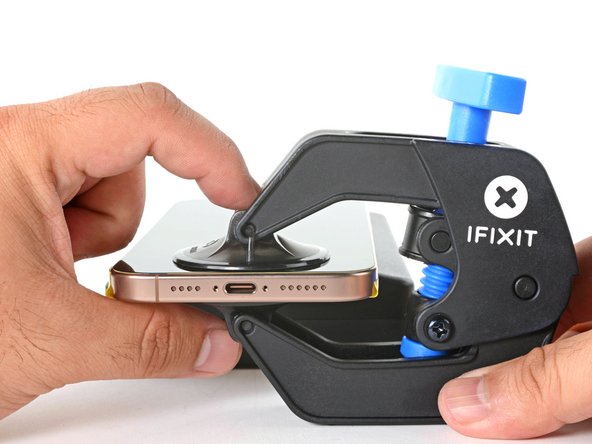
– Pull back the Anti-Clamp’s blue handle to unlock those arms.
– With the screen facing up, slide the arms over the right edge of your phone, with one suction cup on the screen and the other on the back glass. Center those cups near the bottom edge.
– Support your phone so it stays level between the Anti-Clamp’s arms—a small box works like a charm.
– Squeeze the cups together to get that suction going.
Step 7

If you don’t have tape, no worries! Use your hands to clean the suction cups and warm them up a bit to help them stick. Need a hand? You can always schedule a repair.
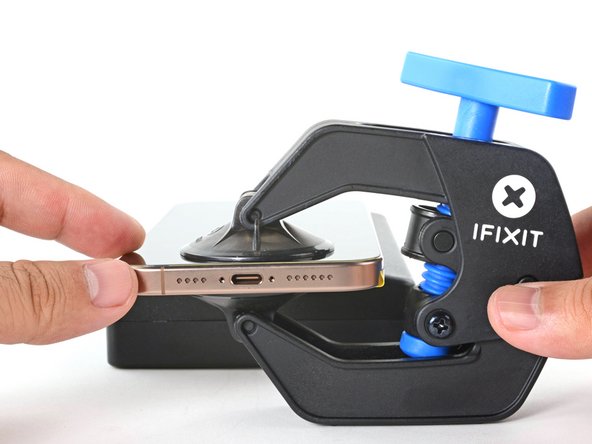
– Give that blue handle a gentle pull forward to secure those arms in place.
– Now, twist the handle a full turn (360 degrees) or keep going until the cups start to stretch out.
– As the cups embark on their stretching journey, ensure they remain perfectly aligned. If they start to wander off, simply detach the Anti-Clamp and pop on some tape to help those cups stick around.
Step 8
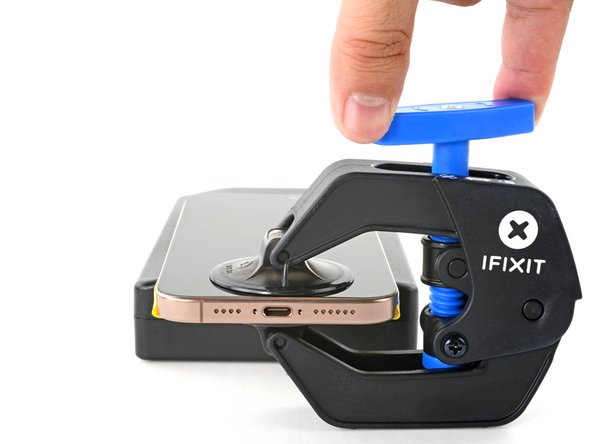
Watch out for the heat! Don’t crank up the temperature on your phone too high—the battery doesn’t like it when things get too toasty.
If a gap hasn’t formed after a minute, don’t sweat it! Just crank up the heat a bit more and twist that handle a quarter turn. Let the Anti-Clamp and some patience do their magic for you.
– Grab a hair dryer or heat gun and warm up the bottom edge of the screen until it’s toasty.
– Chill for a minute while the adhesive loosens and gives you a gap to work with.
– Slide an opening pick into the gap.
– Pull out the Anti-Clamp using the tabs on the suction cups.
– Skip the next two steps.
Tools Used


Step 9

Ready to get started? The next two steps will guide you on how to create that initial gap using a trusty suction handle. Let’s make some space!
Feeling a bit chilly? Warm things up with an iOpener! Follow these tips to heat it up and use the iOpener just right.
– Grab your trusty hair dryer or heat gun and give the bottom edge of the screen a nice warm hug until it’s toasty enough to touch!
Tools Used


Step 10

If you’re having trouble making a gap, just add a bit more heat to the edge and give it another go!
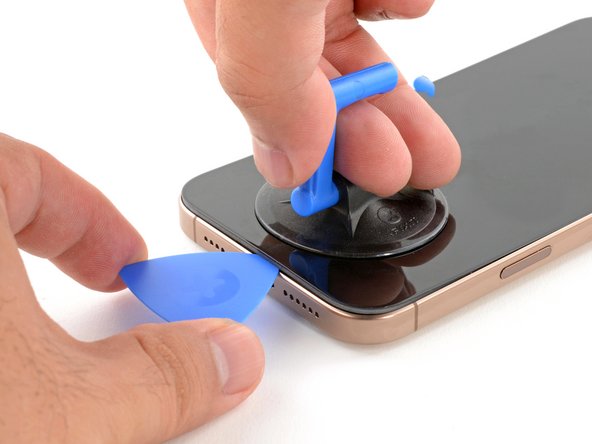
– Grab a suction handle and stick it to the bottom edge of the screen—let’s get that party started!
– With one hand giving the frame some love, gently but firmly pull up on the handle to make a little gap between the screen and the frame—time to let some light in!
– Now, slide the tip of an opening pick into that gap you just created. You’re doing great!
Tools Used
Step 11

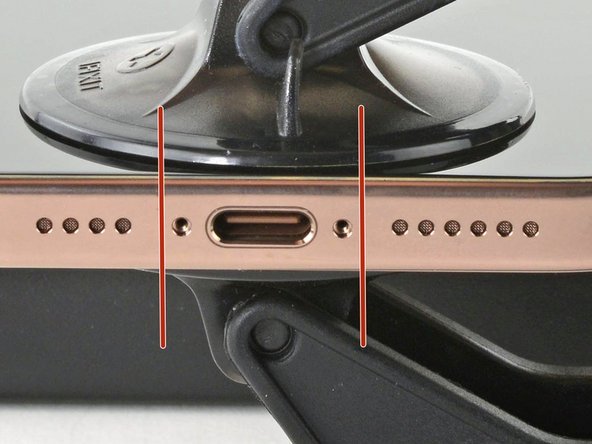
As you carefully slice through the adhesive holding that screen in place, remember to keep your pick no deeper than 3 mm. We want to avoid any accidental damage to sensitive areas below. Stay chill and take your time!
– You’ll find two delicate cables connecting your screen to the iPhone—one is just above the Action button, while the other is about halfway along the left edge of the device. Be gentle with them!
– Look out for multiple spring contacts that are scattered around the perimeter of the iPhone. They’re there to help, just like us!
Step 12

Careful now, don’t go deeper than 3 mm with that pick or you might mess up the spring contacts. If you need help, you can always schedule a repair
If slicing the adhesive gets tricky, give it a quick reheat for about a minute.
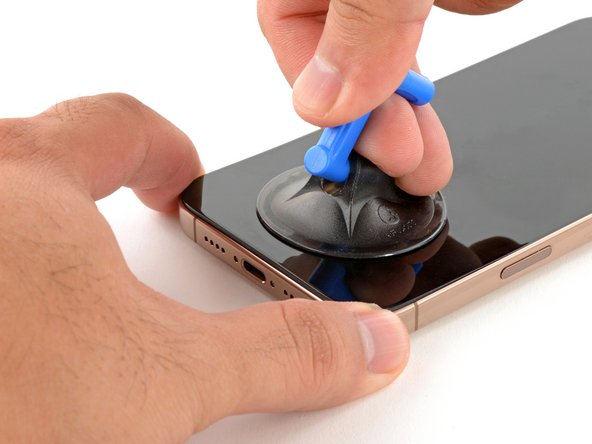
– Gently glide the opening pick along the bottom edge to free up that sticky adhesive.
– Keep that opening pick snug in the bottom-left corner to stop the adhesive from making a comeback.
Step 13

– Grab a hair dryer or a heat gun and give the left edge of the screen a little love until it’s warm and toasty to the touch.
Tools Used
Step 14


Keep your pick to a cool 3 mm max to steer clear of any mishaps with those delicate spring contacts and cables!
As you glide through, you’ll hear and feel those metal clips give way—it’s like a little victory dance!
– Pop in a second opening pick at the bottom-left corner, right next to your first pick buddy.
– Gently slide that opening pick along the left edge of the screen to break free the adhesive and set those metal clips loose!
– Keep the opening pick chilling in the top-left corner to stop the adhesive from making a comeback.
Step 15
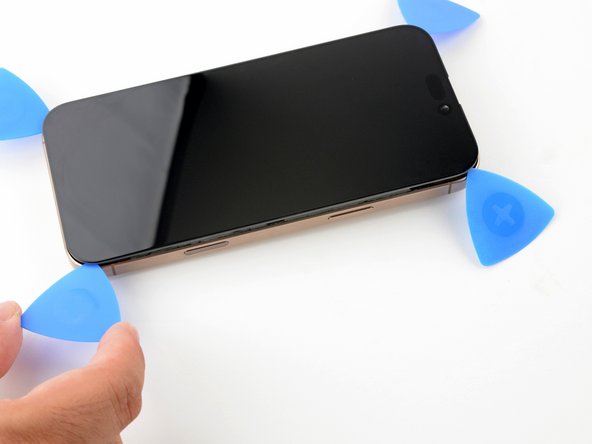


– Keep the heat going and slice along the rest of the screen edges.
Step 16


By now, the screen should be happily detached from the frame. If it’s still feeling a bit stubborn, take a moment to glide your pick around the edges and double-check for any sneaky adhesive spots or clips that might be holding on for dear life.
– Gently lift the screen upwards until those clips along the long edges pop out of the frame.
– Flip the screen open over the left edge of your iPhone and lay it flat on your workspace like it’s about to enjoy a sunbath.
Step 17

– Grab your trusty tri-point Y000 driver and gently unscrew those two 1.3 mm-long screws that are holding down the front sensor and display connector covers. You’ve got this!
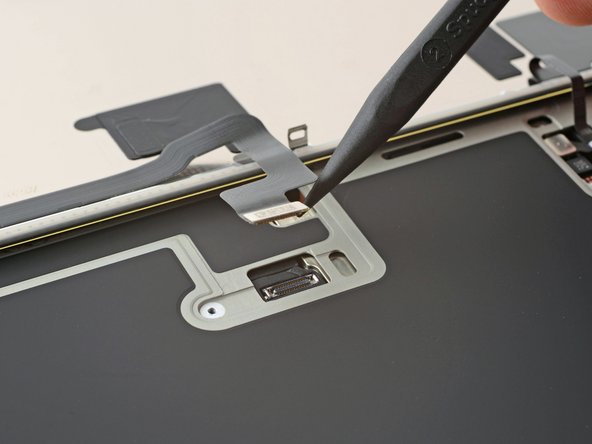
Step 18
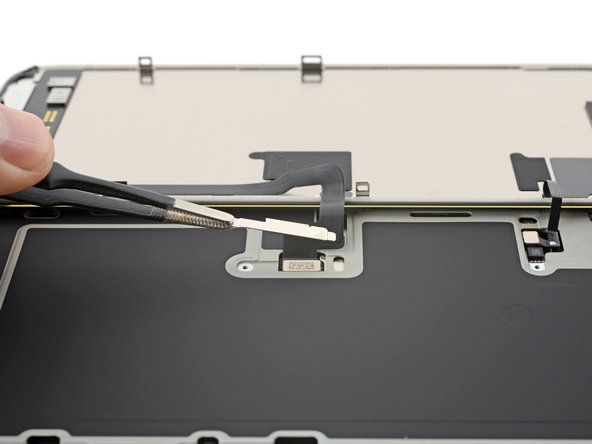

– Grab those tweezers and carefully grip the front sensor connector cover near the screw hole.
– Lift it off and set it aside.
– Do the same thing to remove the display connector cover.
– When putting it back together, make sure the cover’s tab is tucked under its frame cutout, then secure it with the screw. If you need help, you can always schedule a repair.
Tools Used

Step 19

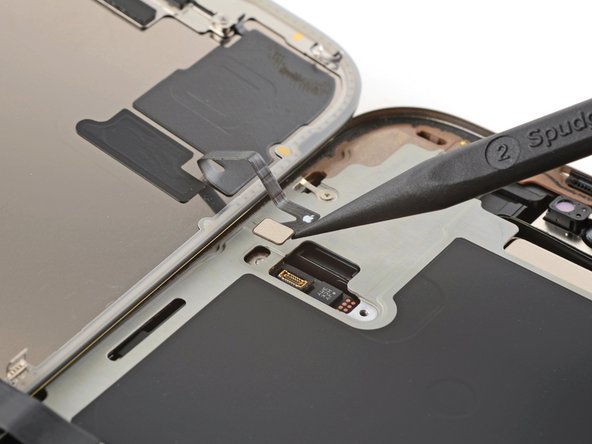
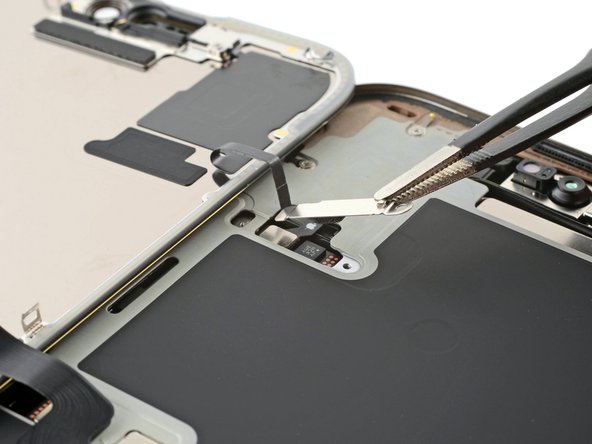
– Grab your trusty spudger and gently pry up to disconnect the display press connector. You’ve got this!
– Now, do the same for the front sensor press connector—easy peasy!
– When it’s time to put everything back together, just make sure to align the connector perfectly over its socket. Then, with a gentle touch of your fingertip, press down on one side, followed by the other, until you hear that satisfying click. No need to rush or force it—if it’s being stubborn, just reposition and give it another go. You’re doing great!
Tools Used

Step 20

Watch out for those delicate spring contacts while you’re sprucing up the frame. If you need help, you can always schedule a repair.
– Gently lift the screen away and set it aside.
– When you’re putting everything back together, follow this guide to reapply the adhesive and install that shiny new screen like a pro!
