DIY iPhone 5s 5c SE Battery Adhesive Strips Replacement Guide
Duration: 45 minutes
Steps: 11 Steps
Hey there! If you’re feeling stuck, don’t worry. You can always schedule a repair with us for some expert help!
Get ready to jazz up your device with brand-new battery adhesive strips! It’s time to give your iPhone 5s, 5c, or SE the TLC it deserves. Remember, these strips are your device’s BFFs, so handle them with care. Pro tip: Keep an extra set handy, just in case. Before you dive in, make sure you’ve safely removed the battery using our handy guides. Psst…if you have an iPhone 5 or an older model, no need for adhesive strips! Check out our step-by-step guides for iPhone 5s, 5c, and SE battery replacements, or explore other models like the 6, 6 Plus, 6s, 6s Plus, 7, 7 Plus, 8, 8 Plus, XR, X, XS, and XS Max. Let’s get adhesive-strip savvy!
Step 1

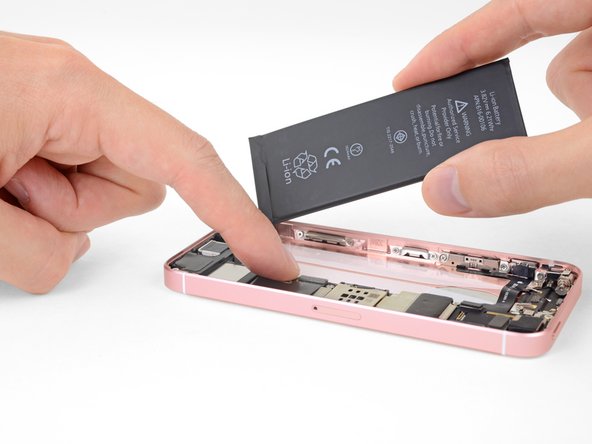
– Before you stick down those new adhesive strips, go ahead and give your new battery a quick connection to check its alignment in the iPhone. No pressure, just a little test run!
– If everything looks peachy, feel free to disconnect the battery and gently remove it. You’ve got this!
Step 2


Hey there! Just a quick heads up – make sure you don’t accidentally touch those adhesive strips once you’re done with this step. The adhesive has one job to do and it’s a one-time deal. So, if it decides to stick to your finger or something else by mistake, just let it go and get yourself a fresh one.
Sometimes that pesky blue film just doesn’t want to cooperate and refuses to peel off. In that case, it’s best to toss those strips and grab some fresh ones. You’ve got this!
– Go ahead and peel off that big blue film liner. Make sure to remove it from the adhesive strips completely!
Step 3

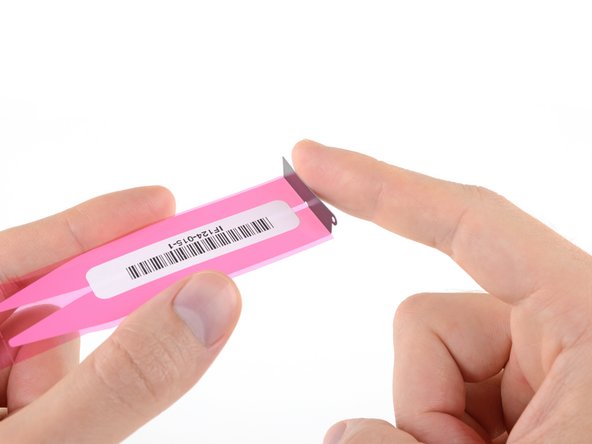
– Get that sticky side facing down and give that black tab a cool 90° lift. You’ve got this!
Step 4

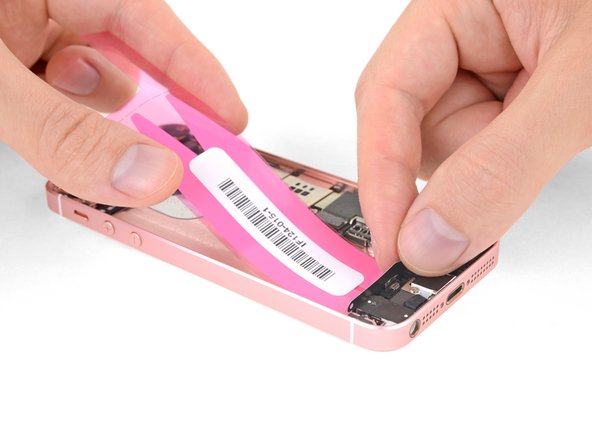

– With the sticky side down, take your time and carefully align those strips into your iPhone’s rear case. You’ve got this!
– Once you’ve got them in place, just let the adhesive do its thing and stick that rear case down nice and snug.
Step 5
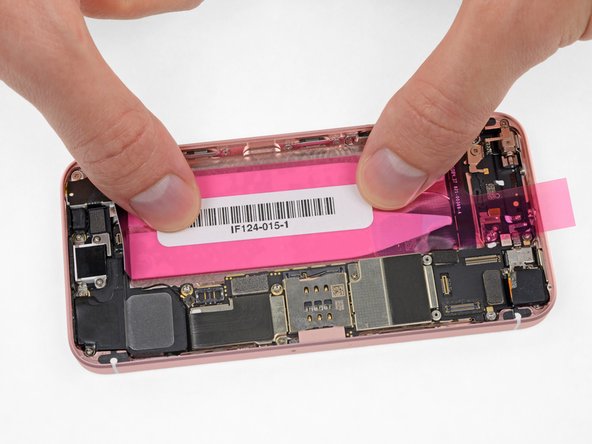


– Gently press down each strip to secure it snugly to the back case, starting from the center and working your way out to the edges. You’ve got this!
Step 6


– Go ahead and peel off that big, colorful film liner and make sure to remove it entirely.
Step 7


– Gently guide the battery connector into its iPhone home without securing it in place. Make sure it aligns perfectly with its socket on the logic board.
– Now, let’s bring the battery back to life by connecting it.
Step 8


Once the battery decides to stick, getting it out or moving it around again will ruin those trusty adhesive strips, meaning it’s back to square one.
– Now it’s time to get your battery in place – carefully position it and gently set it into your iPhone. If you need help, you can always schedule a repair


Step 10


Be careful when working around the battery – it’s a lithium-ion, and puncturing it can cause a fire. If you’re not comfortable with this step, or if you’re feeling unsure, don’t hesitate to schedule a repair and let the pros handle it.
– Hey there! Let’s jazz things up a bit. Grab your spudger or a pair of tweezers (blunt is the way to go) and gently fold that black tab downwards. Slide it neatly between the battery’s lower edge and the components lounging at the bottom of your iPhone. You’ve got this!
Tools Used


