DIY Mac Powerbook 140 Hard Drive Replacement Guide
Duration: 45 minutes
Steps: 7 Steps
Hey there! If you’re feeling stuck, don’t fret. You can always schedule a repair with us for some tech magic!
Get ready to swap out that hard drive in your Macintosh Powerbook 140! Before diving in, double-check that all your parts are a perfect match and won’t cause any drama for your computer or safety. Keep an eye on your parts so nothing goes missing. And hey, remember to wash those hands after handling the components! Most importantly, let’s use some good old common sense. Just a heads up—I’m not a tech wizard, so if you spot any goofs or have suggestions, don’t hesitate to reach out. Thanks for being awesome!
Step 1

– Flip the 140 over and take out those 4 screws at the bottom using a T10 star-headed screwdriver. You’ve got this!
Step 2
– As you carefully keep the top and bottom halves of the computer together, head to the back side of the computer and use a T17 Star-headed screwdriver to remove the final screw.
Step 4

– Gently lift the back of the screen and keyboard unit (the top of the computer) and carefully nudge the front left and right corners away from the bottom unit until you hear a satisfying click. Then, slowly raise the top unit and disconnect the interconnect cable (the large, somewhat delicate cable that links the two halves) from its socket on the sisterboard.
Step 5
– Grab your trusty T-17 Star headed screwdriver and let’s get those screws out! We’re talking about the ones holding the drive retainer that keeps your hard drive and floppy disk drive snug as a bug. Some of these screws might be feeling a bit too cozy, so if you encounter a stubborn one, no worries! Gently use a pair of needle-nosed pliers to give it a little twist and free it up. You’ve got this!
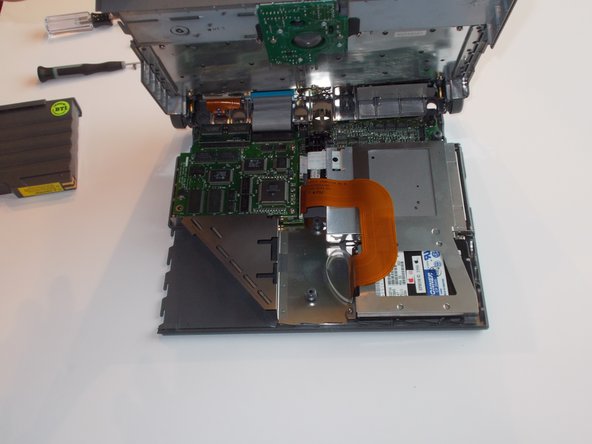
Step 6
– Alright, let’s tackle this step! Gently pull the long, flat HDA cable out of the hard drive by yanking on the white plastic piece at the bottom. Remember, take your time with this part because that flat cable can get a bit fussy and disconnect from the plastic piece. If that happens, just pull the top and bottom of the piece apart and carefully re-insert the cable. You’ve got this!
Step 7
– Find your shiny new hard drive that plays nice with your device. Make sure it’s in tip-top shape and ready to roll without causing any trouble for your computer or any safety concerns for you. Let’s keep it safe and sound!
