
DIY MacBook Pro 15 Hard Drive Cable Replacement Guide
Duration: 45 minutes
Steps: 15 Steps
Heads up, tech whiz! Make sure you’ve got your tools ready and your workspace clear. Let’s make this repair a smashing success!
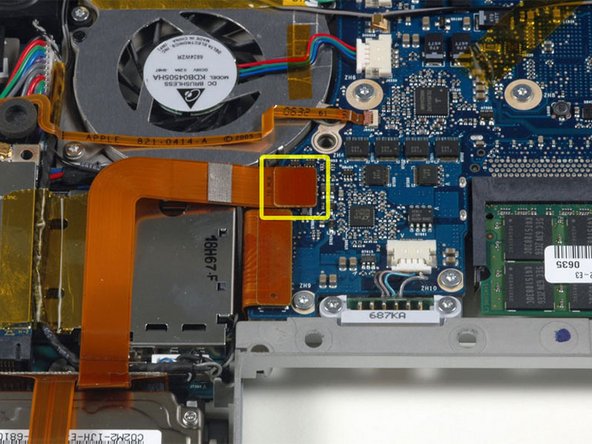
This snazzy little connector is your hard drive’s best buddy—it hooks it right up to the logic board! Keep the friendship strong and make sure they’re securely linked.
Step 2

– Unscrew the trio of matching Phillips screws from the memory door with flair.
– Keep track of which screw sets belong to which parts. This will make reassembly a breeze and a half!
Step 3

– Gently raise the memory door just enough to get a good grip on it, then slide it towards yourself and pull it free from the casing—like magic!

Step 5

– Time to unscrew some stuff! Remove the following 6 screws:
Step 6

– Unscrew the four Phillips dazzlers on the port side of the computer. Let’s make this gadget groovy again!
Step 7

– Give your computer a little twist and turn it 90 degrees! Now, let’s get those two Phillips screws off the back. You’ve got this!
Step 8

– Give your computer a little twist and turn it 90 degrees once more. Now, let’s tackle those four Phillips screws hanging out on the side. Time to show them who’s boss!
Step 9

Whoa there, champ! Slowly does it when removing the upper case. It’s still linked to the logic board by a sneaky ribbon cable. Let’s keep everything in one piece, shall we?
– Start by lifting the rear of the case and wiggle your fingers along the sides to loosen it up. Keep moving your fingers to free up the sides. You might need to do a little dance, rocking the case up and down to unhook the front. This part can be a bit of a pickle. Just above the DVD reader, there are four sneaky tabs that pull out vertically—watch out for them!
– Heads up that the two tiny tongues on the left front of the upper case might get a little bent out of shape during removal. When you’re putting it back together, you might need to give them a little pep talk and bend them back into place to slot nicely into the grooves on the lower case.
Step 10

– Unplug the trackpad and keyboard ribbon cables from the logic board. You might need to peel off some tape, so get ready to channel your inner surgeon!
– Time to remove the upper case. Lift it off like you’re unveiling the secret to eternal tech happiness.


Step 12

– Unplug the sleep light and IR sensor cable from the orange ribbon cable connected to the hard drive. You’ve got this!
Step 14
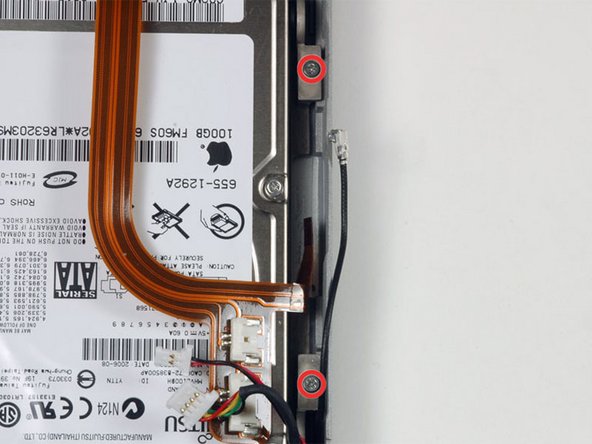
– Unscrew the two shiny Phillips screws that are keeping the hard drive bracket snug against the lower case. It’s like freeing a trapped treasure!
Step 15
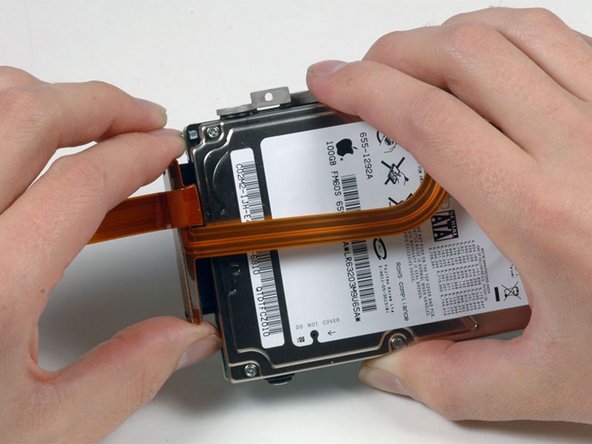
– Hoist that hard drive out of its cozy nook in the computer, then gently unplug the zesty orange ribbon cable. Onward to victory!


