DIY MacBook Pro 15 Hard Drive Replacement Guide
Duration: 45 minutes
Steps: 18 Steps
Heads up! Follow these steps carefully to avoid any hiccups. If you need help, you can always schedule a repair.
Feeling a little thick lately, are we? No worries! You can totally rock hard drives up to 9.5mm in thickness like a boss!

Step 2

– Unscrew the trio of cheeky Phillips screws holding the memory door in place.
– Keep track of which screws come from where—trust me, it’s a real game-changer when you put things back together!
Step 3

– Gently lift up the memory door just enough to get a good grip, then slide it toward yourself and pull it away from the casing. It’s like magic!
Step 4

– Whip out your Phillips screwdriver and unscrew the dynamic duo of screws chilling in the battery compartment near the latch. Let’s get this party started!
Step 5

– Unscrew the six screws listed below:
Step 6

– Unscrew the four Phillips screws on the port side of your device. Let’s get those little rascals out!
Step 7

– Twist your gadget 90 degrees and whisk away the two Phillips screws chilling at the back. Keep it cool, you’re doing great!
Step 8

– Twist your computer 90 degrees once more and unleash the four Phillips screws on the side. Keep on rocking that screwdriver!
Step 9

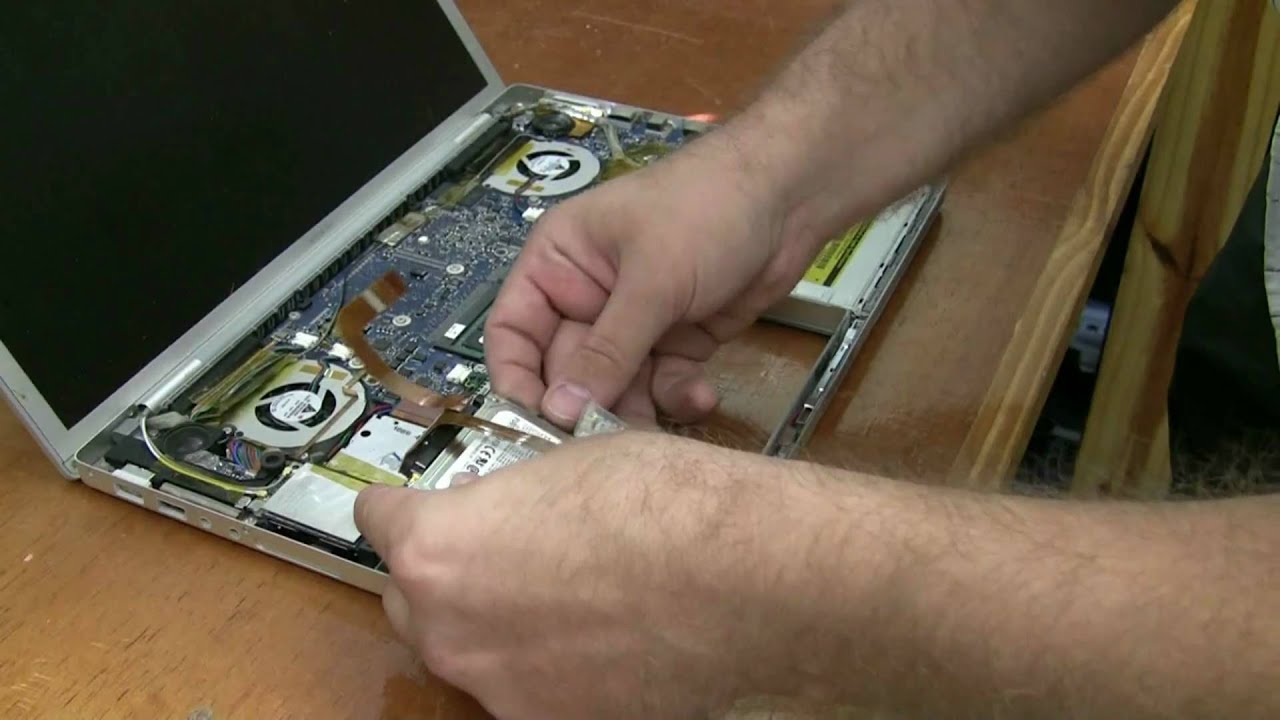
Hold up, party people! Don’t just rip off the upper case like it’s the last dance at prom. Remember, it’s still grooving with the logic board via a ribbon cable.
– Start by lifting the rear of the case, then wiggle your fingers along the sides to loosen it up. Keep going until the sides are free. You might have to gently rock the case up and down to disengage the front. Heads up, this part can be a bit of a challenge! Over the DVD reader, there are four sneaky tabs that like to hide and need to be pulled out straight up.
– Watch out for the two tiny tongues on the front left of the upper case—they might get a little bent out of shape during removal. When putting it back together, you might have to straighten them back out so they can slide into the grooves of the lower case smoothly.
Step 10

– Unplug the trackpad and keyboard ribbon cable from the logic board, carefully peeling off any tape.
– Take off the upper case.

Step 12

– Time to bust out your trusty spudger! Gently loosen up that sticky adhesive holding down the sleep light and IR sensor connectors snug on top of the hard drive.
Tools Used

Step 13

On some devices, you might find that these screws sport T6 Torx heads. Keep an eye out for them!
– Pop out the two shiny Phillips screws holding down the hard drive bracket to the bottom case.
Step 14

– Gently slide the Bluetooth board out of its cozy slot right next to the hard drive. Remember, it’s still attached to the zesty orange hard drive cable, so let’s not yank it out completely—just a little wiggle away from the computer will do!
Step 15

– Hoist that hard drive up with one hand, and with your other hand, sneakily slide out the retaining bracket from the side of the hard drive. It’s like a magic trick, but you’re the magician!
Step 16

– Unplug the zesty orange cable from the hard drive.
– Once you’ve popped in the new hard drive, make sure it can breathe! Don’t let the orange ribbon smother the vent hole on top.
Step 17

Remember to transfer these snazzy screws and bumpers over to your fresh hard drive if you’re switching it up!
– Unscrew the two shiny T6 Torx screws and remove the black rubber bumpers from the right side of the hard drive. Let’s keep things loose and easy!
Step 18

If you’re jazzing up your device with a new hard drive, don’t sweat the setup! Check out our groovy OS X install guide to get your tech vibes flowing.
– Unscrew the two black T6 Torx screws and remove the black rubber bumpers from the left side of the hard drive, like a pro. Remember, these little guys need to hop onto your new hard drive if you’re upgrading.


