DIY Macintosh PowerBook 165c Floppy Drive Replacement Guide
Duration: 45 minutes
Steps: 20 Steps
Heads up! Before diving into the repair adventure, make sure you’ve got everything you need. A well-prepped workspace leads to a smoother journey! If you ever feel stuck, remember, help is just a click away—feel free to schedule a repair.
Get ready to swap out your floppy drive with this handy guide! Whether you’re looking to upgrade or simply replace it, we’ve got all the steps laid out for you. If you need help, you can always schedule a repair.

Step 2

– Gently pull the battery towards you until it’s completely free from the device. You’ve got this!
Step 3

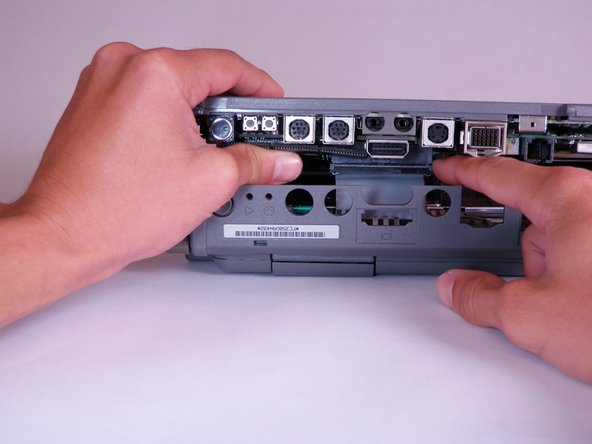
– Flip your computer so it’s right side up with the back facing you, just like a pro!
– Go ahead and pop open that Input/Output (I/O) door like you mean it!
Step 4

– Gently arch the door until you hear one of the pins pop free from its cozy little slot. Nice work!
– Now that one pin is free, go ahead and lift the I/O door off the computer. You’re doing great!
Step 5

– Get your device comfy with its bottom up and rear facing towards you. Make sure you can have a little chat with the Macintosh label from this angle.
Step 6

– Grab your trusty T8 torx screwdriver and let’s tackle that 6.8mm screw just above and to the right of the modem jack. You’ve got this!
– Now, twist that screwdriver counterclockwise to pull out the screw. Easy peasy!
Step 7

– Grab your trusty T10 torx screwdriver and get ready to tackle those four screws—each one is 18mm long—holding the lower case in place. Let’s get this party started!
Step 8

Heads up! You won’t be able to fully remove the lower case until you pop off those two pesky plastic clips in the front corners. Check out the next step for the scoop on how to do it!
– Get your hands comfy on the lower case, just above that I/O panel, and gently lift it a few inches away from the main body of the computer, like you’re giving it a little stretch.
– Now, let’s carefully free that big gray interconnect ribbon cable sitting just behind the I/O panel. Give it a gentle release and let it breathe.
Step 9

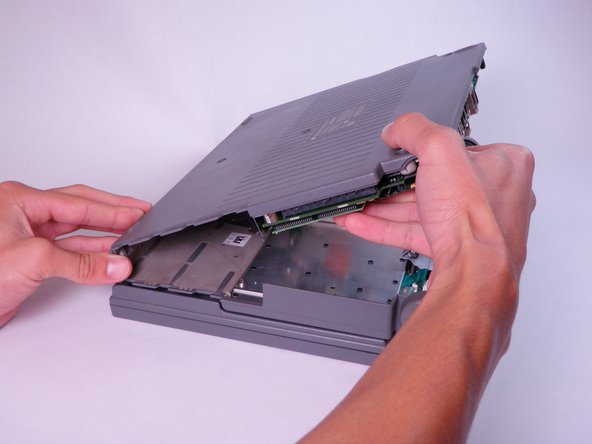
– Pop your thumb on the top case, right inside that cozy battery slot, while your index finger hangs out near your thumb on the left side of the bottom case.
– Give a little pinch with your thumb and index finger to free the clip. Keep that pinch going strong, and then use your index finger to nudge the lower case up.
– Now, simply lift the lower case away to reveal the inner workings!
Step 10

– Get cozy with your device, making sure the ports are front and center.
Step 11
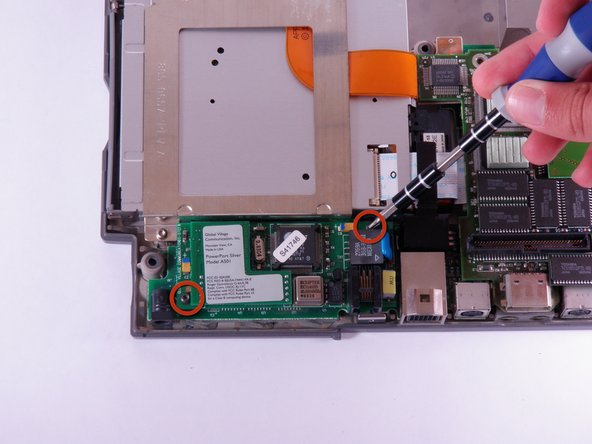

Hey there! Just a heads-up, the modem card is a cool extra feature that some Macintosh 165c devices have, but not all of them come with it. Keep that in mind as you work on your device.
– Hey there! Time to track down the Modem Card chilling in the lower case.
– Get your hands on a T8 torx screwdriver and say bye-bye to the two, 7.7mm long screws in the two corners.
Step 12

– Gently lift the modem card straight up until it pops free from the connector.
– If the modem card is playing hard to get, try giving it a little wiggle while you lift it up.
Step 13

– Gently find that RAM card and give it a little lift straight up until it pops free from the connector. No need to rush, take your time!
– If the connector isn’t cooperating right away, give the card a gentle wiggle back and forth to help it along. Easy does it!
Step 14


Hey there tech whiz! Just a heads up, the PSRAM expansion card is like a shiny accessory for your device, but not everyone gets one in their tech wardrobe.
– Gently find the PSRAM expansion card and lift it straight up until the connector lets go.
– If the PSRAM expansion card seems a bit stubborn, try wiggling it gently while you lift. It’ll come out!
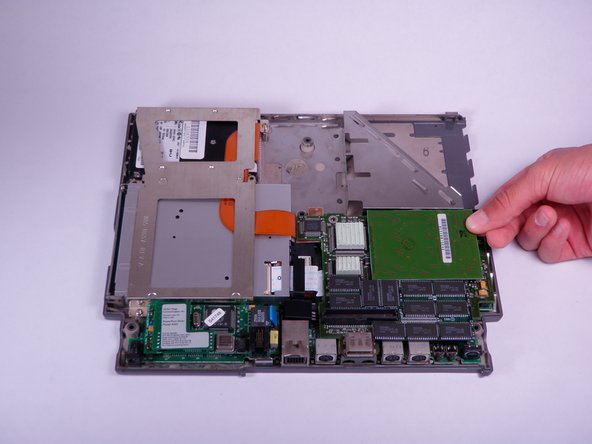
Step 15

– Grab your trusty T8 torx screwdriver and carefully unscrew those four 7.7mm long screws that are holding the daughterboard in place. You’re doing great!
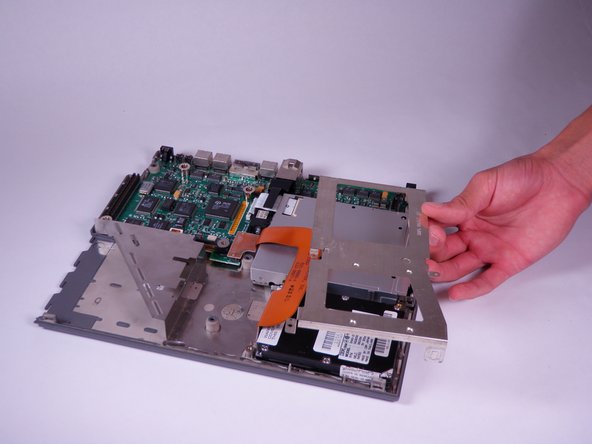
Step 16

– Gently lift the daughterboard straight up to pop it out of the connector.
– If the daughterboard seems a bit stubborn, give it a gentle wiggle while lifting to help it along.
Step 17

– Grab your trusty T8 torx screwdriver and let’s tackle those five screws! You’ll want to remove the 6.8mm long screws on the drive retainer. You’ve got this!
Step 18
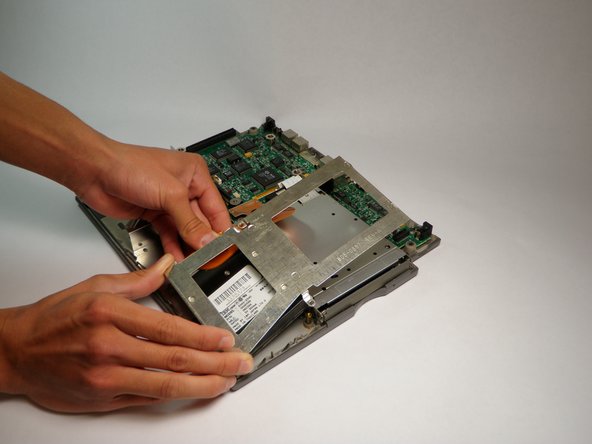

– Position your computer so that the plastic clip at the top left corner of the lower case is right in front of you. Gently release the clip by lifting the retainer. You might need to give the hard drive a little nudge to get that retainer off.
– Carefully lift the drive retainer out.
Step 19

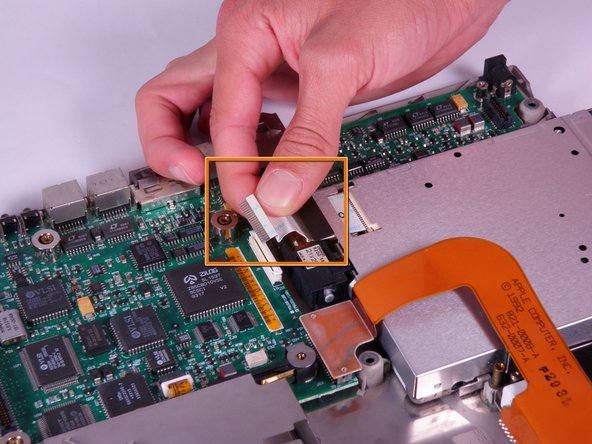
– Give that white lock-out tab to the right of the floppy drive a gentle nudge to open it up.
– Carefully detach the white floppy drive ribbon cable by pulling it away from the now-open tab fastener. Easy peasy!
Step 20

– Gently lift that floppy drive up like it’s saying hello, and remove it with care.
