DIY Microsoft Surface Laptop 3 (13.5-inch) Repair Guide
Duration: 45 minutes
Steps: 11 Steps
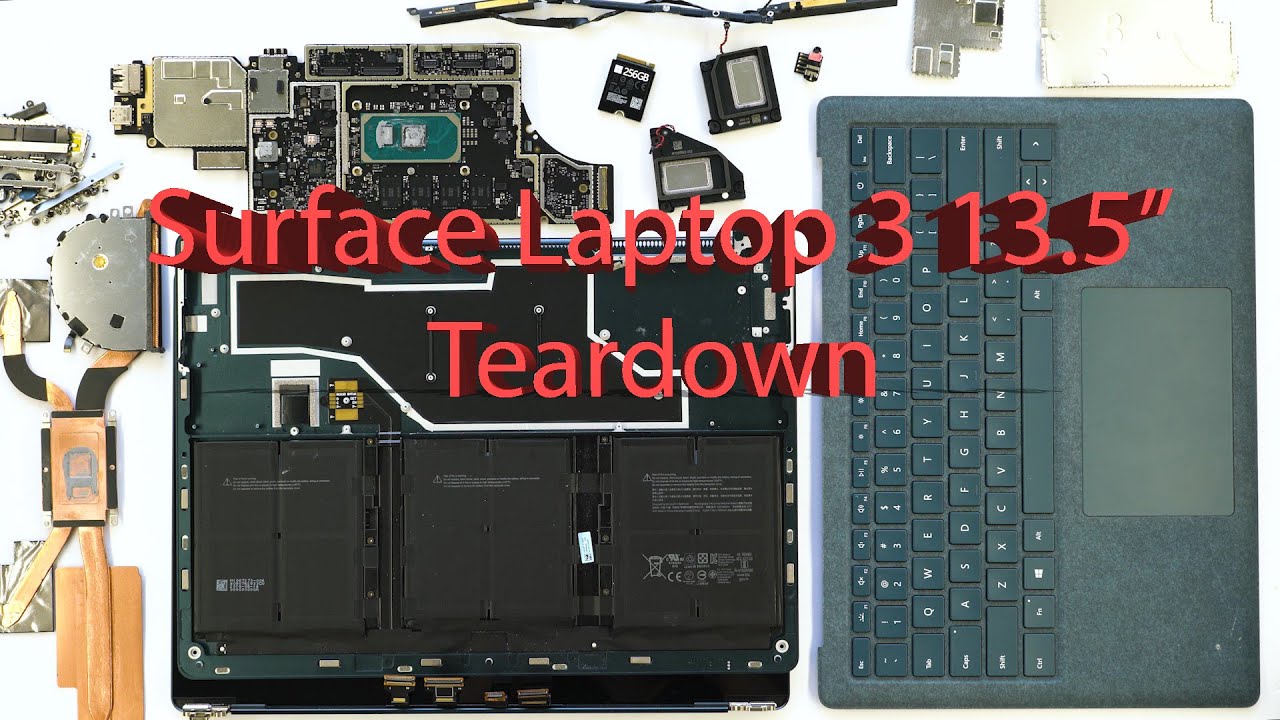
Get ready to tackle the upper case of your Microsoft Surface Laptop 3 (13.5″)! This part houses the keyboard and touchpad, so it’s a pretty important piece of the puzzle. While some of the photos in this guide might show a different model and could have a few visual quirks, don’t worry—they won’t mess with the steps you need to follow. If you find yourself in a jam, remember, you can always schedule a repair!
Step 1


– Turn your laptop upside down and set it on your workspace with the feet pointing up.
Step 2


Use the spudger’s pointed end to remove the feet on the bottom of your laptop.
Heads up: the two feet near the back (screen) edge are different from the front ones.
– Each foot has a secret sweet spot to make removal a breeze.
– Slide the spudger into the nearest long edge of the foot, making sure it finds the hidden groove. Push it gently along, parallel to the short edges of the laptop, as shown.
Tools Used

Step 3


The two rear feet are gently held in place with a bit of light adhesive. Nothing too sticky, just enough to keep them secure.
– Time to get this repair started! Begin by inserting the pointed end of a spudger under one of the rear feet, right at its edge.
– Gently push the spudger under the foot and pry it up to release – easy does it!
– Repeat the process to remove the second rear foot. You’re making great progress!
Tools Used
Step 4


The two front feet are held in place by some nifty plastic clips and a touch of light adhesive.
– Wiggle the pointy end of a spudger under the front edge of one of the two front feet.
– Slide the spudger under the foot and give it a gentle lift to pop it off.
– Do the same for the second front foot.
Tools Used
Step 5


– While putting things back together, remember this:
– The front feet and rear feet are not the same, so keep an eye out!
– Front feet are picky—they only snap into place in one specific direction.
Step 6


– Instead of sticking with those old, tired feet on your device, why not jazz things up with some 8 mm rubber furniture pads? They’re a fantastic alternative!
– Just peel a pad off its backing, line it up over the foot cavity, and give it a good press to make sure it sticks. Easy peasy!
Step 7

As you tackle this repair, keep a close eye on each screw and remember to return it to its original spot. This way, your laptop will stay happy and healthy, and you won’t run into any surprises later on!
– Grab your trusty T5 Torx driver and get ready to tackle those four 3 mm screws hiding in the foot cavities—these little guys are what holds the upper case snugly to your device. You’ve got this!
– And hey, when you’re putting everything back together, remember: don’t go overboard tightening those screws. They have a tendency to strip if you get too enthusiastic.
Step 8


– Turn your device upside down.
– Open the display as wide as it can go.
Step 9


Hold off on completely removing the upper case for now—it’s still tethered to the rest of the laptop, so go easy.
Make sure the upper case snugly hugs the entire perimeter. Any gaps between the upper and lower cases near the display could spell trouble, potentially harming the display when it shuts.
The upper case is held firmly in place with magnets, so it’s nice and secure. No need to worry about it slipping out of place!
– Grab the top edge of the upper case right above the keyboard and give it a nice, straight lift to pop it free.
– Now, gently lift the front edge of the upper case up and away from the laptop, being careful not to put any stress on the ribbon cable for the keyboard and touchpad hiding underneath.
– When it’s time to put everything back together, lower the upper case onto the lower case until those magnets snap together and it sits nice and flat.
Step 10


The keyboard and touchpad ribbon cable is held in place by a handy magnet connector.
On some models, this connector is wrapped up in black tape for extra protection.
– Slide the flat end of a spudger under one side of the ribbon cable connector and gently pop it up to set it free.
– Carefully lift the ribbon cable off the motherboard.
Tools Used
Step 11


Make sure that ribbon cable is laid out flat and relaxed – no twists or stress allowed!
– Before calling it a day, compare your shiny new part with the old one—it might need some finishing touches, like transferring leftover components or peeling off those adhesive backings.
– Putting your device back together is a breeze—just reverse the steps you followed earlier.
– Got some e-waste from the repair? Do the planet a solid and take it to a certified recycler like R2 or e-Stewards.
– Stuck or feeling like your repair hit a snag? No worries, try basic troubleshooting or swing by our Answers community for some crowd-sourced wisdom.
– And hey, if it still feels tricky, remember you can always schedule a repair for expert help.
Success!