DIY Microsoft Surface Laptop 4 13.5-inch Screen Replacement Guide
Duration: 45 minutes
Steps: 23 Steps
Get ready to swap out the screen on your Microsoft Surface Laptop 4 (13.5-inch)! If your battery is looking a bit puffy, make sure to take the right safety measures. Some of the photos in this guide might be from a different model, so they could look a tad different, but don’t worry—they won’t mess with the steps you need to follow.
Step 1


It’s a good idea to let your laptop’s battery drop below 25% before diving into this repair. A battery that’s too charged might throw a spark if it’s damaged, and we definitely don’t want that.
– Disconnect every cable hanging off your laptop and give it a proper power nap by shutting it down completely.
Step 2


– Time to get started! Flip your laptop over and lay it down with the back facing up. This will give you access to the four rubber feet, and we’ll get this repair underway!
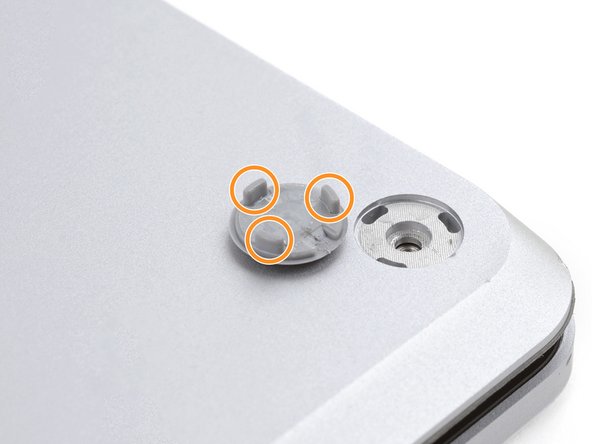
Step 3


Each foot has a little notch to help you pry it off the laptop:
– The back feet slots are nearest to the back edge of your laptop.
– The front feet slots are nearest to the front edge of your laptop.
Step 4


Watch out for those speedy little feet—they can take off before you know it! Keep an eye on them so they don’t go missing.
– Gently slide one arm of your tweezers into the gap beneath one of the feet.
– Twist the tweezers and carefully pry it up to break the adhesive seal and free the foot from the laptop.
– Take the foot off.
– Now, repeat this process for the other feet.
Tools Used

Step 5

– Alright, so this laptop’s got two kinds of feet, like sneakers and flip-flops. When you’re putting it back together, make sure each foot finds its way home to the right spot.
– Gently press the feet into their grooves until they’re snug and comfy.
– The rear feet have just one clip in the middle—simple enough!
– The front feet are fancy with three clips, and they’ll only go in one way, so don’t force it.
– If the feet just aren’t sticking anymore, no worries! Peel off the old adhesive and pop on a tiny piece of Tesa Tape where the old adhesive used to be.
Step 6


– Got worn-out feet? No problem! Grab some 8mm rubber furniture pads and let’s get this repair started!
– Peel off a pad from its backing – easy peasy!
– Now, line up the pad with a foot cavity and press down gently to secure it. You’re doing great!
Step 7

These screws can be a bit fussy! Make sure to press down firmly to keep them from stripping out. You’ve got this!
As you tackle this repair, make sure to keep an eye on each screw and put it back exactly where it belongs. It’s like a little game of memory, and you’ll be the champion!
– Grab your T5 Torx driver and whisk away those four 3 mm screws holding the upper case in place. You’re on a roll!
Step 8


– Time to get started! Flip your laptop over and open the screen all the way.
Step 9


Hey there! Just a friendly reminder: don’t go all out trying to yank off the upper case—it’s still hanging on by a cable.
Make sure the upper case is snug all around the edges. If you spot any gaps between the upper and lower case near the screen, it could lead to some screen drama when it closes.
The upper case is held in place by some nifty magnets.
– Hold onto the top edge of the upper case just above the keyboard and gently lift it straight up to pop it off.
– Carefully raise the bottom edge of the upper case away from the laptop, making sure not to pull too hard on the ribbon cable hiding underneath.
– When putting it all back together, lower the upper case onto the lower case until those magnets click into place and everything sits snugly.
Step 10

The cable connecting the keyboard and touchpad to the laptop’s upper case is like the lifeline of your device. Let’s keep it connected and happy!
– Grab a spudger and slide the pointed end underneath one edge of the magnet connector. Give it a gentle pry to disconnect it – you’re doing great!
– When you’re ready to reconnect, line up the magnet connector over its socket with the cable pointing toward the bottom of the laptop. A simple press down will secure it in place. You’ve got this!
Tools Used

Step 11

– Pop off the upper case and place it keyboard-side down on a clean surface. There you go, you’re halfway to victory!
Step 12

Once the screw is out, the SSD does its little spring-up trick at a gentle angle.
– Grab your trusty T5 Torx driver and pop out that 2.7 mm screw holding the SSD in place—easy peasy!
Step 13


Avoid yanking it up at a sharp angle; that could put a hurt on the SSD and its socket!
Taking out the SSD also does the trick of disconnecting the battery. Pretty handy, right?
– Gently wiggle the SSD out of its cozy little socket and say goodbye for now.
– When it’s time to put everything back together, slide the SSD in at a fun little angle to make it feel right at home.
Step 14

Be gentle with the shield; we want it to stay in shape for reassembly later!
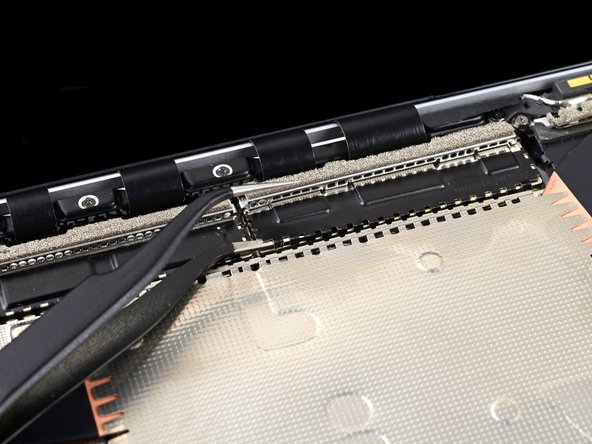
– Slide one arm of your tweezers under the corner of the right display cable shield—like a ninja sneaking in.
– Carefully pop it up to unhook those clips holding the shield in place. Be gentle, but firm—it’s a finesse move!
– Do the same dance around the left, right, and bottom edges of the shield until it’s ready to come off like a pro.
Tools Used
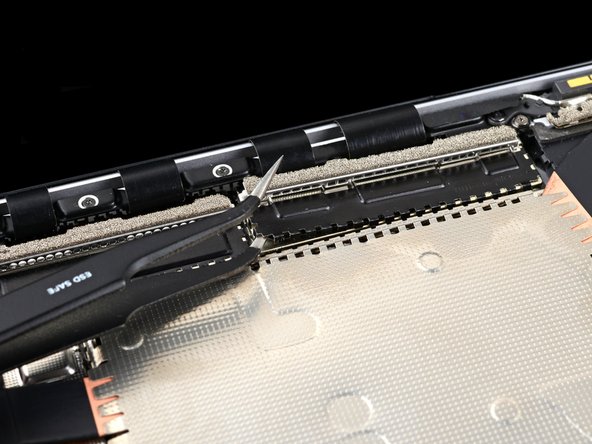
Step 15

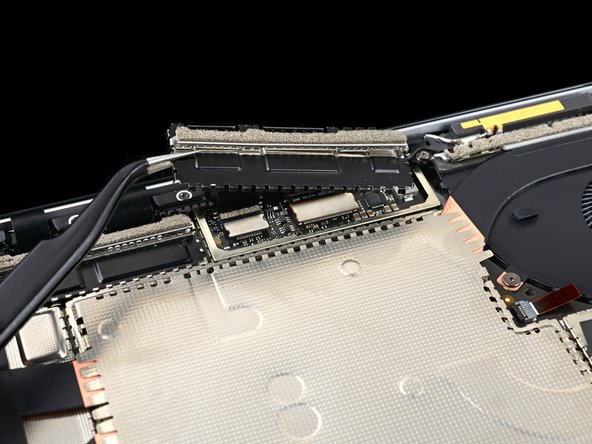
– Gently slide the right display cable shield downwards to release it from its snug little home.
– Now, go ahead and take that shield off!
Step 16

– Give it another go! Just like before, remove the left display cable shield by repeating the last two steps. You’ve got this!
Step 17

– When putting things back together, take the flat end of your spudger and gently nudge the display cables back into their little home in the lower case after you’ve reconnected the press connectors. A little patience goes a long way!
Tools Used
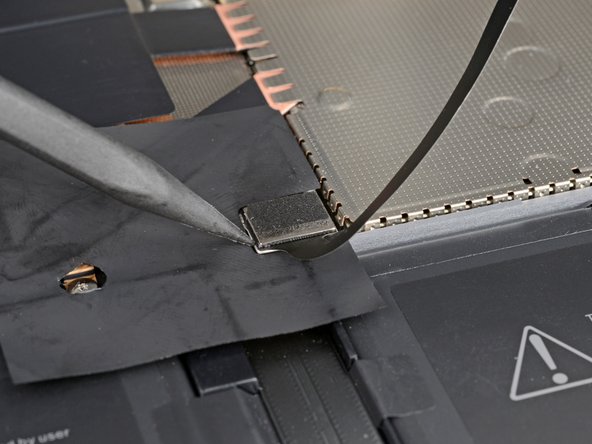
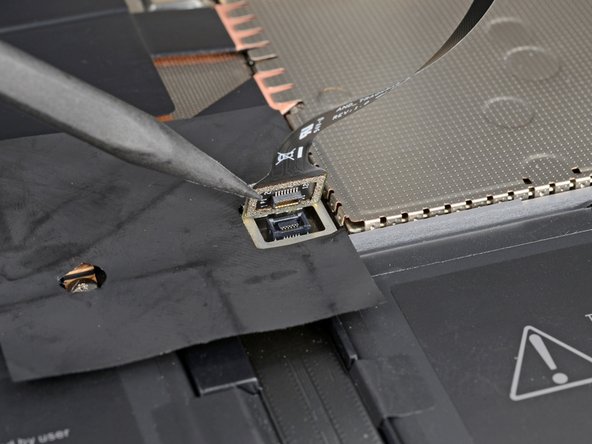
Step 18


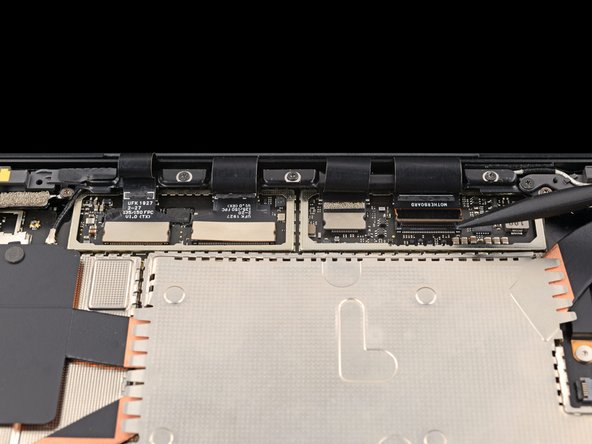
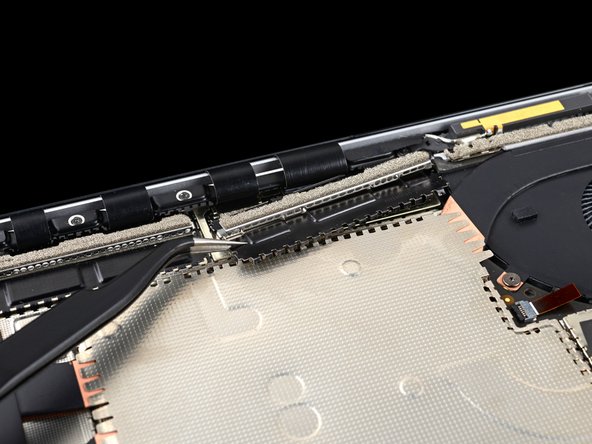
– Grab your trusty spudger and gently pry up to disconnect all four of those tricky display cable press connectors. You’ve got this!
– When it’s time to re-attach those connectors, take a deep breath and carefully line them up. Press down on one side until you hear that satisfying click, then do the same on the other side. Remember, no need to press down in the middle! If things get a bit wonky and the connector isn’t aligned, those tiny pins can bend and cause some serious trouble. But hey, no pressure! If you need help, you can always schedule a repair.
Tools Used
Step 19

– Gently swing that screen wide open!
Step 20


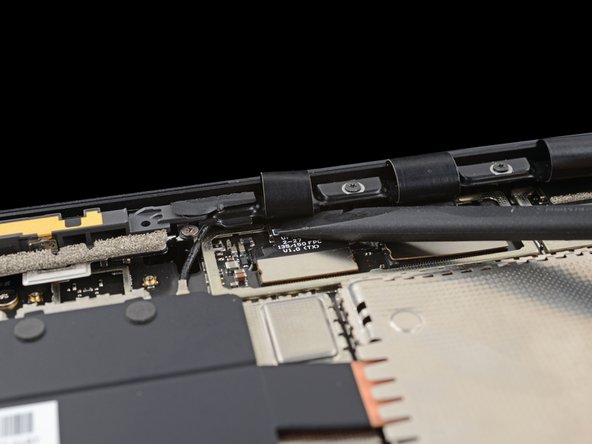
As you tackle those hinge screws, keep a steady hand on the screen! It might start to wiggle a bit as you unscrew, so just give it a little love and attention.
Each hinge should still have one screw left (that’s two screws in total). Just let those screws hang out for now!
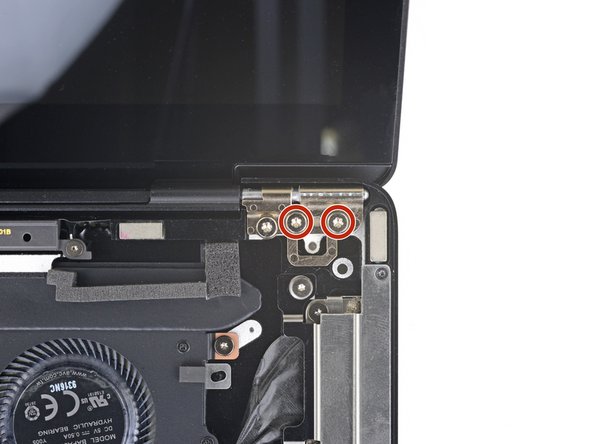
– Keep the screen steady and grab a T6 Torx driver. Remove the four 5.9 mm screws from the outer edges of the screen—two on each side. You’ve got this!
Step 21

– Close the screen until it’s nearly vertical – just enough to keep it steady.
– When you’re putting it back together, tighten the first two hinge screws to hold things in place. The screen should now be free to tilt open, so you can easily add the remaining four hinge screws. Nice and smooth!
Step 22


When the screen is at a 90-degree angle with the lower case, the screwdriver might bump into the screen while removing screws. Having trouble? Just tilt the screen back a bit to give the driver some space.
– While keeping the screen nice and steady, grab your trusty T6 Torx driver and unscrew those two remaining 5.9 mm screws that are holding the screen in place—one on each side. You’ve got this!
Step 23


– Before you dive into the reassembly, take a moment to compare your new part with the original one. You might need to move over some leftover components or peel off adhesive backings from the new part. Once you’re all set, you’re ready to put everything back together!
– Reassemble your device by retracing your steps in reverse. Easy, right?
– When you’re done, don’t forget about your e-waste! Make sure to recycle it at an R2 or e-Stewards certified recycler.
– Things didn’t go as planned? No worries! Try a bit of troubleshooting, or check out our Answers community for some help. We’ve got you covered.
– Need a little more help? If the repair didn’t quite work out, feel free to schedule a repair with us.
Success!