DIY Microsoft Surface Laptop 4 15 inch Motherboard Replacement
Duration: 45 minutes
Steps: 45 Steps
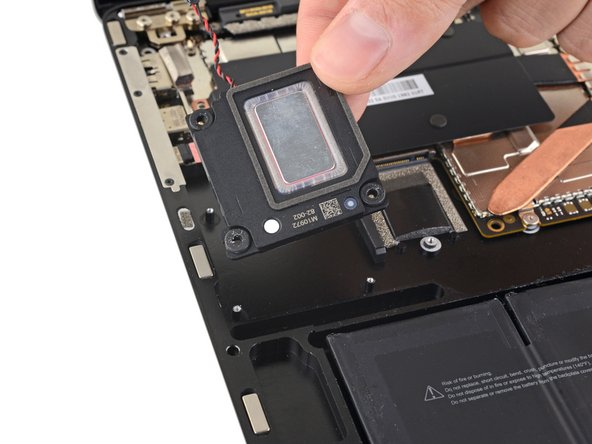
Ready to swap out or replace the motherboard in your Microsoft Surface Laptop 4 (15-inch)? This guide walks you through the process, showing you how to remove the motherboard while keeping the left speaker in place. If you’d like, feel free to remove the left speaker to make the job a little easier. And if your battery’s swollen, be sure to take the necessary safety precautions. A heads-up: some of the photos in this guide come from a different model, so there may be minor visual differences, but don’t worry—they won’t mess with the process!
Step 1


Make sure your laptop’s battery is below 25% before diving into this repair. A battery that’s fully charged could cause a fire if it’s damaged, and we definitely want to avoid that!
– Disconnect all cables and power down your laptop completely.
Step 2


– Gently close that screen and flip your laptop over so the back is facing up, giving you a clear view of those four rubber feet waiting to be addressed.
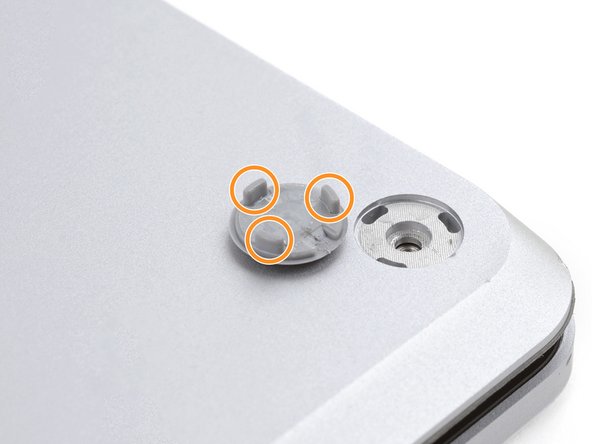
Step 3


Each foot has a handy little recess that makes it super easy to pry it loose from your laptop – let’s get started!
– The back feet recesses are situated nearest to the rear edge of the laptop.
– The front feet recesses are positioned closest to the front edge of the laptop.
Step 4


The feet pop out super fast—watch out or they’ll disappear!
– Slide one arm of your tweezers into the little nook of one of the feet.
– Give your tweezers a twist and gently pry up to break the adhesive seal and pop that foot off the laptop.
– Say goodbye to the foot and remove it.
– Now, just rinse and repeat this process for the other feet.
Tools Used

Step 5

– This laptop’s got two different types of feet, so when you’re putting it back together, make sure each one finds its cozy spot in the right recess.
– Give those feet a little press into their recesses to lock them in place with the frame.
– The rear feet are simple with just one central clip, easy peasy!
– The front feet are a bit more complex with three clips, and they’ve got a one-way ticket back in, so make sure to get them in just the right way.
– If the old feet aren’t sticking like they used to, gently remove the old adhesive and place a small piece of Tesa Tape where the old adhesive used to be. You’ve got this!
Step 6


– Got some wobbly feet? No worries! Grab those 8 mm rubber furniture pads:
– Peel one off its backing like a pro.
– Line it up over the foot cavity and give it a good press to lock it in place.
Step 7

These screws can be a bit tricky! Keep steady pressure downwards to avoid any slipping and stripping action.
As you tackle this repair, keep an eye on each screw and make sure it finds its way back to its original home. You’ve got this!
– Grab your trusty T5 Torx driver and unscrew those four 3 mm screws holding the upper case in place—easy peasy!
Step 8


– Turn your laptop upside down and swing that screen wide open!
Step 9


Hey there! Just a friendly reminder: don’t go all out trying to take off the upper case completely, as it’s still hanging out with the laptop via a cable.
Make sure the upper case fits snugly all around the edges. Any little gaps between the upper and lower case near the screen could lead to some screen squishing damage when it closes. We don’t want that!
The top cover is held in place by magnets.
– Grab the top edge of the upper case above the keyboard and lift it straight up—don’t be shy, it’s ready to pop loose!
– Gently lift the bottom edge of the upper case up and away from the laptop, but go easy on the ribbon cable underneath—it’s delicate.
– When reassembling, place the upper case back on the lower case until the magnets click it into position and it sits nice and flat.
Step 10

The keyboard and touchpad cable is the lifeline connecting the upper case to the laptop—think of it as the ultimate handshake keeping things in sync.
– Time to get this magnet connector disconnected! Use the pointed end of a spudger to carefully pry it up from under one edge – it’s like a little puzzle piece waiting to be freed.
– Now it’s time to reconnect the cable. Align the magnet connector with its socket, making sure the cable is facing the bottom of the laptop. Gently press down on the connector to secure it in place – you got this!
Tools Used

Step 11

– Let’s get started! Carefully remove the upper case and flip it over, setting it keyboard-side down on a clean, flat surface. This will give you a solid foundation for the repair process.
Step 12

Once you’ve said goodbye to that pesky screw, the SSD will gracefully rise up at a slight angle, ready for its next move!
– Grab your T5 Torx driver and confidently unscrew the 2.7 mm bolt holding the SSD in place—you’re doing awesome!
Step 13


Avoid yanking it out at a sharp angle; you don’t want to mess up the SSD or its socket.
Pop out the SSD to cut the battery connection—it’s like giving your device a little nap before surgery.
– Gently pull the SSD out of its socket to remove it – easy does it!
– When putting everything back together, insert the SSD at a slight angle, and you’ll be golden.
Step 14


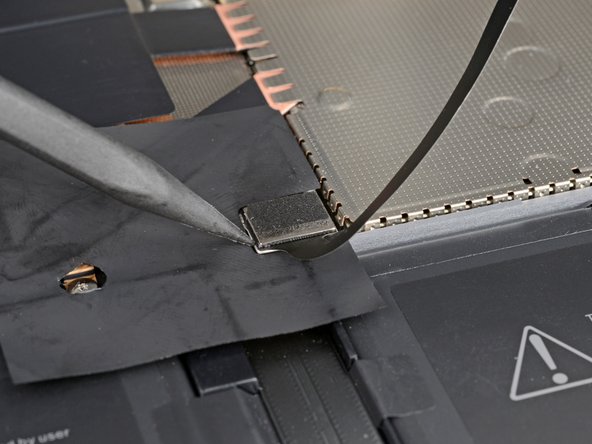
– Peel off the two pieces of black tape hugging the bottom left and right corners of the motherboard.
– Stash that tape somewhere safe. You’ll need it when you’re putting everything back together.
Step 15


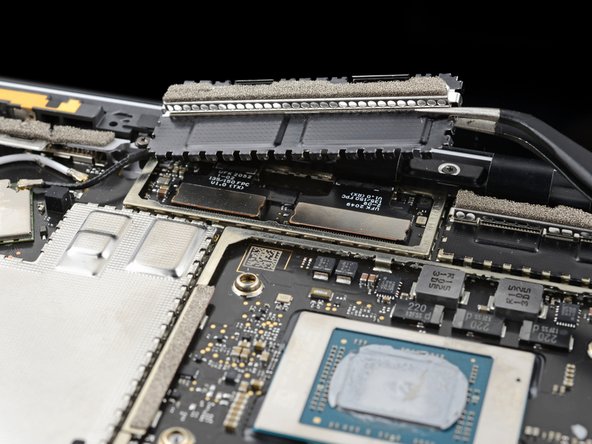
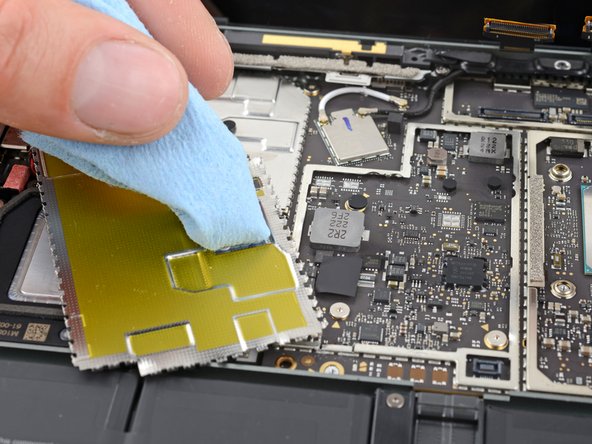
Be gentle with the shield; we want it to stay in shape for reassembly later!
– Slide the sharp end of your spudger into one of the little gaps at the top of the heatsink shield.
– Gently lift it up to pop the clips holding the shield in place.
– Keep the groove going along the right edge, just like before.
– Now, slide one side of your tweezers under the bottom right corner of the heatsink shield.
– Carefully lift it up to free the last of those pesky clips.
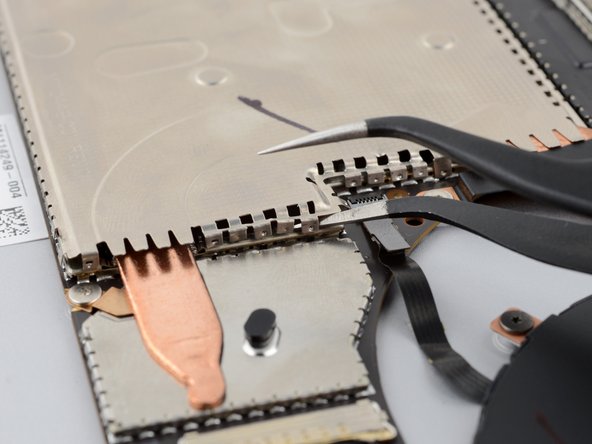
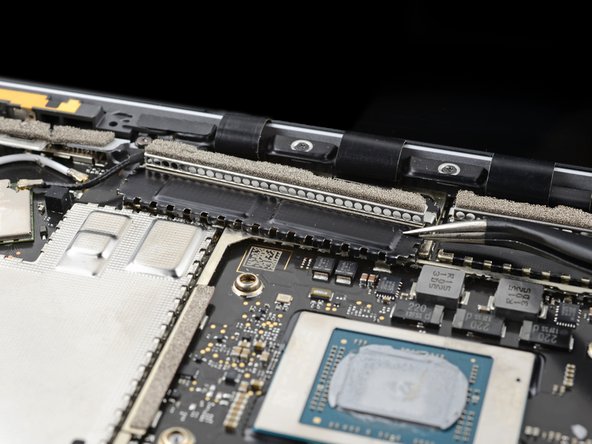
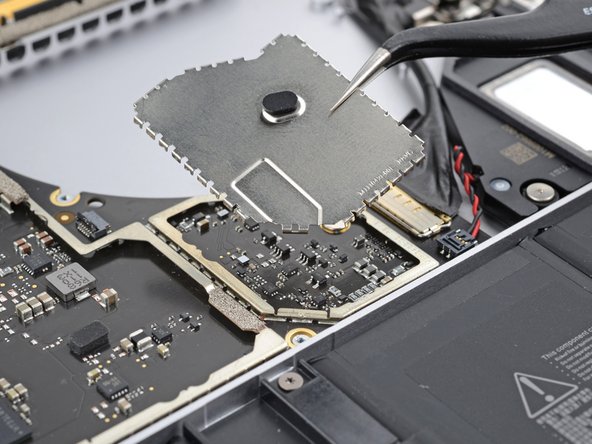
Step 16

– First up, let’s get that heatsink shield off! It’s just a little twist and pull action.
– When you’re ready to put the shield back on, just press down gently around the edges until you hear those clips click into place. Easy peasy!
Step 17

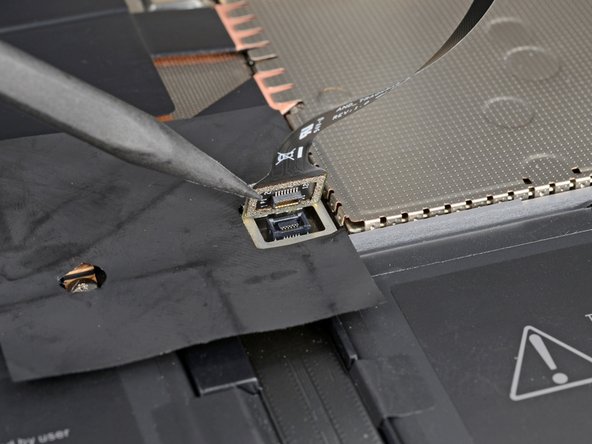
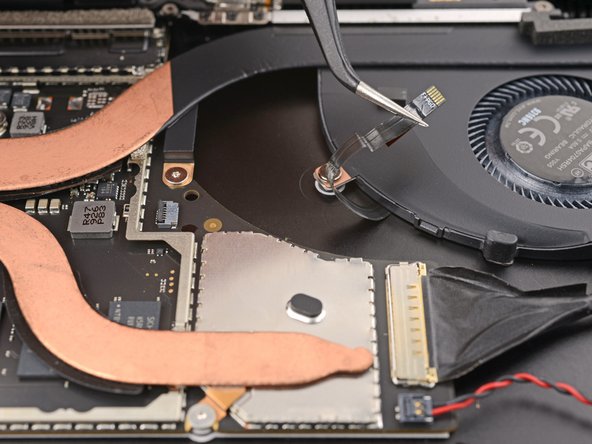
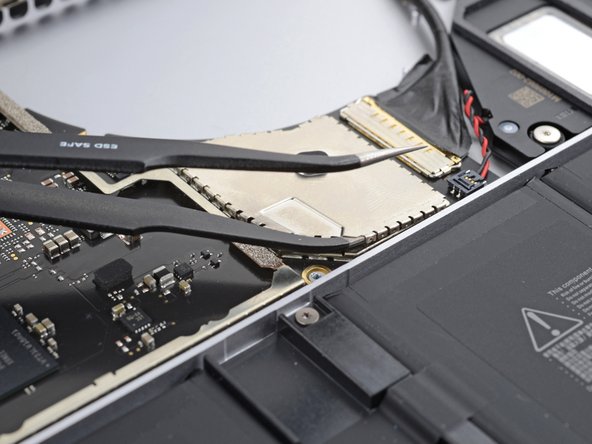
– Take the pointy end of a spudger and gently pop up the locking flap on the fan cable ZIF connector—like opening a little treasure chest!
– With a pair of tweezers, grab the fan cable pull-tab and slide that cable straight out of its connector—smooth and steady does it!
Step 18

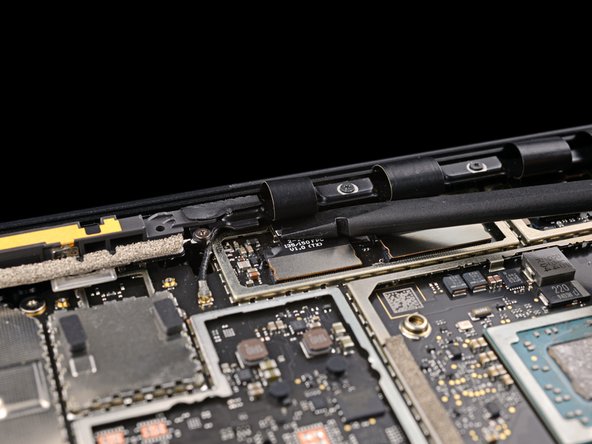
The fan cable is held in place by some trusty adhesive sticking it to the frame.
– Gently grab some tweezers or your fingers and lift the fan cable off the frame. Work your magic to loosen that adhesive—it’s all about the finesse!
Tools Used
Step 19

– Grab your trusty T3 Torx driver and let’s get to work removing the screws holding down the heatsink. Here’s the lineup:
– Two screws, 2.5 mm each—small but mighty!
– Three screws, 2.0 mm—tiny but not to be underestimated.
– One screw, 3.0 mm—solo but strong.
– Two screws, 4.1 mm—tag team champions.
– Two screws, 3.4 mm—wrapping things up nicely.
Step 20

– Alright, it’s reassembly time! Let’s get that heatsink lined up with the centering peg on the motherboard.
– Now, let’s tighten those four CPU tension screws in an ‘X’ pattern. Think of it like a little dance: start at the top left, then shimmy to the bottom right, groove over to the top right, and finish off at the bottom left. You’ve got this!
Step 21

This might need a bit of muscle. Take care not to flex the heat pipes.
Thermal paste keeps the heatsink and CPU cozy and connected!
– Slide your trusty spudger under the left heat pipe like you’re sneaking a peek at a surprise party.
– Gently pry upwards to set the left section of the heatsink free, just like unwrapping a gift.
– Now, give the right heat pipe and the CPU screw mounts the same treatment until the heatsink waves goodbye to the motherboard and is completely free.
Tools Used

Step 22


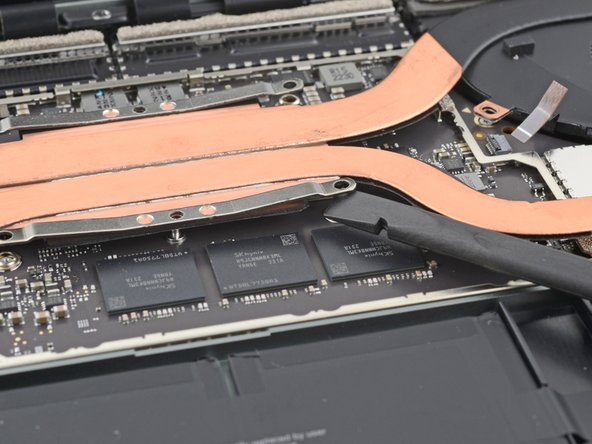
– Gently nudge the right edge of the heatsink upwards, sliding it off the alignment peg next to the fan on the right side. It’s like giving it a little lift-off!
– Now, with a light tug, ease the right edge of the heatsink away from the screen. This will help free it from its cozy spot in the frame. You’re doing great!
Step 23


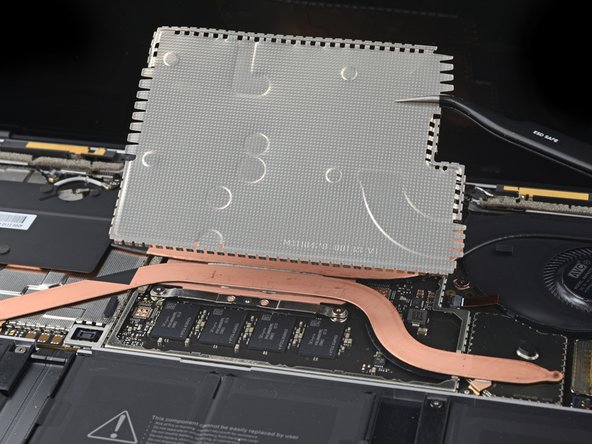
Hey, go easy on the heatsink! Those heat pipes are super delicate and can bend without much effort. If it’s giving you a hard time, try a gentle wiggle to loosen it up.
– Time to say goodbye to the heatsink! Carefully remove it and keep it safe for the next steps. You’ve got this!
Step 24


– Before putting the heatsink back in place, make sure to give the heatsink and CPU a good cleaning and slap on some fresh thermal paste. Keep it cool and running smooth!
Tools Used
Step 25


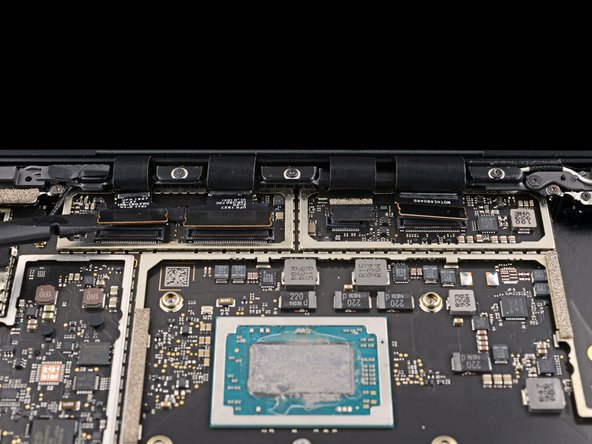
Be gentle with that shield—it’s going to need to go back on during reassembly!
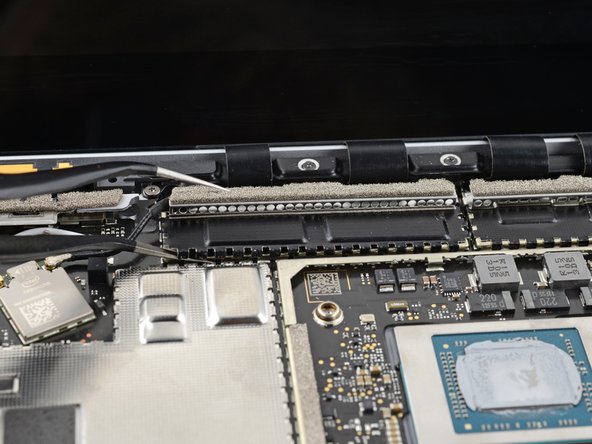
– Slide one arm of your tweezers under the edge of the left display cable shield.
– Gently lift to pop the clips that are holding the shield in place.
– Keep going around the edges of the shield until it’s free and ready to be removed.
Tools Used
Step 26

– Gently wiggle the left display cable shield away from the screen to pop it out of its snug little spot.
– Take the shield out and set it aside—you’re doing awesome!
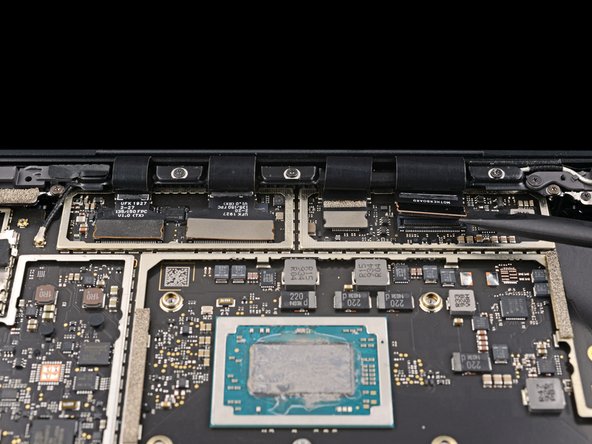
Step 27

– Do the same as before and remove the right display cable shield.
Step 28


Some of those sneaky motherboard screws are hiding under two metal shields, so you’ll need to pop those off first. No biggie!
Just a heads up—try to keep the shields in good shape. You’ll want to put them back on when you’re wrapping things up!
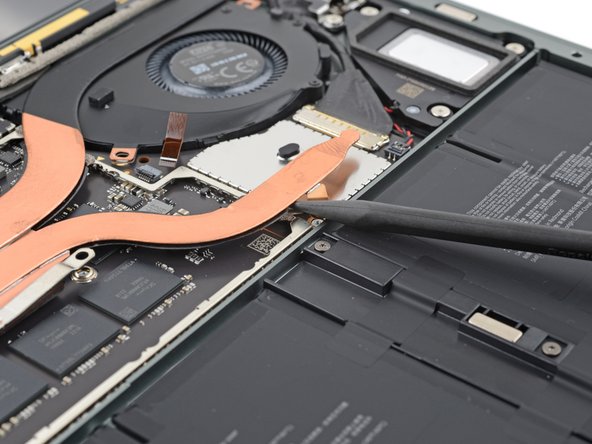
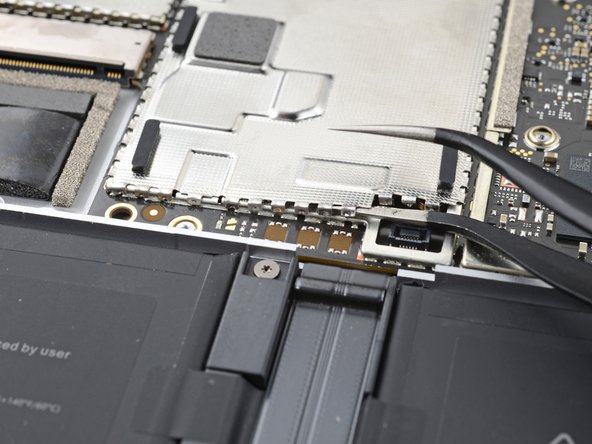
– Slide one arm of your tweezers under the edge of the left touchpad shield.
– Gently lift to pop the clips that are holding the shield in place.
– Keep going around the edges of the shield until it’s free and ready to be removed.
Tools Used
Step 29


– Let’s get started by removing the left motherboard shield. This is the first step in giving your device a brand new lease on life!
Step 30
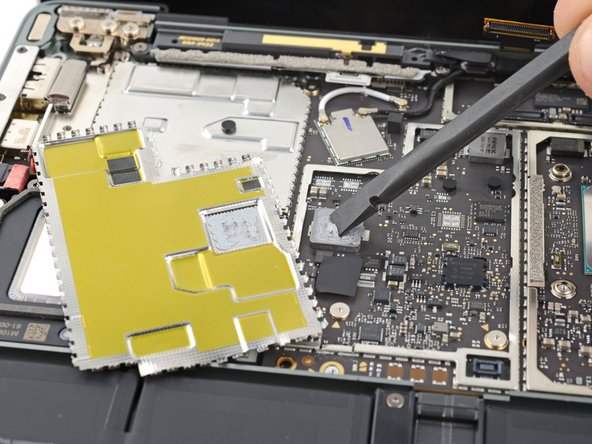

You might find some thermal paste hanging out between the motherboard and the left shield.
– Before you snap that left motherboard shield back into place, make sure to check out this guide to clean and reapply thermal paste.
Tools Used
Step 31

– Grab your trusty tweezers and sneak one arm under the corner of the right motherboard shield. Gently pry around the edges to pop those clips loose.
– Now, with a little finesse, lift off the right motherboard shield.
Tools Used
Step 32

– Alright, time to reassemble! Grab the flat end of your trusty spudger and gently guide those display cables back into their snug little home in the lower case. Reconnect the press connectors with care—you’re doing awesome!
Tools Used
Step 33

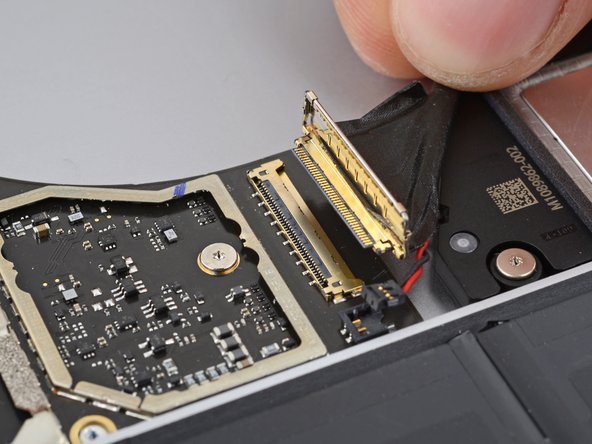
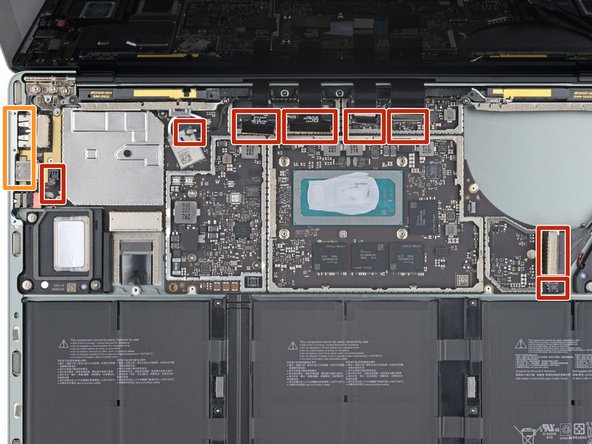
To reattach those connectors, gently align them and press down on one side until you hear that satisfying click! Then, do the same on the other side. Remember, no pressing down in the middle! If things get misaligned, those little pins can bend and that’s a one-way ticket to permanent damage city.
– Gently use the flat end of a spudger to lift and disconnect all four display cable press connectors. You’ve got this!
Tools Used
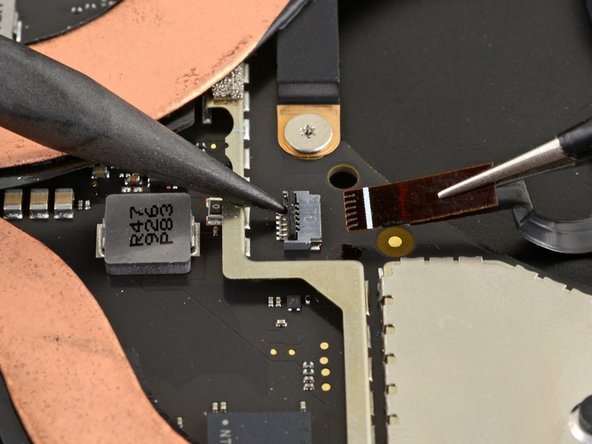
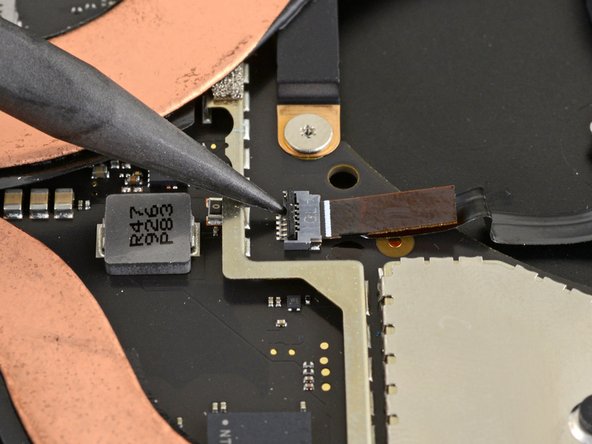
Step 34
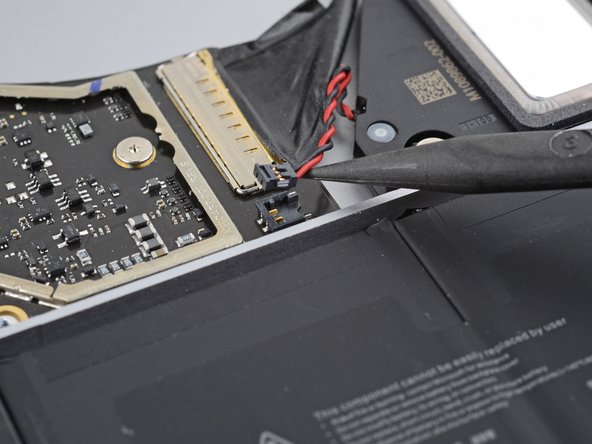

– Time to get this repair started! Use the pointed end of a spudger to gently lift and disconnect the right speaker wire from its connector on the motherboard. Take your time and be careful not to damage any of the surrounding components.
Tools Used
Step 35

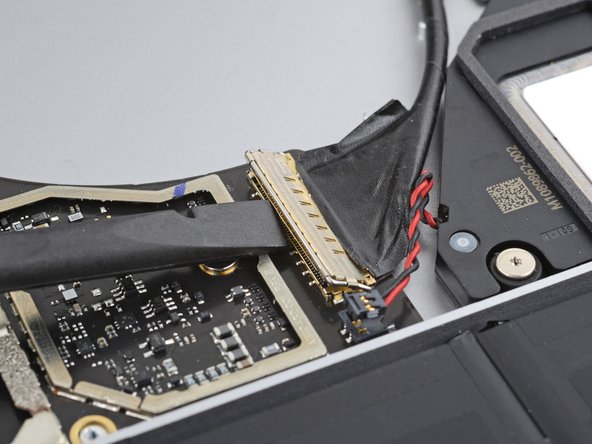
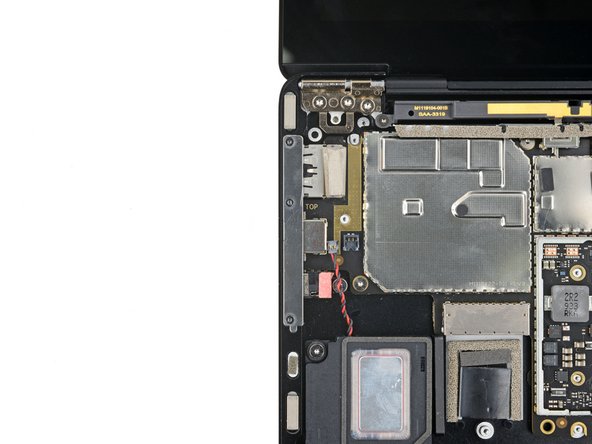
– Let’s get started! Use the flat end of a spudger to carefully flip open the locking arm on the Surface Connect port connector.
– Now it’s time to set the cable free! Grip the Surface Connect port cable firmly and pull it straight out of its socket.
Tools Used
Step 36

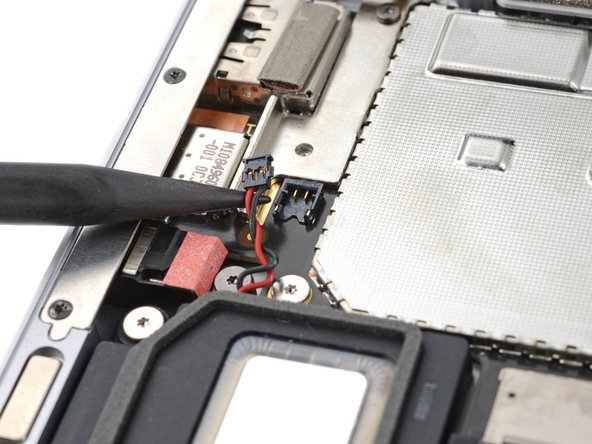
– Gently tease the left speaker wire away from its connector using the pointed end of a spudger, carefully lifting it free from the area near the left ports. Remember, you got this!
Tools Used
Step 37
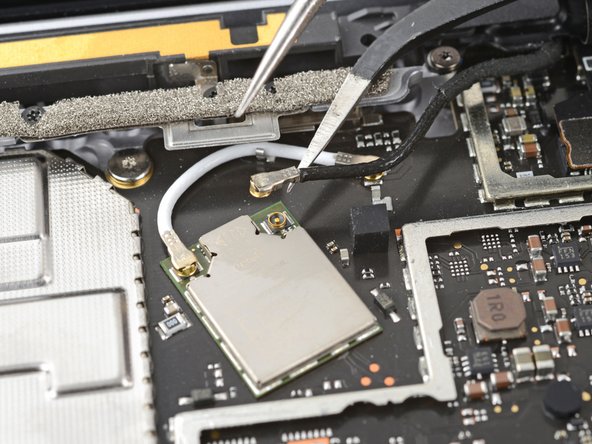

– Get your tweezers in there and slide one arm under the black antenna connector, right near the head.
– Lift it up carefully to disconnect the cable. Up, up, and away!
– To get the antenna connector back in place, line it up over the socket and press down with the flat end of a spudger. You’ll hear a satisfying snap when it’s in!
Step 38

– Grab your T3 Torx driver and pop out those two 3 mm screws holding down the motherboard bracket. You got this!
Step 39
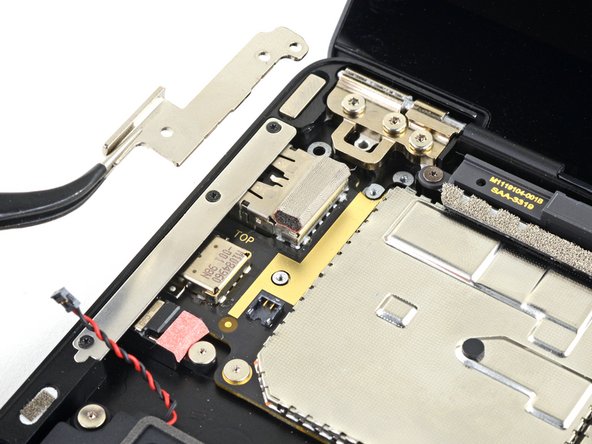

– Take off the motherboard bracket and give that little piece a break!
Step 40

– Grab your trusty T3 Torx driver and loosen up those three 2.1 mm screws holding the left port cover in place. You’re doing great—keep it up!
Step 41
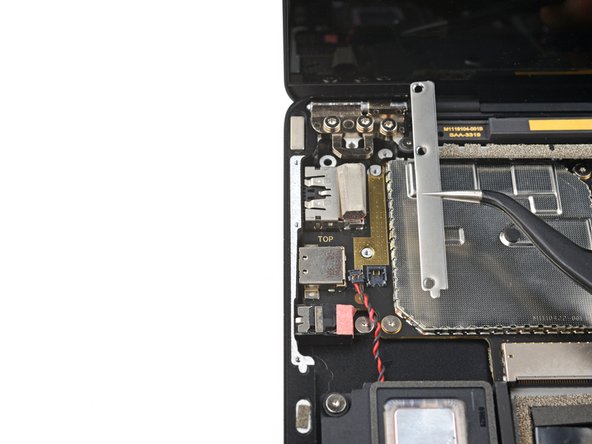

– Pop off the left port cover.
Step 42
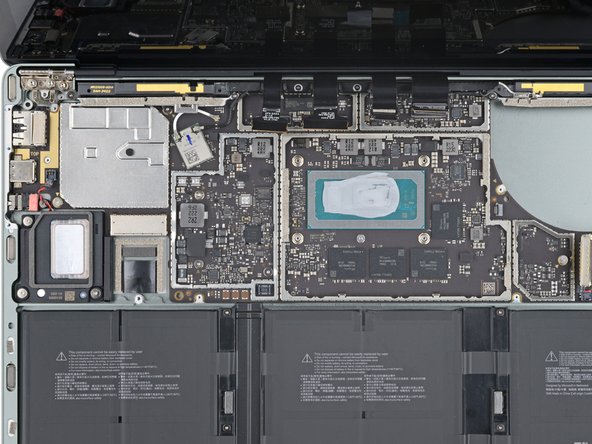

Time to get started! If any of your screws have those pesky rubber covers, go ahead and peel them off. Easy peasy!
– Grab your trusty T3 Torx driver and unscrew those six tiny 2 mm screws holding the motherboard in place. Let’s make it happen!
Step 43

The left side of the motherboard is snugly held in place by the port cutouts, the speaker, and the frame. It’s a bit of a tight squeeze, but it stays put!
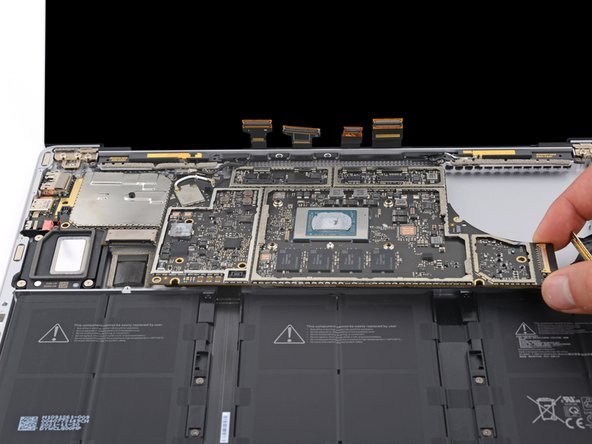
– Gently nudge up the right edge of the motherboard just enough to peek over the battery.
– Keep the motherboard steady while you work on freeing up the left edge. One step at a time!
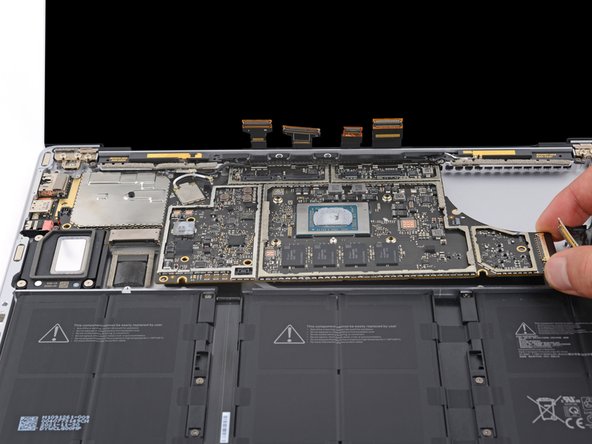
Step 44

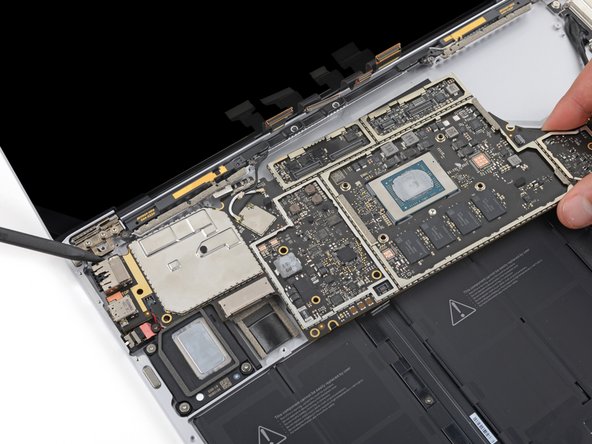

There’s a cheeky tab on the upper left of the motherboard giving you trouble by pressing against the frame’s protrusions and stopping the left edge from popping out.
If the motherboard is refusing to budge over the left speaker, that tab is probably still playing hard to get. Adjust your spudger angle and give it another go.
– Slide the spudger tip into the tab nestled in the upper left corner of the motherboard. Give it a little nudge to fit it snugly between the frame and the screen hinge.
– With a gentle lift, pry up on that tab using your trusty spudger while you raise the right edge of the motherboard toward the laptop’s front. You’ve got this!
Tools Used
Step 45

Keep an eye on those little screwpost braces hiding under the motherboard—they have a sneaky way of disappearing during removal!
– Put your device back together by following these steps in reverse—it’s like rewinding the fix-it magic!
– Be an eco-hero: take your e-waste to an R2 or e-Stewards certified recycler.
– If things didn’t pan out, no sweat! Try some basic troubleshooting or dive into our Answers community for backup.
– Still stuck? No worries—if you need help, you can always schedule a repair.
Success!