
DIY Microsoft Surface Laptop 5 13.5 Inch Feet Replacement Guide
Duration: 45 minutes
Steps: 5 Steps
As your trusty laptop ages, the rubber feet on the bottom might start to wear out or even take a little vacation. No worries! This guide is here to help you replace the feet on your Microsoft Surface Laptop 5 (13.5-inch) and keep it standing tall. Let’s dive in!
Step 1


– Gently close your laptop’s screen and flip it over so the back cover is facing up, revealing the four rubber feet waiting for your attention.
Step 2


Each foot has a little groove to make popping it off the laptop a breeze:
– The grooves for the back feet snug right up to the laptop’s back edge.
– The grooves for the front feet cozy up close to the laptop’s front edge.
Step 3


Watch out for those little feet—they tend to pop out in a flash! Keep an eye on them so they don’t wander off.
– Slide one arm of your tweezers into the little pocket of one of the feet.
– Give your tweezers a gentle twist and lift to break the adhesive and pop that foot free from the laptop.
– Take off the foot.
– Now, just do the same for the remaining feet!
Tools Used

Step 4

– This laptop sports two types of feet—fancy, right? When putting everything back together, be sure to match each foot to its rightful recess.
– Pop the feet snugly into their recesses to lock them in place on the frame.
– The back feet? Easy—they’ve got a single center clip.
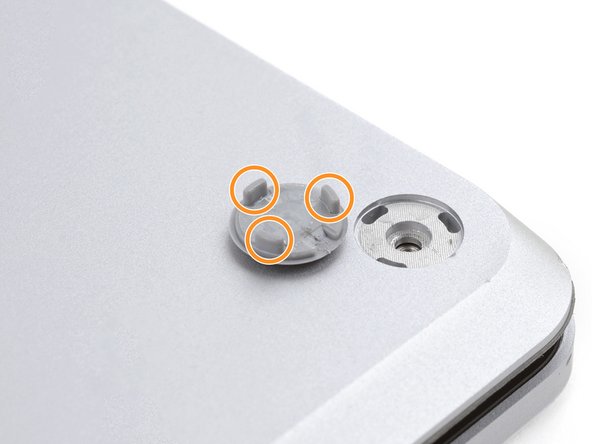
– The front feet? A bit trickier. They have three clips and can only fit back in one specific way.
– If those old feet aren’t sticking anymore, carefully remove the leftover adhesive and put a little Tesa Tape where the adhesive used to be. It’ll hold like a champ!
Step 5


– Reassembling your device? Just reverse these steps.
– Cancel: I did not complete this guide.
– If you need help, you can always schedule a repair
Success!

