DIY Microsoft Surface Laptop 5 13.5-inch Motherboard Replacement
Duration: 45 minutes
Steps: 44 Steps
Get ready to tackle the motherboard replacement in your Microsoft Surface Laptop 5 (13.5-inch)! This guide will walk you through the process of removing the motherboard while keeping the left speaker in place. If you want a bit more elbow room, feel free to take out the left speaker. And hey, if your battery is looking a little puffy, make sure to handle it with care. Some of the photos in this guide might be from a different model, so they could look a tad different, but don’t worry—they won’t mess with the steps you need to follow!
Step 1


Let your laptop’s battery dip below 25% before diving into this repair adventure. A charged battery could become a fire hazard if it gets damaged.
– Disconnect all cables and power down your laptop completely.
Step 2


– Close the screen and gently flip your laptop over so the back is facing you, giving you easy access to those four little rubber feet.
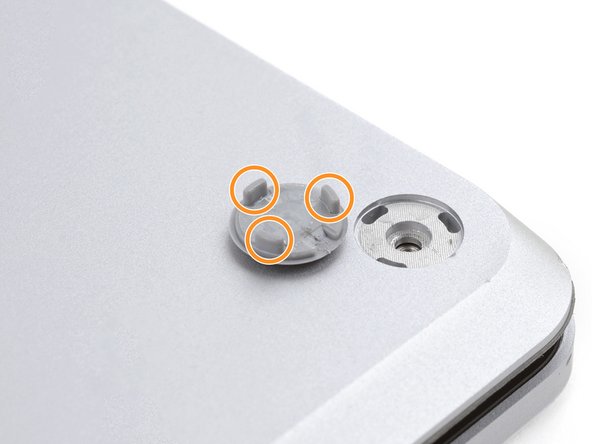
Step 3


Use the recesses on each foot to gently pry it off the laptop:
– The back feet spots are closest to the back edge of the laptop.
– The front feet spots are closest to the front edge of the laptop.
Step 4


The feet pop out pretty fast—watch out, or they might vanish into thin air!
– Slide one arm of your tweezers into the little nook of one of the feet.
– Give your tweezers a twist and gently pry up to break the adhesive seal and pop that foot off the laptop.
– Say goodbye to the foot and remove it.
– Now, just rinse and repeat this process for the other feet!
Tools Used

Step 5

– This laptop has a couple of different foot styles. When putting it back together, just make sure those feet find their cozy little homes.
– Give those feet a little push into their snug recesses to keep them firmly attached to the frame.
– The rear feet come with a nifty single center clip.
– The front feet are a bit more complex with three clips and have a specific way they like to be inserted.
– If your existing feet just aren’t sticking anymore, take off the old adhesive and stick a smidge of Tesa Tape where the old glue used to be.
Step 6


– Got some feet that are looking a bit rough around the edges? No worries! Grab some 8 mm rubber furniture pads:
– Carefully peel a pad off its backing.
– Line it up perfectly over the foot cavity and give it a good press to lock it in place.
Step 7

Heads up, these screws can strip pretty easily. Press down firmly and keep a steady hand to avoid any trouble.
As you tackle this repair, be sure to keep an eye on each screw and return it to its rightful home after you’re done. It’s like a little puzzle, and you’re the master!
– Grab your trusty T5 Torx driver and carefully unscrew the four 3 mm screws holding the upper case in place. You got this!
Step 8


– Flip your laptop over and open the screen all the way—give it a good stretch, like you’re warming it up for repair yoga!
Step 9


Keep the upper case in place—it’s still tethered to the laptop by a cable, so don’t go yanking it off!
Make sure the upper case fits snugly all the way around. Any gaps near the screen could put the screen at risk when you close it.
The upper case is held in place by some nifty magnets.
– Grab the top edge of the upper case right above the keyboard and gently lift it straight up to pop it loose.
– Carefully lift the bottom edge of the upper case away from the laptop, making sure not to put any stress on the ribbon cable hiding underneath.
– When putting it all back together, lower the upper case onto the lower case until you hear those magnets click into place and it sits nice and flat.
Step 10

The cable connecting the keyboard and touchpad to the laptop is nestled snugly within the upper case.
– Take the spudger and gently slide the pointed end under one side of the magnet connector. Give it a little nudge to pop it off and disconnect it.
– To hook the cable back up, just line up the magnet connector with its socket, making sure the cable faces the bottom of the laptop. Press it down firmly to snap it back into place.
Tools Used

Step 11

– Gently lift off the upper case and place it keyboard-side down on a clean surface, ready for the next steps in your repair adventure!
Step 12


Your SSD has thermal paste that bonds with the upper case.
Alternatively, you can apply a bead of thermal paste directly to the SSD’s label. Use the dot method with a bead slightly larger than the screw head securing the SSD.
– Alright, it’s reassembly time! Let’s get that device back together.
– Grab your trusty spudger and gently scrape off the old thermal paste from the SSD and the underside of the upper case. We want a clean slate!
– Next up, apply a few drops of high-octane isopropyl alcohol (over 90%) to both the SSD and the upper case. Wipe away the residue with a lint-free or microfiber cloth for a sparkling finish.
– Finally, swap out the thermal pad for a new one that matches the size of the SSD sticker. You’re almost there!
Tools Used

Step 13

Once the screw is out, the SSD lifts up at a slight angle.
– Grab your T5 Torx driver and unscrew that 2.7 mm screw holding the SSD in place. You got this!
Step 14


Avoid pulling up at a steep angle to prevent damaging the SSD and its socket.
Taking out the SSD also acts like hitting the pause button on the battery.
– Gently slide the SSD out of its socket and set it aside like a prized possession.
– When you’re putting it back, tilt the SSD at a slight angle and slide it in like a pro!
Step 15

Stick some conductive tape to the left edge of the heatsink shield to keep it securely connected to the heatsink. Nice and snug!
– Give that tape a little love with a heat gun or hair dryer to warm up its adhesive and make it easier to peel away.
– Use your trusty tweezers or just your fingers to gently lift off the tape.
– When it’s time to put everything back together, stick the tape right where it came from. If it’s being a little stubborn, just reheat the adhesive to help it stick to the heatsink better.
Tools Used
Step 16

Be gentle with the shield; bending it too much could lead to trouble. You’ll want to keep it in good shape for when it’s time to put everything back together.
– Slide the pointed end of your trusty spudger into one of the little gaps at the top edge of the heatsink shield.
– Gently nudge it up to pop those clips holding the shield in place.
– Keep the momentum going and repeat this along the right edge.
– Now, take one arm of your tweezers and sneak it under the bottom right edge of the heatsink shield.
– With a gentle lift, release the last of those pesky clips.
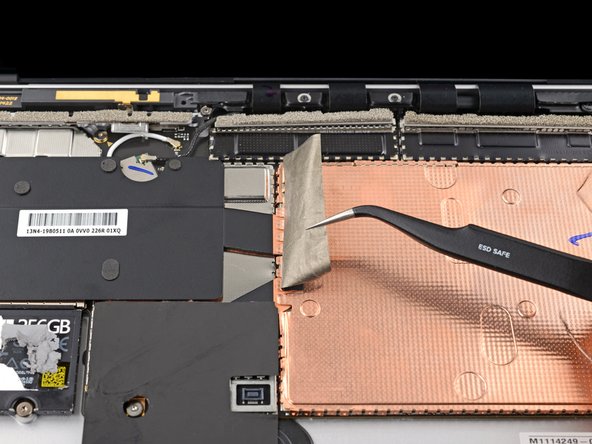
Step 17


– Time to say goodbye to that heatsink shield! Gently remove it and set it aside.
– When you’re ready to put that shield back on, just press down around the edges to lock those clips in place. You’ve got this!

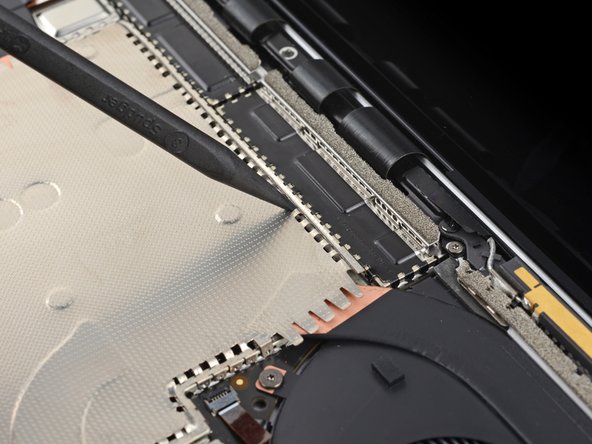
Step 19


– Grab your trusty T3 Torx driver and let’s get those nine screws out of the way to free the heatsink:
– First up, we’ve got two 2.5 mm screws.
– Next, let’s tackle two 2 mm screws.
– Don’t forget about that one 3 mm screw waiting for attention.
– Now, on to two 4.1 mm screws that need removal.
– And finally, finish off with two 3.4 mm screws to complete the mission!
Step 20

– When putting everything back together:
– Line up the heatsink with the centering peg on the motherboard like it’s meant to be there.
– Secure the four CPU tension screws in a crisscross ‘X’ pattern: top left, bottom right, top right, bottom left. Keep it snug, but don’t go Hulk mode!
Step 21


It might take a bit of muscle here. Just be cautious not to bend those heat pipes – they’re more fragile than they look!
Thermal paste hooks up the heatsink with the CPU. It’s a match made in tech heaven!
– Slide your spudger under the left heat pipe like a pro.
– Gently pop up the left section of the heatsink.
– Do the same for the right heat pipe and the CPU screw mounts until the heatsink is completely free from the motherboard. If you need help, you can always schedule a repair
Tools Used
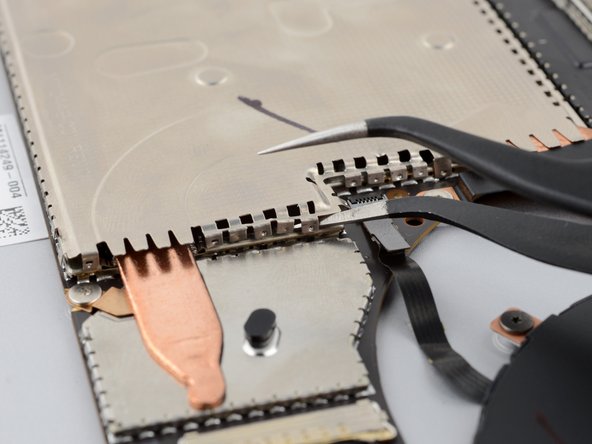
Step 22


– Gently lift the heatsink and fan over that little alignment peg hanging out in the upper right corner.
– Now, slide that heatsink and fan towards the front edge of the laptop and pop it out like a pro!
Step 23

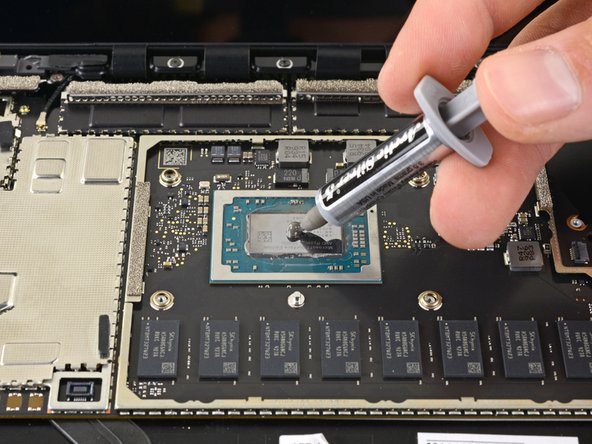
– Before you dive into reinstalling that heatsink, take a moment to give it and the CPU a good cleaning and reapply some fresh thermal paste. It’s like giving your tech a little spa day!
Tools Used
Step 24


Be gentle with the shield—try to keep it in good shape because you’ll need it again when putting everything back together.
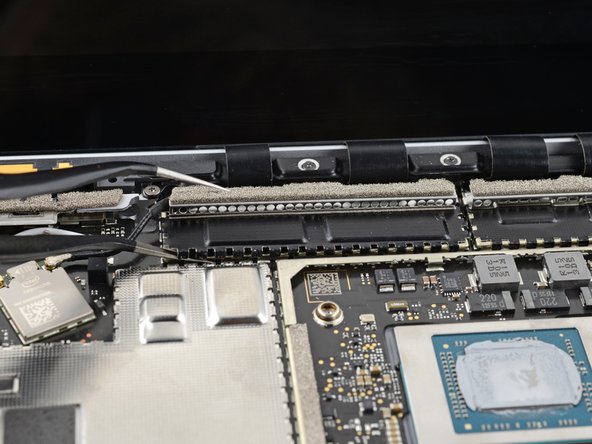
– Let’s get started! Carefully slide one arm of your trusty tweezers under the corner of the left display cable shield.
– Gently pry up to release the clips that are holding the shield in place – it’s like setting it free!
– Keep working your way around the perimeter of the shield, repeating this process until you can completely remove it. You’re making great progress!
Tools Used
Step 25
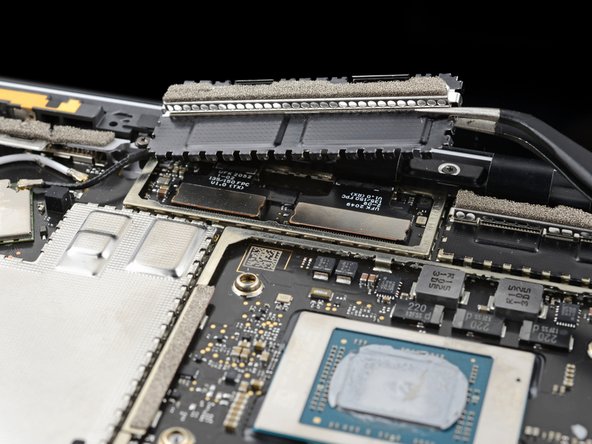

– Gently slide the left display cable shield away from the screen to release it from its snug little spot.
– Now, go ahead and take off the shield!
Step 26

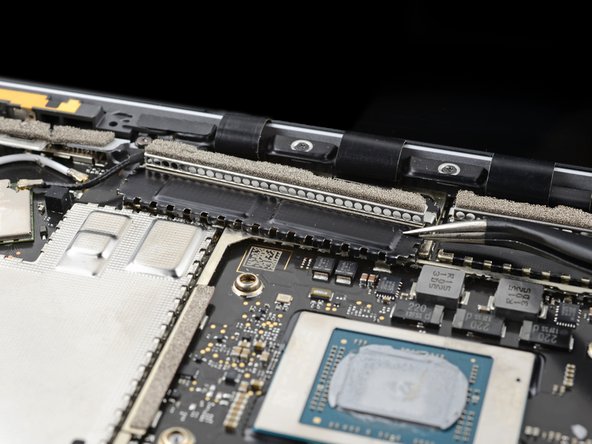
– Give it another go and follow the same two steps to gently take off the right display cable shield. You’re doing great!
Step 27


Some of the motherboard screws are chilling under two of those metal shields, so both need to come off to get to them.
No need to bend the shield out of shape—you’re putting it back on when you’re done. Keep it classy!
– Carefully slide one arm of your tweezers under the corner of the left touchpad shield.
– Gently lift it up to free the clips that are holding the shield in place.
– Continue this around the edges of the shield until you can easily take it off.
Tools Used
Step 28


– Gently pop off the left motherboard shield—like unveiling a secret passage!
Step 29
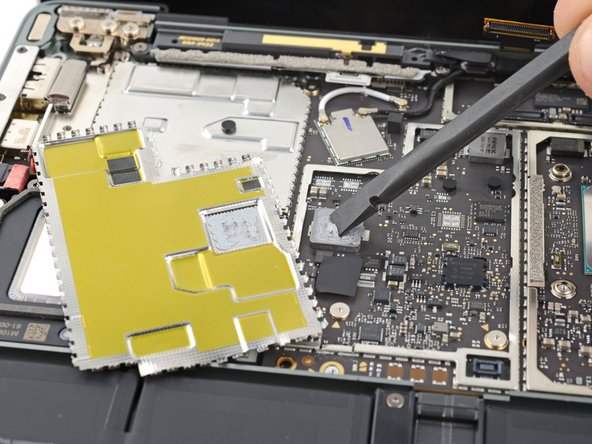

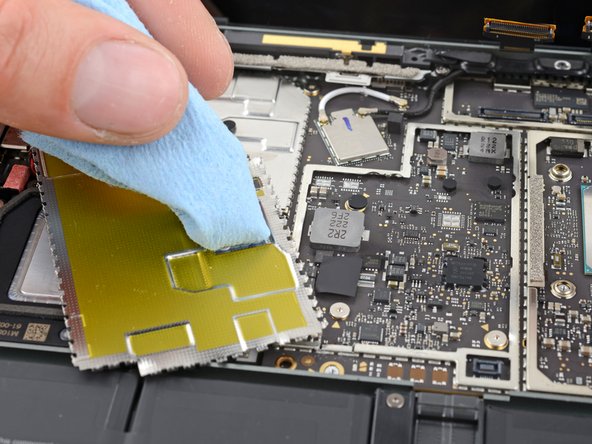
Heads up, you might find some thermal paste between the motherboard and its left shield.
– Before you pop that left motherboard shield back in place, take a moment to freshen things up! Follow this guide to clean off the old thermal paste and reapply a nice, new layer. Your device will thank you for it!
Tools Used
Step 30

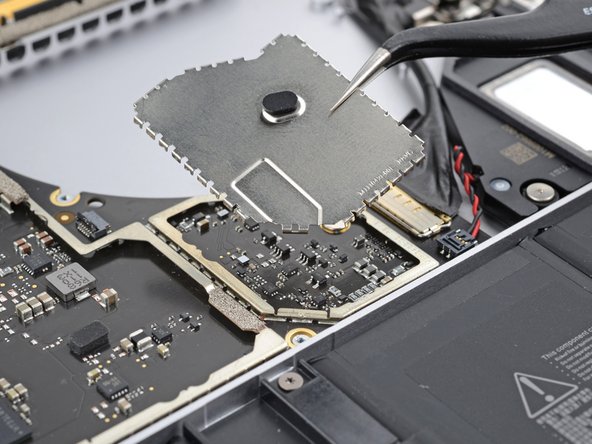
– Slide one arm of your tweezers under the corner of the right motherboard shield and gently pry around its edges to pop the clips.
– Lift off the right motherboard shield.
Tools Used
Step 31

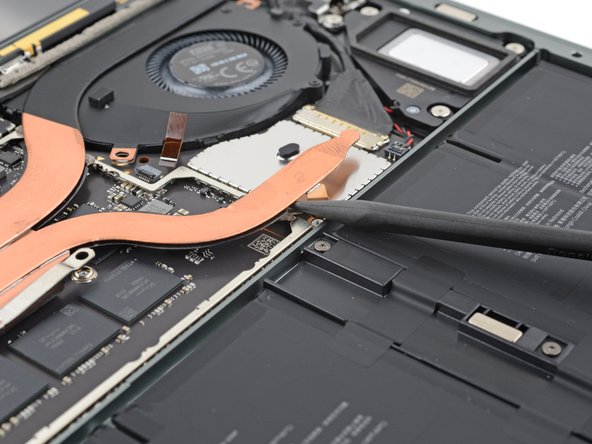
– When putting things back together, grab your trusty spudger and gently nudge those display cables back into their cozy little spot in the lower case after reconnecting the press connectors. Easy does it—patience wins the day!
Tools Used
Step 32

To reconnect those pesky connectors, gently line them up and give one side a firm press until you hear that satisfying click. Then, do the same on the other side. Just a heads up—avoid pressing down in the middle! If things get a little crooked, those tiny pins could bend, and nobody wants that kind of permanent souvenir.
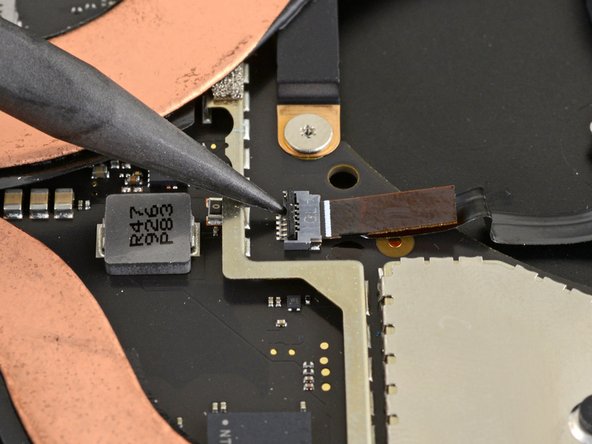
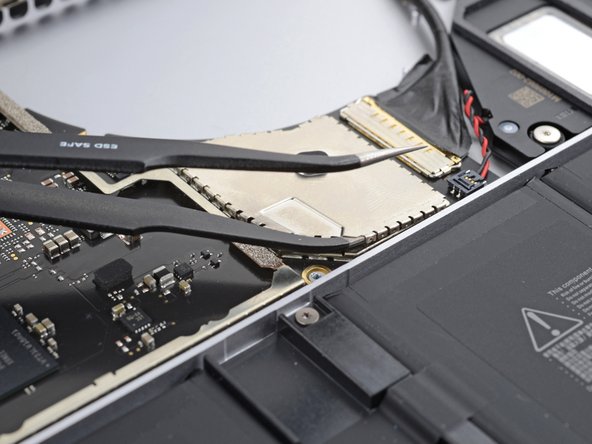
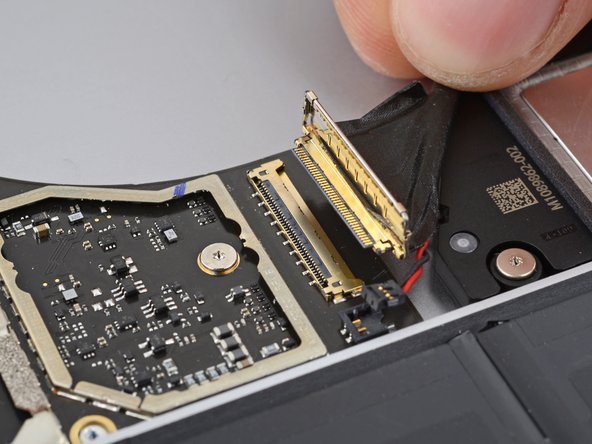
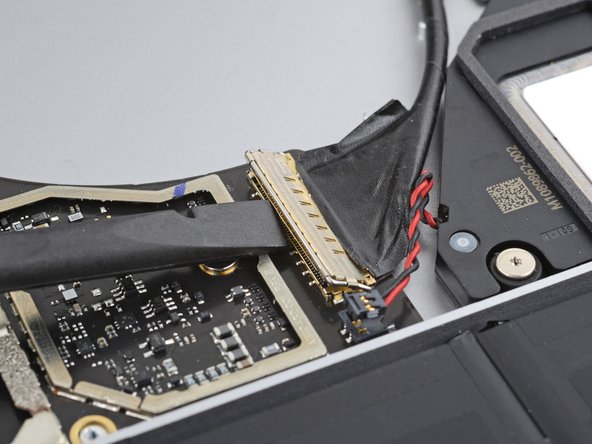
– Grab your spudger and give those four display cable connectors a gentle lift and wiggle to pop them free.
Tools Used
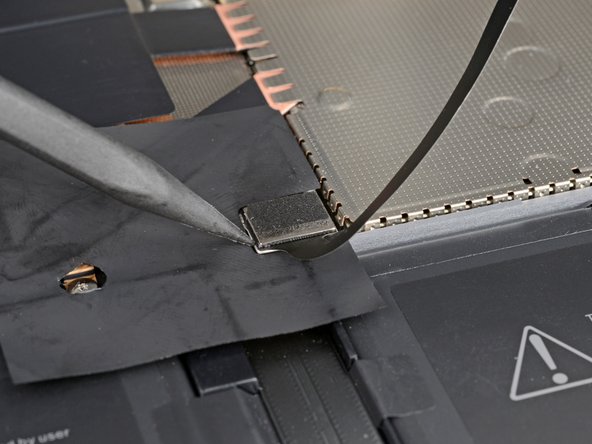
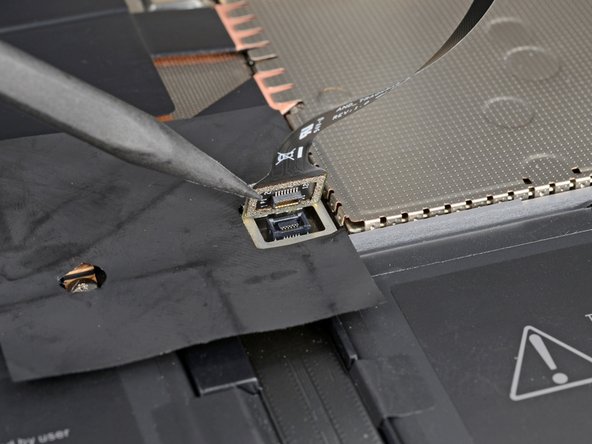
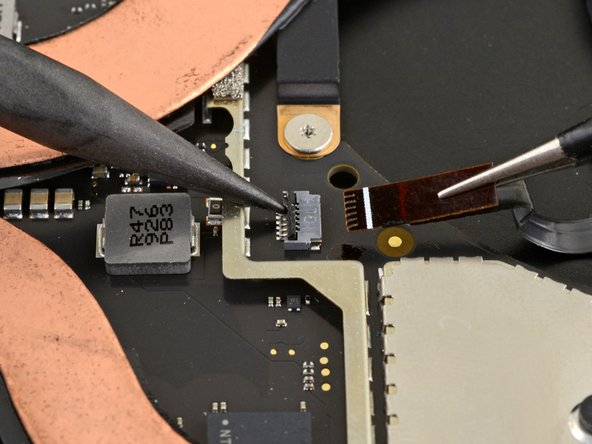
Step 33
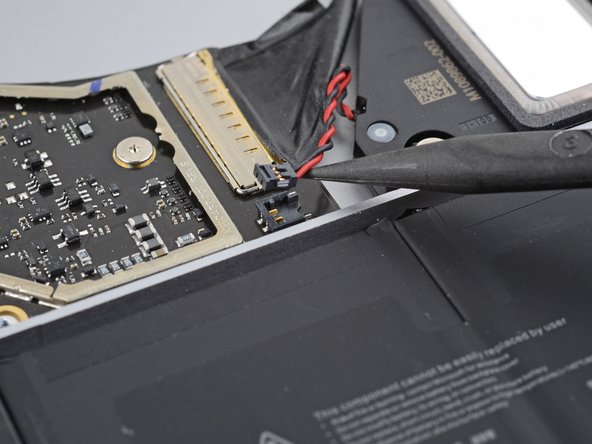

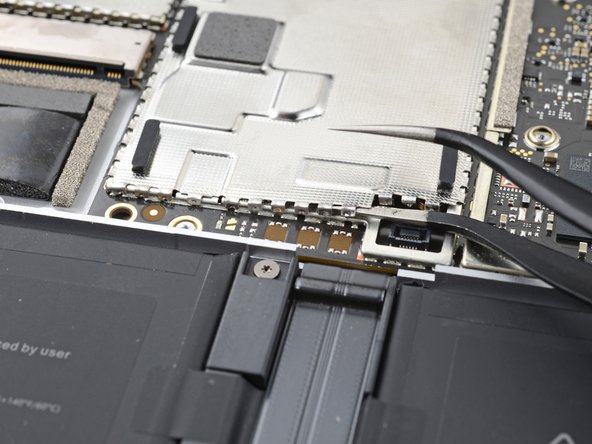
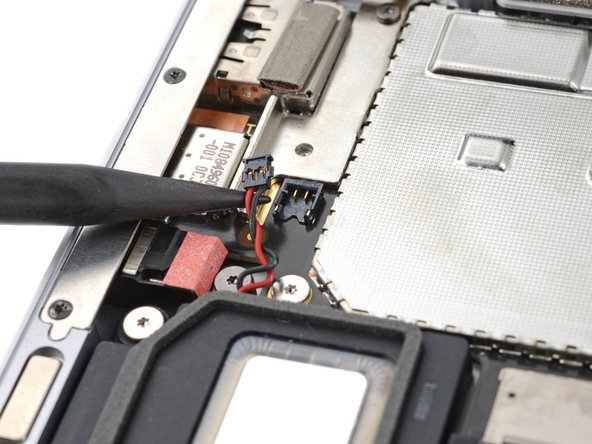
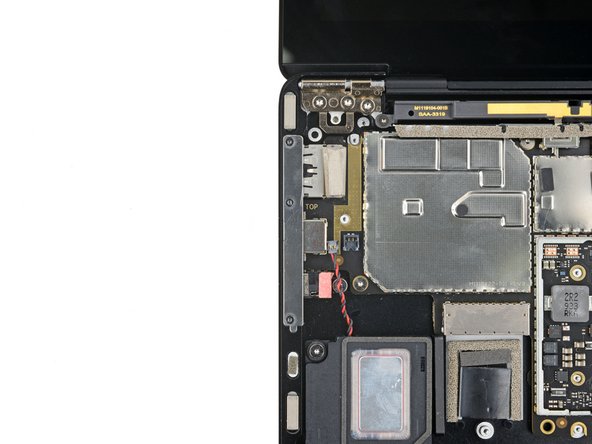
– Gently use the pointed end of a spudger to carefully lift and disconnect the right speaker wire from its cozy spot on the motherboard connector. You’ve got this!
Tools Used
Step 34

– Grab the flat end of a spudger and pop open the locking arm on the Surface Connect port connector.
– Hold onto the Surface Connect port cable and give it a firm pull straight out of its socket.
Tools Used
Step 35

– Gently use the pointed end of a spudger to carefully lift and disconnect the left speaker wire from its connector located near the left ports. You’ve got this!
Tools Used
Step 36
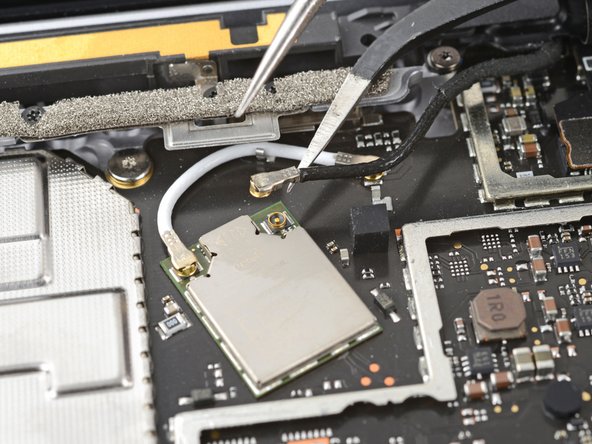

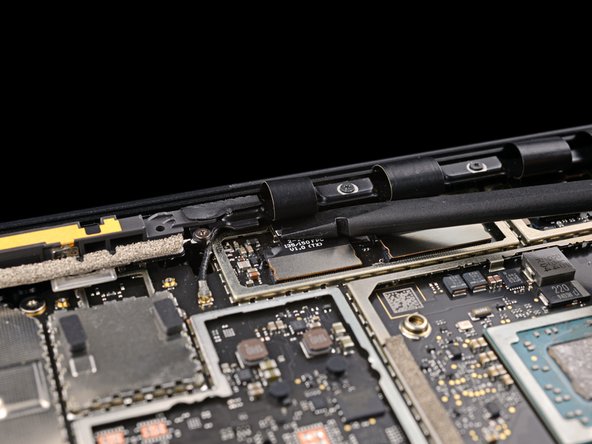
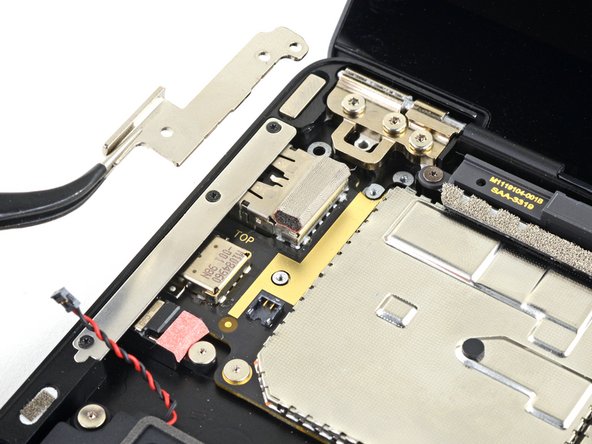
– Let’s get started! Use your trusty tweezers to carefully slide one arm under the black antenna connector, getting as close to the head as possible.
– Now, gently lift straight up to disconnect the cable – easy does it!
– To reattach the antenna connector, simply align the head over its socket and press down with the flat end of a spudger. You’ll know it’s in place when you hear a satisfying snap!
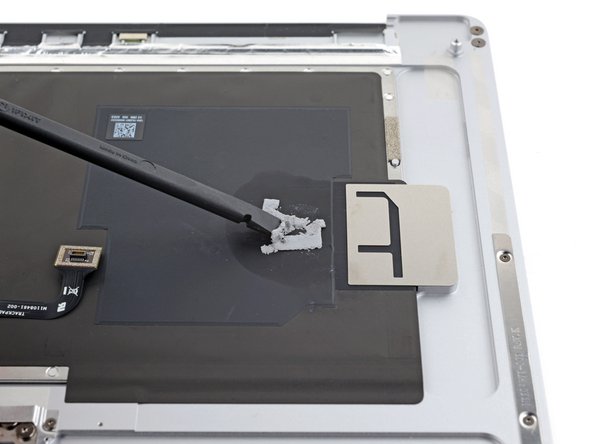
Step 37

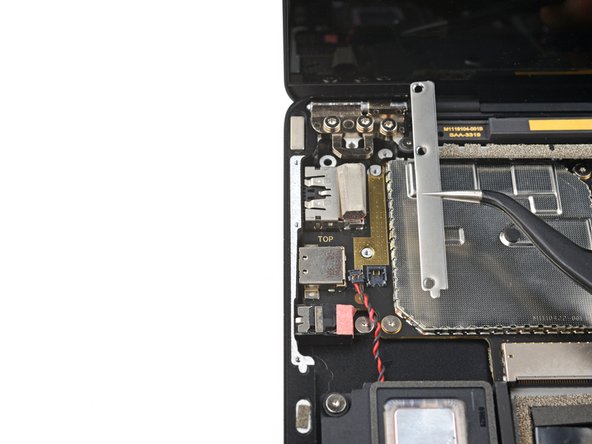
– Let’s get started! Use a T3 Torx driver to carefully remove the two 3mm screws that hold the motherboard bracket in place. Take your time and make sure they’re completely out before moving on to the next step.
Step 38

– Take off the motherboard bracket with care.
Step 39

– Grab your trusty T3 Torx driver and get ready to tackle those three 2.1 mm screws holding the left port cover in place. You’ve got this!
Step 40

– Take off the left port cover with a gentle tug. You’ve got this!
Step 41

If any of your screws are sporting rubber covers, gently peel them off and set them aside.
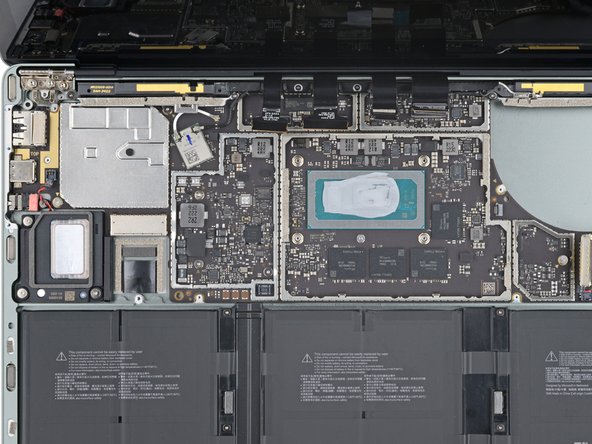
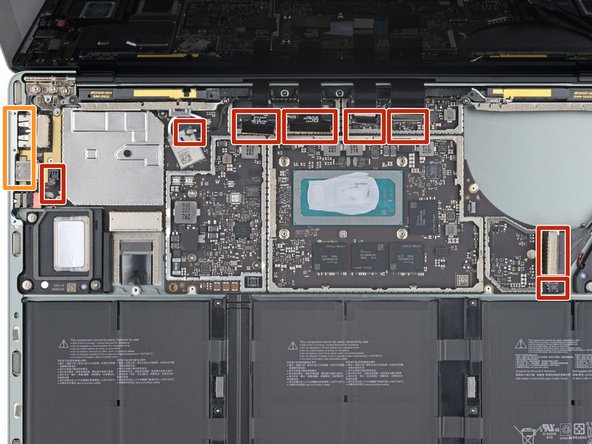
– Grab your trusty T3 Torx driver and let’s get to work! Carefully remove the six 2 mm screws that are holding the motherboard in place. You’re doing great—keep it up!
Step 42

The left edge of the motherboard is snugly held in place by the port cutouts, the speaker, and the frame – let’s get it loose!
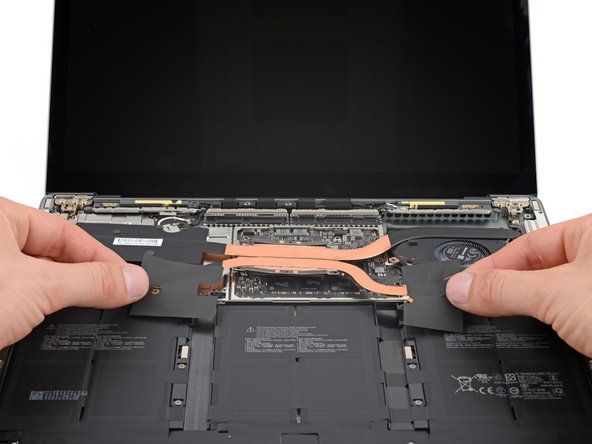
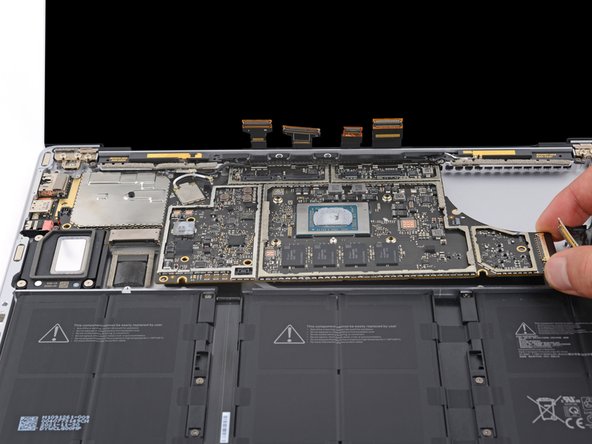
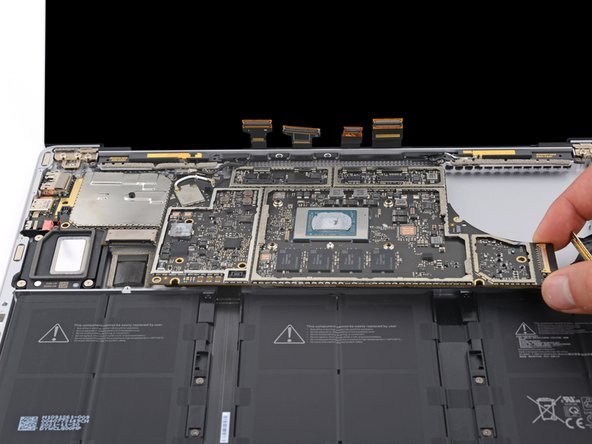
– Gently lift the right edge of the motherboard, just enough to hover it over the battery.
– Once you’ve got that edge lifted, keep the motherboard steady while you move on to releasing the left edge.
Step 43


There’s a tab on the upper left of the motherboard that snuggly presses against the frame’s protrusions, keeping the left edge from popping free.
If the motherboard refuses to lift over the left speaker, the tab might still be hanging on. Just shift the angle of your spudger and give it another go!
– Gently slide the tip of your spudger into the tab located in the upper left corner of the motherboard. Give it a little nudge between the frame and the screen hinge.
– While you’re at it, lift the tab with your spudger and raise the right edge of the motherboard towards the front of the laptop. You’ve got this!
Tools Used
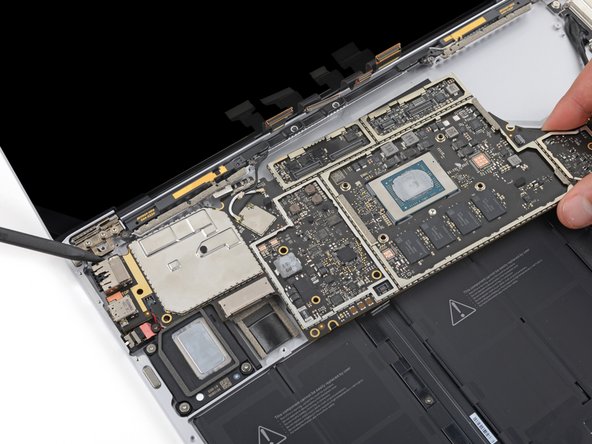
Step 44
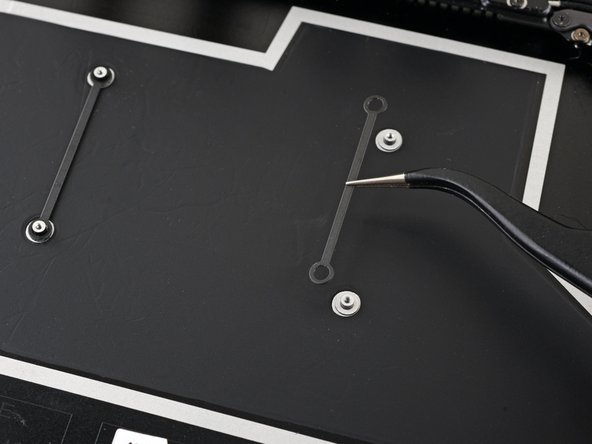

Keep an eye on those two screwpost braces underneath the motherboard when you’re removing it—don’t let them sneak away!
– Time to put your device back together! Just follow these steps in reverse, and you’re golden.
– Got some old gadgets lying around? Don’t forget to drop them off at an R2 or e-Stewards certified recycler.
– Things didn’t go as smoothly as you’d hoped? No worries! Give some quick troubleshooting a shot, or check in with our awesome Answers community for a hand.
–
Success!

