DIY Microsoft Surface Laptop 7 13.8 inch Audio Jack Replacement
Duration: 45 minutes
Steps: 14 Steps
Before diving into the world of audio jack replacement, make sure you’re ready to tackle this with a smile!
Ready to tackle the audio jack replacement in your Microsoft Surface Laptop 7 (13.8-inch)? If your headphones are acting up with a loose connection, distorted sound, or only one side working, it might be time for a change! But first, let’s make sure it’s not your headphones playing tricks on you—try them out on another device. And don’t forget to check if the issue could be software-related. If you need help, you can always schedule a repair.
Step 1


Before jumping into this repair, make sure your laptop’s battery is below 25%. A fully charged battery could cause some serious issues if things go wrong.
– Disconnect all cables and power down your laptop completely. Time to give it a little nap!
Step 2


– Shut your laptop and flip it over so the rubber feet are having a little party on the table!
Step 3


Watch out for those little feet—they might pop off faster than you can say ‘oops!’ Keep an eye on them so they don’t wander off.
Using the tip of a spudger can be handy, but be careful! There’s a chance you might accidentally damage the foot if you’re planning to reuse it. Keep it light and gentle, and if you feel stuck, don’t hesitate to schedule a repair for some expert help!
– With a gentle touch, slide one arm of your trusty angled tweezers into the cozy recess near the upper right edge of one of the feet.
– Now, give it a little nudge and use those tweezers to pop up and say goodbye to the foot.
– Keep the momentum going and repeat the magic to remove the rest of the feet.
– When it’s time to bring a foot back, just align the pegs on the bottom with their cozy little cutouts in the frame and give it a firm press to secure it in place.
Tools Used


Step 4


As you dive into this repair adventure, make sure to keep an eye on each screw and put it back in its cozy little home when you’re done!
The Surface Laptop 7 may have Torx Plus screws, but don’t worry—standard Torx bits will do the trick! Just remember to apply steady pressure downwards to keep those screws from stripping out.
– Grab your trusty Torx Plus 5IP screwdriver and twist out those four 4.5 mm screws (and their washers) holding down the lower case. Easy peasy, right?
Step 5


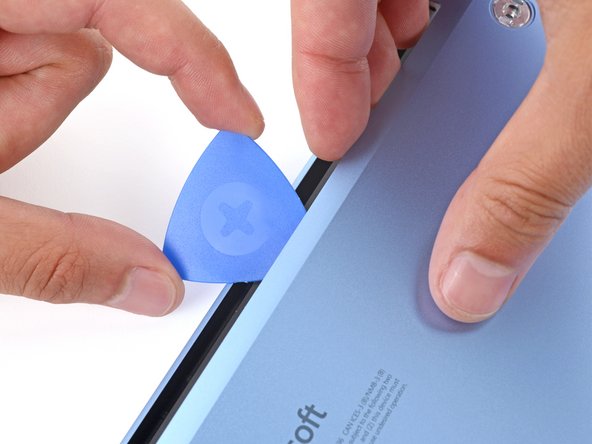
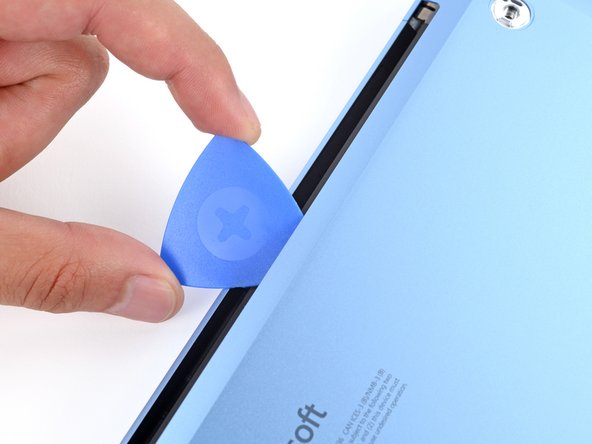
Keep that pick away from the outer edges, or you might just tick off the antenna bar!
– Slide the tip of your trusty opening pick beneath the top edge of the lower case, about an inch (2.5 cm) to the left or right of that iconic Microsoft logo. Let’s get this party started!
Step 6

– Give that pick a twist and gently lift the lower case just enough so you can get a solid grip with your hand. You’ve got this!
Step 7


– Pop off that lower case and set it aside!
Step 8


– Grab your trusty Torx Plus 3IP screwdriver and get ready to work your magic! It’s time to unscrew those two 2.3 mm-long screws that are keeping the battery connector cover in place. You’ve got this!
Step 9


– Gently lift off the battery connector cover using tweezers or your fingers. You’ve got this!
Step 10


To reconnect a press connector, line it up with the socket and give one side a gentle push until you hear that satisfying click. Then, do the same for the other side. It might take a couple of attempts to get it just right—no need to force it!
– Gently slide the flat end of a spudger under the top edge of the battery press connector, give it a little lift, and pop it loose. Easy does it!
Tools Used
Step 11

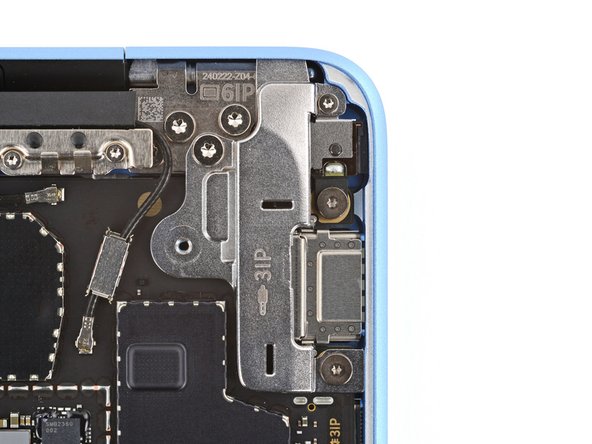
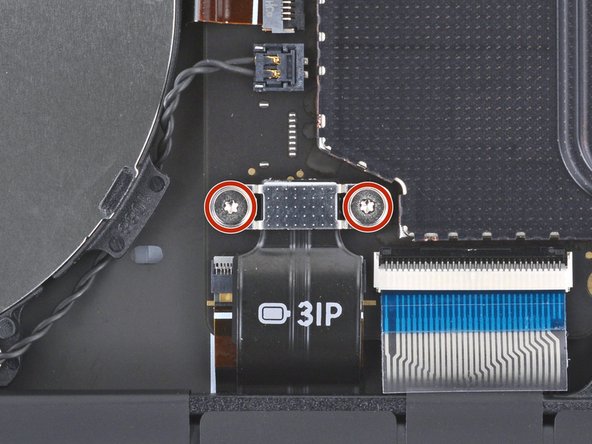
– Grab your trusty Torx Plus 3IP screwdriver and unscrew the two fasteners on the right side of the audio jack cover. Easy peasy, right?
– Switch over to the Torx Plus 6IP screwdriver and tackle the 6.3 mm-long screw hanging out in the top left corner. It’s just waiting to be removed!
– Next up, remove the 3 mm-long screw chillin’ in the top right corner. Just a quick twist, and it’s outta there!
– Lastly, find the 4.7 mm-long screw lounging at the bottom right corner and unscrew it. Boom, you’re all set!
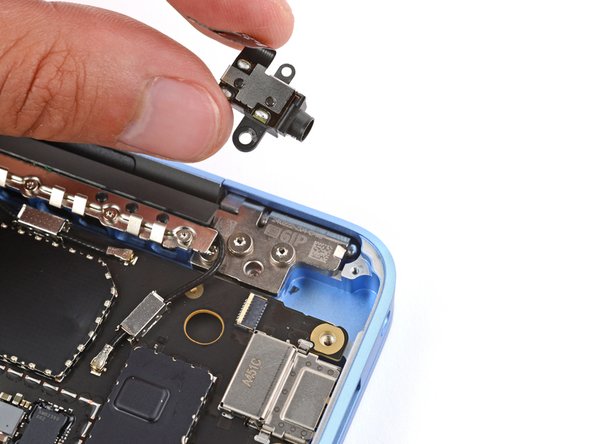
Step 12
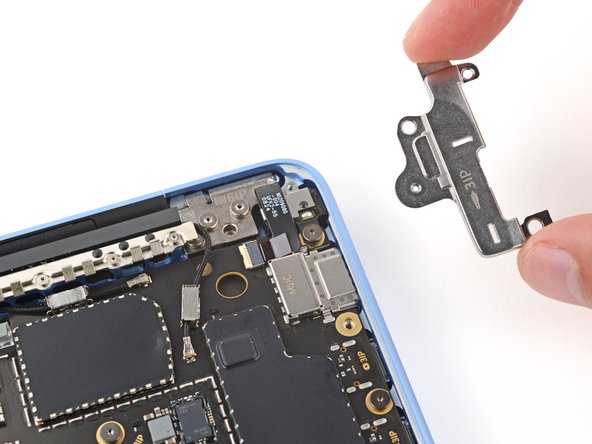

– Pop off that audio jack cover like a pro!
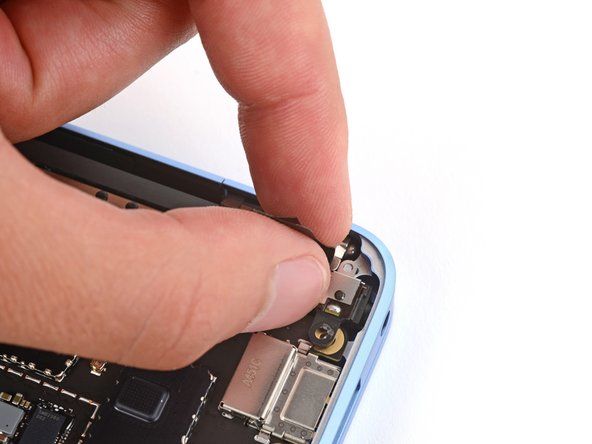
Step 13
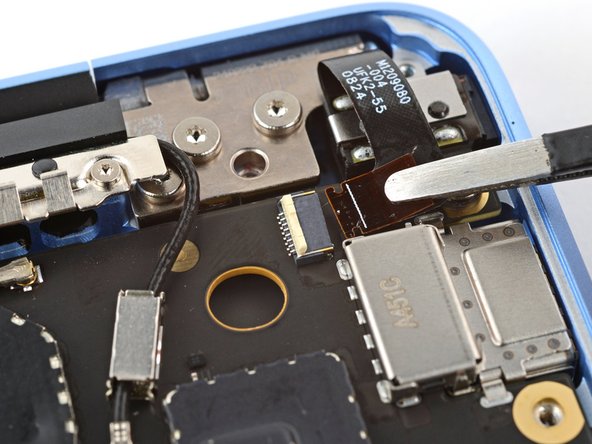
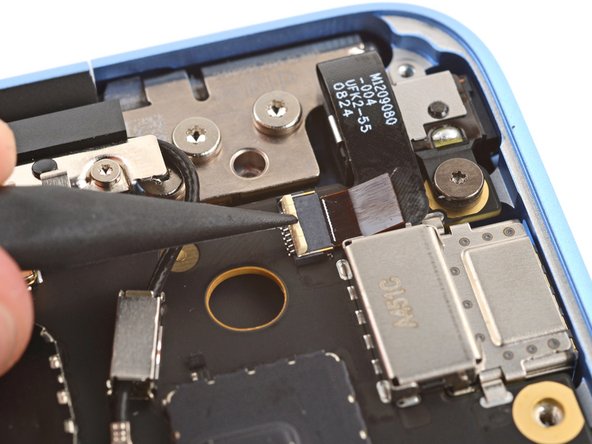

– Grab your trusty spudger and gently lift that little hinged locking flap on the audio jack ZIF connector. You’ve got this!
– Now, take your tweezers and give a gentle grip on the audio jack cable’s pull tab. Slide that cable out of its cozy socket like a pro!
Tools Used
Step 14

– Time to put your gadget back together! Just follow these steps in reverse, and you’ll be good to go.
– Got some e-waste? Make sure to drop it off at an R2 or e-Stewards certified recycler. It’s the right thing to do!
– Things didn’t go as smoothly as you hoped? No worries! Check out some basic troubleshooting tips, or reach out to our Answers community for some friendly advice.
– Changed your mind? No problem! Just hit cancel.
–
Success!