DIY Microsoft Surface Laptop 7 13.8 inch Heat Sink Replacement Guide
Duration: 45 minutes
Steps: 18 Steps
Get ready to tackle that heat sink replacement in your Microsoft Surface Laptop 7 (13.8‑inch)! This guide is your trusty sidekick for swapping out the thermal paste too. If your laptop’s been feeling a bit too toasty lately, don’t forget to check if the fan is doing its job first. Let’s dive in!
Step 1


Before you start this repair, let your laptop’s battery run down to below 25%. If the battery is charged, it might catch fire if it gets damaged.
– Disconnect all the cords, and give your laptop a well-deserved nap by shutting it down completely.
Step 2


– Flip your laptop over so the rubber feet are staring at the ceiling, and give it a comfy spot to rest.
Step 3


Watch out for those speedy little feet—they might just zip away! Keep an eye on them so they don’t go missing.
Using the tip of a spudger can be handy, but be careful! There’s a chance you might accidentally damage the foot if you’re planning to reuse it. Keep it light and easy, and remember, if you need help, you can always schedule a repair.
– Carefully slide one arm of your angled tweezers into the little groove at the upper right corner of one of the feet.
– Now, use your tweezers to gently lift and pop off the foot.
– Keep going! Do the same thing to remove the rest of the feet.
– To put a foot back on, line up the pegs on the bottom with their matching cutouts in the frame and press it down snugly.
Tools Used


Step 4


As you dive into this repair adventure, keep a close eye on each screw and remember to return it to its cozy home when you’re done.
The Surface Laptop 7 may rock Torx Plus screws, but don’t worry—standard Torx bits are your trusty sidekicks. Just remember to apply steady, downward pressure to keep things from getting stripped!
– Grab your trusty Torx Plus 5IP screwdriver and let’s get to work! Carefully remove those four shiny screws, each measuring 4.5 mm long, complete with their little washers, that are holding the lower case in place. You’ve got this!
Step 5


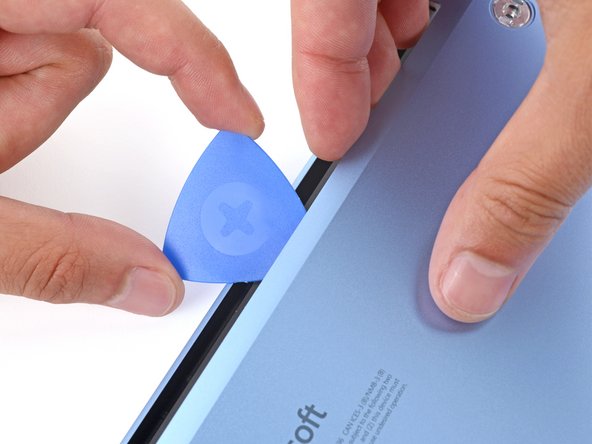
Steer clear of inserting the pick too close to the edges, or you might just give the antenna bar a little love tap—and not the kind it wants!
– Slide the tip of an opening pick under the top edge of the bottom case—about an inch (2.5 cm) to the left or right of the Microsoft logo. You’ve got this!
Step 6
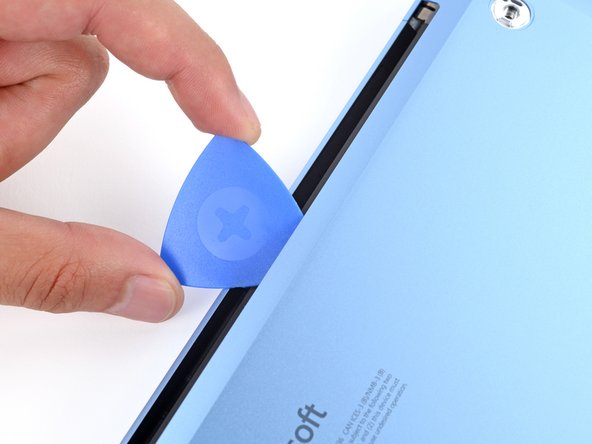

– Give that pick a little twist to lift the lower case just enough so you can grab it with your hand. You’ve got this!
Step 7


– Gently lift the lower case and take it off like you’re unveiling a surprise!
Step 8


– Grab your trusty Torx Plus 3IP screwdriver and get ready to tackle those two 2.3 mm-long screws holding down the battery connector cover. You’ve got this!
Step 9


– Gently grab the battery connector cover with your fingers or tweezers and lift it away. Easy does it!
Step 10


To get that connector back in action, just line it up with the socket and give a gentle push on one side until you hear that satisfying click. Then, do the same on the other side. It might take a couple of tries to get it just right, so be patient—no need to force it in there!
– Take your trusty spudger and carefully slide the flat end under the top edge of the battery press connector. Gently lift it up to disconnect. Patience is key here – you’ve got this!
Tools Used
Step 11

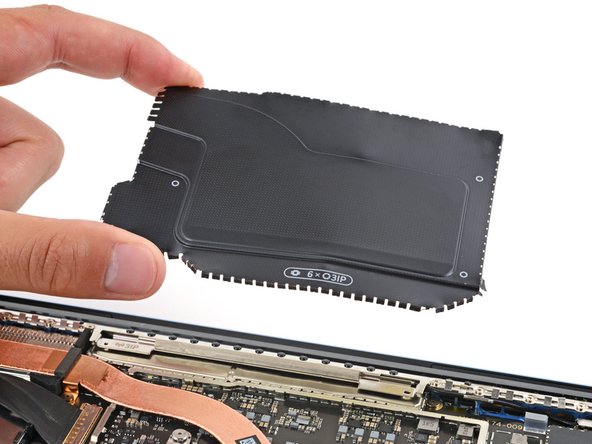
As you tackle the next few steps and remove the motherboard shield, remember to keep it as flat as possible. You’ll want to give it a second chance during reassembly, so treat it with care!
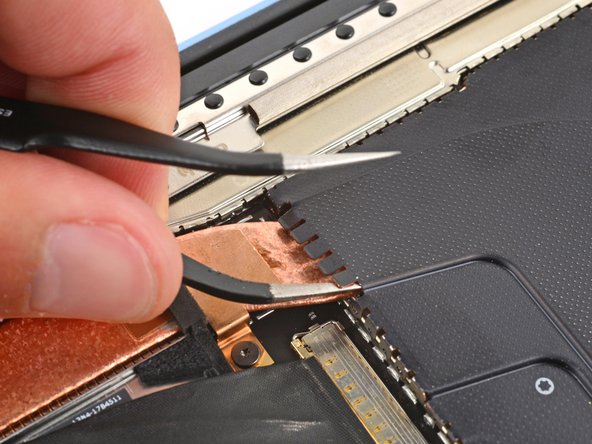
– Gently slide one arm of your angled tweezers into a gap on the edge of the display cable shield. You’re on the right track!
– Now, use those tweezers to lift and release the shield. You’re doing great!
Tools Used
Step 12

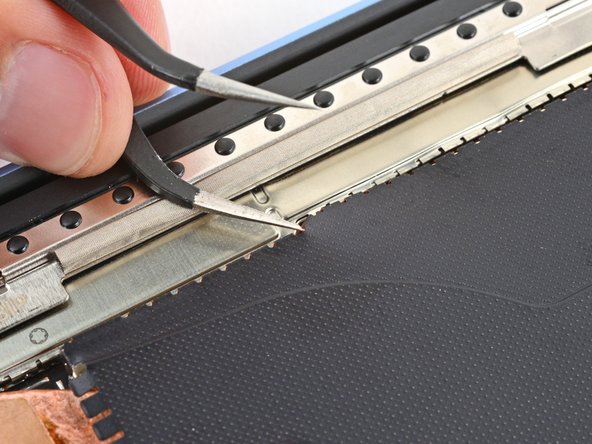
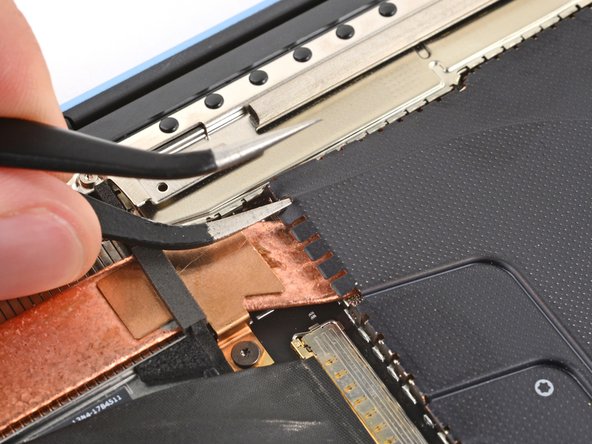
If the shield feels a bit stubborn, grab your tweezers and unclip the stuck area.
– Keep working your way around the edges of the shield until you can finally get a good grip on it with your fingers.
– Now that you’ve got a hold of it, give it a gentle pull to fully release the shield!
Step 13


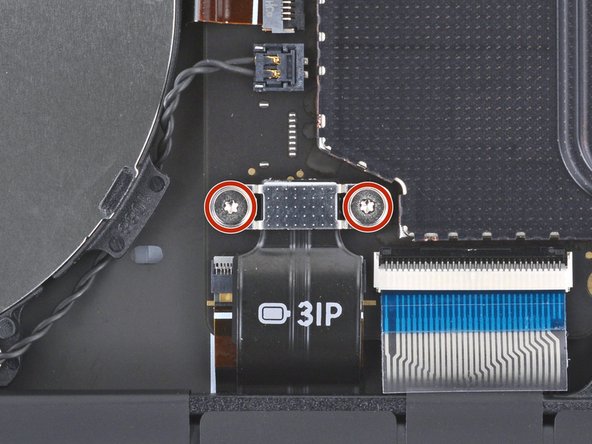
– Grab your trusty Torx Plus 3IP screwdriver and let’s tackle those five screws holding the heat sink in place!
– When you’re putting everything back together, make sure to tighten those four CPU tension screws in an ‘X’ pattern. Think of it like a little dance: top left, bottom right, top right, bottom left.
– You’ll need four screws that are 3.2 mm long for the CPU tension.
– And don’t forget about that one little 2.7 mm long screw hanging out near the top left side.
Step 14

Handle with care! Avoid scraping or damaging those tiny surface-mounted components on the motherboard. They’re delicate little treasures, and we want them to stay safe and sound!
The thermal paste is like a special kind of glue that helps your heat sink stick to the CPU. Over time, this paste can lose its stickiness, especially if your laptop is getting up there in age or the paste is just plain worn out.
– Slide the flat end of your trusty spudger under the left CPU tension bracket and gently lift it to free the heat sink. You’re doing great!
Tools Used
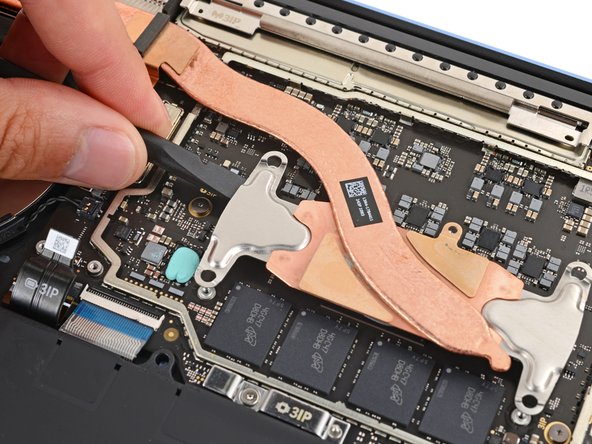
Step 15

– Gently lift the heat sink straight up and set it aside.
– When you’re putting it back together, make sure to place the heat sink carefully, using the alignment peg to guide it. Once it’s snug in place, try not to budge it around, or you might end up with uneven thermal paste smears!
Step 16
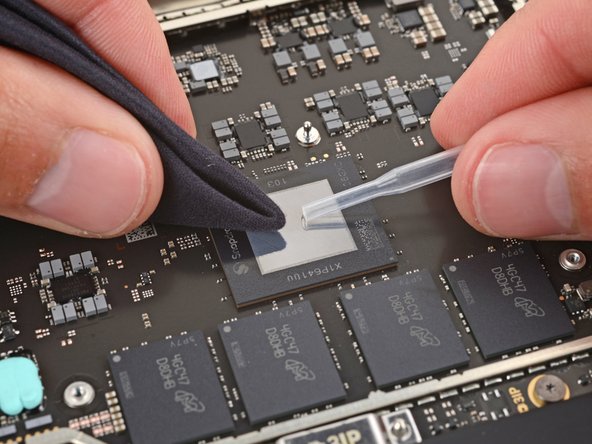

Keep your hands off the CPU and make sure no dust or debris lands on it—even a tiny fingerprint can mess with heat dissipation.
Before you pop in that shiny new heat sink, make sure to give your CPU a little TLC by wiping away all the old thermal paste. It’s like a fresh start for your device!
– Grab your trusty spudger and gently use its flat end to scoop up that old thermal paste from the CPU. It’s like giving your CPU a little spa treatment!
– Next up, take some high-concentration (over 90%) isopropyl alcohol and a microfiber cloth to give your CPU a thorough cleaning. We want it shining bright, free of any leftover goo!
– Once you’ve cleaned it up, let the isopropyl alcohol evaporate completely before slathering on any fresh thermal paste. Patience is key here, but you’ve got this!
Tools Used

Step 17

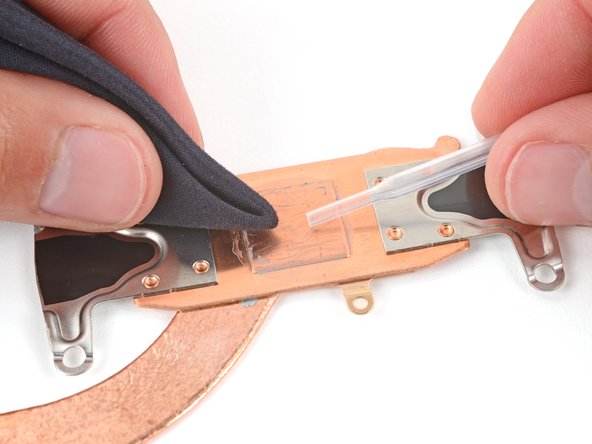
If you’re swapping out the heat sink, you can skip this step—save yourself the hassle!
– Go ahead and do the same thing again to make sure you’ve cleaned off all that pesky thermal paste and any leftover residue from the bottom of the heat sink. You’re doing great!
Step 18

– To put your device back together, just follow these steps in reverse, starting with this one. Easy peasy!
– Got some e-waste? Make sure to take it to an R2 or e-Stewards certified recycler. It’s the responsible thing to do.
– Things didn’t go as planned? No worries! Give some basic troubleshooting a shot, or feel free to reach out to our awesome Answers community for a hand.
– Changed your mind? No problem! Just hit cancel and move on.
–
Success!