DIY Microsoft Surface Laptop 7 Right Speaker Replacement Guide
Duration: 45 minutes
Steps: 16 Steps
Ready to swap out that right speaker on your Microsoft Surface Laptop 7 (13.8-inch)? It’s on the same side as the Surface Connect port. If you’re noticing crackles, static, or no sound at all, chances are it’s seen better days and needs a little TLC. Let’s get it replaced and sounding fresh!
Step 1


Before diving into this repair adventure, make sure your laptop’s battery is lower than 25%. A charged battery can be a bit of a drama queen and might catch fire if it gets damaged!
– Disconnect all cables and power down your laptop completely.
Step 2


– Time to get started! Close your laptop and flip it over so the rubber feet are facing upwards. Let’s get this repair underway!
Step 3


Watch out—those feet can pop out faster than a jack-in-the-box, so keep an eye on them!
You could also go with the pointy end of a spudger. Just a heads-up, though: it’s a bit risky and might mess up the foot if you plan to reuse it.
– Slide one arm of your angled tweezers into the little nook near the top-right corner of one of the feet—take it slow and steady.
– Now, use those tweezers to pop the foot out of its spot—no sweat, you’re doing great!
– Rinse and repeat for the other feet—you’re on a roll now!
– When it’s time to install a foot, just line up the pegs on the bottom with their designated cutouts in the frame, then give it a firm press into place—snap, it’s done!
Tools Used


Step 4


As you dive into this repair adventure, keep a sharp eye on each screw and remember to tuck it back in its original cozy spot when you’re done.
The Surface Laptop 7 may be playing with Torx Plus screws, but don’t worry—standard Torx bits will do the trick! Just remember to apply steady, downward pressure to keep those threads happy and avoid any stripping mishaps.
– Grab your Torx Plus 5IP screwdriver and unscrew the four 4.5mm screws (with washers) that are holding down the lower case. Easy does it, just make sure they’re all out before moving on!
Step 5


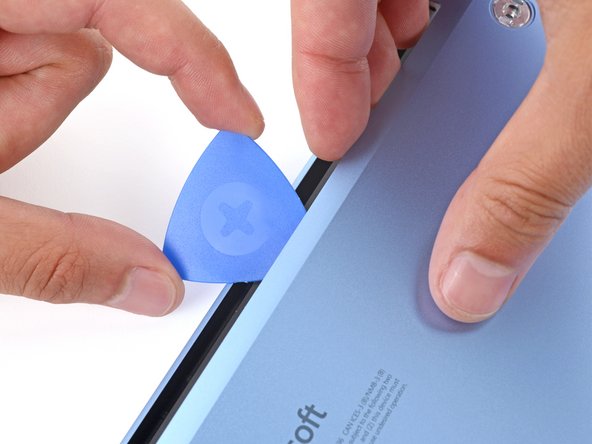
Steer clear of jamming that pick in too close to the outer edges; it might just give the antenna bar a rough time!
– Slide the pointy end of your trusty opening pick beneath the top edge of the lower case, about an inch (2.5 cm) to the left or right of that snazzy Microsoft logo. Let’s get this party started!
Step 6
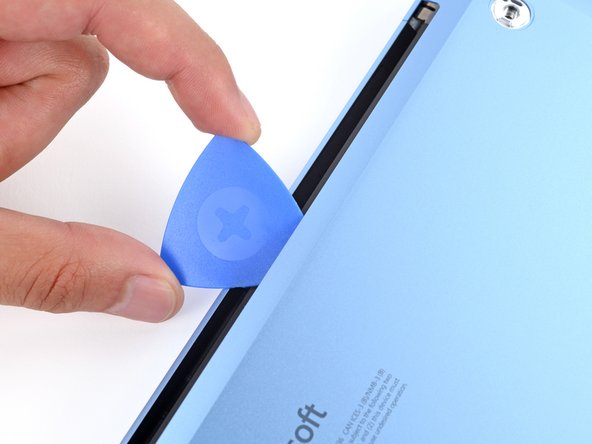

– Give the pick a little twist to pop the lower case up just enough so you can grab it with your hand. Easy peasy!
Step 7


– Gently pop off the lower case and set it aside like a pro.
Step 8


– Grab your trusty Torx Plus 3IP screwdriver and unscrew the two 2.3 mm screws holding down the battery connector cover. Easy peasy, right? Let’s keep going!
Step 9


– Grab your trusty tweezers or use your fingers to carefully pop off the battery connector cover.
Step 10


To reconnect that press connector, just line it up with the socket and give one side a gentle press until you hear that satisfying click! Once that’s done, do the same on the other side. It might take a couple of attempts to get it just right—no need to force it! You’ve got this!
– Slide the flat end of a spudger under the upper edge of the battery press connector, then gently pop it up to disconnect. You’ve got this!
Tools Used
Step 11

Be gentle with those cables! Lifting them directly could lead to some unwanted damage.
The right speaker is actually hanging out on your left side since the laptop is flipped over like a pancake!
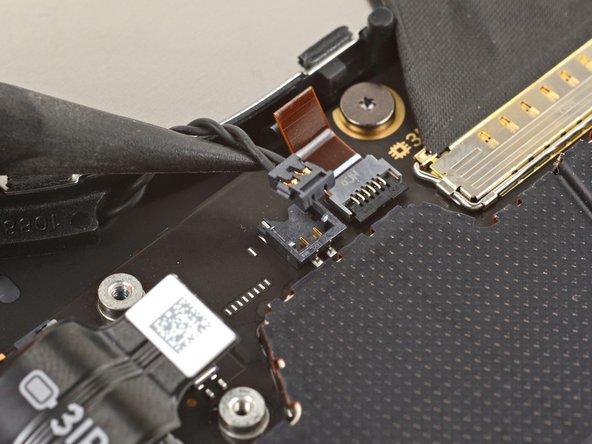
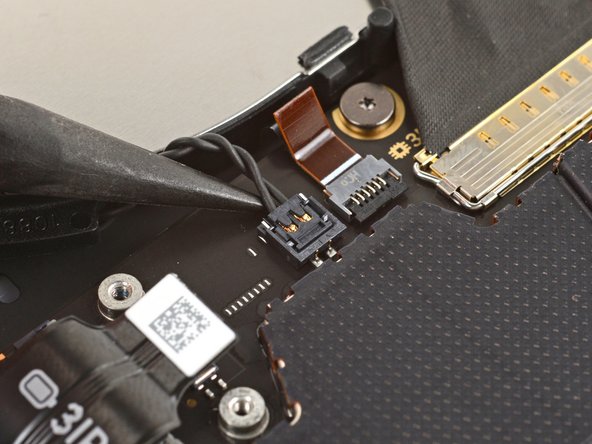
– Carefully slide the tip of a spudger beneath the right speaker connector and gently lift it straight up, freeing it from the socket. Easy peasy!
– When you’re putting everything back together, hover that connector over its socket and give it a gentle push down with the flat end of a spudger until you hear that satisfying click. If it’s being stubborn, don’t stress! Just reposition it and try again. Remember, if you need a hand, feel free to schedule a repair.
Tools Used
Step 12
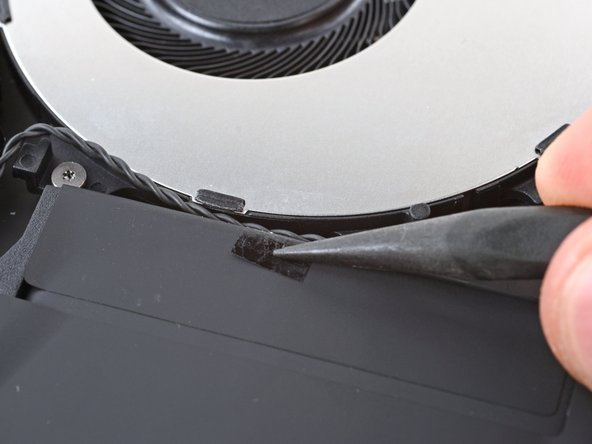
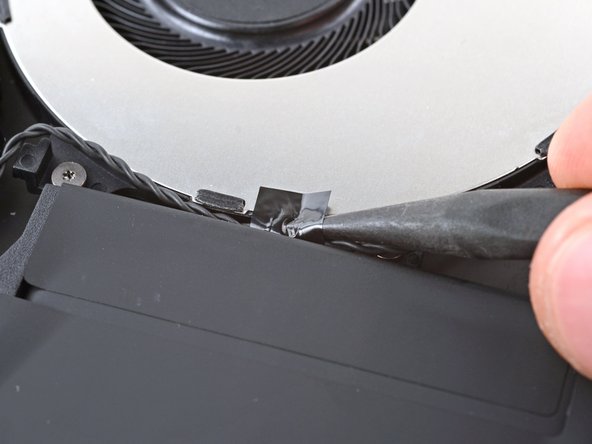

– Gently use the tip of a spudger to peel back the tape from the bottom of the fan and move it aside to make way for the speaker cable.
Tools Used
Step 13
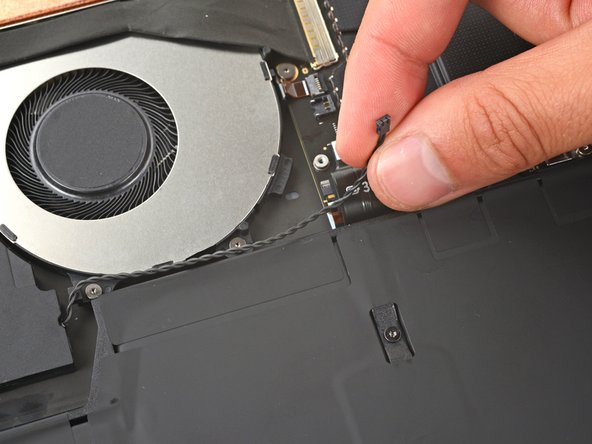
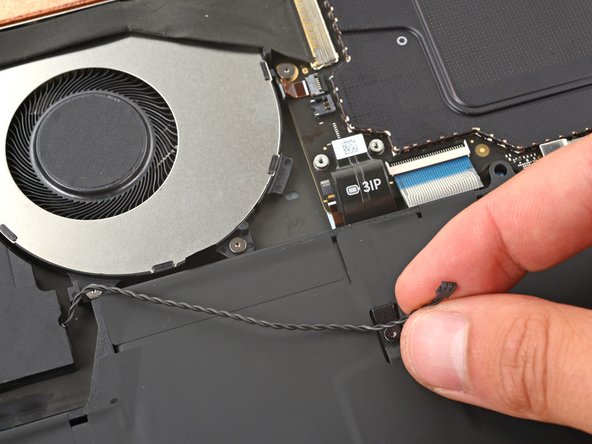

– Take hold of the speaker cable with your fingers and gently coax it out of the clips hugging the edge of the fan.
Step 14

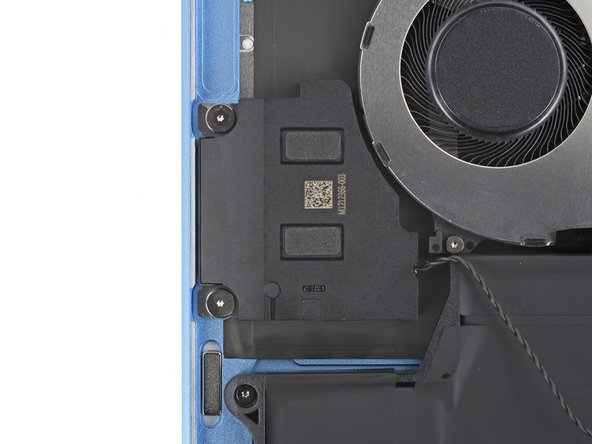
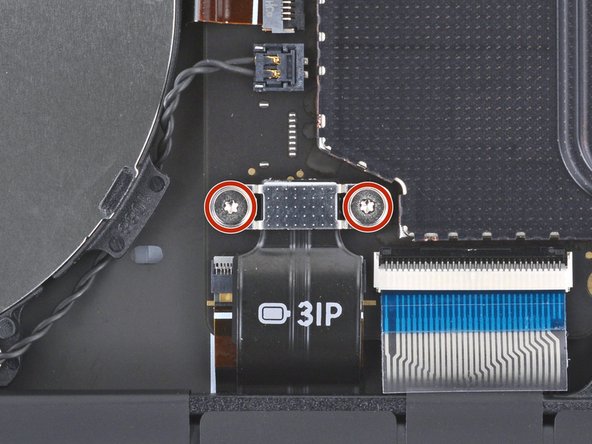
– Grab your Torx Plus 3IP screwdriver and carefully unscrew the two 3.2 mm-long screws holding the right speaker in place. Take your time and keep them safe, you’ll need them later!
Step 15
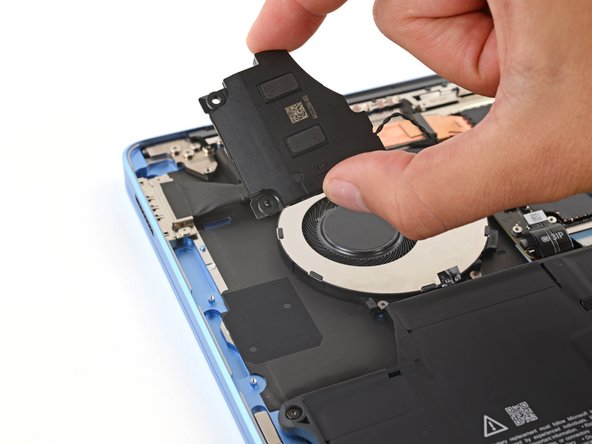

– Time to take out the speaker. Be gentle, we don’t want any surprises!
– When putting things back together, carefully place the speaker onto the frame. Make sure the grommets on the left side slide over the screw posts just right.
Step 16
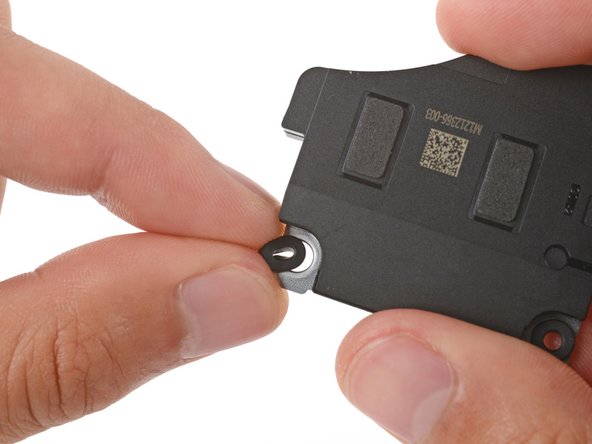
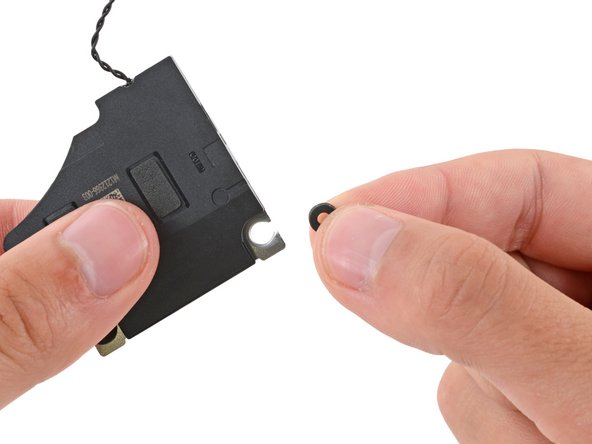

Getting these installed can be a bit of a puzzle. Just give that grommet a gentle pinch with your fingers and glide it right into its cozy little notch.
– Put your device back together by reversing the steps—like rewinding a cool repair mixtape.
– Keep it green! Drop off your e-waste at a certified R2 or e-Stewards recycler.
– Did things take an unexpected turn? Try some basic troubleshooting or give yourself a break and come back with fresh eyes.
– Not feeling it? No worries—you can stop here and come back anytime.
– If you need help, you can always schedule a repair.
Success!