DIY PlayStation 5 Fan Replacement Guide: Step-by-Step Tutorial
Duration: 45 minutes
Steps: 16 Steps
Time to power down and unplug all those cables! Let’s keep things safe and sound while we work our magic.
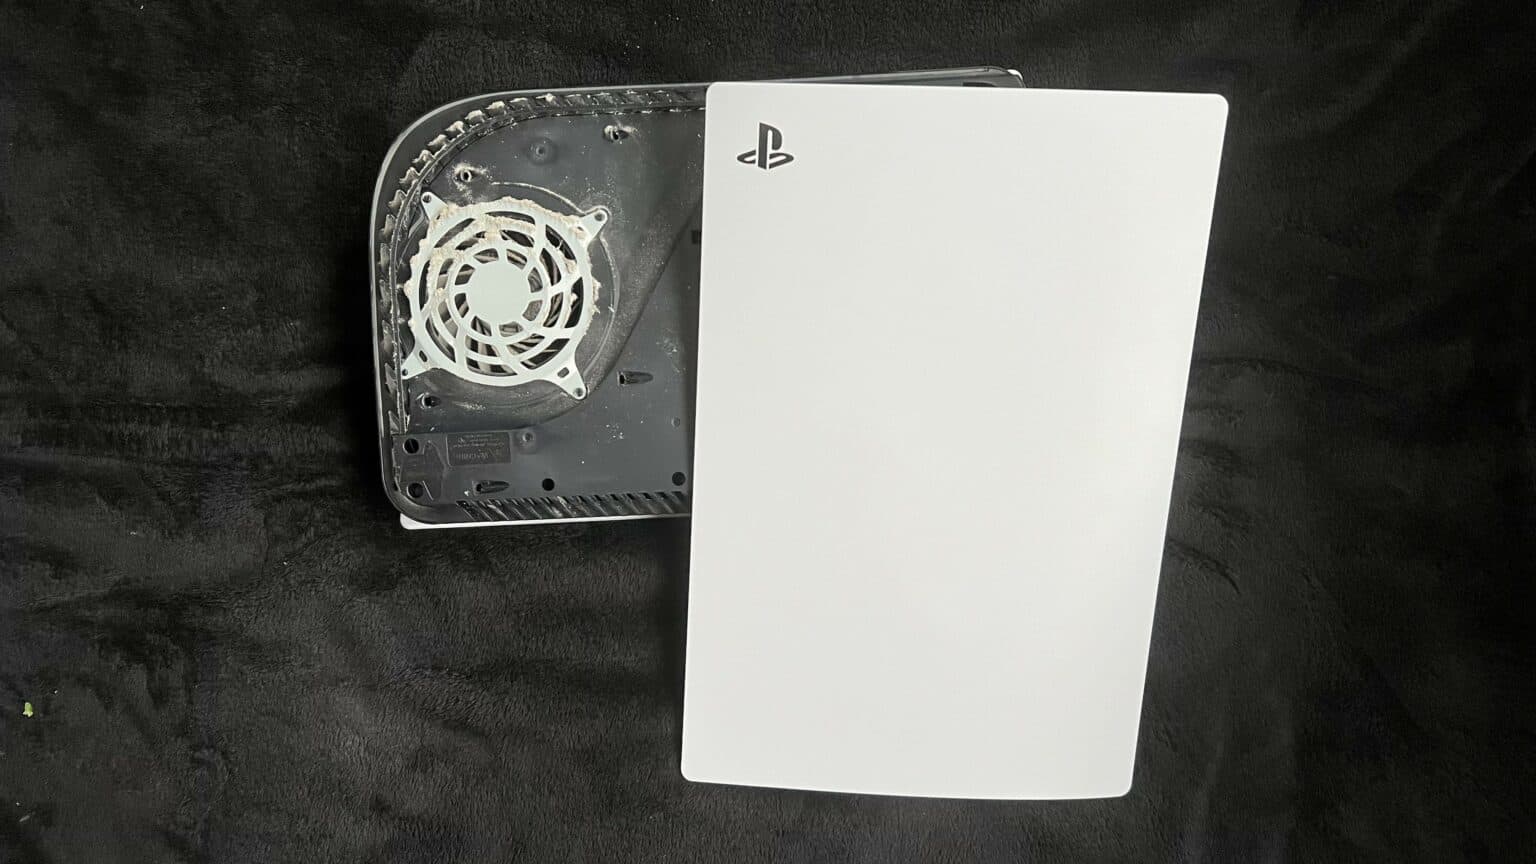
Ready to swap out that faulty cooling fan in your PlayStation 5? Or maybe just give it a good clean to get rid of the dust bunnies? Let’s do this! Start by completely powering down and unplugging all the cables from your console. And don’t forget to follow general electrostatic discharge (ESD) safety procedures while you work. If you need help, you can always schedule a repair.
Step 1

Make sure to work on a stable surface so your PlayStation stays put and doesn’t take a tumble!
If your PlayStation 5 is lying flat like a cool cat, just hop on over to Step 6.
– First things first, if your PlayStation 5 is standing tall in vertical mode, gently flip it over so that the stand is now on top, ready for action.
– Next up, grab a coin or a flathead screwdriver and get to work on that 26.5 mm-long stand screw. It’s time to show it who’s boss!
Step 2


– Gently pull straight up to free the stand.
Step 3


– Pop that screw into the little cubby hole at the bottom of the stand. You’ve got this!


Step 5


– Give the stand a gentle twist to the left to snugly close the cubby. Keep it cool and steady!
Step 6


– Hey there! If your PlayStation 5 is hanging out in its horizontal position, just give it a little flip onto its face with the charging port saying hello to the sky.
– Time to say goodbye to the stand! Simply lift it straight up, like you’re picking a feather off a pillow.
Step 7


– Get your device ready by flipping it over so the USB and ethernet ports are chillin’ on the left side.
– Gently lift up the corner of the faceplate to unclip it from the case like a boss.
Step 8


– As you gently lift the corner, give the faceplate a little slide down towards the bottom of the device.
– Now, it’s time to say goodbye to the right faceplate. Go ahead and remove it.


Step 10


– Gently lift the grille away from the case to set it free.
Step 11

As you tackle this repair, keep an eye on each screw and remember to return it to its original spot. This way, your console stays happy and healthy!
– Grab your trusty TR8 Torx security driver and let’s tackle those four screws holding the fan shroud to the case. Here’s what we’re working with:
– Two screws that are 23.3 mm long – they’re the tall ones!
– One little screw at 11.4 mm long – it’s the cute one!
– And last but not least, one screw measuring 31 mm long – the big guy in the group!


Step 13


Carefully pry on the wire cover, avoiding the fan wires. If you need help, you can always schedule a repair
– Slide the flat end of a spudger under the black wire cover and into the little gap just above the fan wires. You’ve got this!
– Now, use that trusty spudger to gently lift the wire cover until you can grab it with your fingers. Keep going, you’re on the right track!
Tools Used
Step 14


– Using your fingers, carefully peel off the wire cover. If you need help, you can always schedule a repair.
Step 15


Always grab those cables by their connectors, not by the wires. Treat them right, and they’ll treat you right in return!
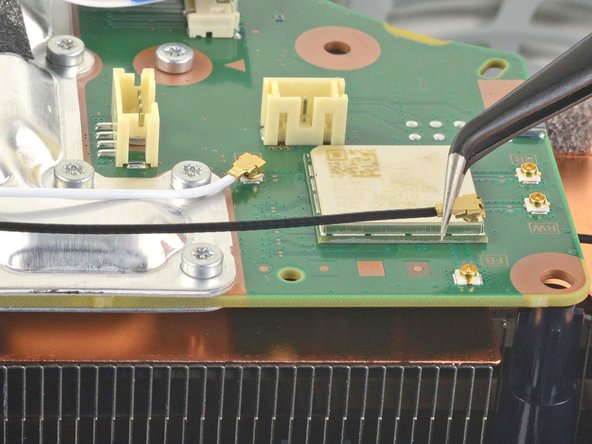
– Get a good grip on the edges of the fan cable connector and gently lift it up to detach it from the motherboard.