DIY Samsung Galaxy A10e Daughterboard Replacement Guide
Duration: 45 minutes
Steps: 21 Steps
Dive into this guide to swap out the daughterboard that houses the charge port and headphone jack. It’s a straightforward process, and if you need help, you can always schedule a repair.
Step 1


– Grab your trusty SIM card eject tool, a handy bit, or even a straightened paperclip, and gently slide it into that tiny hole on the SIM card tray.
– Give it a little press to pop that tray out like a pro!
Tools Used

Step 2


The SIM card(s) and SD card are likely to pop right out of the tray without any fuss.
– Pop out that SIM card tray from your phone like a pro!
– When you’re sliding the tray back in, double-check that both the SIM card and SD card are in their cozy little homes and facing the right way.
– If your phone’s rocking a dual-SIM setup, you might have two SIM cards to manage. Just make sure you tuck them into the slots that match your phone lines, and you’re all set!
Step 3

The back cover is snugly secured with some nifty plastic clips.
– Slide an opening pick gently between the screen and the back cover at the bottom of the phone, right where the charging port hangs out. You’re doing great!
Step 4

– Gently glide that opening pick down to the bottom left corner—this will help pop those clips loose!
Step 5

– Gently glide that opening pick along the left edge and up to the top left corner of your phone to pop those clips free!
Step 6

– Gently glide the opening pick from the top left corner to the top right corner to pop those plastic clips free. You’ve got this!
Step 7

– Gently slide the opening pick from the top right corner down to the bottom right corner to pop those last clips free. You’ve got this!
Step 8

– Pop off that back cover like a pro! You’ve got this! If you need help, you can always schedule a repair.
Step 9

– Unscrew the motherboard antenna cover.
– Use a Phillips #00, 3mm screwdriver.
Step 10

– Grab your trusty spudger or a pair of tweezers and gently lift off the antenna cover. You’re doing great!
Tools Used

Step 11

– Pop out those screws from the motherboard cover!
– 3 Phillips #00, 3mm length. If you need help, you can always schedule a repair.
Step 12

– Take the spudger or tweezers and gently pop off the motherboard cover. If you need help, you can always schedule a repair.
Tools Used
Step 13
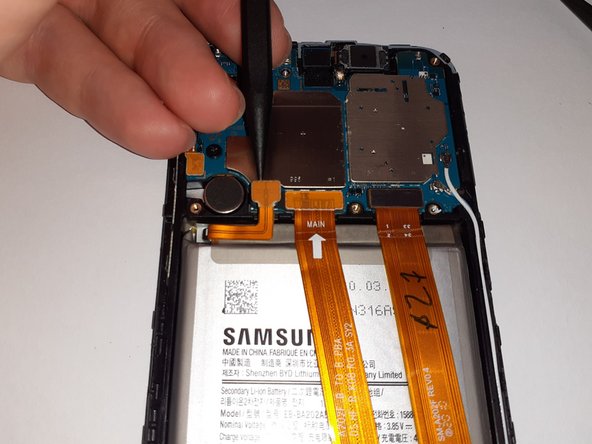

– Grab a spudger and gently lift the battery connector straight up from its socket. If you need help, you can always schedule a repair
Tools Used
Step 14

– Carefully bend the battery connector away from its socket, like you’re giving it a gentle nudge to say, ‘Hey, it’s time to take a break!’
Step 15

– Let’s get those screws out from the daughterboard cover, shall we?
– You’ll need 7 Phillips #00 screws, each about 3mm long.
Step 16

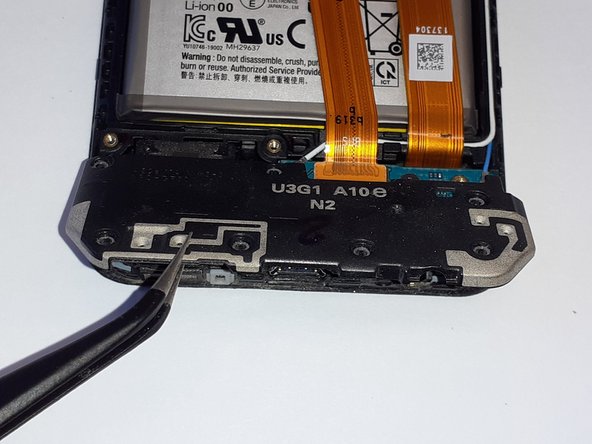
There’s a sneaky plastic tab holding down the top left corner of the daughterboard cover. Time to give it a gentle nudge!
– Grab your trusty tweezers and gently lift the bottom of the daughterboard cover to about a 30-degree angle. You’re doing great!
– Now, with a smooth motion, pull the daughterboard cover straight out, away from the phone. Easy peasy!
Step 17


– Slide the flat end of your trusty spudger beneath the interconnect flex connector and give it a gentle lift straight up. You’ve got this!
Tools Used
Step 18
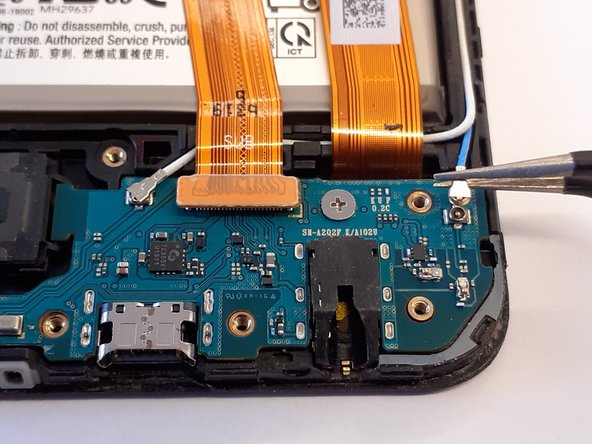

– With a trusty pair of tweezers in hand, carefully detach one of the antenna connectors. You’ve got this!
Step 19

– Grab your trusty tweezers and with a gentle touch, disconnect that other antenna connector. You’ve got this!
Step 20

– Time to tackle that daughterboard! First, grab your trusty Phillips #00 screwdriver and remove the screw. It’s a 2mm length, so it should be a breeze. You’ve got this!
Step 21

– Time to say goodbye to the daughterboard! Carefully remove it and keep it safe for the next steps. If you need help, you can always schedule a repair.