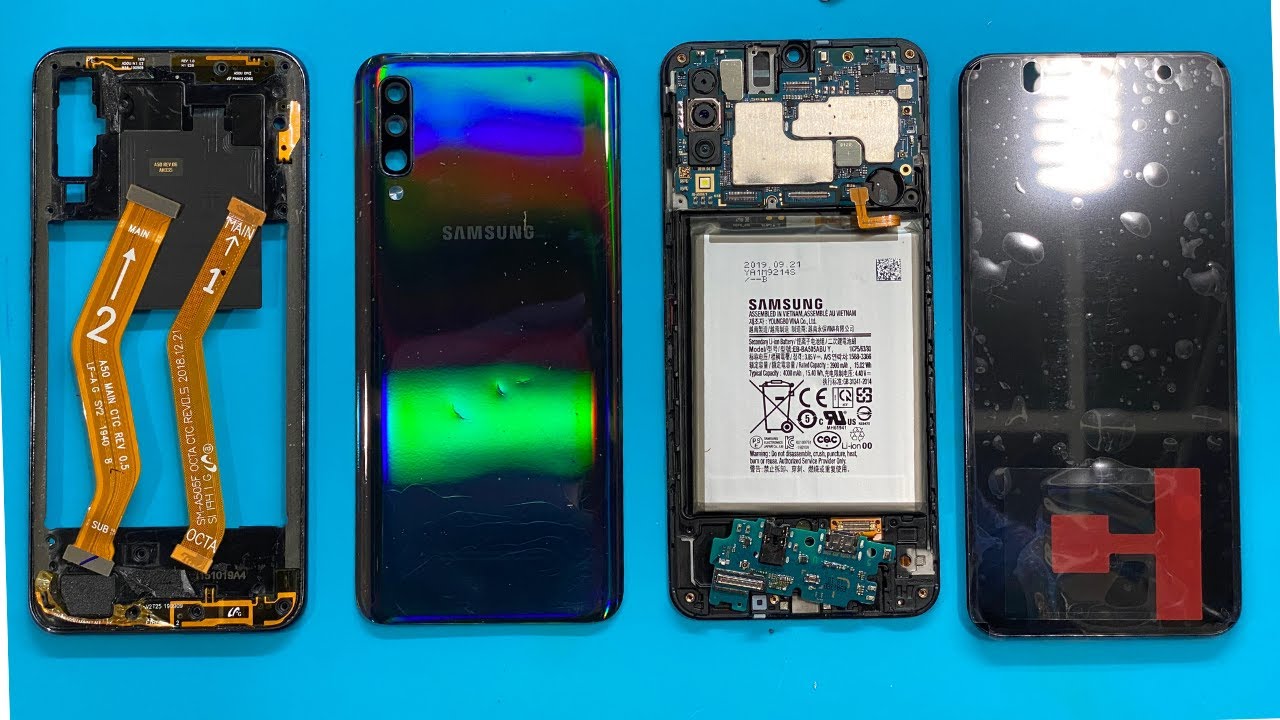
DIY Samsung Galaxy A50 Front Camera Replacement Guide
Duration: 45 minutes
Steps: 16 Steps
Let’s get this Samsung Galaxy A50 front camera swap party started! This guide will walk you through the process, and remember, if you need any help along the way, you can always schedule a repair. You’ll need some replacement adhesive to stick everything back together when you’re done. Get ready to rock that new camera!
Step 1


– Time to get started. Insert a SIM card eject tool, a SIM eject bit, or even a straightened paper clip into the hole on the SIM tray, which you’ll find on the left side of your phone.
– Give it a firm press to eject the tray – it’s easier than you think.
– Now, carefully remove the SIM card tray from your phone.
– When you’re ready to put everything back together, just make sure your cards are properly oriented in the tray. If you need help, you can always schedule a repair
Tools Used

Step 2

Okay, the Samsung Galaxy A50 is stuck together pretty good. That’s a good thing, it means it’s built strong! To help loosen things up, we’ll use an iOpener to warm up the adhesive. You can also use a hairdryer, heat gun, or hot plate if you need to, but don’t get it too hot. You don’t want to mess up the display or battery. If you’re not sure what you’re doing, you can always schedule a repair.
– First things first, let’s power down your phone and give it a little break.
– Next up, grab that iOpener and warm it up! Apply it to the back cover to loosen up that stubborn adhesive.
Tools Used

Step 3


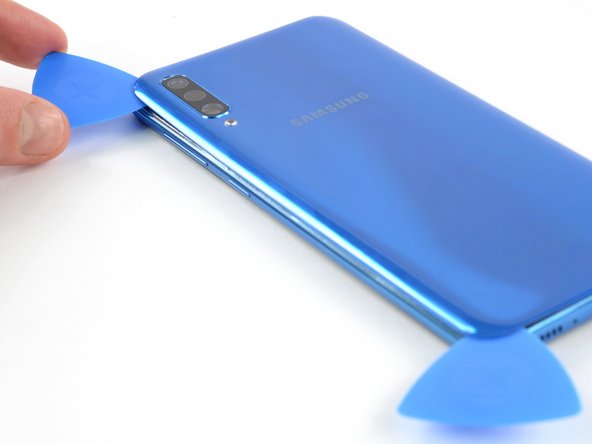
If you’re having trouble getting that opening pick between the back cover and midframe, don’t worry! You can grab a suction handle or some strong tape and give that back cover a little lift to create some space.
– Gently slide an opening pick into the bottom of your phone, right by the USB-C port.
– Now, glide that pick over to the bottom left corner like you’re on a mission!
Tools Used

Step 4
If you’re having a bit of a tough time, don’t hesitate to crank up the heat a notch to really loosen that adhesive. Just remember to check out the iOpener instructions to keep things from getting too hot to handle!
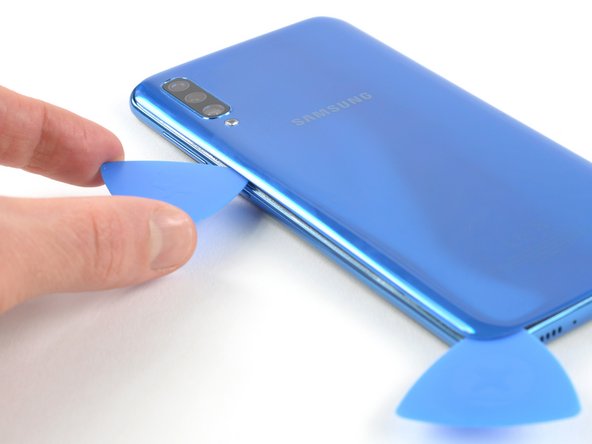
– Let’s loosen things up a bit! Grab another opening pick and slide it from the bottom to the top left corner, cutting through that sticky adhesive.
– Leave those picks in place so that the adhesive doesn’t try to play tricks on you. Keep going!
Tools Used
Step 5


– Let’s get that back cover off! Slide a third opening pick under the top left corner of the back cover.
– Now, let’s work our way around the top edge. Slide the opening pick along the top edge of the phone.
– Awesome, we’re almost there! Leave the opening pick in the top right corner to prevent the adhesive from resealing.
Step 6


– Slide a fourth opening pick into the top right corner of the back cover like a pro.
– Gently glide the tip of the opening pick down the side of the phone to the bottom right corner, slicing through that adhesive like butter.
– Keep the opening pick snug in the bottom right corner to stop the adhesive from making a comeback.
Step 7

– Pop off that back cover like a pro!
– Once you’ve got the back cover snugly in place, give your phone some love by applying firm and steady pressure for a few minutes to help that adhesive really stick. A few heavy books piled on top will do the trick nicely!
Step 8

– Get ready to tackle those 13 Phillips #00 screws (4 mm long) like a pro!
Step 9


– Start by slipping an opening pick between the display and the midframe at the bottom of your phone, just above the USB-C port – it’s like a little wedge that helps you get started.
– Now, gently slide the pick along the bottom edge to release the clips. Take your time and work your way around – if you need help, you can always schedule a repair
Step 10


– Keep gliding that pick along the left side of the phone to pop those clips loose. You’re doing great!


Step 12


– Gently glide your opening pick along the right edge, making your way to the bottom right corner like a pro!
Step 13


Release all the clips that hold the midframe in place, and you’re one step closer to fixing your device. If you need help, you can always schedule a repair
– It’s time to gently wiggle that midframe away from your phone. You’ve got this!


Step 15


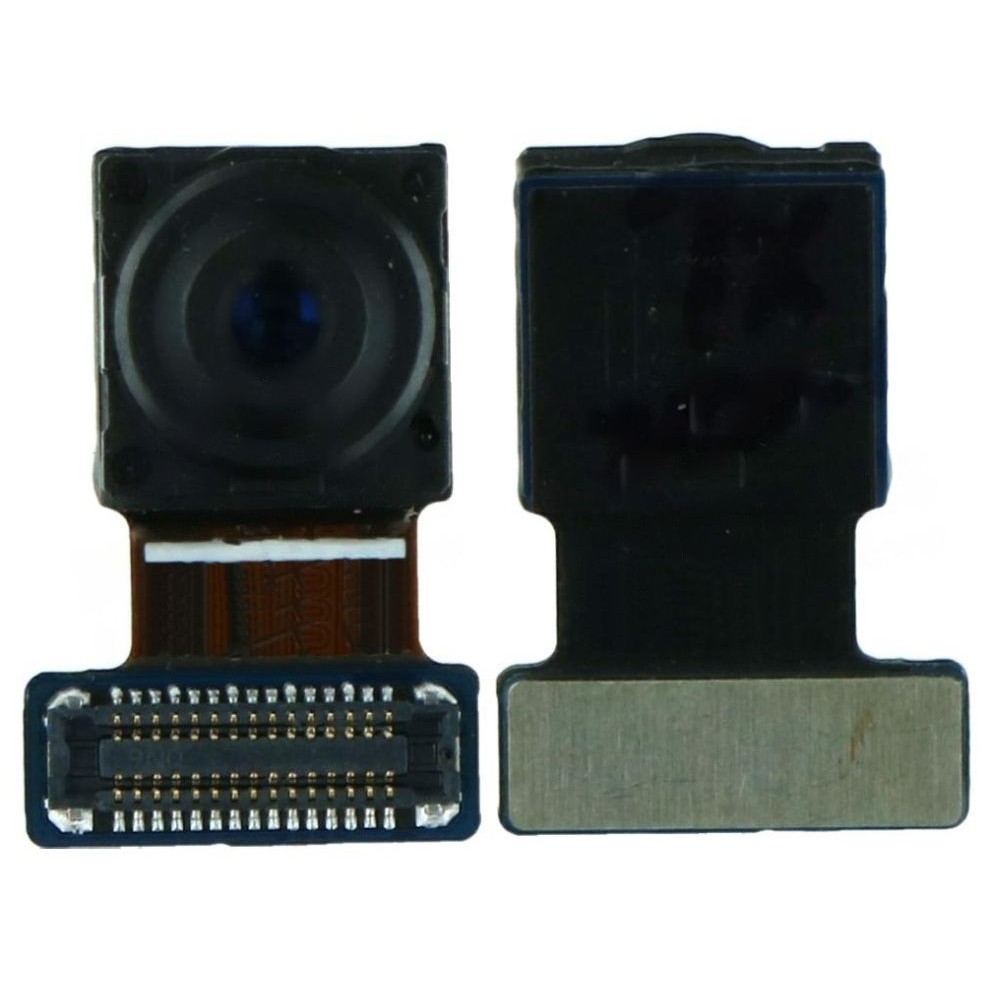
– Time to get started with the front camera removal. Use a spudger to carefully pry the connector straight up from its socket, freeing it from its home. If you need help, you can always schedule a repair
Tools Used