DIY Samsung Galaxy A53 5G Battery Replacement Guide
Duration: 45 minutes
Steps: 20 Steps
Before you start disassembling your phone, make sure to discharge the battery to below 25% for your safety. If you need help, you can always schedule a repair
Ready to say goodbye to that old battery in your Samsung Galaxy A53 5G? Awesome! Before you dive in, make sure your battery is below 25% charged. This little step keeps things safe and sound, reducing the chance of a fiery surprise if things get a bit bumpy during your repair. And hey, if your battery looks like it’s been working out a bit too hard (you know, swollen), take the necessary precautions. Just a heads up, if you skip replacing those adhesive seals when putting everything back together, your device will still work like a champ, but it might not keep out the water as well as before. So, grab some replacement adhesive to stick everything back in place once you’re done. If you need help, you can always schedule a repair.
Step 1

You can use a hair dryer, heat gun, or hot plate, but watch out! Don’t let the phone get too hot, as both the display and the internal battery can get heat damage. If you need help, you can always schedule a repair.
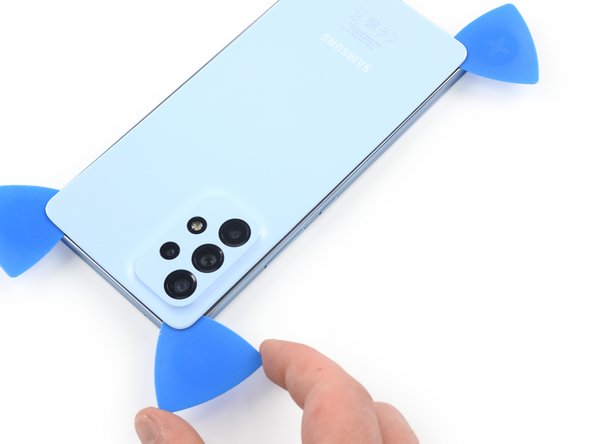
– Get your iOpener ready and place it on the back cover for a solid two minutes to help soften that stubborn adhesive underneath.


Step 2


If you’re finding it tricky to create a gap, don’t sweat it! Just apply a bit more heat to help loosen that stubborn adhesive. And hey, make sure to check out the iOpener instructions to keep things from getting too toasty.
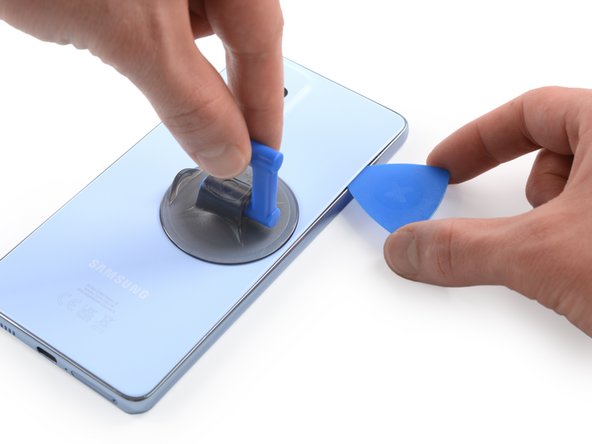
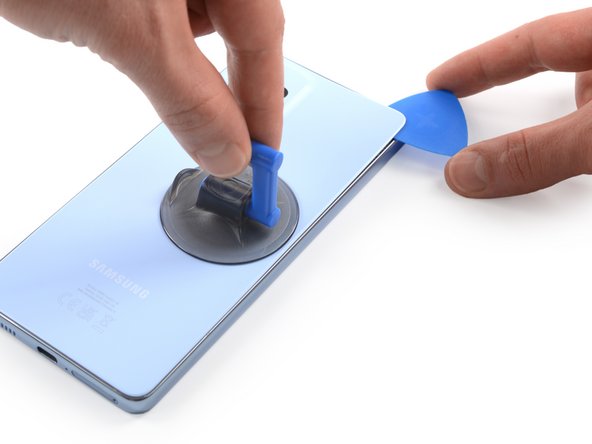
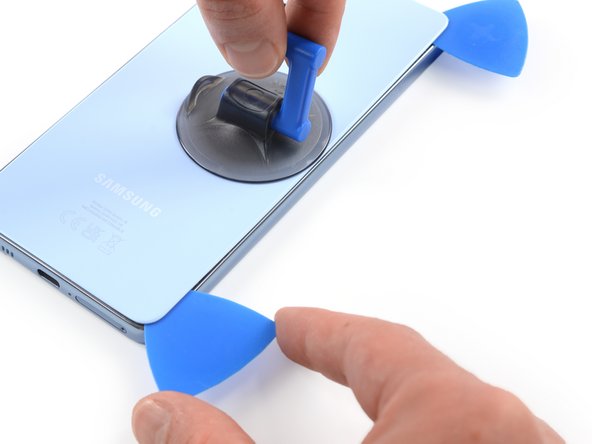
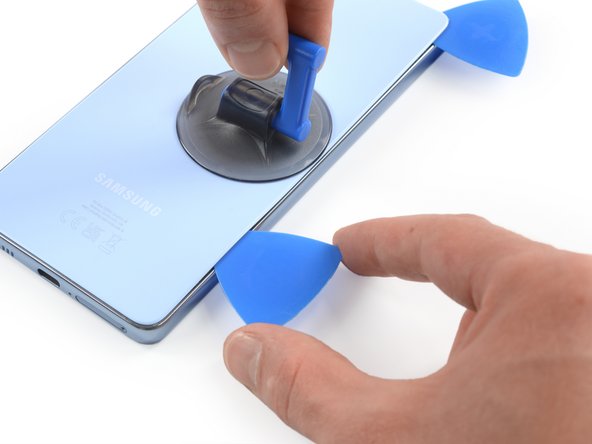
– Get a grip on that back cover by attaching a suction handle to the right edge – the closer to the edge, the better.
– Use the suction handle to carefully lift the back cover and create a small gap between it and the frame. You’re making progress!
– Now it’s time to bring in the opening pick – insert it into the gap you just created and you’ll be one step closer to fixing your device. If you need help, you can always schedule a repair
Tools Used

Step 3

– Gently glide that opening pick to the top right corner and give a little slice to the adhesive—think of it as a warm hug for your device!
– Keep that pick snug in place to stop the adhesive from pulling a fast one and resealing. You’re doing great!
Step 4

– Now it’s time to bring in some backup – insert a second opening pick at the top right edge of your phone to help loosen things up.
– Gently slide the opening pick down to the bottom right corner to slice through the adhesive, making sure not to apply too much pressure.
– Leave those opening picks right where they are – this will prevent the adhesive from resealing and make the rest of the repair process a whole lot easier. If you need help, you can always schedule a repair
Step 5

If the adhesive is proving tricky to slice through, it’s probably cooled off a bit. Give your iOpener a go for one to two minutes to warm things back up.
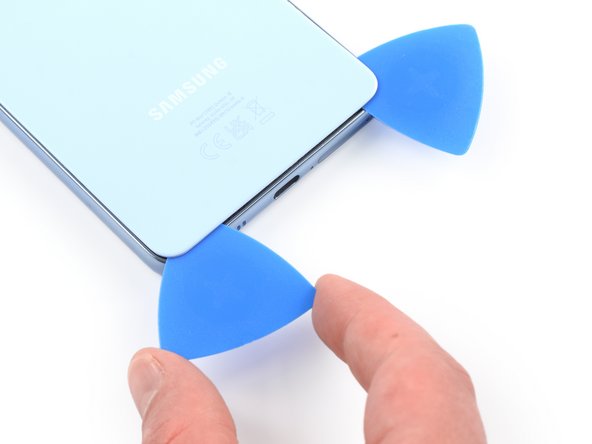
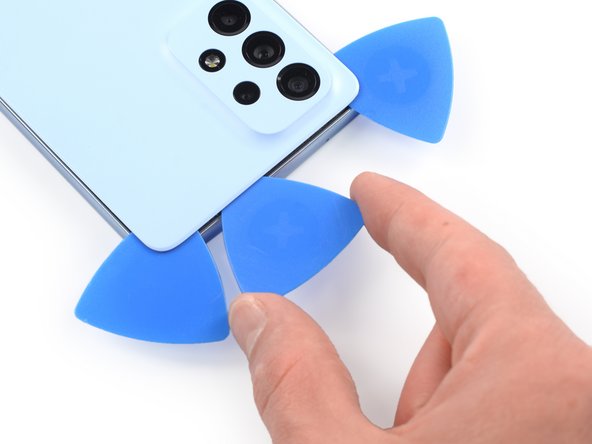
– Let’s get this phone open! Start by gently inserting a third opening pick at the bottom right corner.
– Now, slide that opening pick along the bottom edge of your phone, like you’re cutting a cake, to slice through the adhesive.
– Leave that trusty opening pick in the bottom left corner to stop the adhesive from sticking back together. We don’t want it to get too cozy!
Tools Used
Step 6


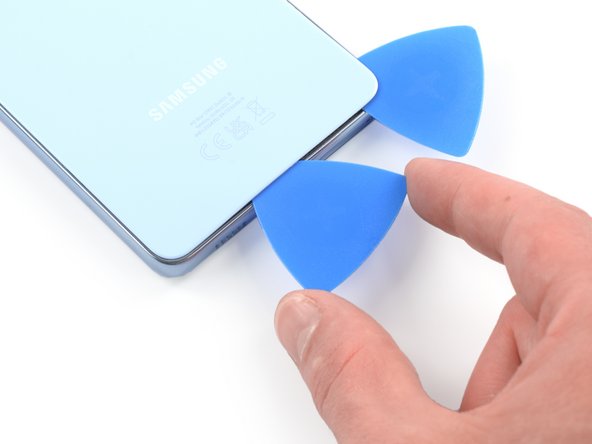
– Now it’s time to add a fourth opening pick – slide it into the bottom left corner of your phone and get ready to make some progress.
– Gently slide the opening pick along the left edge to cut through the adhesive. You’re doing great!
– Leave that opening pick right where it is, up in the top left corner, to keep the adhesive from sealing back up. If you need help, you can always schedule a repair
Step 7

– Pop in a fifth opening pick right at the top left corner to get things rolling.
– Gently glide that opening pick along the top edge of the back cover to cut through the last bits of adhesive holding it on.
Step 8

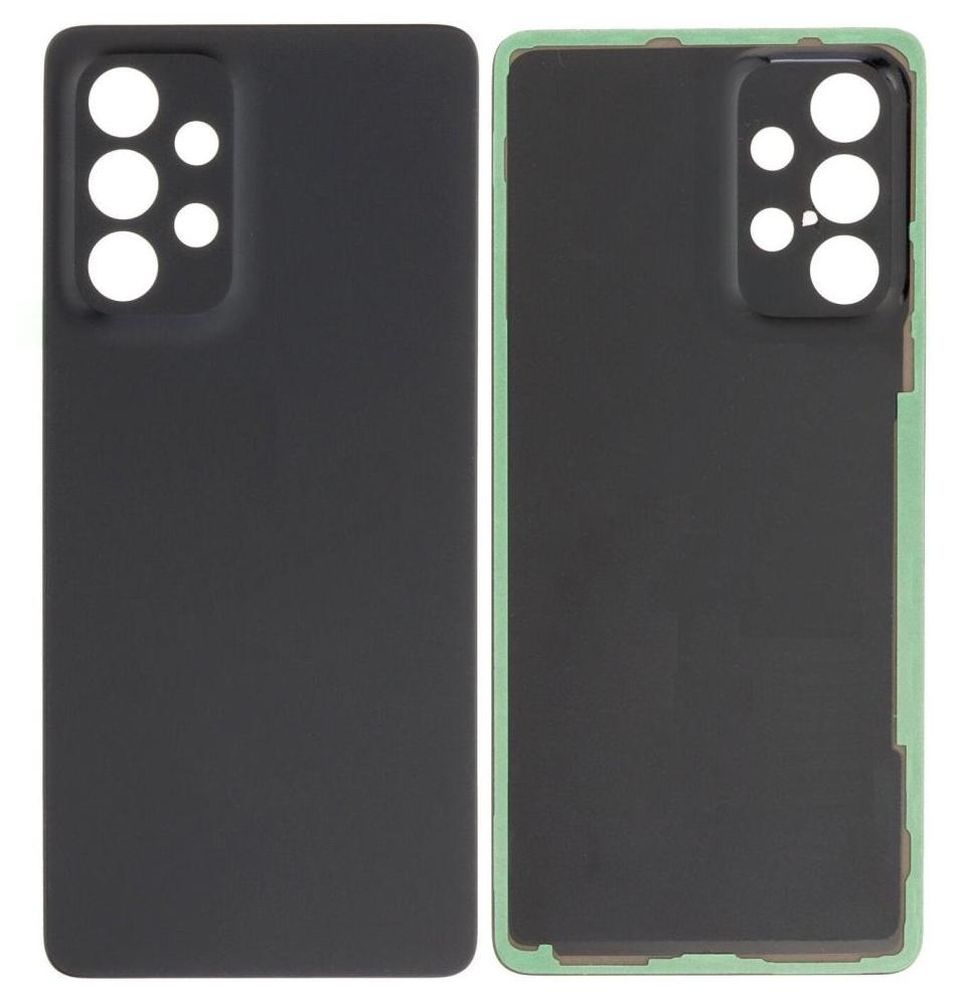
– First things first, let’s get that back cover off! No need to be shy.
– Once you’ve got it off, grab some isopropyl alcohol (>90%) and give those areas a good clean. Then, apply fresh adhesive where it’s needed—your phone will thank you!
– Now, it’s time to secure that shiny new back cover! Use some pre-cut adhesive or double-sided tape. After you’ve placed it on, give your phone a little love by applying steady pressure for a few minutes. A stack of heavy books works wonders for this—just make sure they’re not your favorite novels!
Step 9

– Let’s get started by removing the eight 3.9 mm-long screws that hold the motherboard cover in place – just grab your trusty Phillips screwdriver and get to work. If you need help, you can always schedule a repair
Step 10

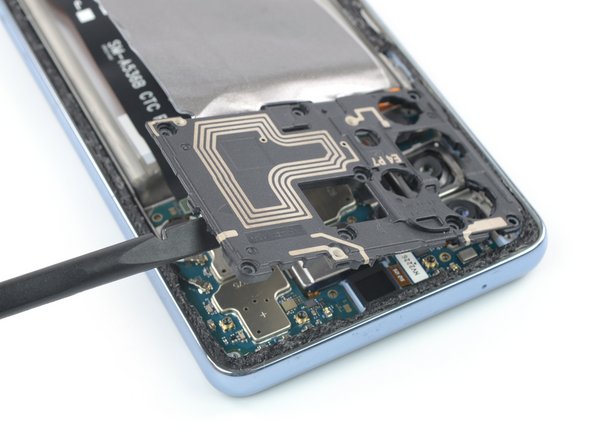

– Slide the flat end of your trusty spudger into the little space between the frame and the motherboard cover on the right side. It’s like a gentle nudge to get things moving!
– Now, give that motherboard cover a little lift with your spudger. You’ve got this!
Tools Used


Step 12
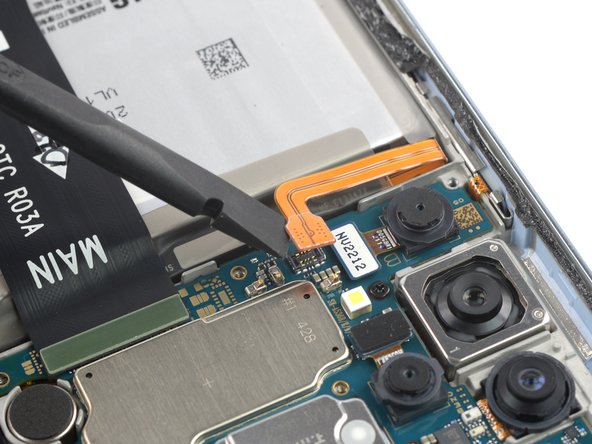

– Now, let’s disconnect that battery! Grab your trusty spudger (you know, the one you got from schedule a repair) and gently pry up the battery connector. It’s just like popping the lid off a soda can, but a bit more techy. Remember, you’re just lifting it straight up, no need to twist or yank.
Tools Used
Step 13

– Grab your trusty Phillips screwdriver and get ready to tackle those seven 3.9 mm-long screws holding the loudspeaker assembly in place. You’ve got this!
Step 14

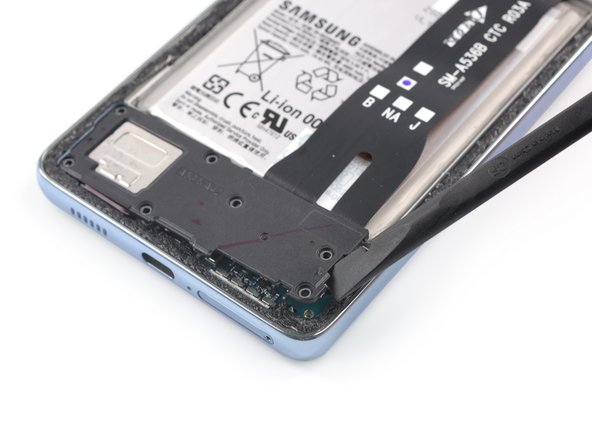

– Time to get started – insert the flat end of a spudger into the gap between the right edge of the loudspeaker assembly and the midframe. Take your time and make sure it’s in the right spot.
– Now, use your trusty spudger to carefully pry up the loudspeaker assembly. Don’t worry if it takes a little bit of effort – you’ve got this!
– The final step: remove the loudspeaker assembly. If you need help or feel unsure, you can always schedule a repair with the experts at Salvation Repair.
Tools Used
Step 15

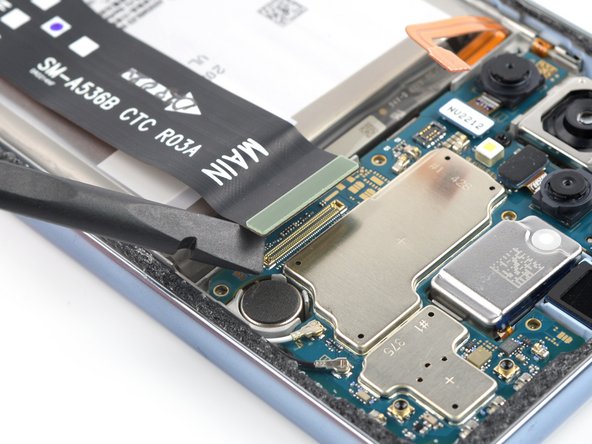
– Grab your trusty spudger and gently pry the interconnect cable off the motherboard by lifting the connector straight up from its socket. You’ve got this!
Tools Used
Step 16

– Grab your trusty spudger and gently pry up the interconnect cable from the daughterboard by lifting those two connectors straight out of their sockets. You’re doing great!
Tools Used
Step 17

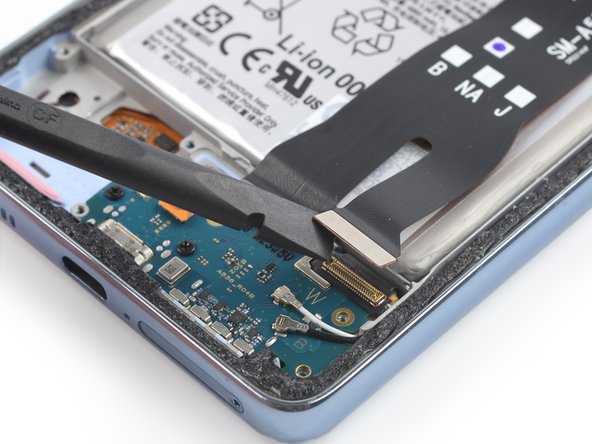
– Pop off the interconnect cable.
Step 18

Avoid putting heat directly on the battery – it could turn into a real safety pickle!
You can use a hair dryer, heat gun, or hot plate to warm things up, but remember to keep an eye on the temperature so you don’t accidentally turn your device into a crispy critter!
Step 19


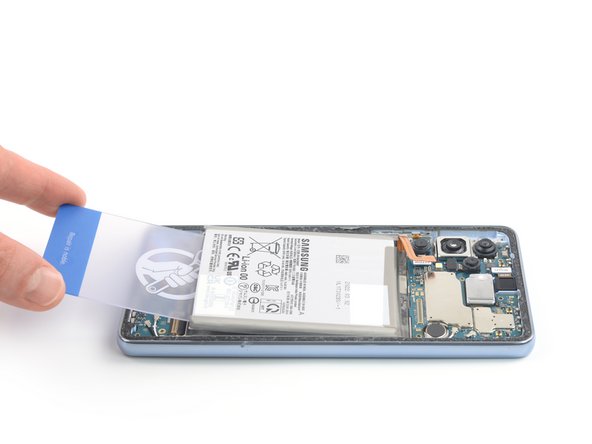
Watch out for the battery! Don’t bend or puncture it, or you might release some nasty chemicals or even spark a fire. If you need help, you can always schedule a repair
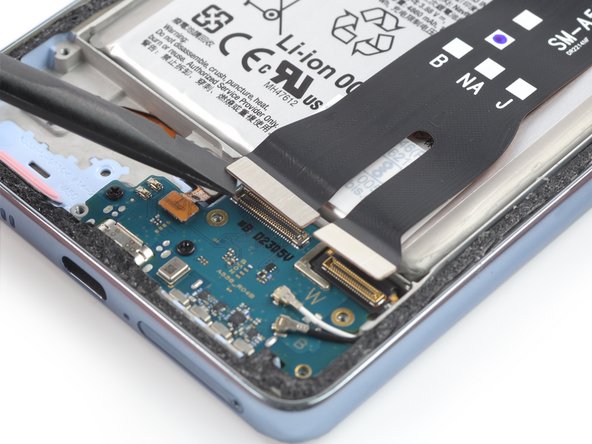
– Time to get this battery out – start by sliding a plastic card into the gap between the bottom edge of the battery and the frame. It’s like a little puzzle, and you’re the master solver.
– Now, use that trusty plastic card to gently slice through the adhesive underneath the battery. Be patient and work your way around – it’s almost like a mini game of Operation.
– If you’re using isopropyl alcohol, give it a couple of minutes to really penetrate the adhesive. This will make the removal process way smoother. And remember, if you need help, you can always schedule a repair with the pros at Salvation Repair.
Tools Used
Step 20

– Pop out that battery.
– Stick in the new battery with some pre-cut adhesive or double-sided tape. To make sure it’s in the right spot, put the new adhesive in the same places the old adhesive was, not directly on the battery. Press down firmly to secure it.
– While putting things back together, temporarily plug in the battery to the motherboard to help with alignment. Once it’s seated correctly, unplug it.