DIY Samsung Galaxy A71 Battery Replacement Guide: Step-by-Step
waDuration: 60 min.
Steps: 17 Steps
Ready to embark on the battery replacement journey for your Galaxy A71? In this fun and informative photo guide, we’ll walk you through the process step by step! Replacing the battery on the A71 can be a bit of a challenge since both the back cover and the battery are really stuck together. So, grab a snack, settle in, and make sure you set aside enough time for this project. Good luck, and remember to enjoy the process! If you have issues you can always schedule a repair.
Step 1
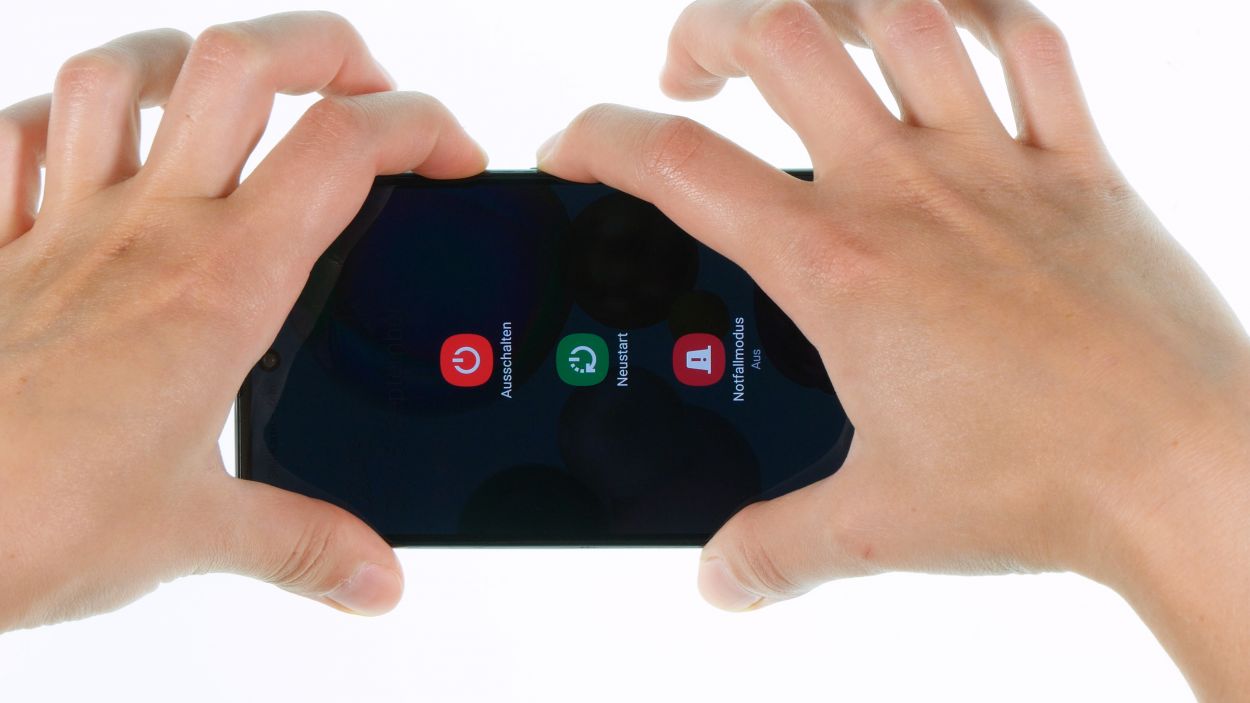
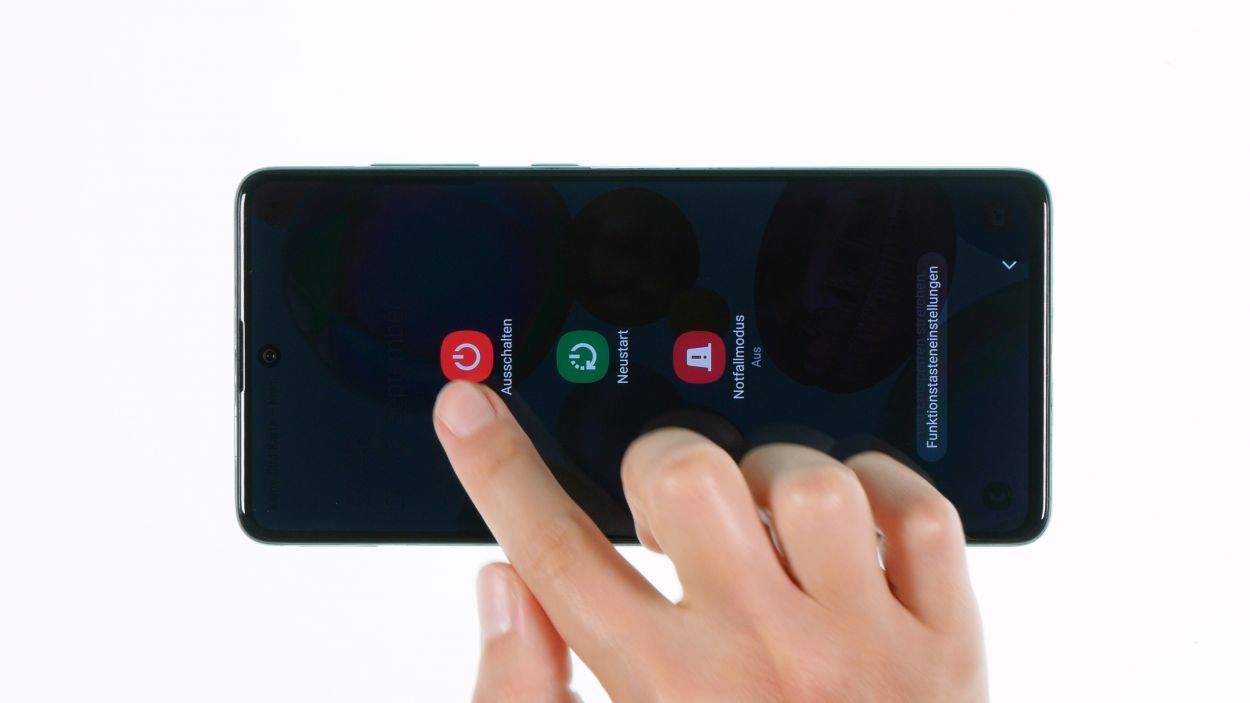
– First, give the side and volume down buttons a good press and hold together for a few seconds – like a team high-five!
– Next, tap on ‘Switch off’ in the menu that pops up – it’s like telling your phone to take a little nap.
– In just a few moments, your phone will be completely powered down, ready for the next exciting step!
Step 2

Here’s a handy tip: When you’re heating the edge of the back cover, aim for a temperature that’s warm enough to touch without turning your fingers into crispy fries.
– To kick things off, lay your phone down on a nice, soft surface—think cozy, not rough!
– Now, gently glide that hot air device around the edge of the back cover like you’re painting a masterpiece.
Tools Used
- heat gun to heat parts that are glued on so they’re easier to remove.
In most cases, you can also use a hairdryer.” href=”https://www.amazon.com/s?k=Heat+gun+Repair&linkCode=ll2&tag=salvationrepa-20&linkId=1c0aa533b7b8148cb48741a4635ea648&language=en_US&ref_=as_li_ss_tl” target=”_blank” rel=”noopener”>Heat gun
Step 3
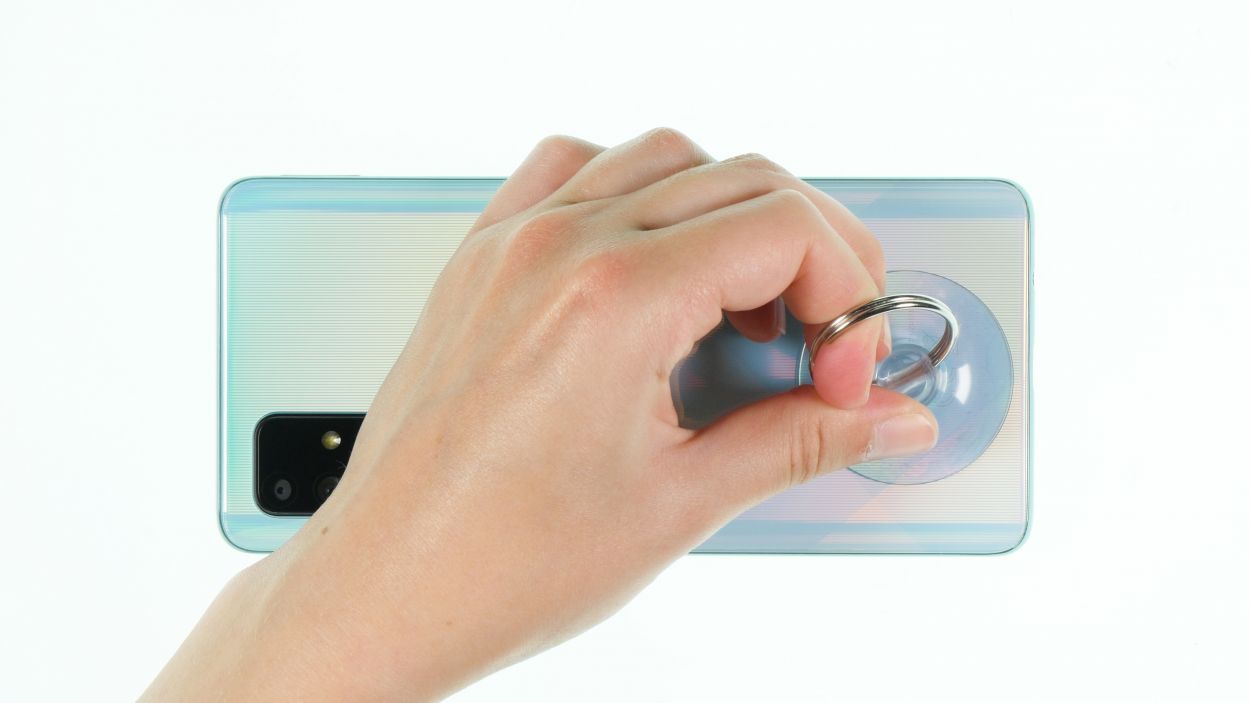

– Grab a suction cup and place it at the lower section of the back cover, then give it a gentle pull upwards to create a snug little gap between the back cover and the middle frame.
– While you’re at it, slide a flat, sturdy tool into that gap to help widen it. The iFlex is a great choice for this task!
Opening up your Galaxy A71 is like stepping into a secret club—once you do, the manufacturer’s warranty will be left out in the cold!
The iFlex is crafted from ultra-thin, sturdy metal and has some sharp edges—yikes! To keep your device’s frame looking fabulous, we suggest using the iFlex only at the start of your adventure. Once you’ve made a little progress, switch to a plastic tool for the rest of the journey. Happy repairing!
Tools Used
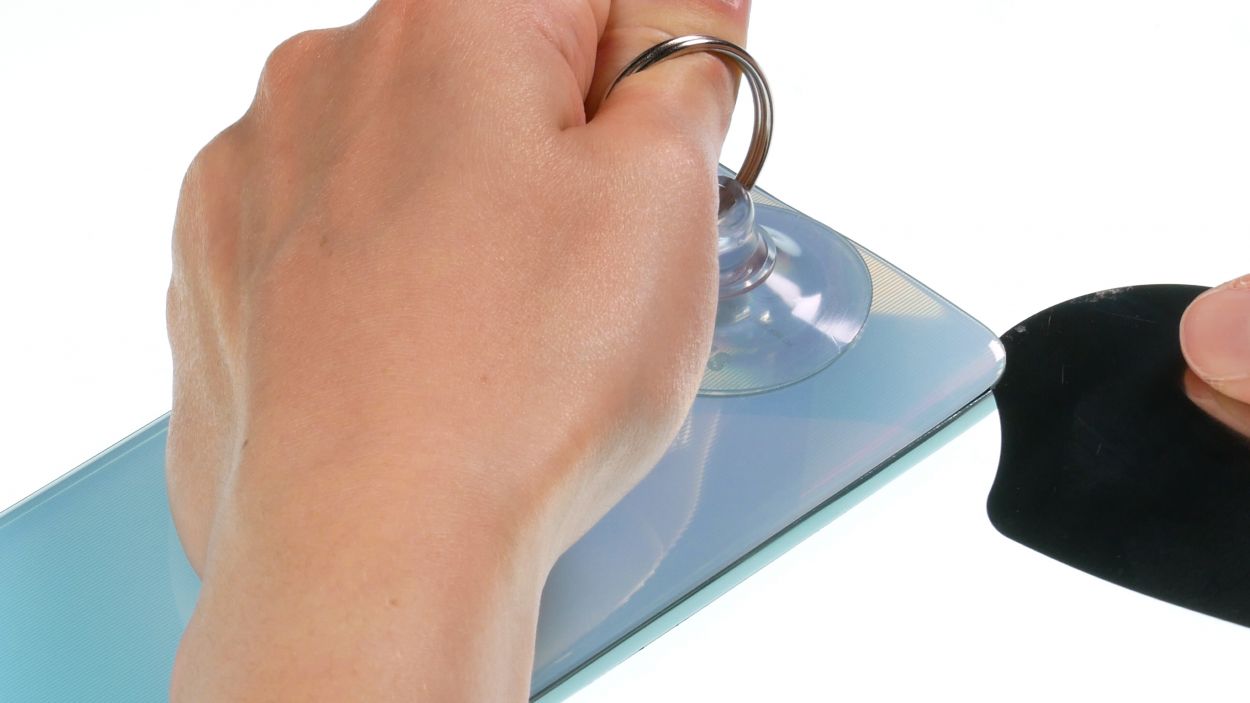
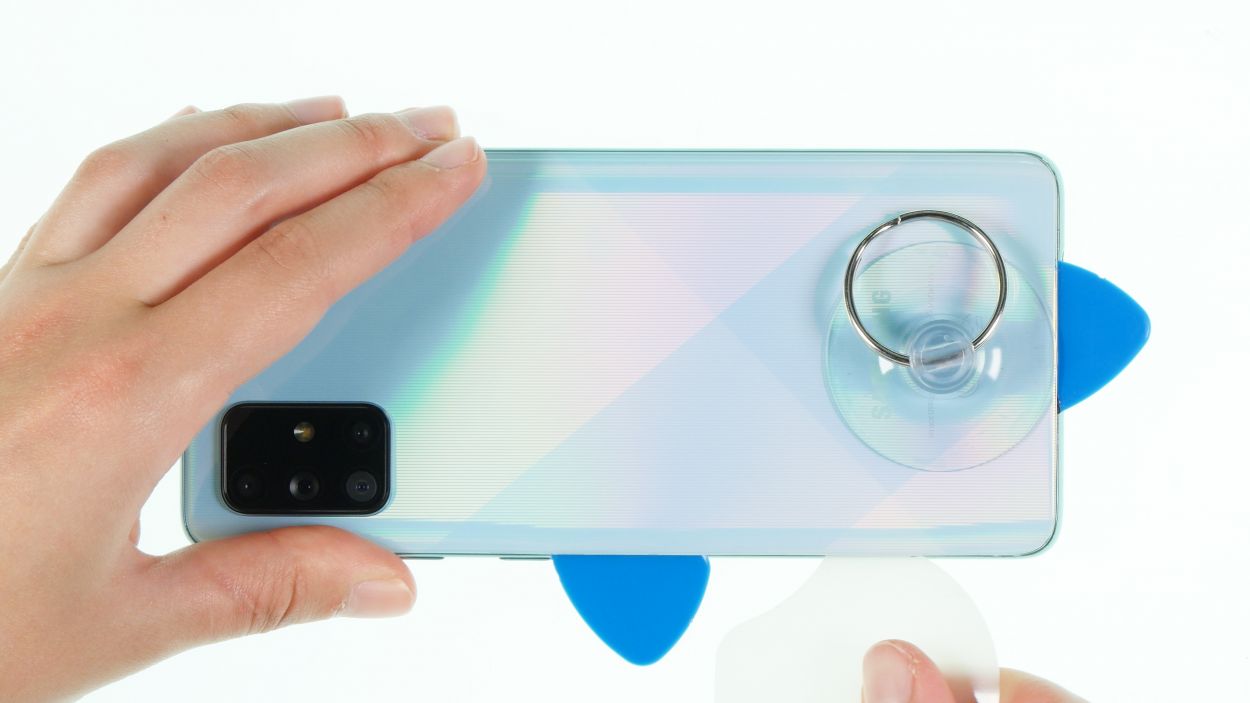
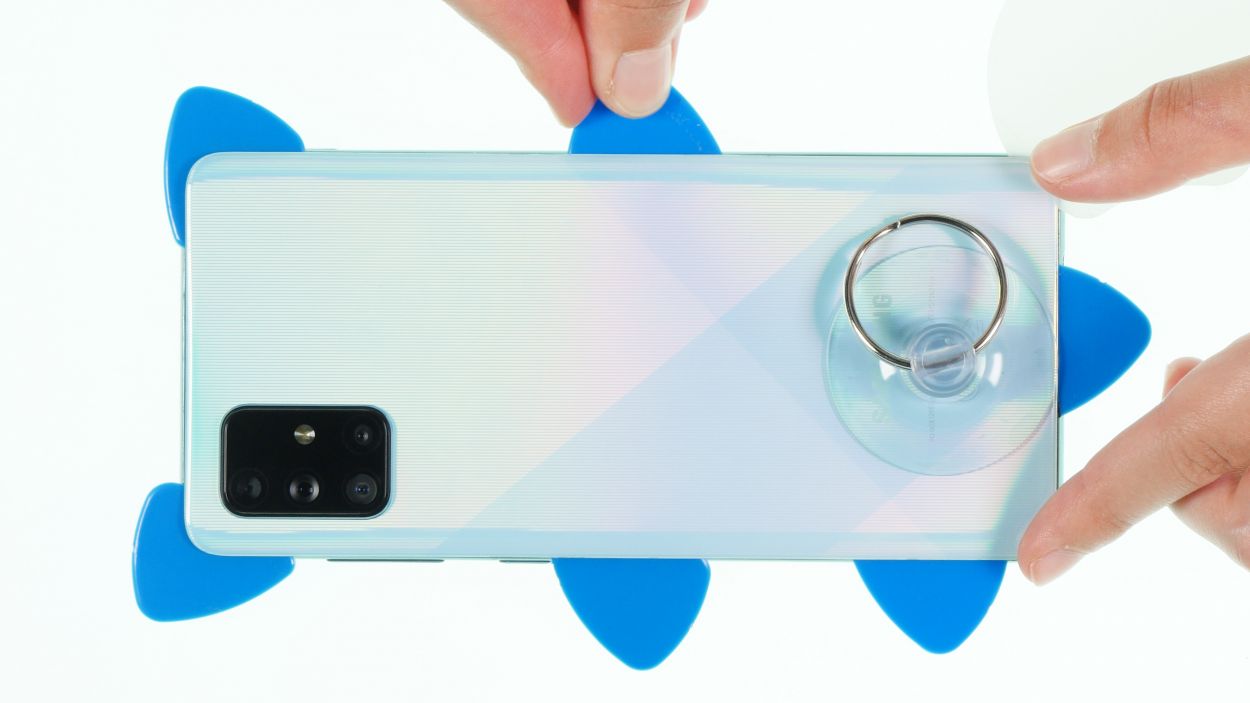
Step 4

Watch out! When you’re using your tool, keep it from diving too deep into the device—let’s not play a game of ‘who can damage the components!’
The iPlastix is crafted from a lightweight and bendy plastic that’s super handy! Unlike the iFlex, it’s designed to keep your fingers safe with no sharp edges in sight.
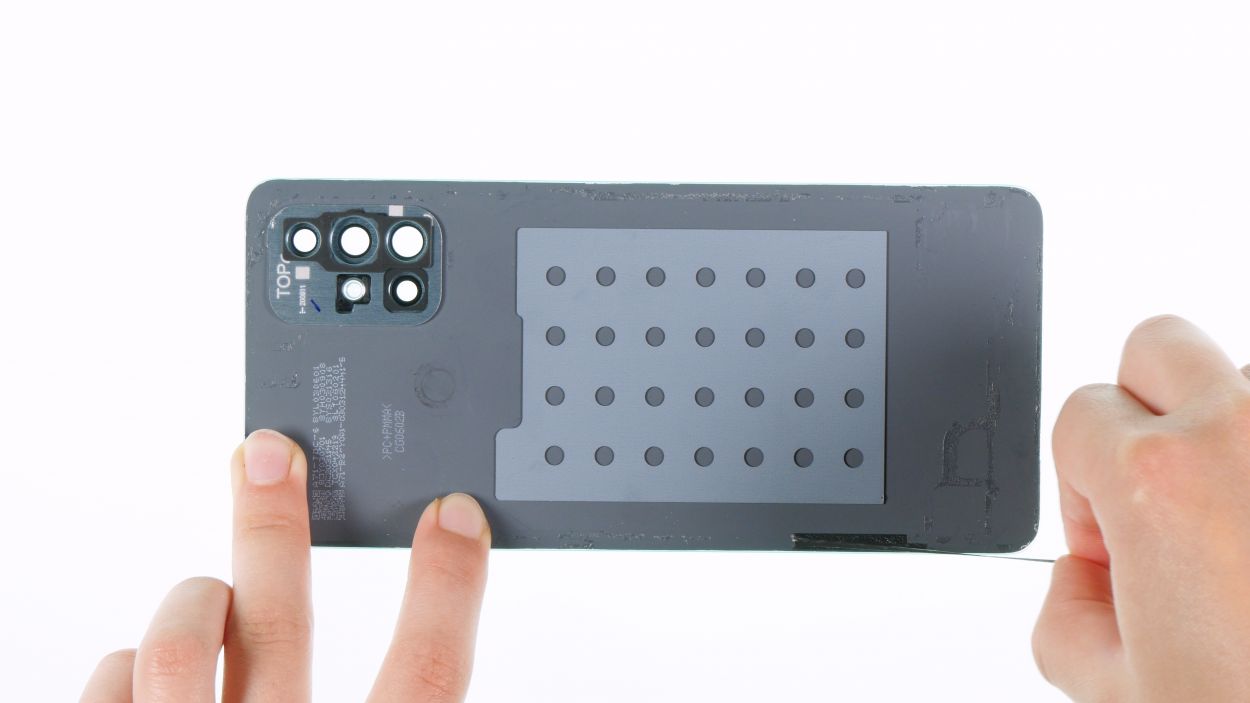
– Gently pry off the back cover from the middle frame, working your way around the edge with a trusty plastic tool. The iPlastix is perfect for this job!
Tools Used
- heat gun to heat parts that are glued on so they’re easier to remove.
In most cases, you can also use a hairdryer.” href=”https://www.amazon.com/s?k=Heat+gun+Repair&linkCode=ll2&tag=salvationrepa-20&linkId=1c0aa533b7b8148cb48741a4635ea648&language=en_US&ref_=as_li_ss_tl” target=”_blank” rel=”noopener”>Heat gun - Flat Picks
- battery? Then the iPlastix with its large blade will help you. The practical assistant is made of flexible, especially sturdy plastic and lies comfortably in the hand. Thanks to its design, you can even get into smaller gaps, for example to lift the screen or to prevent it from sticking together again.” href=”https://www.amazon.com/s?k=iPlastix+Opening+Tool+Repair&linkCode=ll2&tag=salvationrepa-20&linkId=1c0aa533b7b8148cb48741a4635ea648&language=en_US&ref_=as_li_ss_tl” target=”_blank” rel=”noopener”>iPlastix Opening Tool
Step 5

14 × 3.4 mm Phillips
When it comes to keeping those pesky screws and tiny parts safe, a screw storage box is your best buddy! We totally recommend our magnetic pad for this task. It’s the perfect spot to lay out all the little bits just like they were in your phone, making reassembly a breeze!
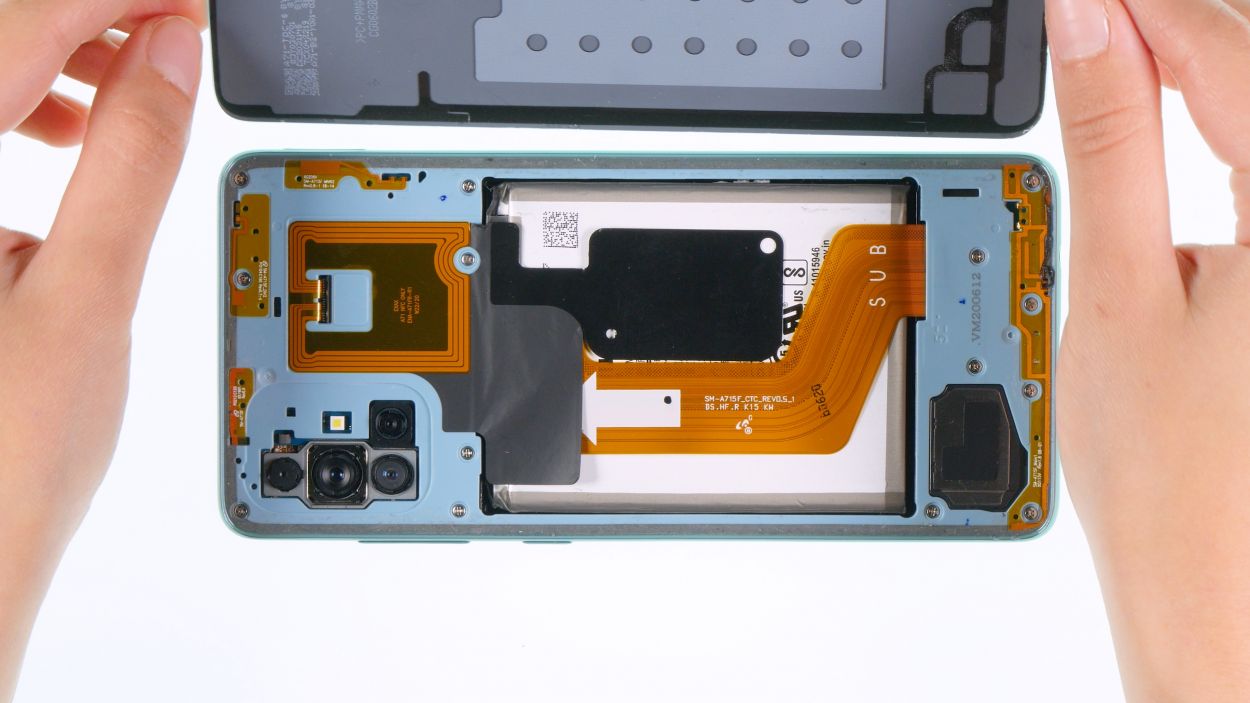
– To start off, grab your trusty Phillips screwdriver and loosen all the screws that hold the middle frame to the display unit. It’s like giving your phone a little massage before the big reveal!
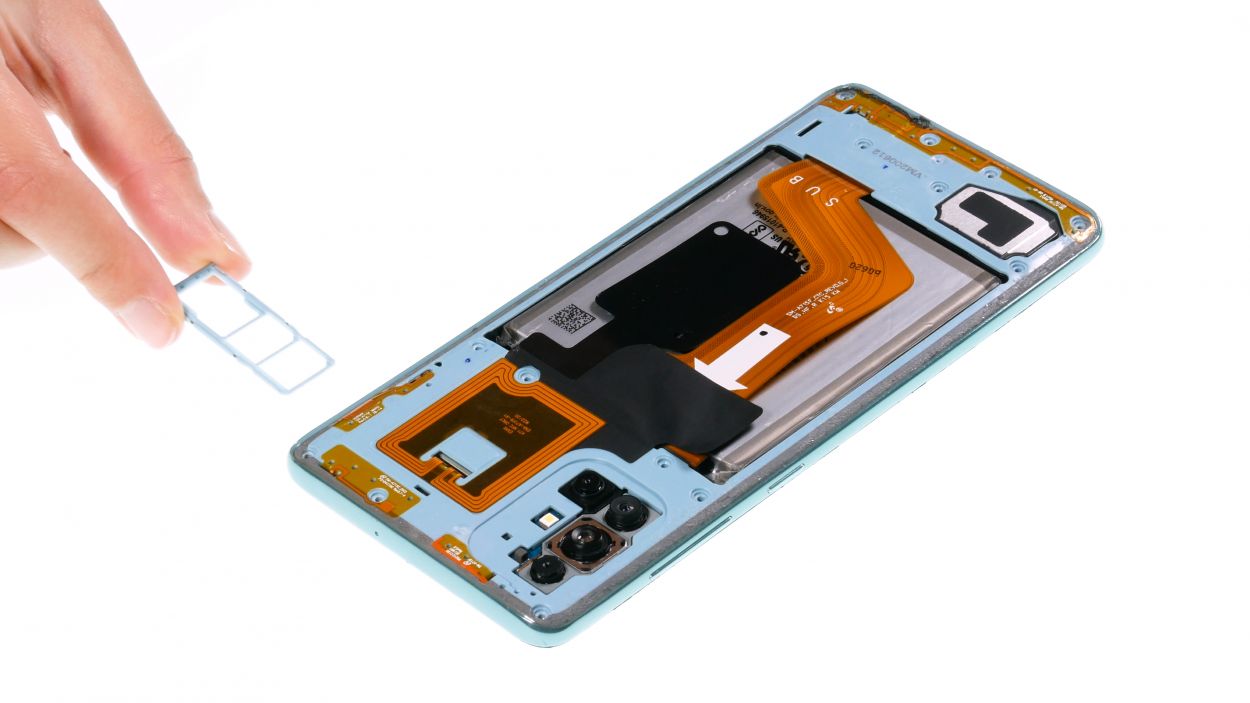
Step 6

Be gentle around the keys and SIM slot—these areas can be a bit wobbly, and we definitely don’t want to send the middle frame on a wild ride!
The hard plastic pick is super easy to hold onto thanks to its clever shape! Made from sturdy plastic with narrow edges, it slides right in without a fuss. Plus, it’s designed to keep you from going too deep into your phone—let’s avoid any accidental damage while we’re at it!
Tools Used
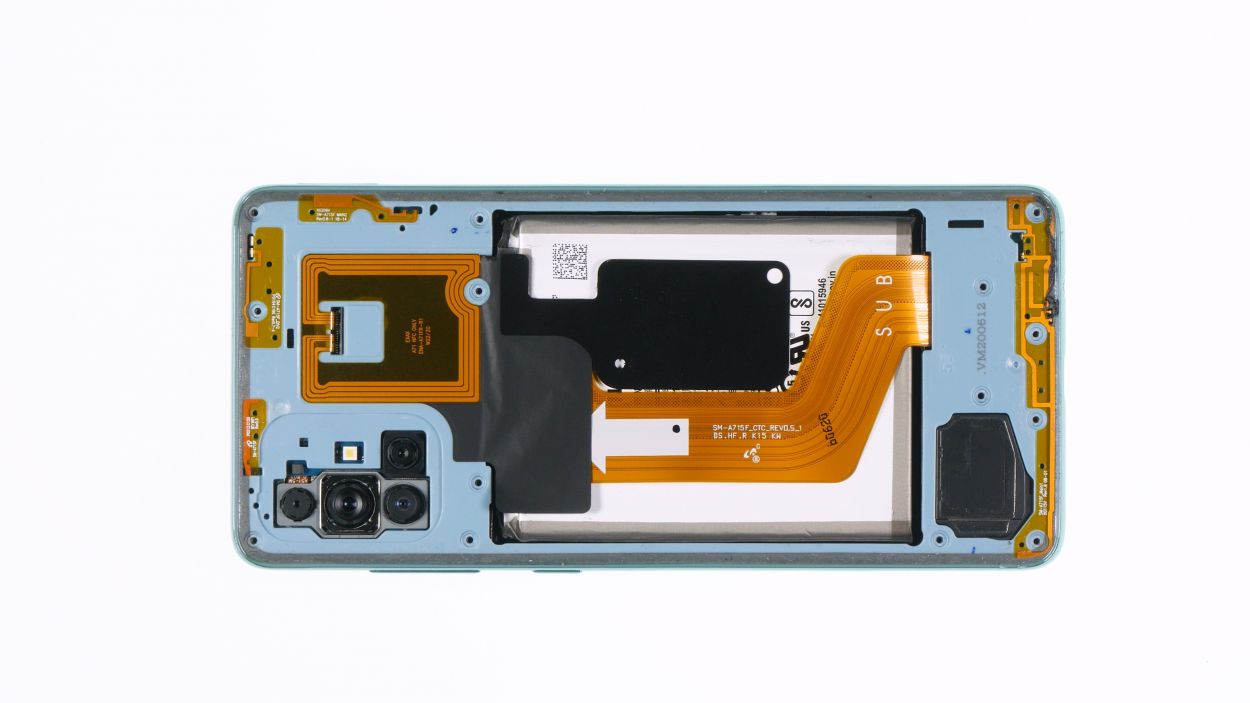
Step 7
When you’re disconnecting the battery connector, kick things off from the side without any tiny components hanging out. This little move will help keep everything safe and sound!
– Grab a sturdy plastic lever tool and gently slide it under the battery connector to lift it off with care. A handy plastic spudger works wonders for this task!
Tools Used
Step 8

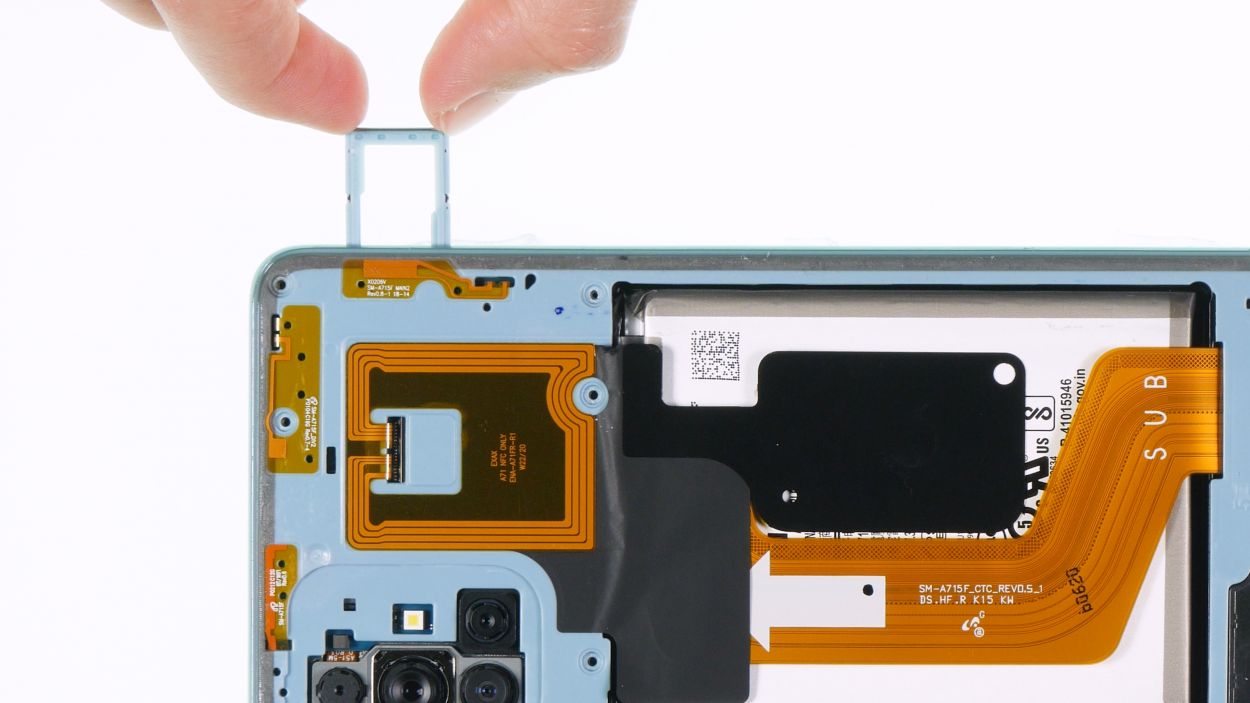
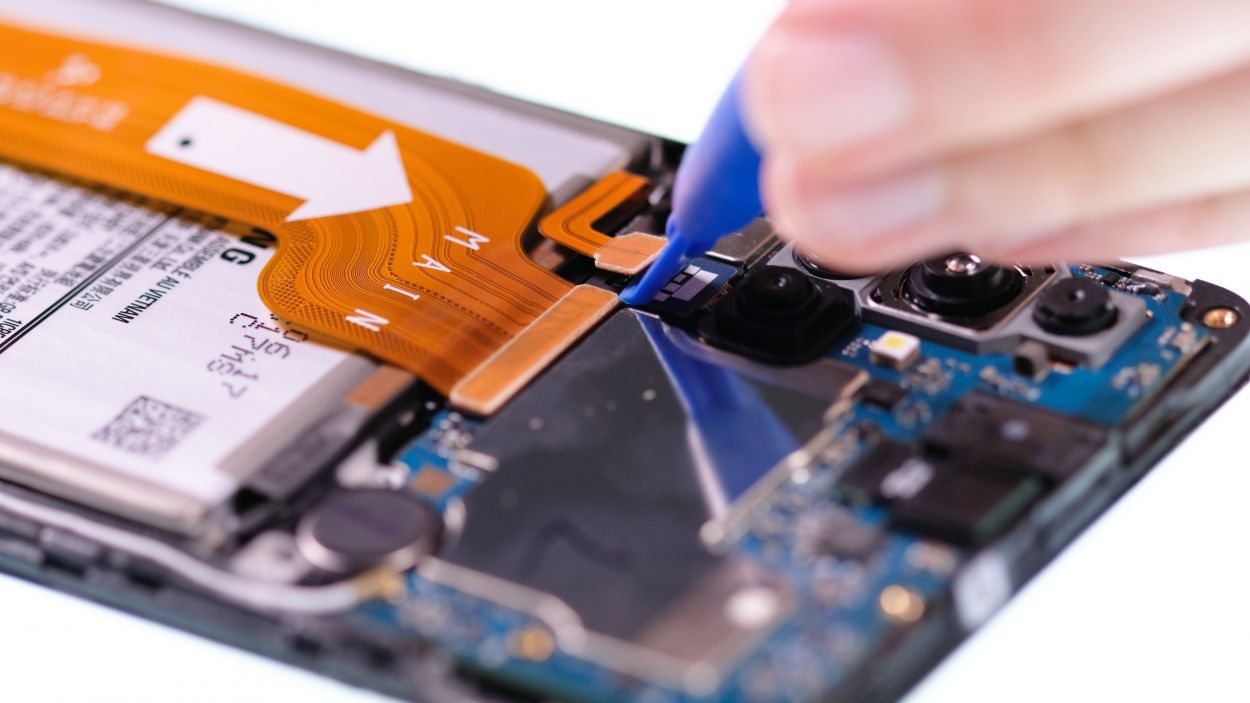
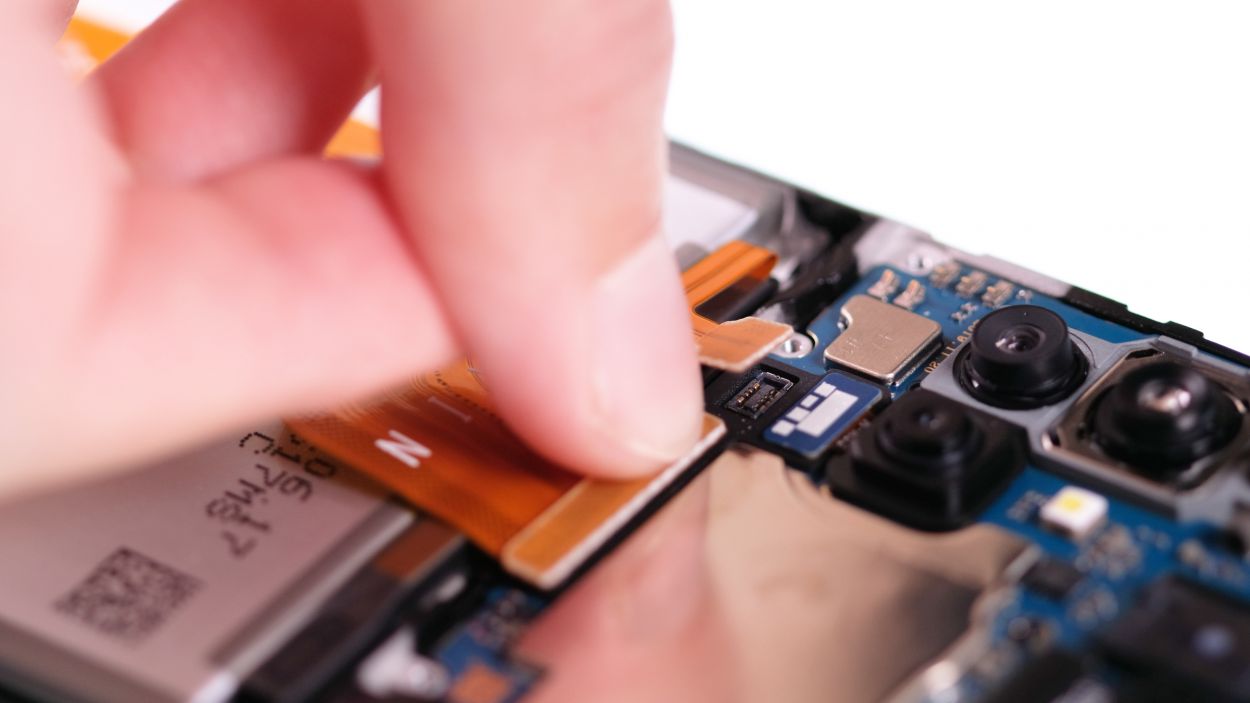
When you’re unhooking those flex cable connectors, kick things off from the side that’s free of any tiny components on the board. It’s a smart move to keep everything safe and sound!
– Use that nifty plastic spudger to slide under each flex cable connector, one at a time, and gently lift them off like you’re peeling a sticker.
– Once you’ve got them all free, set the detached flex cable aside for safekeeping.
Tools Used
Step 9
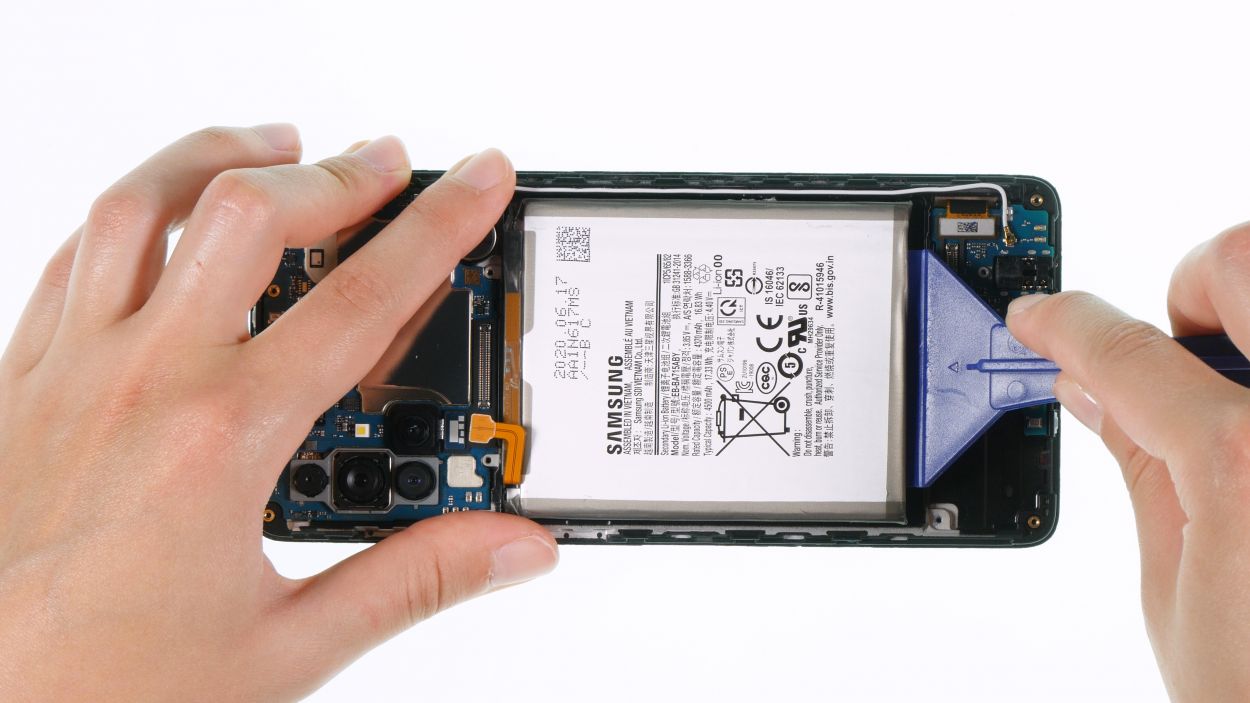
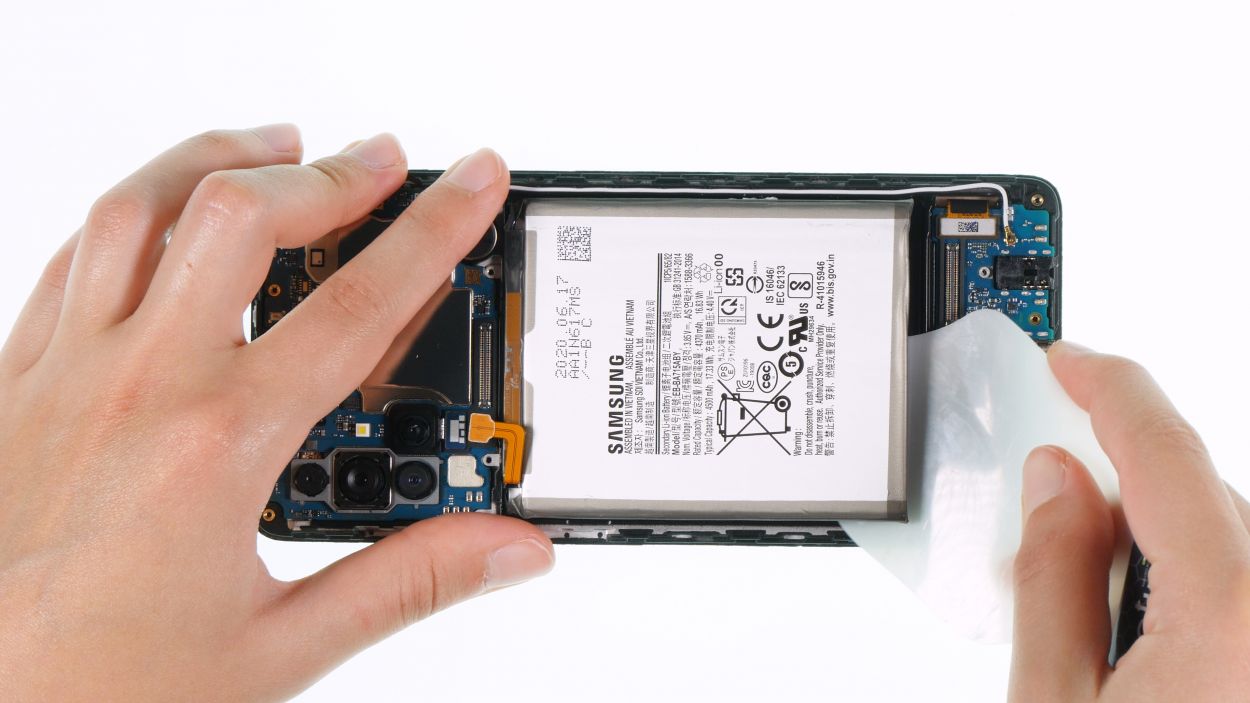
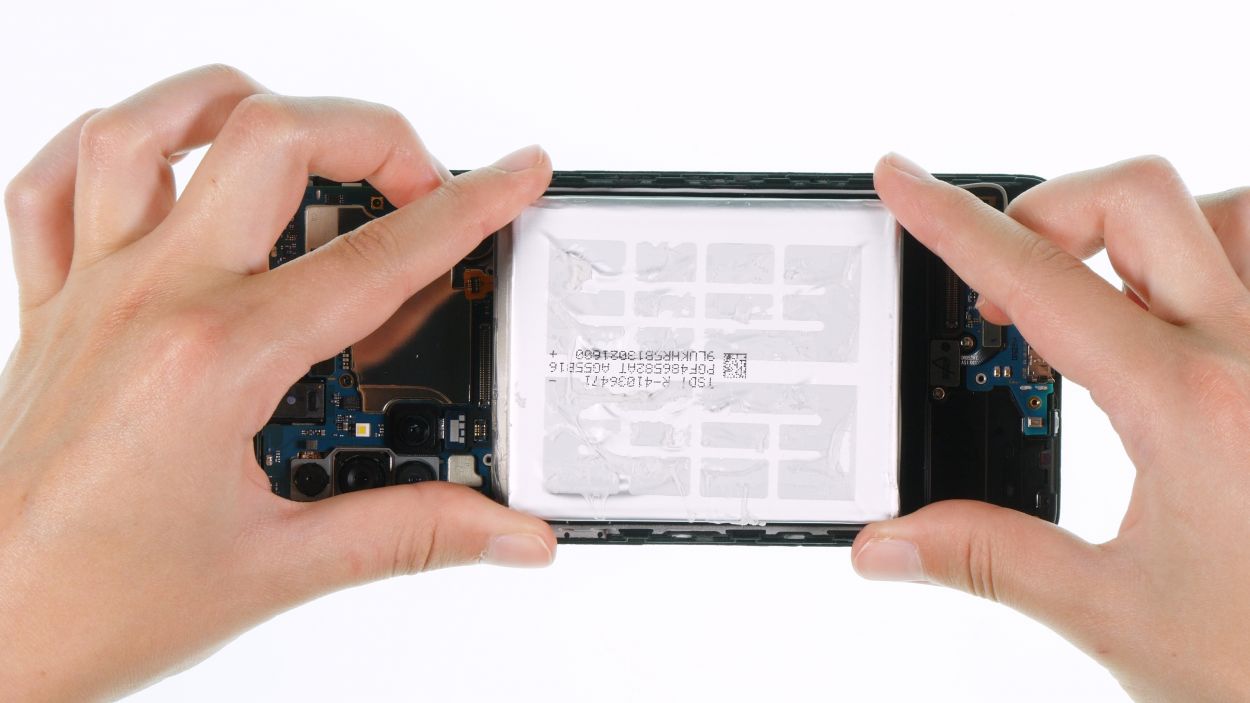
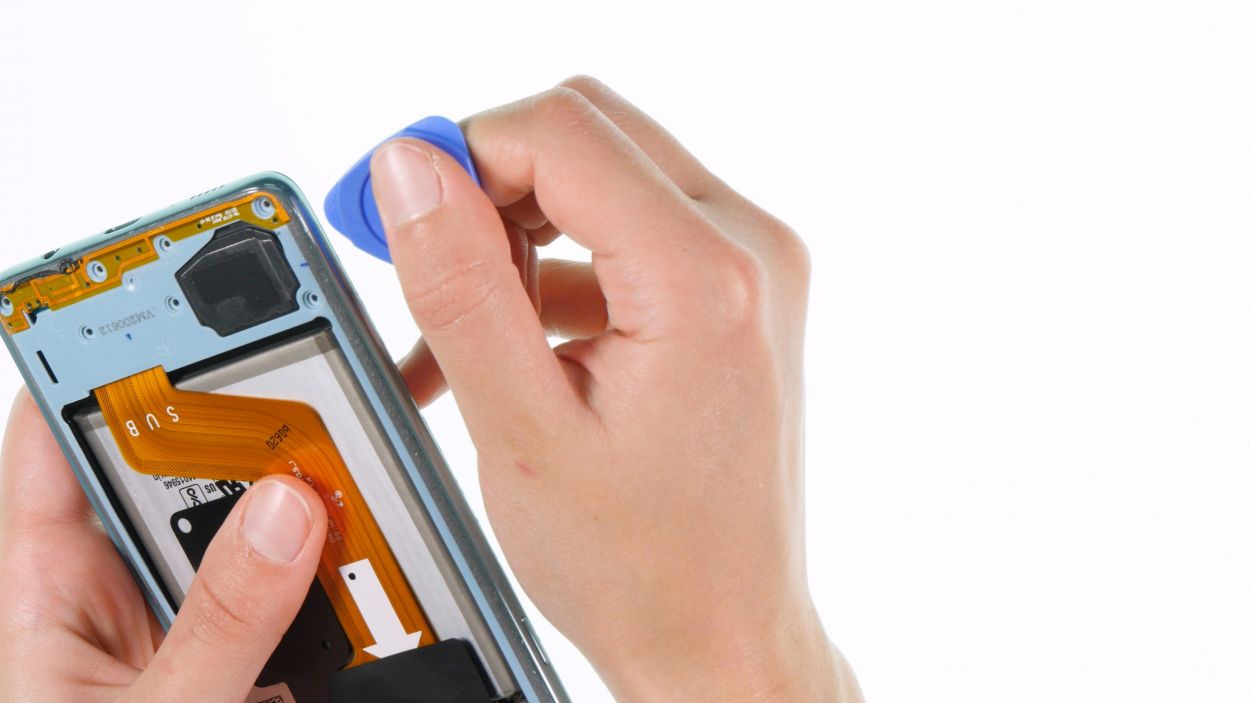
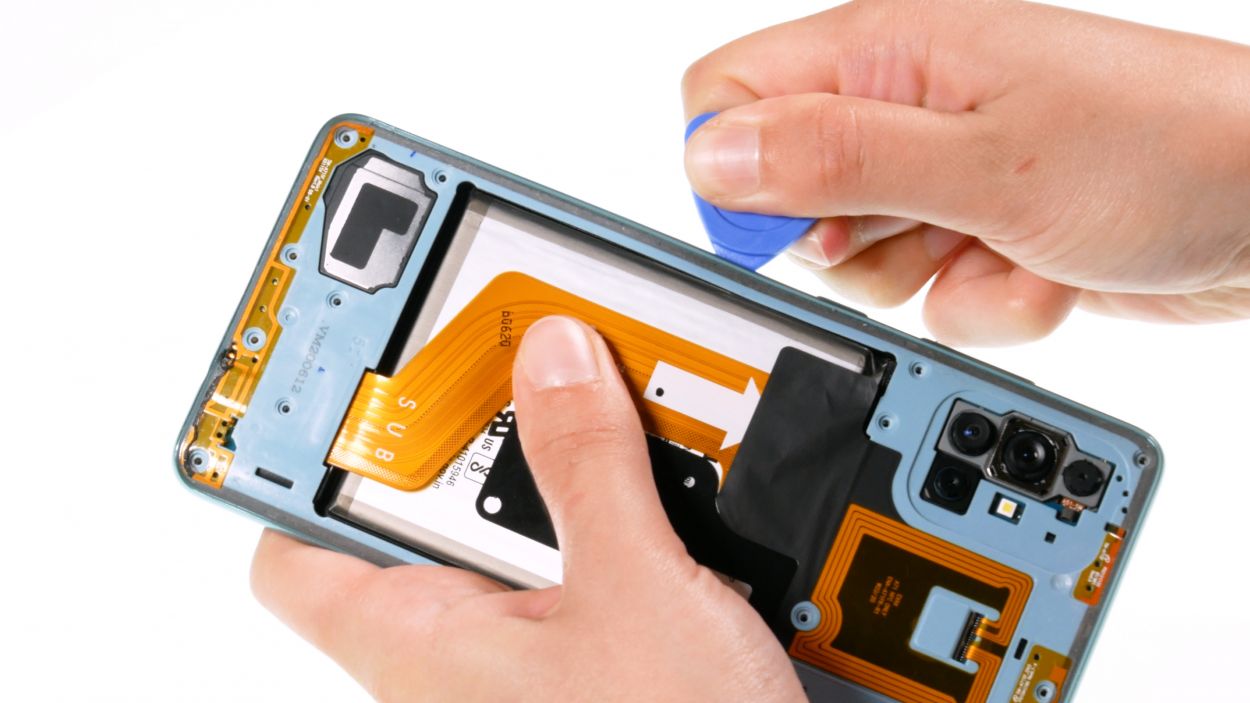
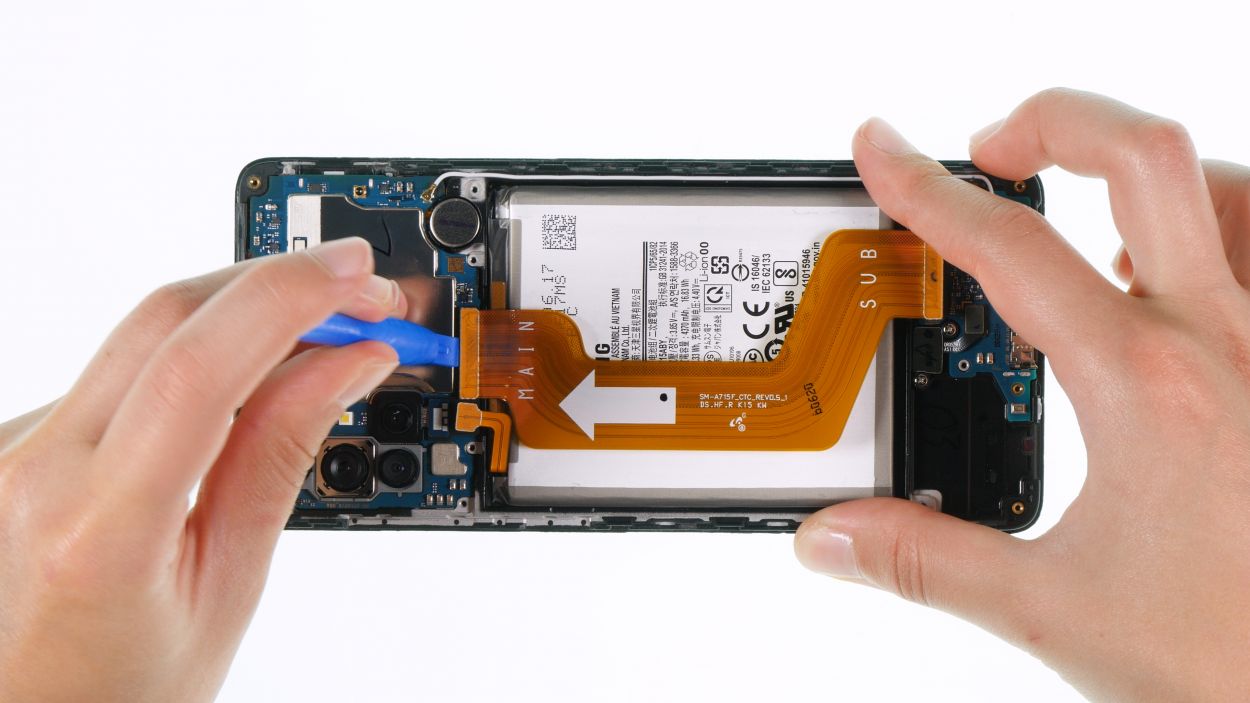
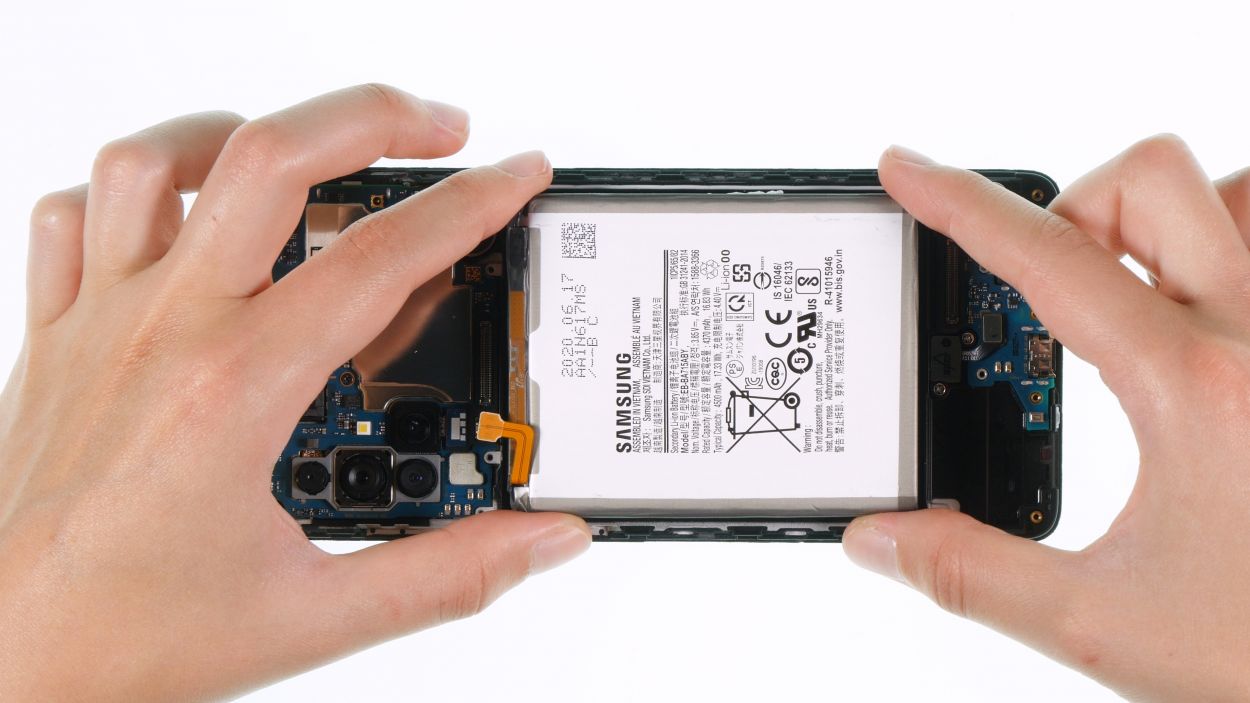
– Flip your phone over so the screen is facing up, and gently blow some warm air over the battery area like you’re giving it a cozy hug.
– Now, turn your phone back over and grab a sturdy plastic tool to slide it under one edge of the battery. Give it a gentle lift—our favorite tool for this is the battery spudger!
– If the battery is feeling a bit loose, take a flat, flexible tool like the iPlastix and slide it under the battery to fully detach it from the display unit. You’re almost there!
Tools Used
- battery? Then the iPlastix with its large blade will help you. The practical assistant is made of flexible, especially sturdy plastic and lies comfortably in the hand. Thanks to its design, you can even get into smaller gaps, for example to lift the screen or to prevent it from sticking together again.” href=”https://www.amazon.com/s?k=iPlastix+Opening+Tool+Repair&linkCode=ll2&tag=salvationrepa-20&linkId=1c0aa533b7b8148cb48741a4635ea648&language=en_US&ref_=as_li_ss_tl” target=”_blank” rel=”noopener”>iPlastix Opening Tool
- Battery Spudger

Step 11
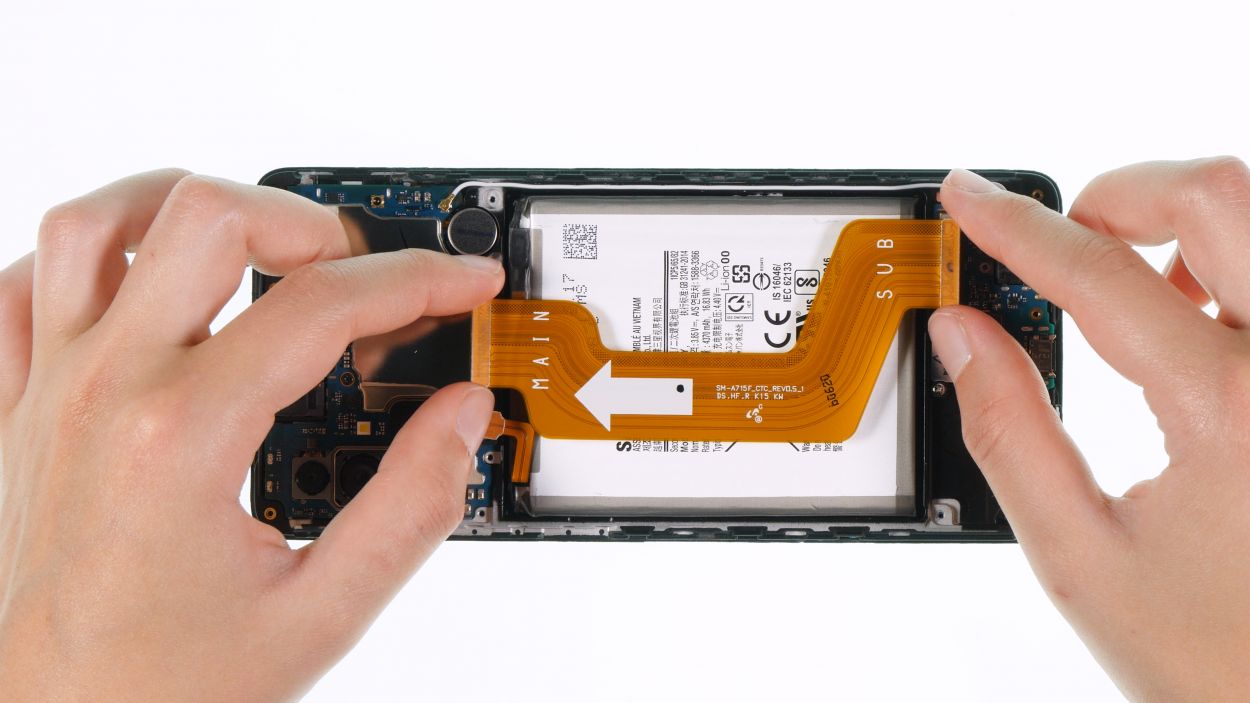
Take it easy when connecting those little plugs! Forcing them can lead to a major meltdown of the whole component. Let’s keep everything working smoothly!
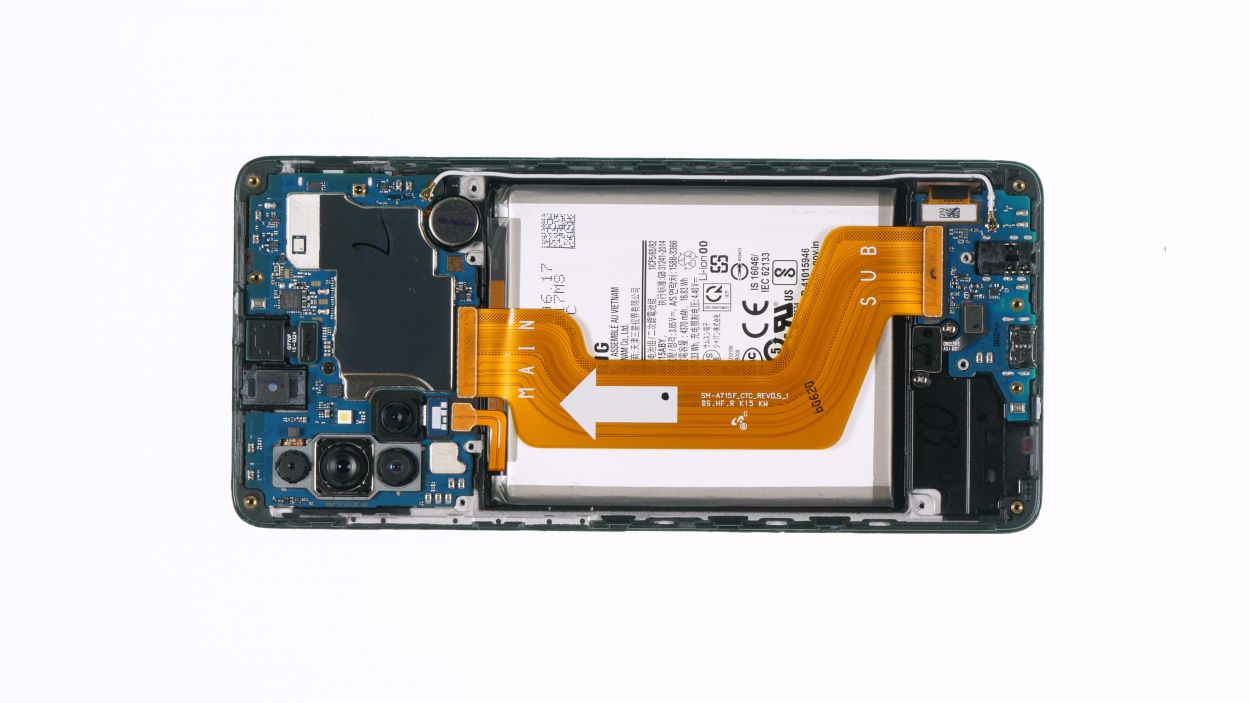
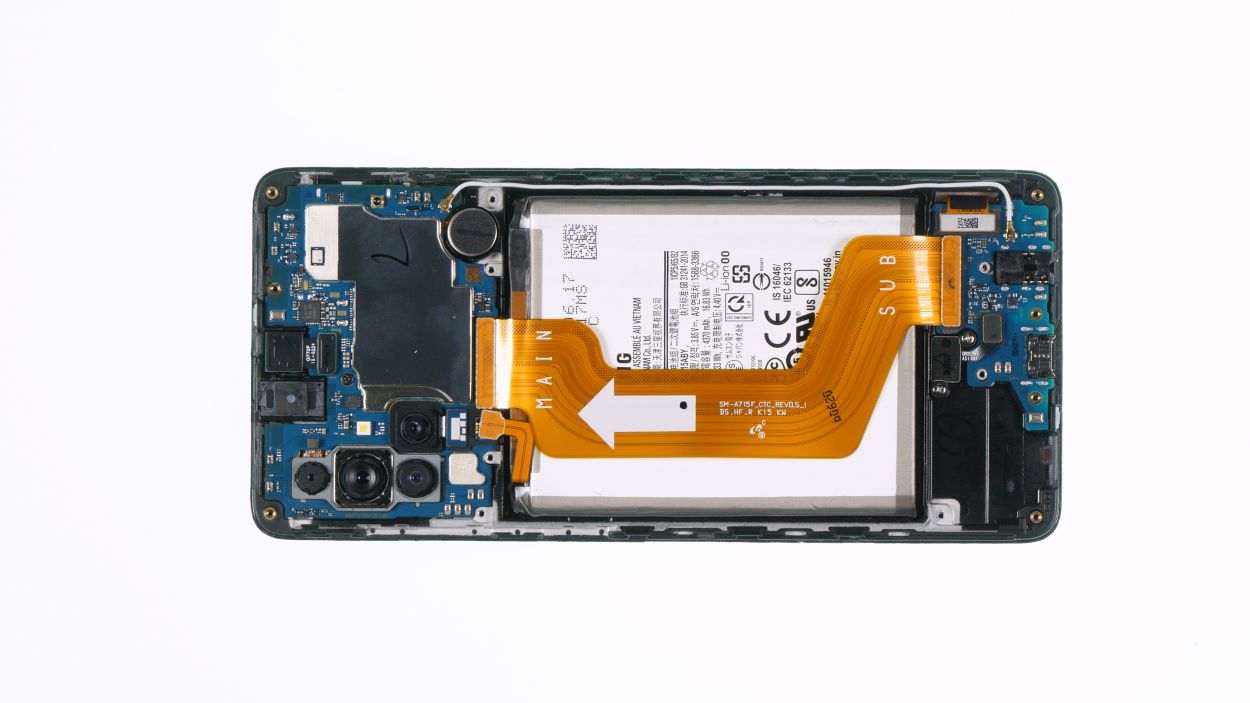
– Place the flex cable right above the battery, making sure to use those handy labels on the cable to get everything lined up just right.
Step 12
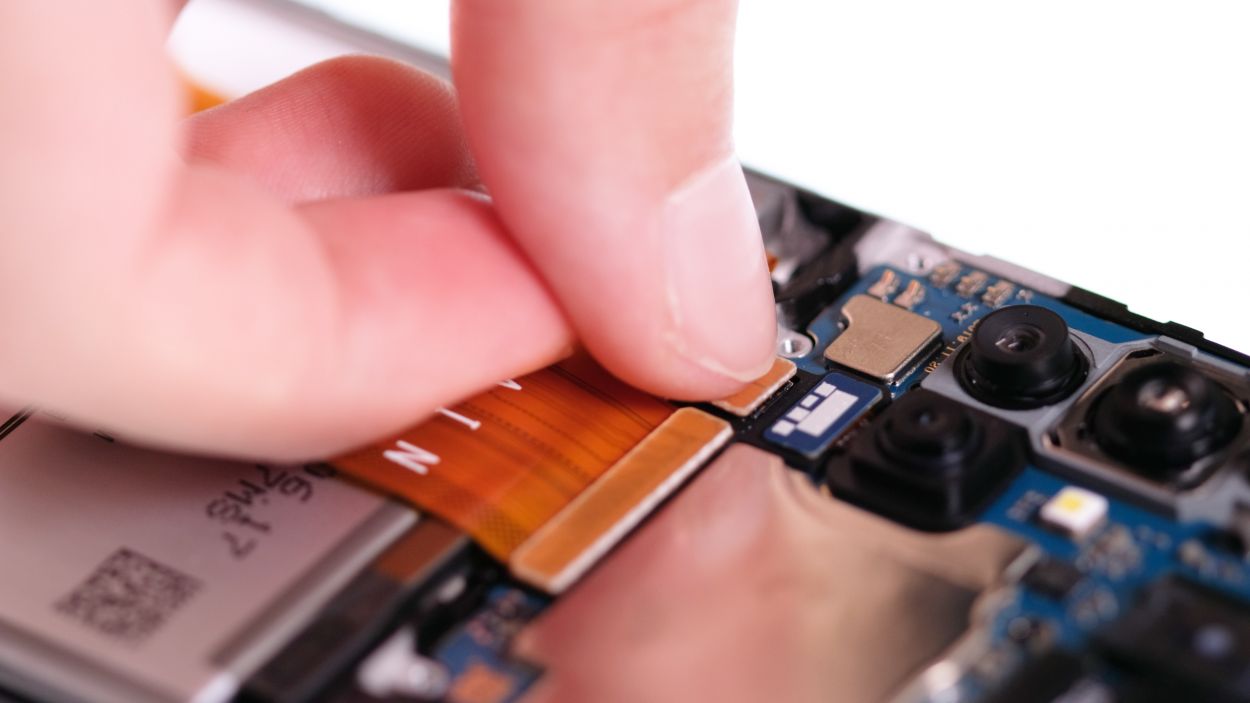
Hey there! When connecting those little plugs, take it easy! Forcing them can lead to a full-on meltdown of the whole component. Let’s keep everything running smoothly!

Step 15

Don’t forget to give a little love to other components like the vibration motor and speakers while you’re at it!
Step 16

– Start by peeling away the old adhesive frame from the inside of the back cover—it’s like giving your phone a little spa day!
– Next, play around with the new frame and see how it lines up with the back cover. It’s like a dress rehearsal before the big show!
Tools Used
Step 17
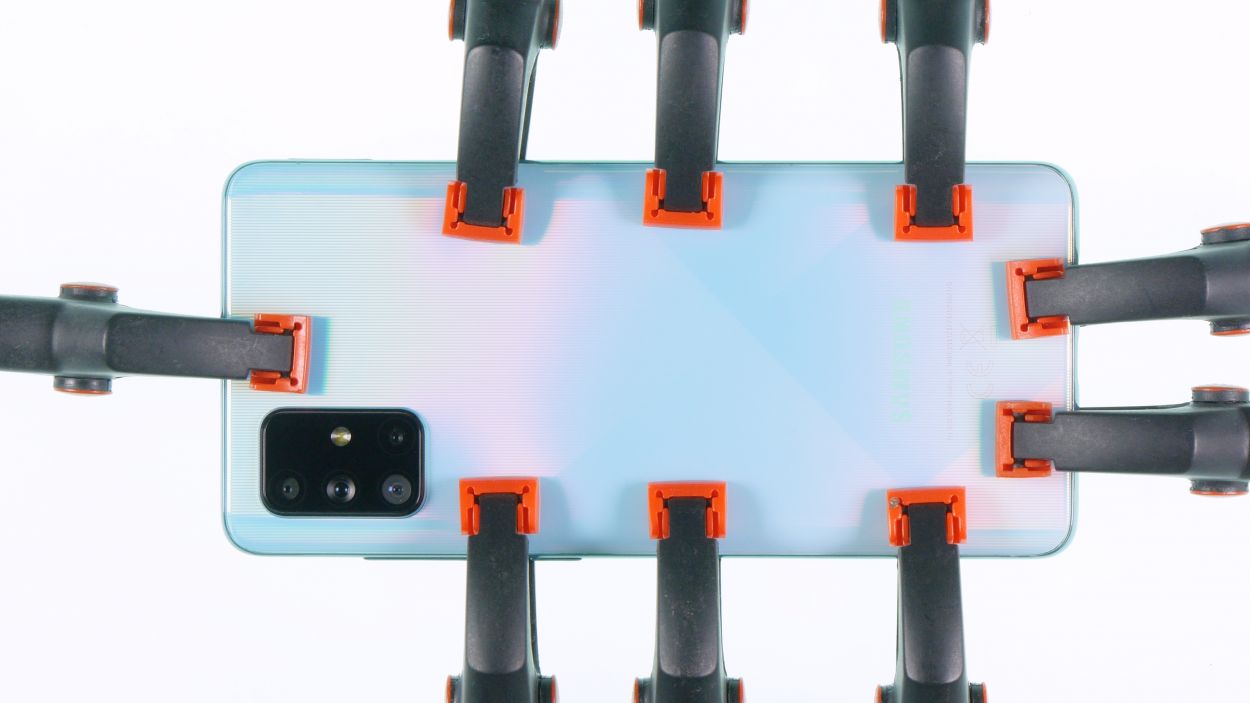
We gave the back cover a snug hug with some clamps to ensure it stays put. If you want to add a little extra weight, feel free to grab something hefty, like a thick book—because who doesn’t love a good read while waiting?
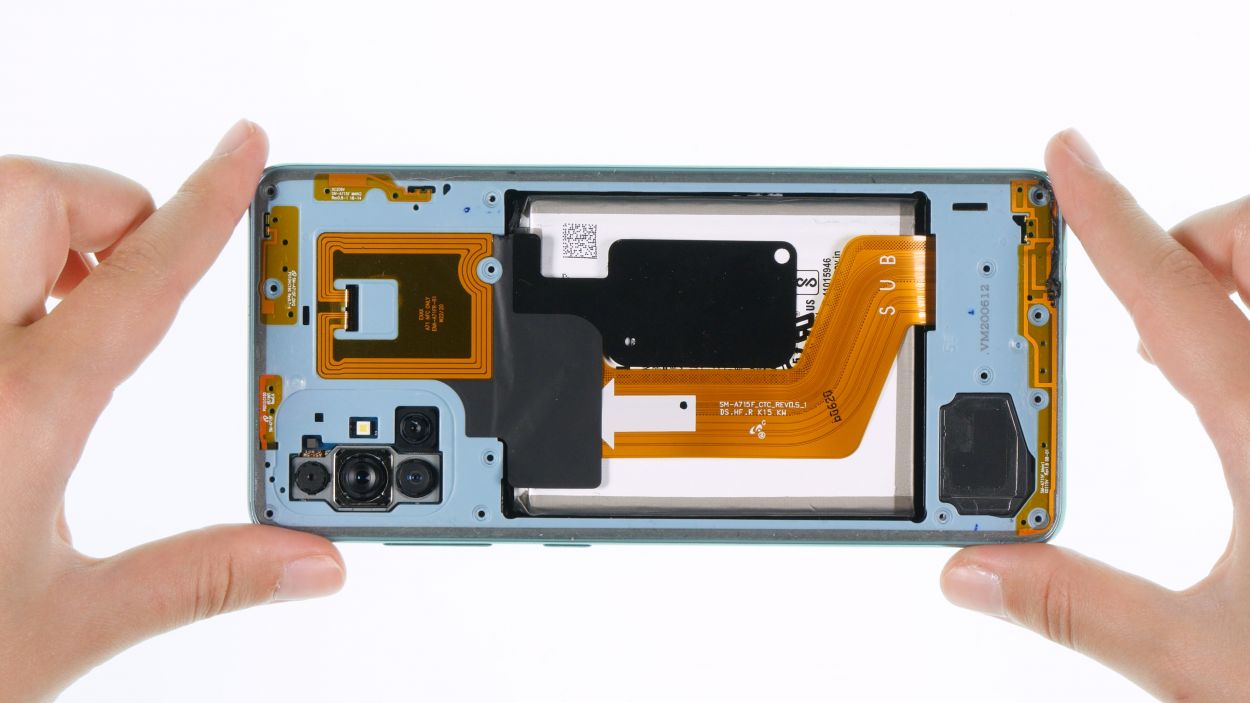
– First, place the back cover right over the display unit, like a cozy blanket.
– Next, give it a gentle press all around, running your fingers along the edge to ensure a snug fit.
– And for the grand finale, warm up that back cover again and set something heavy on top for about 30 minutes. This helps the glue make a solid connection—like a best friend handshake!
Tools Used
- heat gun to heat parts that are glued on so they’re easier to remove.
In most cases, you can also use a hairdryer.” href=”https://www.amazon.com/s?k=Heat+gun+Repair&linkCode=ll2&tag=salvationrepa-20&linkId=1c0aa533b7b8148cb48741a4635ea648&language=en_US&ref_=as_li_ss_tl” target=”_blank” rel=”noopener”>Heat gun