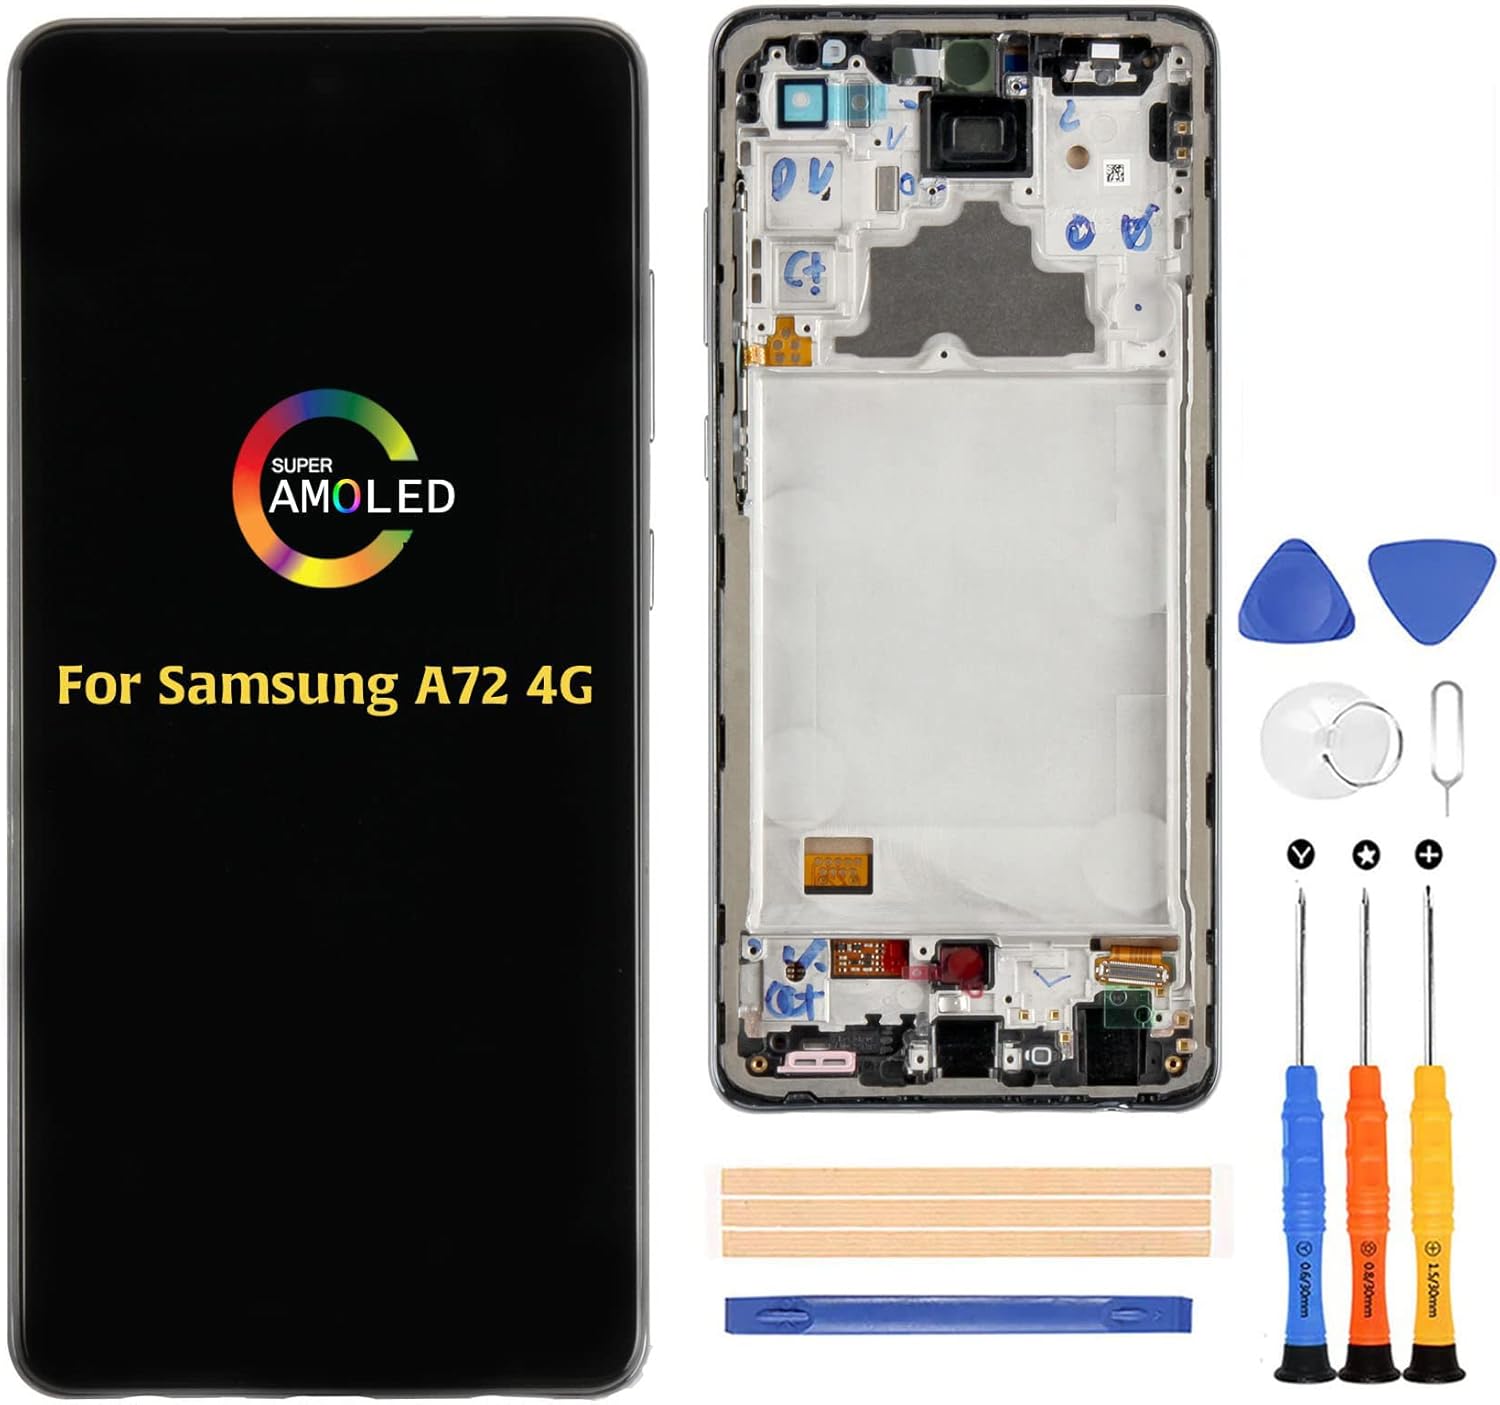
DIY Samsung Galaxy A72 Back Cover Replacement Guide
Duration: 45 minutes
Steps: 7 Steps
Ready to rock that new back cover? This guide will help you swap out the old one and get your Samsung Galaxy A72 looking fresh. Don’t worry about those adhesive seals – you can skip ’em if you need to. Your phone will still work like a champ, even without the water protection. But if you want to get that waterproof swagger back, you’ll need some replacement adhesive. If you need help with that, you can always schedule a repair.
Step 1

When using heat to loosen things up, a hair dryer, heat gun, or hot plate can be super helpful – just be sure to keep an eye on the temperature, as your phone’s display and internal battery can be sensitive to heat. If you need help, you can always schedule a repair
– Get ready to unlock your device’s back cover. Start by applying an iOpener to the back for at least two minutes – this will help loosen the adhesive underneath, making the removal process a whole lot easier. If you need help, you can always schedule a repair


Step 2


If the back cover is all cracked up, the suction handle might not stick like it should. Give lifting a shot with some sturdy tape, or get a little creative by supergluing the suction handle in place and letting it cure so you can get back to work.
Having a hard time making a gap? No worries! Just apply a bit more heat to loosen that adhesive up even more. Remember to check out the iOpener instructions to keep things from getting too hot to handle.
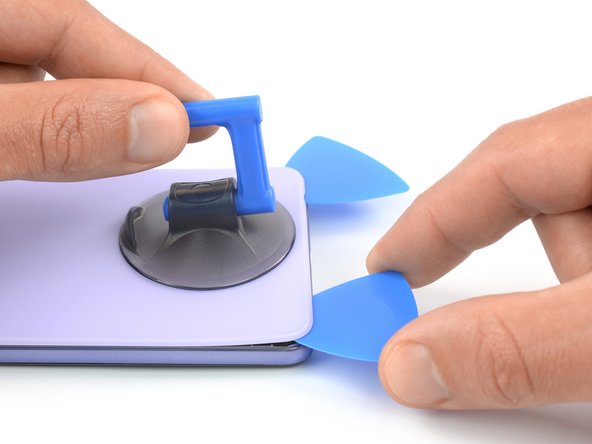
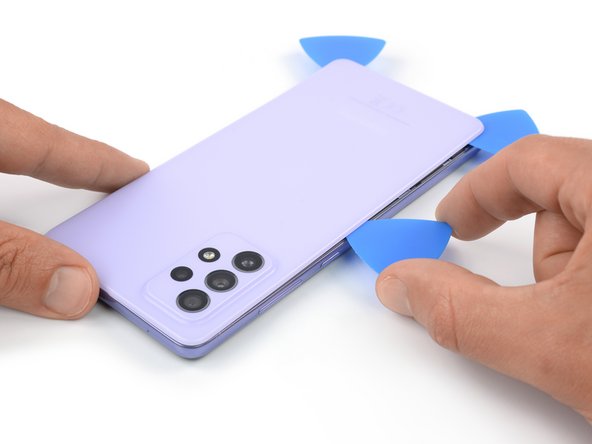
– Grab a suction handle and attach it snugly to the bottom edge of the back cover—aim for that sweet spot near the edge.
– Gently pull up on the suction handle to pop the back cover just a bit, making a tiny gap between the cover and the frame.
– Now, slide an opening pick into that little gap you’ve created.
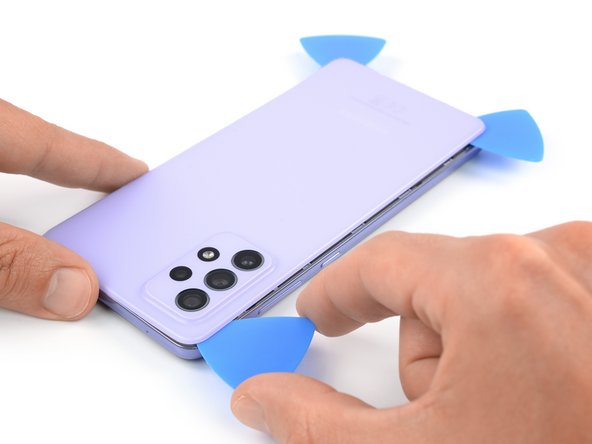
– Carefully glide the opening pick down to the bottom right corner to slice through that pesky adhesive.
– Keep the opening pick in place to ensure the adhesive doesn’t go back to its old ways.
Tools Used

Step 3

– Pop in a second opening pick at the bottom edge of your phone, like it’s a cozy little seat.
– Gently slide that opening pick over to the bottom left corner, giving the adhesive a little slice to get things moving.
– Keep those picks snug and secure to make sure the adhesive doesn’t decide to play shy and seal back up.
Step 4

If the adhesive gets tough to cut, it’s probably just a little chilly. Give it a quick warm-up with your iOpener for a minute or two to make it happy again.
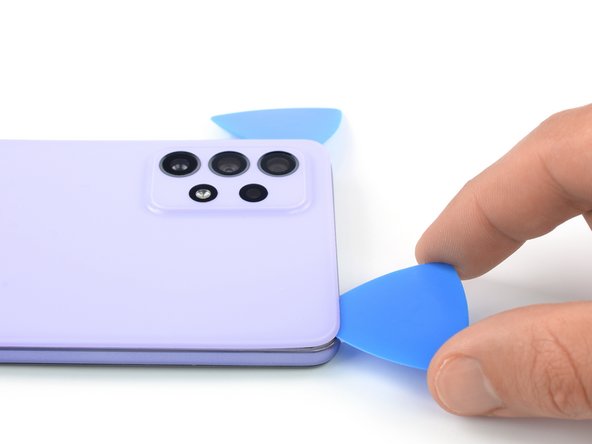
– Alright, let’s get this party started! Insert your third opening pick into the bottom left corner of your phone.
– Now, gently slide the opening pick along the left edge of your phone, slicing through the adhesive. It’s like butter!
– Keep that opening pick in the top left corner, so the adhesive doesn’t stick back together. We don’t want to undo all our hard work!
Tools Used
Step 5

– Now it’s time to get underneath that top left corner – gently insert a fourth opening pick to start making some progress.
– Take your opening pick and slide it along the top edge, carefully slicing through the adhesive as you go.
– Leave that opening pick right where it is, in the top right corner, to keep everything from sealing back up – you’re making great progress, and if you need help, you can always schedule a repair
Step 6
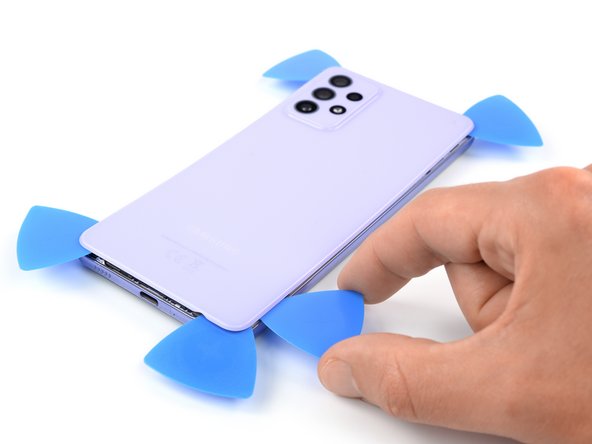

– Get ready to make your move! Slide a fifth opening pick right under that top right corner.
– Now, gently glide that opening pick down the right edge of the back cover to cut through the leftover adhesive. You’re doing great!
Step 7
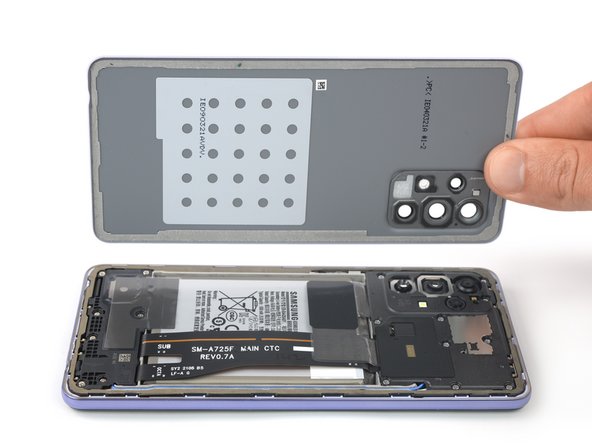

– First, let’s get started by removing the back cover – it’s time to get up close and personal with your device.
– Next, give the relevant areas a good clean with some isopropyl alcohol (make sure it’s over 90%!). Then, apply new adhesive where needed – this will help everything stick together nicely.
– Now it’s time to secure the new back cover. Use pre-cut adhesive or double-sided adhesive tape to get the job done. Once it’s on, apply some strong, steady pressure to your phone for a few minutes to help the adhesive bond – a stack of heavy books works like a charm. If you need help, you can always schedule a repair