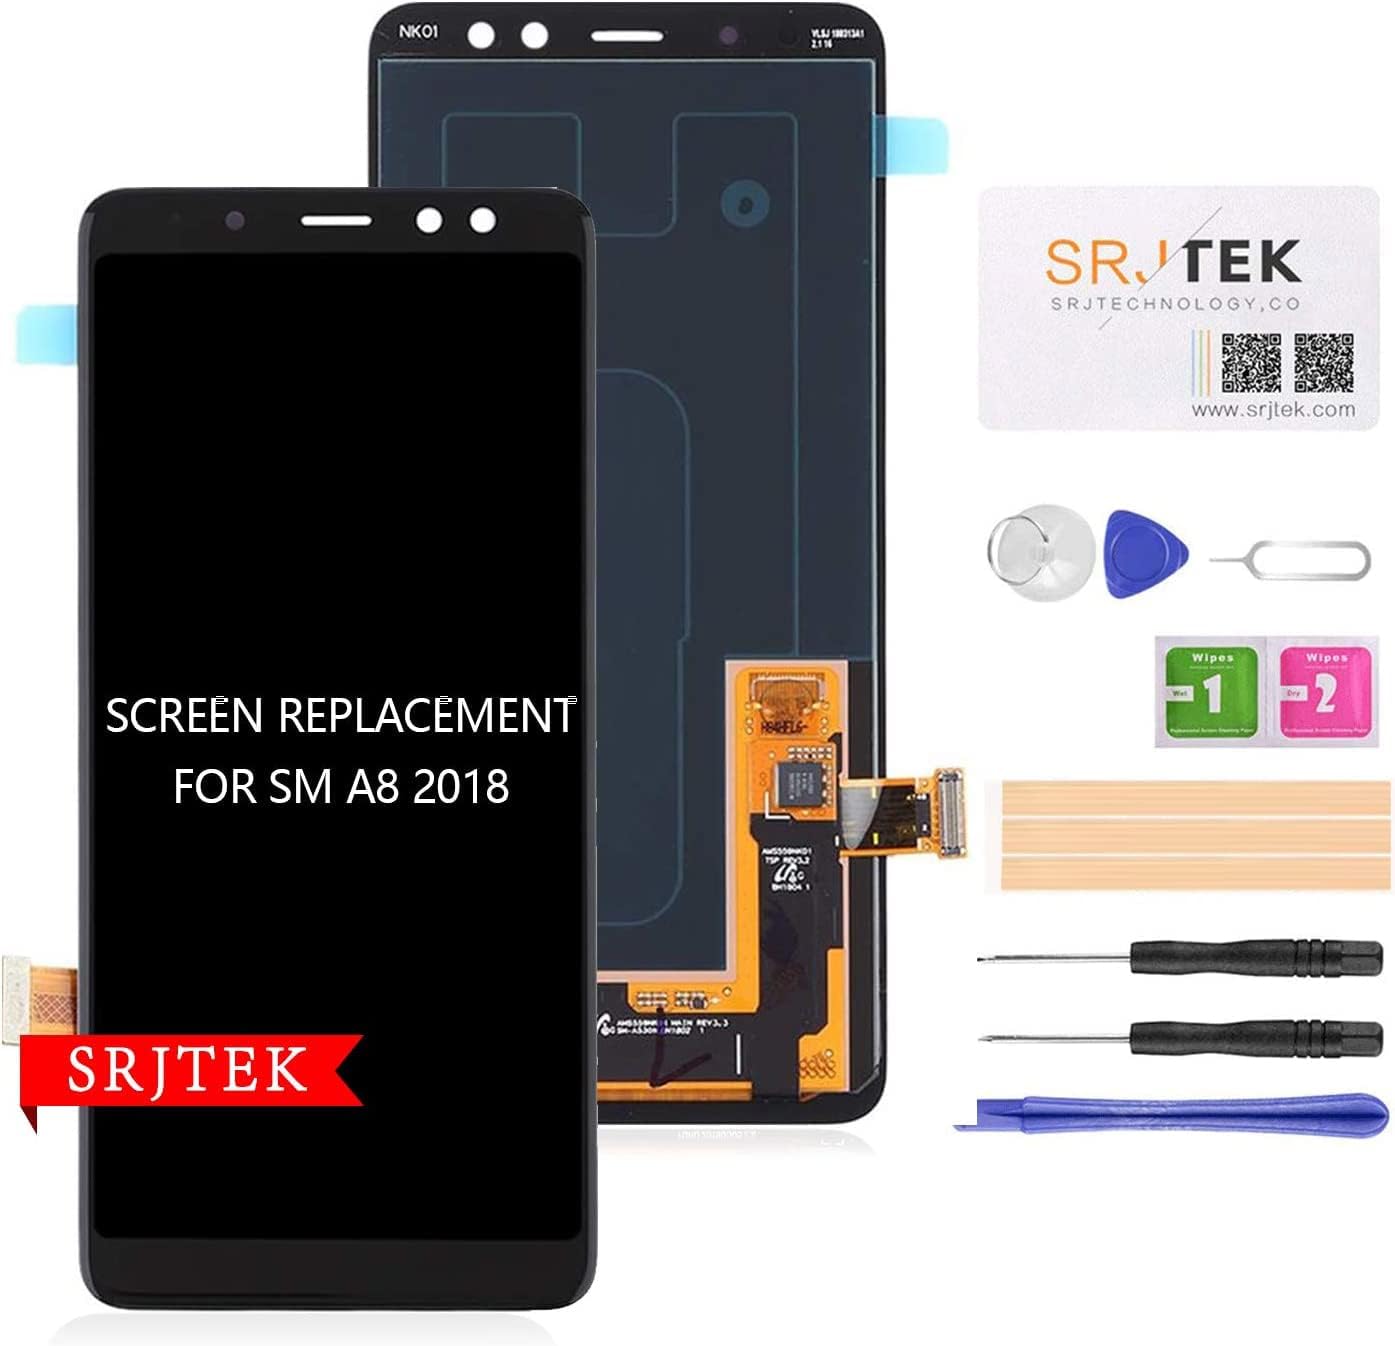
DIY Samsung Galaxy A8 (2018) Display Replacement Guide
Duration: 45 minutes
Steps: 7 Steps
Get ready to breathe new life into your Samsung Galaxy A8 (2018) with this easy-to-follow repair guide from Salvation Repair. Whether you’re dealing with a broken or unresponsive touchscreen, we’ve got you covered. Our step-by-step guide will walk you through the process of replacing your screen without messing with the original panel, logic board, or battery. Before you start, make sure you’ve got all the necessary tools and take a minute to back up your data – better safe than sorry. If you need help or want some extra guidance, you can always schedule a repair.
Step 1

– Alright, before we dive into swapping that screen on your Galaxy A8 (2018), go ahead and press and hold that power button to turn your device off. Safety first, my friend!
Step 2
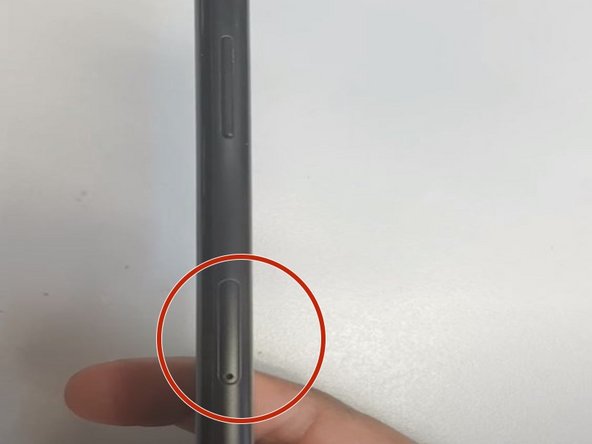
– Pop that little SIM card ejection tool into the tiny hole—yeah, that one! Now, pull out the SIM card tray like a pro.
Step 3


Handle the rear glass with care – it’s delicate and can’t take the heat!
– Let’s warm up that back panel! Grab your hairdryer and give it a gentle heat treatment to loosen the adhesive. It’s like a little spa day for your device.
– Now, slide a plastic card (or an opening pick, if you’re feeling fancy) between the glass and frame. This is where a little patience goes a long way – we’re going for a smooth separation. Don’t worry, you’ve got this!
Step 4
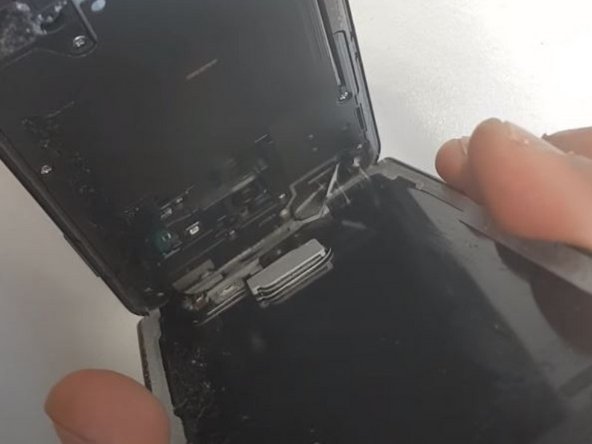

– Grab those tweezers and gently detach the clip that connects the camera to the motherboard. You’re doing great!
– Now, go ahead and lift the back panel off the device like a pro. You’ve got this!
Tools Used

Step 5


– Grab your P2 Pentalobe screwdriver and let’s tackle those 14 (0.8mm) screws like a pro!
– Next up, take your Phillips #0 screwdriver and remove the remaining four 1.5mm screws. You’ve got this!
– Now, gently slide the spudger under the top antenna and give it a little lift. It’s like giving a friendly nudge!
– Keep that spudger going and carefully lift out the NFC antenna. You’re almost there!
Tools Used


Step 7


Be gentle with that display panel – overheating the centre can cause damage, so let’s take it easy and get the job done safely! If you need help, you can always schedule a repair
– Let’s get started by warming up the adhesive that keeps the display panel stuck to the chassis – just blast the front panel with a hairdryer for a few seconds
– Now it’s time to create an opening, carefully slide the opening pick between the screen and the chassis to get things moving
– Almost there, gently work the plastic card around the screen to release it from the chassis. If you need help, you can always schedule a repair