DIY Samsung Galaxy J7 V Motherboard Replacement Guide
Duration: 45 minutes
Steps: 10 Steps
Let’s get this Galaxy J7 V back in the game! This guide will walk you through swapping out the motherboard. We’ll be taking a peek under the screen, popping off the front panel, giving the home button a little ‘see ya later’, and saying goodbye to the battery to get to the motherboard. It’s a bit of a journey, but totally doable. If you need help, you can always schedule a repair.
Step 1

Handle with care! The OLED display is super delicate and can shatter like a dream. Keep your cool and take it easy during this step.
– Time to get started. Insert a Jimmy tool under one of the corners of the display and carefully lift it up. If you need help, you can always schedule a repair
Tools Used

Step 2

– Carefully work your way around the phone’s edges with the Jimmy tool – it’s time to set that screen free. If you need help, you can always schedule a repair
Tools Used
Step 3

Hey, those display ribbon cables are like delicate little butterflies. Handle them with care, okay?
– Now, gently lift that display right up and out. You got this! It’s like giving your device a little high five.
Step 4

– First up, let’s find that home button socket! It’s the little spot where your home button lives.
– Now, gently slip your trusty metal spudger between the socket and the home button. We’re just making some room, no need to be rough!
Tools Used

Step 5

– Grab your trusty metal spudger and carefully slide it under the home button – it’s time to set it free from its socket.
– Gently lift up until the home button pops out of its socket. If you need help, you can always schedule a repair
Tools Used
Step 6


– Find the groove on the right side of your phone to start lifting the back cover.
– With the phone facing down, gently remove the back cover starting from the right side.
Step 7

– Gently lift up the bottom edge of the battery to free it, and then take it out completely. You’ve got this!
Step 8

– Unscrew fourteen screws from the midframe with a Phillips #00 screwdriver and let the fun begin!
Tools Used

Step 9

– Now it’s time to flip your phone over to the back side, where you removed the battery – let’s get a look at what’s underneath.
– Apply some gentle pressure with your hands to carefully pop the midframe off. If you need help, you can always schedule a repair
Step 10
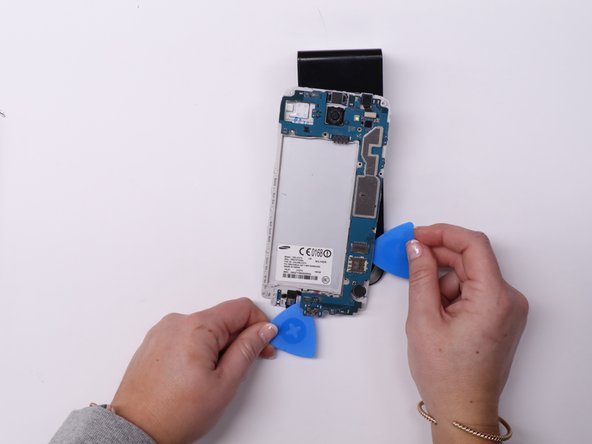

Distribute the opening picks around the motherboard to keep it stable and prevent bending as you carefully remove it. If you need help, you can always schedule a repair
– Flip that phone back over, you’ve got this!
– Let’s loosen up that motherboard with a Phillips #00 screwdriver. Just remove that one little black screw.
– Time to get those iFixit opening picks in there! Place a few under the motherboard.
– Now lift that motherboard using the iFixit picks. You’re doing great!
Tools Used