DIY Samsung Galaxy Mega 2 LCD Replacement Guide
Duration: 45 minutes
Steps: 5 Steps
Ready to give your Galaxy Mega 2 a fresh look? This guide will walk you through replacing the LCD/Digitizer, showing you how to swap out the screen and get your device looking brand new. It’s a simple process – just a few screws and you’ll be on your way to a sparkling screen. If you get stuck along the way, no worries – you can always schedule a repair with us!
Step 1

Before you start, make sure to power down your phone – safety first! If you need help, you can always schedule a repair
– Alright, let’s get this party started! On the back of your phone, find the little slot at the charging port down at the bottom. It’s like a secret entrance for your phone’s back cover.
– Now, use a plastic opening tool or your trusty fingernail to gently pull up on that back cover. Think of it like a puzzle piece you’re carefully lifting.
– Once you’ve popped that corner loose, just slide your finger around the edge, and watch as the back cover releases. It’s like giving your phone a little hug and then saying goodbye.
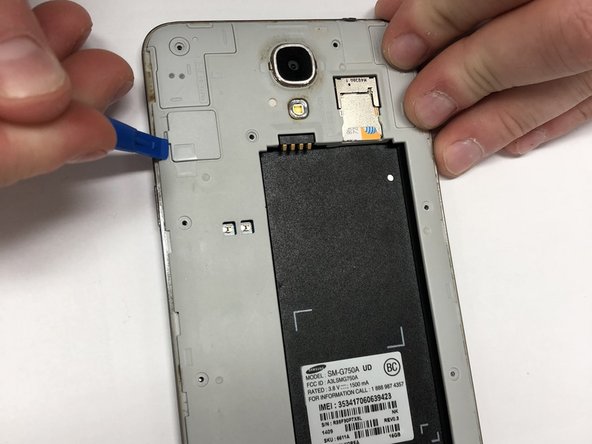
Step 2


– Alrighty, time to embark on this wild adventure together! First things first, let’s track down that sneaky little battery. Once you’ve found it, take your trusty fingernail or that cool plastic opening tool and slide it into the slot at the bottom. Give it a gentle lift like you’re performing magic, and then watch as that battery makes its grand exit!
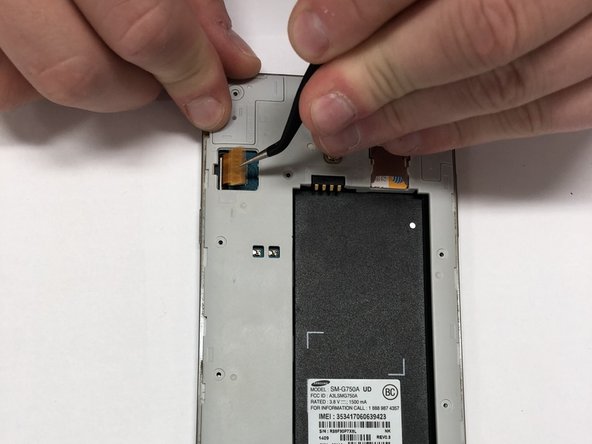
Step 3

– Grab your trusty Phillips head PH000 and take out all 13 visible screws, each measuring 1.4 mm. You’ve got this!
– Next up, take that pry tool and gently pop the Digitizer cover off your device. Be careful, it’s like giving it a little hug!
– Now, with that same pry tool, disconnect the digitizer. You’re on the right track!
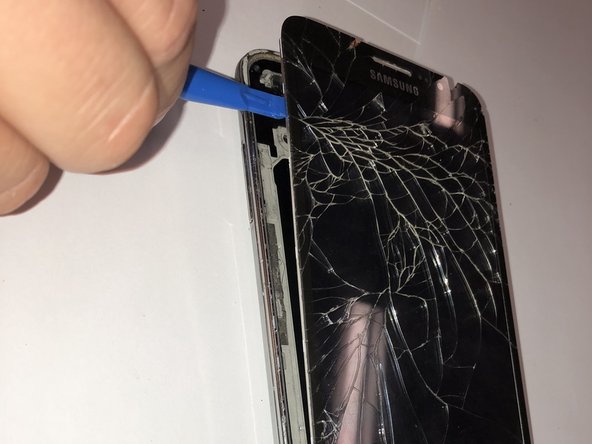
Step 4


Almost there, just be gentle and don’t fully remove the screen yet – keep it at an angle for now.
Make sure the buttons are coming loose from the adhesive, you’re doing great!
– Slide that trusty pry tool along the side of your device, and then make your way around the screen’s edges to gently separate it from the rear assembly frame. You’re doing great!
– Grab the heat gun and warm up the bottom to help loosen that adhesive from the menu and back buttons. A little heat goes a long way!
– Once everything’s nice and toasty, carefully pull the screen upward. You’re almost there!
Tools Used

Step 5
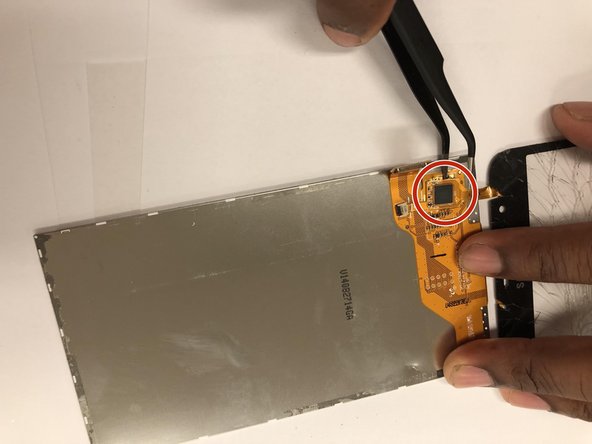

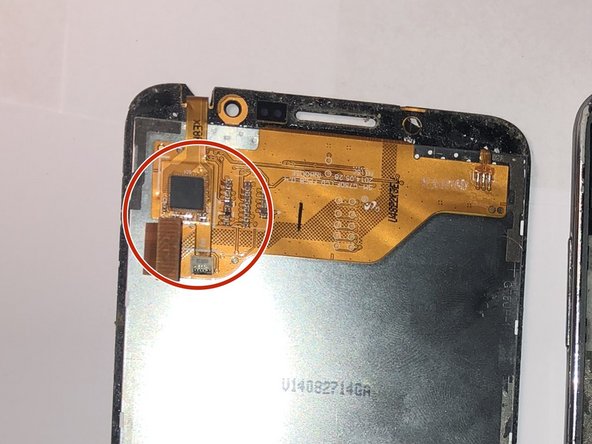
– Flip the screen over and give it a little high five! You’re on your way to fixing this.
– Now, find the LCD/Digitizer. It’s hiding under there somewhere.
– Use your tweezers to carefully disconnect the LCD/Digitizer. Just like unplugging a lamp, but way cooler. If you need help, you can always schedule a repair.
Tools Used


