DIY Samsung Galaxy S21 5G Antenna Replacement Guide
Duration: 45 minutes
Steps: 28 Steps
For your own safety, make sure to run that battery down to below 25% before diving into your phone disassembly adventure!
Ready to tackle the challenge of swapping out one or both 5G antennas in your Samsung Galaxy S21? Awesome! Before diving in, make sure to juice that battery down to below 25%. It’s a smart move to avoid any unexpected heat surprises if things go a bit sideways during the process. And hey, if your battery looks like it’s been to the gym a little too much (you know, swollen), just be sure to take those extra safety precautions. Oh, and don’t forget, you’ll need some replacement adhesive to seal the deal when you’re done. If you need help, you can always schedule a repair.
Step 1

Make sure to turn off your phone completely before diving in!
– Warm up an iOpener and gently press it against the lower edge of the back cover for a couple of minutes.
Tools Used

Step 2


– Get ready to show that phone who’s boss! Grab a suction cup and stick it to the back of the phone, targeting the center of the bottom edge for optimal results.
– Time to flex those muscles! Apply firm and steady pressure on the suction cup to create a tiny gap between the back cover and the frame.
– Now, it’s pickin’ time! Slide an opening pick into that gap like a champ.


Step 4

– Now, let’s add some warmth to the back cover’s left edge using a heated iOpener for a brief two minutes.
Tools Used
Step 5


– Alrighty, pals! Time for some fun phone-saving shenanigans. First things first, grab a suction cup and place it on your phone, right smacker in the middle of its left edge. Now, give that baby some serious upward tug to create an opening! Once you’ve got yourself a lil’ gap, dive in that pick and voilà! If you need help, you can always schedule a repair!
Step 6


– Gently glide an opening pick along the left edge all the way to the bottom left corner to gracefully slice through the adhesive.
– Keep the pick snug in place to ensure the adhesive stays tamed.
Step 7

– Grab a cozy iOpener and gently warm up the right edge of the back cover for a couple of minutes.
Tools Used
Step 8


– Grab a suction cup and stick it on the back of your phone, aiming for the sweet spot near the center of the right edge.
– Give that suction cup a solid tug—steady and strong—to open up a little space between the back cover and the frame.
– Slide in an opening pick to keep that gap nice and cozy.
Step 9


– Gently slide an opening pick back and forth along the right edge of the back cover to slice through that sticky adhesive like a pro.
– Keep the pick in place to stop the adhesive from sealing back up on you.
Step 10


To successfully complete this task, make sure to apply this procedure to all corners, with the exception of the top-left corner where the rear-facing camera is located.
– Swing that right-edge opening pick around the top-right corner of your phone like you’re giving it a little dance!
Step 11


– Gently slide that top pick right up close to the camera shell, like you’re giving it a little high-five.
– Now, do the same for the left-edge pick. Keep it smooth and steady!
Step 12

– Warm up your iOpener and let it cozy up to the camera shell for two minutes.
Tools Used
Step 13


If this step doesn’t do the trick, no worries! Just hop on to the next one for a different approach; if it works, feel free to skip ahead!
– Give that back cover a gentle twist to the left until you see a little space between the camera shell and the frame. You’re doing great!
– Slide an opening pick into that space you’ve just created. Keep it steady!
Step 14


Hey there handy person! Just a heads-up – taking this approach might result in some unwanted alterations to the plastic back cover. So, proceed with caution and a steady hand!
– Carefully slide those two picks right up to the camera shell, tucking them under the corners of the back cover that sit next to the camera shell.
– Gently wiggle the picks back and forth along the seam between the back cover and the camera shell until you create a little gap between the camera shell and the frame.
Step 15


– Gently slide an opening pick between the camera shell and the frame to break the adhesive seal like a pro.


Hey there! Don’t fret if the pick gets stuck on that pesky plate surrounding your phone’s flash – it’s totally normal and happens to the best of us. Just be sure to work carefully with it, and if you need any extra support, ya know what to do: Schedule a repair with us and we’ll help get your device back in tip-top shape!
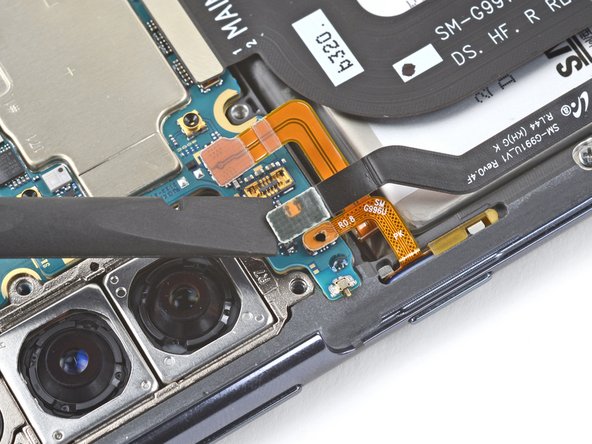
Step 17


– Align the tip of your opening pick with your phone’s flash like a pro!
– Gently slide the pick in, taking care to steer clear of the flash’s plate.
– Carefully slice through the adhesive just to the right of the camera.


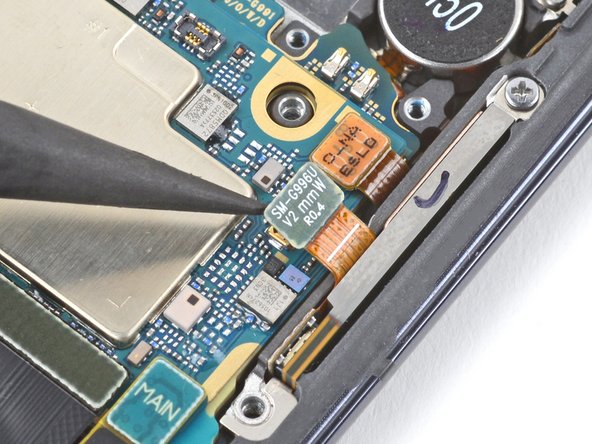
Step 19

As you tackle this repair, be sure to keep an eye on each screw and remember where it belongs—let’s keep those little guys organized and happy!
– Grab your trusty Phillips screwdriver and get ready to rock! You’ll want to take out those five 4 mm-long screws that are keeping the motherboard bracket snug in the frame. Let’s do this!
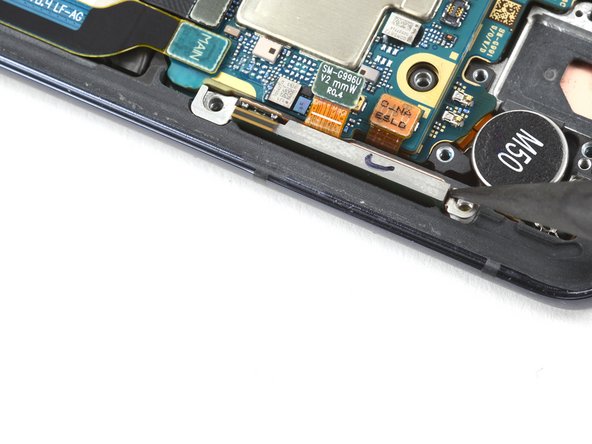
Step 20


Hey there! Just hold off on fully removing the bracket for now, as it’s still all connected to the wireless charging magic right here!
– Grab a trusty pair of tweezers and gently lift up the motherboard bracket from the frame, giving it a little nudge to unclip it. You’ve got this!
Tools Used

Step 21


– Hey there tech whiz! So you’re feeling a bit brave, diving into the world of repairing gadgets, huh? No worries, we’ve got your back! First off, when you’re getting all tweezery with that motherboard bracket, grab a spudger and pop that battery press connector up. You’re totally rockin’ this repair stuff! Now, when you’re ready to put that bad boy back together, don’t forget to line it up just right and give it a gentle squeeze on both sides – oh and don’t worry, there’s no need to panic if it’s not perfect the first time. Just keep at it, my friend! And hey, if you’re ever feeling a bit stuck or confused, you know what to do – just schedule a repair to get some extra hands on help!

Step 22


– While keeping the motherboard bracket safely out of the way, grab a spudger and gently nudge up to disconnect the wireless charging coil’s press connector. You’ve got this!
Tools Used
Step 23


Time to give that wireless charging coil a little nudge. It’s not stuck, just lightly glued on. Give it some love and a gentle prod to set it free!
– Peel that wireless charging coil away from your phone like it’s a mask on a playtime superhero, and when you’re reassembling, make sure those screws hold down the motherboard bracket so your charging coil aligns perfectly! Boom, thats how it’s done – let’s charge up!
Step 24

– Grab your trusty Phillips screwdriver and let’s get to work! Start by unscrewing those three 3.5 mm screws that are holding the 5G antenna brackets snugly to the frame. You’re one step closer to a successful repair!