
DIY Samsung Galaxy S21 5G Screen Replacement Guide
Duration: 45 minutes
Steps: 37 Steps
For your safety, make sure to let your battery chill below 25% before diving into disassembling your phone.
Alright, let’s dive in and tackle the screen on your Samsung Galaxy S21. To play it safe, make sure the battery level is below 25% before you start. This step minimizes any potential dangers in case the battery gets hit during the repair. If your battery looks puffed up, take the necessary precautions. Remember to grab some replacement adhesive to get the job done smoothly.
Step 1

Make sure to power off your phone completely before diving in!
– Warm up your iOpener and give some love to the bottom edge of the back cover for a solid two minutes.
Tools Used

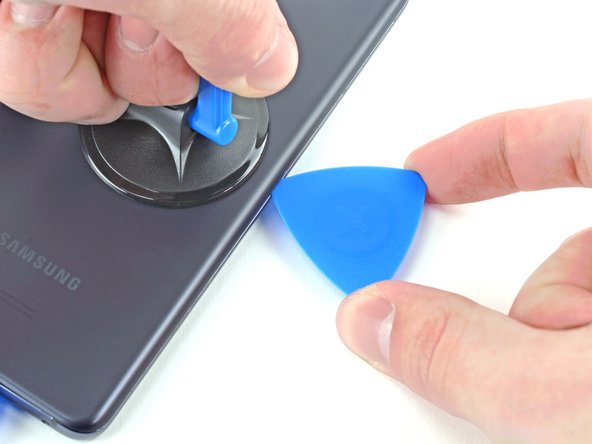
Step 2


– Stick a suction cup onto the back of your device, aiming for the center of the bottom edge.
– Apply a steady, strong upward pull on the suction cup to create a little gap between the back cover and the frame.
– Slide in an opening pick into that gap.


Step 4

– Heat up that iOpener and give the left edge of the back cover a cozy two-minute hug.
Tools Used
Step 5


– Got your suction cup ready? Stick it to the back of the device near the left edge, right in the middle.
– Now, show that back cover who’s boss! Pull up on the suction cup with some muscle to make a gap between the cover and frame.
– Time to work some magic. Slide an opening pick into the gap you just created.
Step 6


– Gently slide an opening pick along the left edge, making your way to the bottom left corner to slice through that stubborn adhesive.
– Keep the pick in place to stop the adhesive from sealing up again. You’ve got this!
Step 7

– Warm up a trusty iOpener and give some love to the right edge of the back cover for two minutes.
Tools Used
Step 8


– Grab a suction cup and stick it to the back of the phone around the middle of the right side.
– Gently but firmly pull upwards on the suction cup to create some space between the back cover and the frame.
– Slide in an opening pick into the gap you’ve made.
Step 9


– Gently glide an opening pick back and forth along the right edge of the back cover to slice through that pesky adhesive.
– Keep the pick in place to stop that adhesive from playing hide and seek again.
Step 10


Feel free to tackle each corner in this repair process, but just skip the top-left corner where the rear-facing camera resides.
– Gently glide that right-edge opening pick around the top-right corner of the phone like you’re giving it a little dance!
Step 11


– Kick it up a notch for this fun pick business! Slide that top pick right next to your phone’s camera and have another pick adventure with that left edge. If you need help, you can always schedule a repair
Step 12

– Grab a groovy iOpener, heat it up, and gently place it on the camera shell for a cool two minutes.
Tools Used
Step 13


If this approach doesn’t do the trick, don’t sweat it! Just hop on over to the next step for another option. If it works like a charm, you can totally skip the next one.
– Give the back cover a gentle counterclockwise twist to create some space between the camera shell and the frame.
– Slide an opening pick into the gap, and you’re good to go!
Step 14


Take it easy with this method, as there’s a chance you might crack the plastic back cover.
– Carefully slide the two picks towards the camera shell, positioning them under the corners of the back cover next to the camera shell.
– Gently move the picks back and forth along the bridge between the back cover and the camera shell until a gap forms between the camera shell and the frame.
Step 15


Getting that frame off the camera shell might take a bit of elbow grease—there’s a good amount of sticky stuff holding it all together. So, don’t be shy; a few rounds of heat may be just what you need to make it cooperate.
– Now, get that opening pick grooving between the camera shell and the frame to slice through the adhesive like a smooth operator!
Step 16


Watch out for that sneaky plate on the back cover around the phone’s flash! Your pick might just decide to hang out there, so be careful!
– Just a heads up, there’s some extra adhesive chilling out to the right of the camera that you’ll want to snip through.
Step 17


– Get ready to rock and roll by lining up the opening pick’s tip with your phone’s flash
– Gently insert the pick, dancing your way around the flash’s plate.
– Whistle while you work as you slice the adhesive to the right of the camera.
Step 18


– Get ready to unleash your inner phone hero and remove the back cover, it’s time to show that phone who’s boss!
– Welp, reassembly time! Make sure all cables and parts are put back in the right spots like a repair pro. 😉
Step 19

As you tackle this repair, keep an eye on those screws! Make sure each one returns to its original home, so everything fits back together just right.
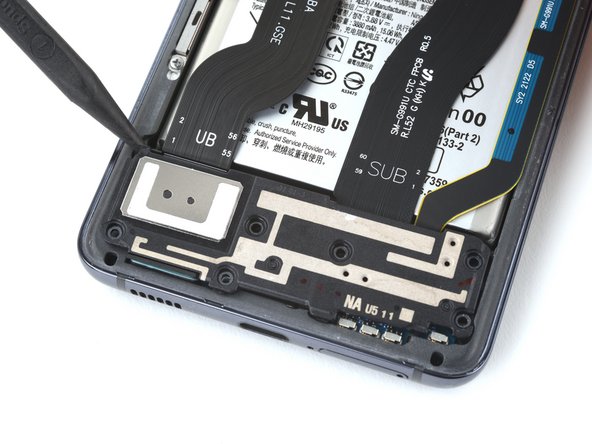
– Grab your trusty Phillips screwdriver and get ready to tackle those five 4 mm-long screws that are holding the motherboard bracket to the frame. You’ve got this!
Step 20


Hold your horses! Don’t take off the bracket just yet; it’s still hanging out with the wireless charging coil.
– Grab a pair of tweezers and skillfully lift and unclip the motherboard bracket from the frame with finesse.
Tools Used

Step 21


– Using tweezers or your fingers, gently hold the motherboard bracket out of the way. Now, grab a spudger and carefully pry up the battery press connector. You’ve got this!
– When it’s time to reattach those press connectors, take a moment to align them just right. Press down on one side until you hear that satisfying click, then do the same on the other side. Just a friendly tip: avoid pressing down in the middle. If things get misaligned, those little pins can bend, and we definitely don’t want that!

Step 22


– Keep that motherboard bracket out of the way with style. Grab a spudger and gently lift up to separate and bid farewell to the wireless charging coil’s press connector.
Tools Used
Step 23


To keep things charging wirelessly, the cozy coil in your device is gently stuck on with some light adhesive.
– Alrighty, let’s gently wiggle and pull up that wireless charging coil with your paws (fingers), like you’re peeling off a stubborn sticker. In the grand reassembly, start by tightening the motherboard bracket screws – they’re like the architect of this charging coil city. Then, give a firm pressed-down vote for the rest of the coil to stick in place. Remember, you’re the chief conductor of this coil crusade! Need an extra hand? You can always schedule a repair and let our tech champs handle the heavy lifting!
Step 24

– Grab your trusty Phillips screwdriver and get ready to tackle those six 4 mm screws that are keeping the loudspeaker snugly attached to the frame. You’ve got this!


Step 29

The adhesive on the Galaxy S21 display is super tough, so don’t sweat it if you have to give that iOpener some extra love a few times before taking off the screen for some R&R.
Feel free to bust out your hair dryer, heat gun, or hot plate to lend a helping hand, just remember to keep things cool to avoid any device meltdowns.
– Gently warm up a snuggly iOpener on the screen for about five minutes to give the adhesive a little love tap.
Tools Used
Step 30

– While the adhesive is taking its sweet time to get nice and soft, keep these points in mind:


Step 32
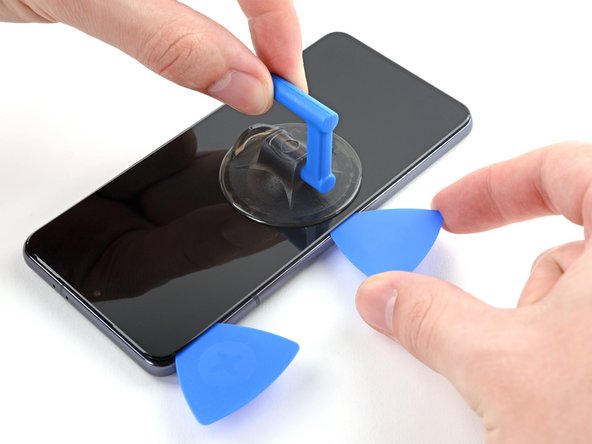

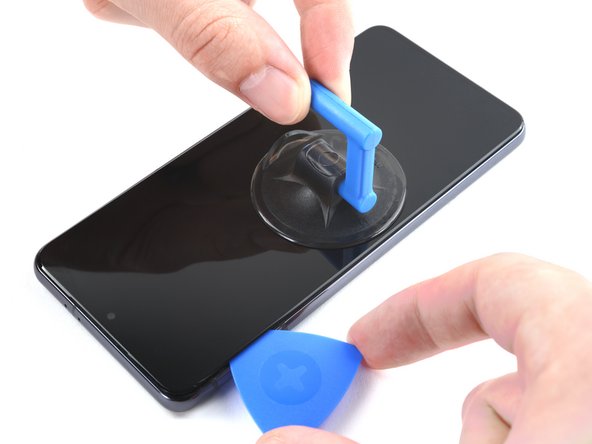
– Get groovy and slide a second opening pick from the top left corner down to the bottom left corner to cut through that sticky adhesive.
– Keep that opening pick chillin’ in place to make sure the adhesive doesn’t try to stick back together on ya.
Step 33

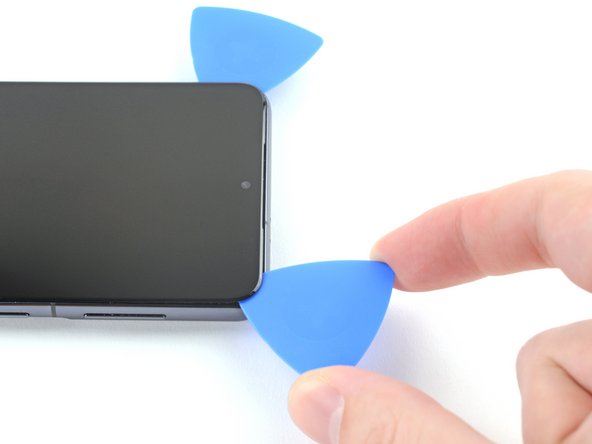
Whew, careful with that camera! Just like a delicate flower, we don’t want to squish it. Keep that opening pick’s tip limited to about 1 inch (2-3 mm) to preserve your device’s pretty face!
– Time to spice things up a bit!
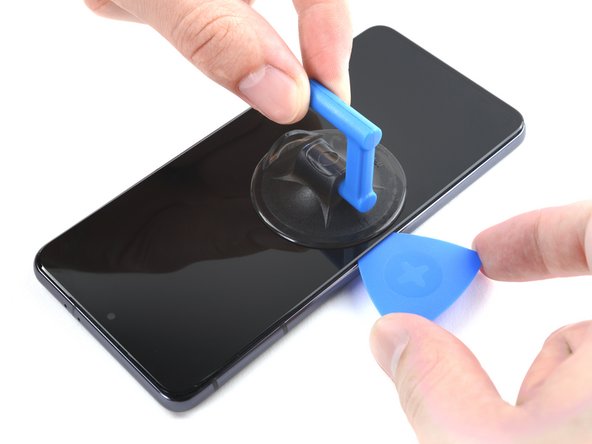
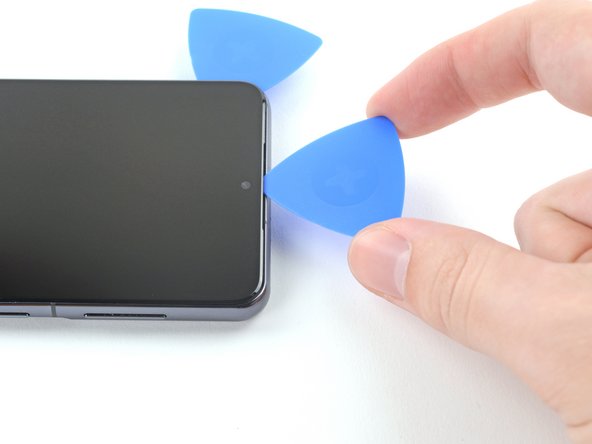
– Carefully place a third opening pick at the top left corner of the screen.
– Glide the opening pick along the top edge of the phone to cut through the adhesive.
– Keep that opening pick right where it is to make sure the adhesive doesn’t decide to stick again.
Step 34
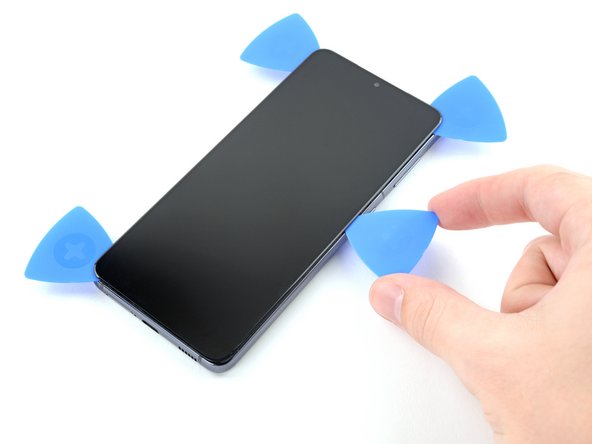

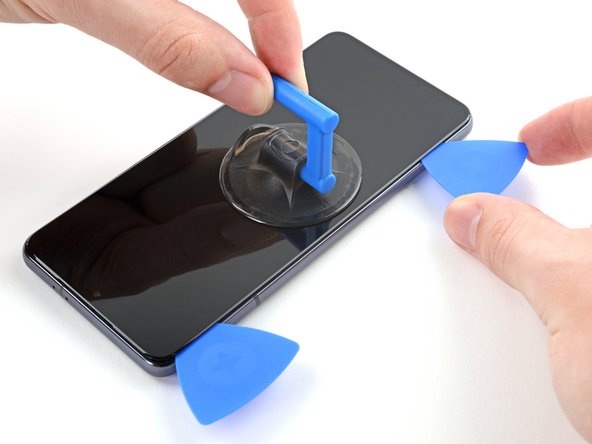
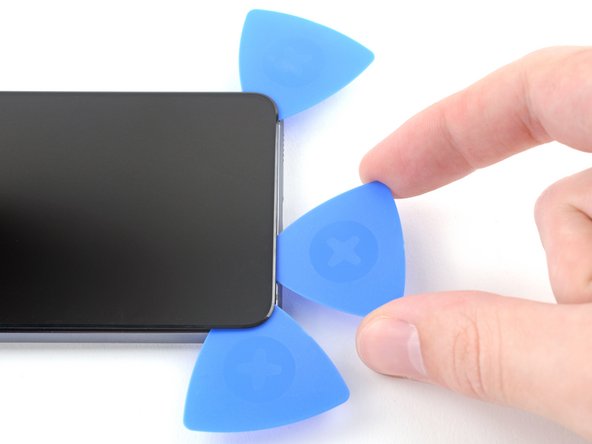
– Slide a fourth opening pick under the top-right corner of the screen—just like tucking a cozy blanket in!
– Now, glide that opening pick down along the right edge to slice through the adhesive like butter.
– Keep that opening pick in place to ensure the adhesive doesn’t get any bright ideas about resealing!
Tools Used
Step 35

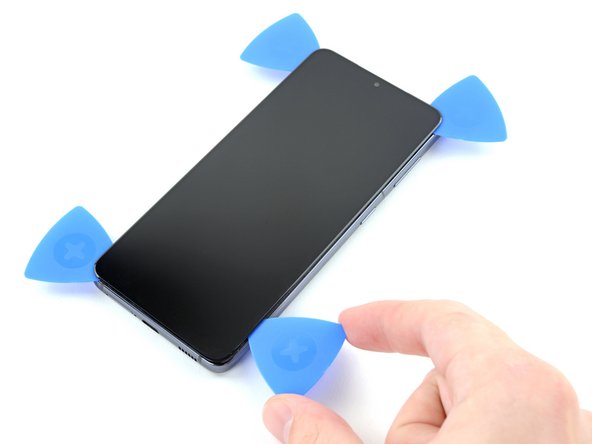
– Slide a fifth opening pick into the bottom right corner of your screen like it’s a secret agent on a mission.
– Now, glide that pick along the bottom edge to cut through the last bits of adhesive like a pro.
Step 36


Hey there tech-savvy friend! When tackling the Galaxy S21 repair, just a heads-up – there’s some adhesive lurking beneath the screen’s center. But fear not! With a little snip-snip, you’ll have that frame off in no time. Happy repairing! If you need help, you can always schedule a repair
Step 37


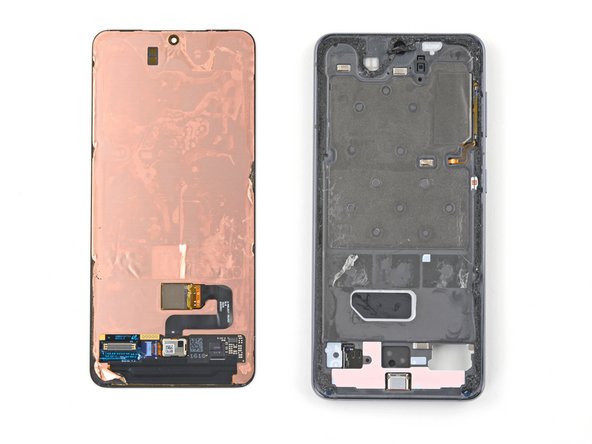
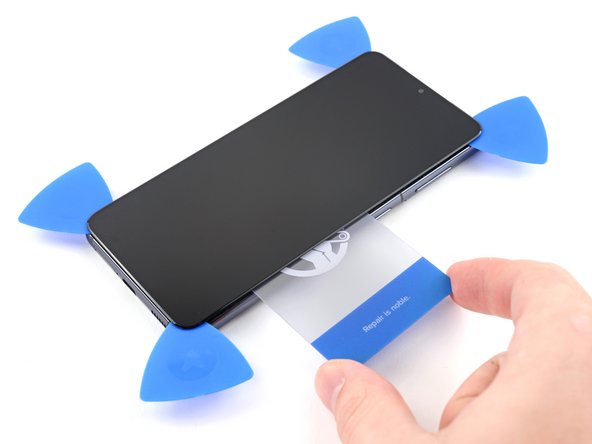
– First things first, gently take off that screen! You’ve got this.
– Next up, give your shiny new replacement part a good look over compared to the original. If there are any bits and bobs that need to move over from your old screen, now’s the time to make that swap.
– Before you stick everything back together, make sure to clean the necessary areas with some isopropyl alcohol (over 90% works like a charm!) and apply new adhesive where it’s needed. You’ll be back in action in no time!


