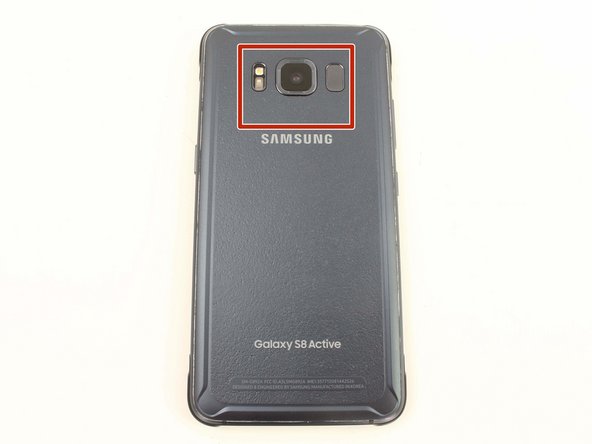
DIY Samsung Galaxy S8 Active Iris Scanner Replacement Guide
Duration: 45 minutes
Steps: 9 Steps
No worries if you’re feeling stuck – we’ve got your back! Remember, you can always schedule a repair for expert assistance.
Ready to give your Samsung Galaxy S8 Active a new look? Let’s dive in and replace or remove the iris scanner! Remember, before we start, make sure your device is charged below 25% to keep things cool. Safety first! Accidents happen, and we definitely don’t want any fiery surprises. You got this! 🔧📱
Step 1


– Get ready to perform some phone surgery! Grab your trusty SIM card ejector tool (or an unfolded paperclip) and slide it into the small hole on the left side of the top edge of your phone.
– Give it a gentle nudge to coax the SIM tray out of its cozy home.
– Carefully pluck the SIM card tray from your device’s embrace.
– Time to reunite the SIM card with its slot! Make sure the golden contacts are pointing skyward and the notch is winking at the bottom right corner. Slide the SIM card back into the tray with a tender touch.
Step 2


Taking off the back cover of the S8 Active could mess with its waterproof magic. It’s a good idea to have some replacement adhesive ready before diving in, or if adhesive isn’t your thing, just keep the device dry while you work your magic on reassembly.
– First up, grab your trusty TR6 Torx Security Screwdriver and remove those four black 3mm screws sitting snugly around the outer edges of your device. These little guys are keeping the rubber bumpers in check!
– Once those screws are out of the way, gently lift off the rubber bumpers from the top and bottom edges of your device. You’re making great progress!
Tools Used

Step 3

When you’re using a heat gun, hair dryer, or hot plate, remember that the metal frame can get pretty toasty. So, give it a gentle touch!
Keep an eye on the heat! Overdoing it can harm the OLED display, battery, and other sensitive parts. A quick minute should do the trick to loosen that stubborn adhesive.
Don’t sweat it if you don’t have a specialized tool handy – grab your trusty iFixit iOpener, hair dryer, or hot plate and give those edges a little warmth
– Grab a heat gun and give those back edges a cozy little heat hug. This will make the adhesive loosen up and make separating the back cover much easier.
Tools Used

Step 4


– Alrighty, time to put on your Rocket Scientist hat and delicately lift the back cover with our trusty Jimmy tool, under that pesky edge of it, aye? 🚀
– Don’t be a hero, folks! Stick an opening pick in. We don’t need you slipping or losing your cool now, do we? 🙅♂️
– Now, you’re a surgeon with that pick! Carefully cut around the top bit but no scary cables or sensors please. Avoid that top hole for the fingerprint funtime! 👀👣
– Feels like dancing down the side, right? Jimmy, slide and shimmy, separating that devilish adhesive. 🕺💃
Tools Used

Step 5

The fingerprint sensor cable hooks up at the top of your phone, near the front-facing camera. To avoid ripping the cable, gently pop off the back cover. If you need help, you can always schedule a repair.
– Slice through any remaining adhesive with the opening pick and crack open the back cover just enough to check out the fingerprint sensor flex cable connector. If you need help, you can always schedule a repair!
Step 6


– Gently flip the cover and place it on top of the device.
– Use the flat end of a spudger to disconnect the fingerprint flex cable.
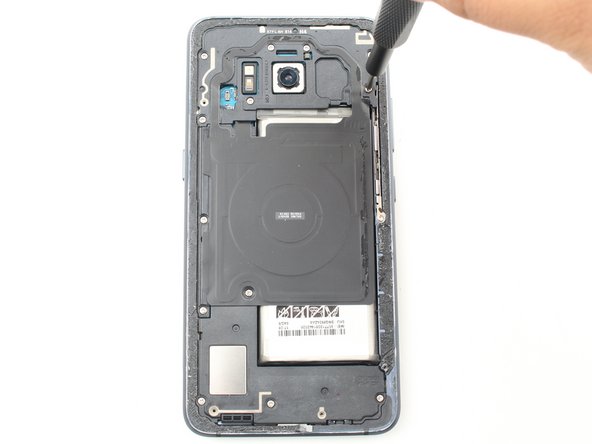
– Take off the back cover.
– To reconnect the fingerprint sensor cable during reassembly, angle the back cover so the flex cable aligns with its socket. Press the cable into place with the flat end of a spudger by gently pressing straight down. If you need help, you can always schedule a repair
Tools Used

Step 7


– Let’s kick things off by taking out eleven 3.5 mm screws with your trusty Phillips #00 Screwdriver. You’ve got this!
– Next up, grab that same Phillips #00 Screwdriver and remove two 2mm screws. You’re doing great!
Tools Used

Step 8


– You’re doing awesome! Next up, it’s time to remove the NFC antenna and charging coil assembly. Grab your trusty spudger with its flat end and gently pry it away. Isn’t this repair guide just a blast? If you need any help, you can always schedule a repair!
Tools Used
Step 9


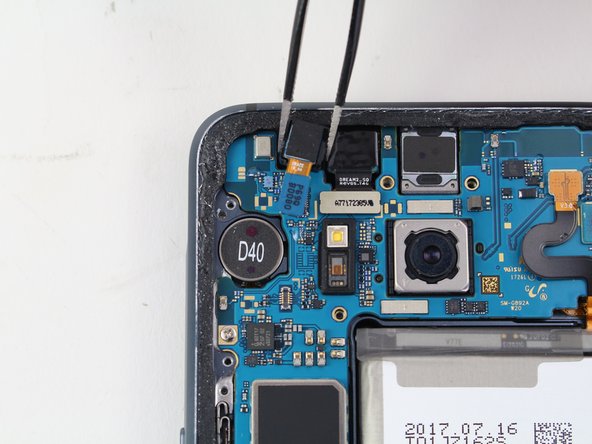
– To start things off, gently disconnect the iris scanner flex cable from the motherboard using the flat end of a spudger.
– Next, with the finesse of a pro, delicately use tweezers to lift the iris scanner from its cozy slot.