DIY Samsung Galaxy Star Pro Motherboard Replacement Guide
Duration: 45 minutes
Steps: 6 Steps
The motherboard is like the boss of all the features on your device! It controls everything from the operating system to the camera and audio – if any part of it starts acting up, you might need to give it a gentle nudge by replacing it! Check out this super convenient guide to doing just that right from the comfort of your own home.
Step 1

– Grab your phone with one hand on the back and the other on the front. Give it a little squeeze and pop off that back cover!


Step 3

– After removing the battery, it’s time to get to the good stuff. Use a screwdriver with a J00 Phillips head screw bit to unscrew the five 1.2mm Phillips screws on the back of the phone. Take your time and make sure they’re all out before moving on to the next step. If you need help, you can always schedule a repair
Step 4

Watch out for that press-fit connector! It’s like the glue that holds the screen and motherboard together—treat it with care and we’ll be golden.
– After removing the screws, flip the phone over and grab your plastic opening tool. Pop that connector loose to free the screen from the motherboard. If you need help, you can always schedule a repair.
Step 5

– Grab your trusty plastic opening tool and gently wedge it between the screen and the body of the phone. Start at one end and make your way around like a superhero saving the day, uncovering the whole device with care and precision!
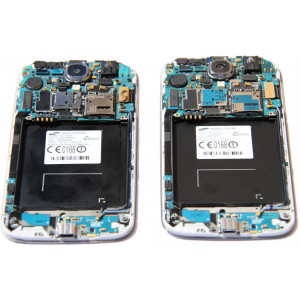
Step 6


– Let’s get started by removing the 1.2mm Phillip screw that holds the motherboard in place. Next, use your thumbs to gently pry the phone’s inner components out. Remember to use the same J00 Phillips head bit from the previous steps. If you need help, you can always schedule a repair