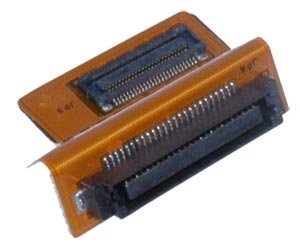
DIY Tutorial: Replace MacBook Pro 15 Optical Drive Cable Step-by-Step Guide
Duration: 45 minutes
Steps: 14 Steps
Hey there! Looks like things might need a little tweaking. No worries, you’ve got this! If you need help, you can always schedule a repair.
This little cable is the lifeline between your optical drive and the logic board. Let’s get them talking!
Step 2
– Remove the three matching Phillips screws from the memory door.
– Make a note of where each set of screws came from. This’ll make re-assembly way easier!
Step 3
– Gently lift the memory door just enough to get a good grip, then give it a smooth slide toward you. Pull it clear off the casing with a little flair!
Step 4
– Unscrew the dynamic duo of Phillips screws chilling in the battery compartment near the latch.
Step 5
– Time to get your screwdriver ready! Let’s tackle those 6 screws and get this repair party started!
Step 6
– Unscrew the fabulous four Phillips screws chilling on the port side of the computer.
Step 7
– Twist your computer 90 degrees and unscrew the two Phillips screws hanging out at the back. Easy-peasy!
Step 8
– Twist your computer 90 degrees once more and unscrew the four Phillips screws on the computer’s side. Keep it groovy!
Step 9
Hold up, don’t just whip the upper case off like you’re unveiling a magic trick! It’s still tethered to the logic board with a ribbon cable. Let’s keep it smooth and gentle.
– Start by lifting the rear of the case and wiggle your fingers along the sides to loosen it. Keep going until the sides feel free. The front might be a bit stubborn, so a gentle rock back and forth could do the trick. Remember, there are four sneaky tabs over the DVD reader that need a straight pull upwards. This part can be a bit of a puzzle, so take your time!
– Watch out for the two tiny tabs on the front left of the upper case—they might get a little bent out of shape as you lift off the upper case. When putting it back together, give them a little tweak to tuck them back into the grooves of the lower case.
Step 10
– First up, gently disconnect the trackpad and keyboard ribbon cable from the logic board. Don’t forget to peel off any tape that might be holding it down!
– Next, it’s time to remove the upper case. You’ve got this!
Step 11
– Unplug the vibrant orange SuperDrive ribbon cable from the logic board, gently peeling off any tape needed.
Step 12
– Take out these 3 screws:
Step 13
– Hoist that optical drive out of its cozy nook in the computer like you’re lifting a treasure chest out of the sand!


