DIY Tutorial: Samsung Galaxy S8 Plus Screen Replacement Guide – Step-by-Step Tutorial
Duration: 45 minutes
Steps: 31 Steps
Whoa there, buddy! If the frame starts looking all wobbly or like it’s been through a war, it’s best to call in the big guns! Ehh, I mean, you can always schedule a repair!
Got a cracked screen? Touch not responding? Bad OLED giving you trouble? No worries! This guide will help you swap out the display and touch panel assembly on your Galaxy S8+ to get it back to its shining glory. Just a heads-up: we’re focusing on replacing just the display, leaving the original frame, motherboard, and battery intact. Some replacement screens, however, might come with a new frame, which means you’ll need a whole different approach—like moving your phone’s insides and popping in a new battery. Get the right part before diving in! If you’re replacing the entire screen assembly with a new frame, check out this other guide. If your frame is bent or damaged, don’t skip replacing it—otherwise, your new screen might not sit right and could get damaged from pressure! And remember, separating the display from the frame usually means a not-so-happy ending for the old display, so only follow this guide if you’re ready to get that display swapped out!
Step 1

Cracking open your phone will mess with its waterproofing. Make sure you have some replacement adhesive ready before you dive in, or keep your phone dry if you’re putting it back together without new adhesive. If you need help, you can always schedule a repair.
– Grab your trusty iOpener and give the back of your phone a warm hug along its left edge for about two minutes. This little warm-up will work wonders, making the adhesive that holds the back cover nice and soft.
Tools Used

Step 2


Alright, let’s talk adhesive. It’s placed just like in the first snapshot, giving you a peek under the hood once the cover’s off.
– Get ready to slice through that stubborn adhesive holding the back cover in place. It’s time to show it who’s boss!
– Check out the areas indicated from the outside of the phone where you’ll be making those cuts. Let’s get to work!
Step 3


– Let’s get this party started on the right track! Grab a suction cup and attach it to the back cover, right near the heated edge. Then, with a friendly wave of your hand, lift the back cover’s left edge using your trusty suction cup, creating a little space between the back cover and the frame. If you’re feeling stuck, don’t worry, buddy! You can always schedule a repair.


Remember, gentle touch is key! Avoid superhero-level strength and keep those metal tools away to prevent any unwanted glass-breaking action. If you need help, you can always schedule a repair.
If you want to go the extra mile, after inserting the pick, consider sprucing things up with a few drops of isopropyl alcohol in the crevice. It’ll make the adhesive less stubborn in the upcoming procedures.
Step 5


Next, keep that pick in place and grab another one for the next step. Keeping the pick there helps stop the glue you just separated from sticking back together. If you need help, you can always schedule a repair
– Glide your trusty opening pick along the left edge of the device to smoothly slice through the adhesive holding the back cover in place.
Step 6


– Keep on slicing through that adhesive along the bottom edge of the phone.
– And hey, why not leave the opening pick right there and grab another one for the next move?
Step 7


Be careful not to jab your pick in too deep during this step, or you might accidentally harm the fingerprint sensor’s flex cable. Take it slow and use the diagram in step 2 as your trusty guide!
– Carefully slice through the rest of the adhesive along the top edge and right side.
Step 8


Hold your horses! We’re not ready to pop that back cover off just yet.
– Gently lift the back cover from its left edge and give it a little swing open.
Step 9


– Now it’s time to bust a move! Grab your trusty spudger and gently pop off the fingerprint sensor flex cable like a pro.
Tools Used

Step 10


Stay cool and take your time. No need to rush or force the connector into place.
– As you put things back together, make sure to position the back cover at a slight angle until the fingerprint sensor cable connector aligns perfectly with its socket.
– Next, grab your spudger and gently nudge the connector into place by pressing it down directly. Remember, gentle pressure is key!
Tools Used
Step 11

Feel free to pop the back cover back on without swapping out the adhesive. Just make sure to clear away any big, pesky chunks of adhesive that could keep the back cover from fitting snugly. Once you’ve got it in place, give it a little warmth and some good pressure to lock it down. While it might not be waterproof anymore, the glue is usually more than up to the task of holding things together.
– Pop off the back cover.
– Ready to put on a shiny new back cover:
– For reattaching the back cover, or if you’re dealing with one minus pre-installed adhesive, check out this guide.
– You might need to switch over the camera bezel to your new part. If that’s the case, follow our camera bezel replacement guide.
Step 12


– Unscrew the eleven 3.7 mm Phillips screws that are holding the wireless charging coil and antenna assembly in place. You’ve got this!
Step 13


Securing the wireless charging coil + antenna assembly is a breeze with those small plastic clips! It’s like giving your device a warm, cozy hug to keep it safe and sound.
– Grab a spudger and gently pop up the plastic in the marked spots to release those clips with ease!
Tools Used
Step 14


– Time to jazz it up! Let’s remove the wireless charging coil + antenna assembly with style.
– To put it back in place, start by sliding the top edge of the assembly into the phone’s frame groove and then give it some love taps to snap it all into place.


Step 16

As a little precaution, gently press the phone’s back cover into place for now. This will help keep the motherboard and battery safe from any oops moments as you dive into the next steps.
– Grab your trusty spudger and gently lift the display’s flex cable connector from the motherboard socket. You’ve got this!
Tools Used
Step 17

The adhesive holding the display in place can be quite a bit tougher than the glue keeping the back cover secure. If you’re having a tough time, feel free to grab a hair dryer or heat gun to warm things up a bit and help loosen that sticky situation.
Step 18


If your screen is super cracked, the suction cup might not want to stick around. No worries! Try using some sturdy tape to give it a lift, or if you’re feeling adventurous, superglue that suction cup in place and let it set. Once it’s ready, you’ll be all set to keep going!
– If you can, use a suction cup near the bottom edge of the screen. Need help? You can always schedule a repair
Step 19


If you’re feeling adventurous, once you slip that pick in, try adding a few drops of isopropyl alcohol into the gap. It’ll help loosen up that stubborn adhesive for the next steps. Keep it cool and steady!
– Gently tug on the suction cup to lift the lower edge of the display, creating a tiny gap between the display and the frame.
– Slide an opening pick into that little gap you just made.
Step 20


– Gently glide your opening pick along the bottom edge of the display to break free the adhesive lurking underneath.
Step 21


– Keep the pick in place and grab another one to move to the next step. Keeping the pick inserted helps prevent the glue you just separated from sticking back together.

Step 23


– Grab your trusty opening pick and gently slide it under the left side of the display to break that adhesive seal. You’re doing great!
Step 24

– Warm up the right side of the screen for at least two minutes. Give it some love and heat to help things along!
Step 25


Don’t fret! The display’s flex cable is right below the middle on this edge, so be gentle with your tool to avoid any mishaps.
– Get your opening pick ready to groove and gently separate the adhesive beneath the cool right edge of the display.

Step 27


Be gentle when prying, or you might mess up the front-facing sensors and speaker assembly. You can come back and finish this part once the rest of the display is loose.
– Slide your opening pick under the top edge of the display to gently lift the adhesive underneath. If you need help, you can always schedule a repair


Step 30


– Carefully thread the display’s flex cable through its designated slot in the frame, ensuring you completely detach the right edge of the display. You’ve got this!
Step 31


Before you slap on that shiny new display, make sure to get rid of all the old sticky stuff from the frame, and watch out for any sneaky little glass pieces.
If the frame is bent or still has glue or glass bits stuck on, the new display won’t fit right and could get damaged. If you need help, you can always schedule a repair.
– Get ready to show that display who’s boss!
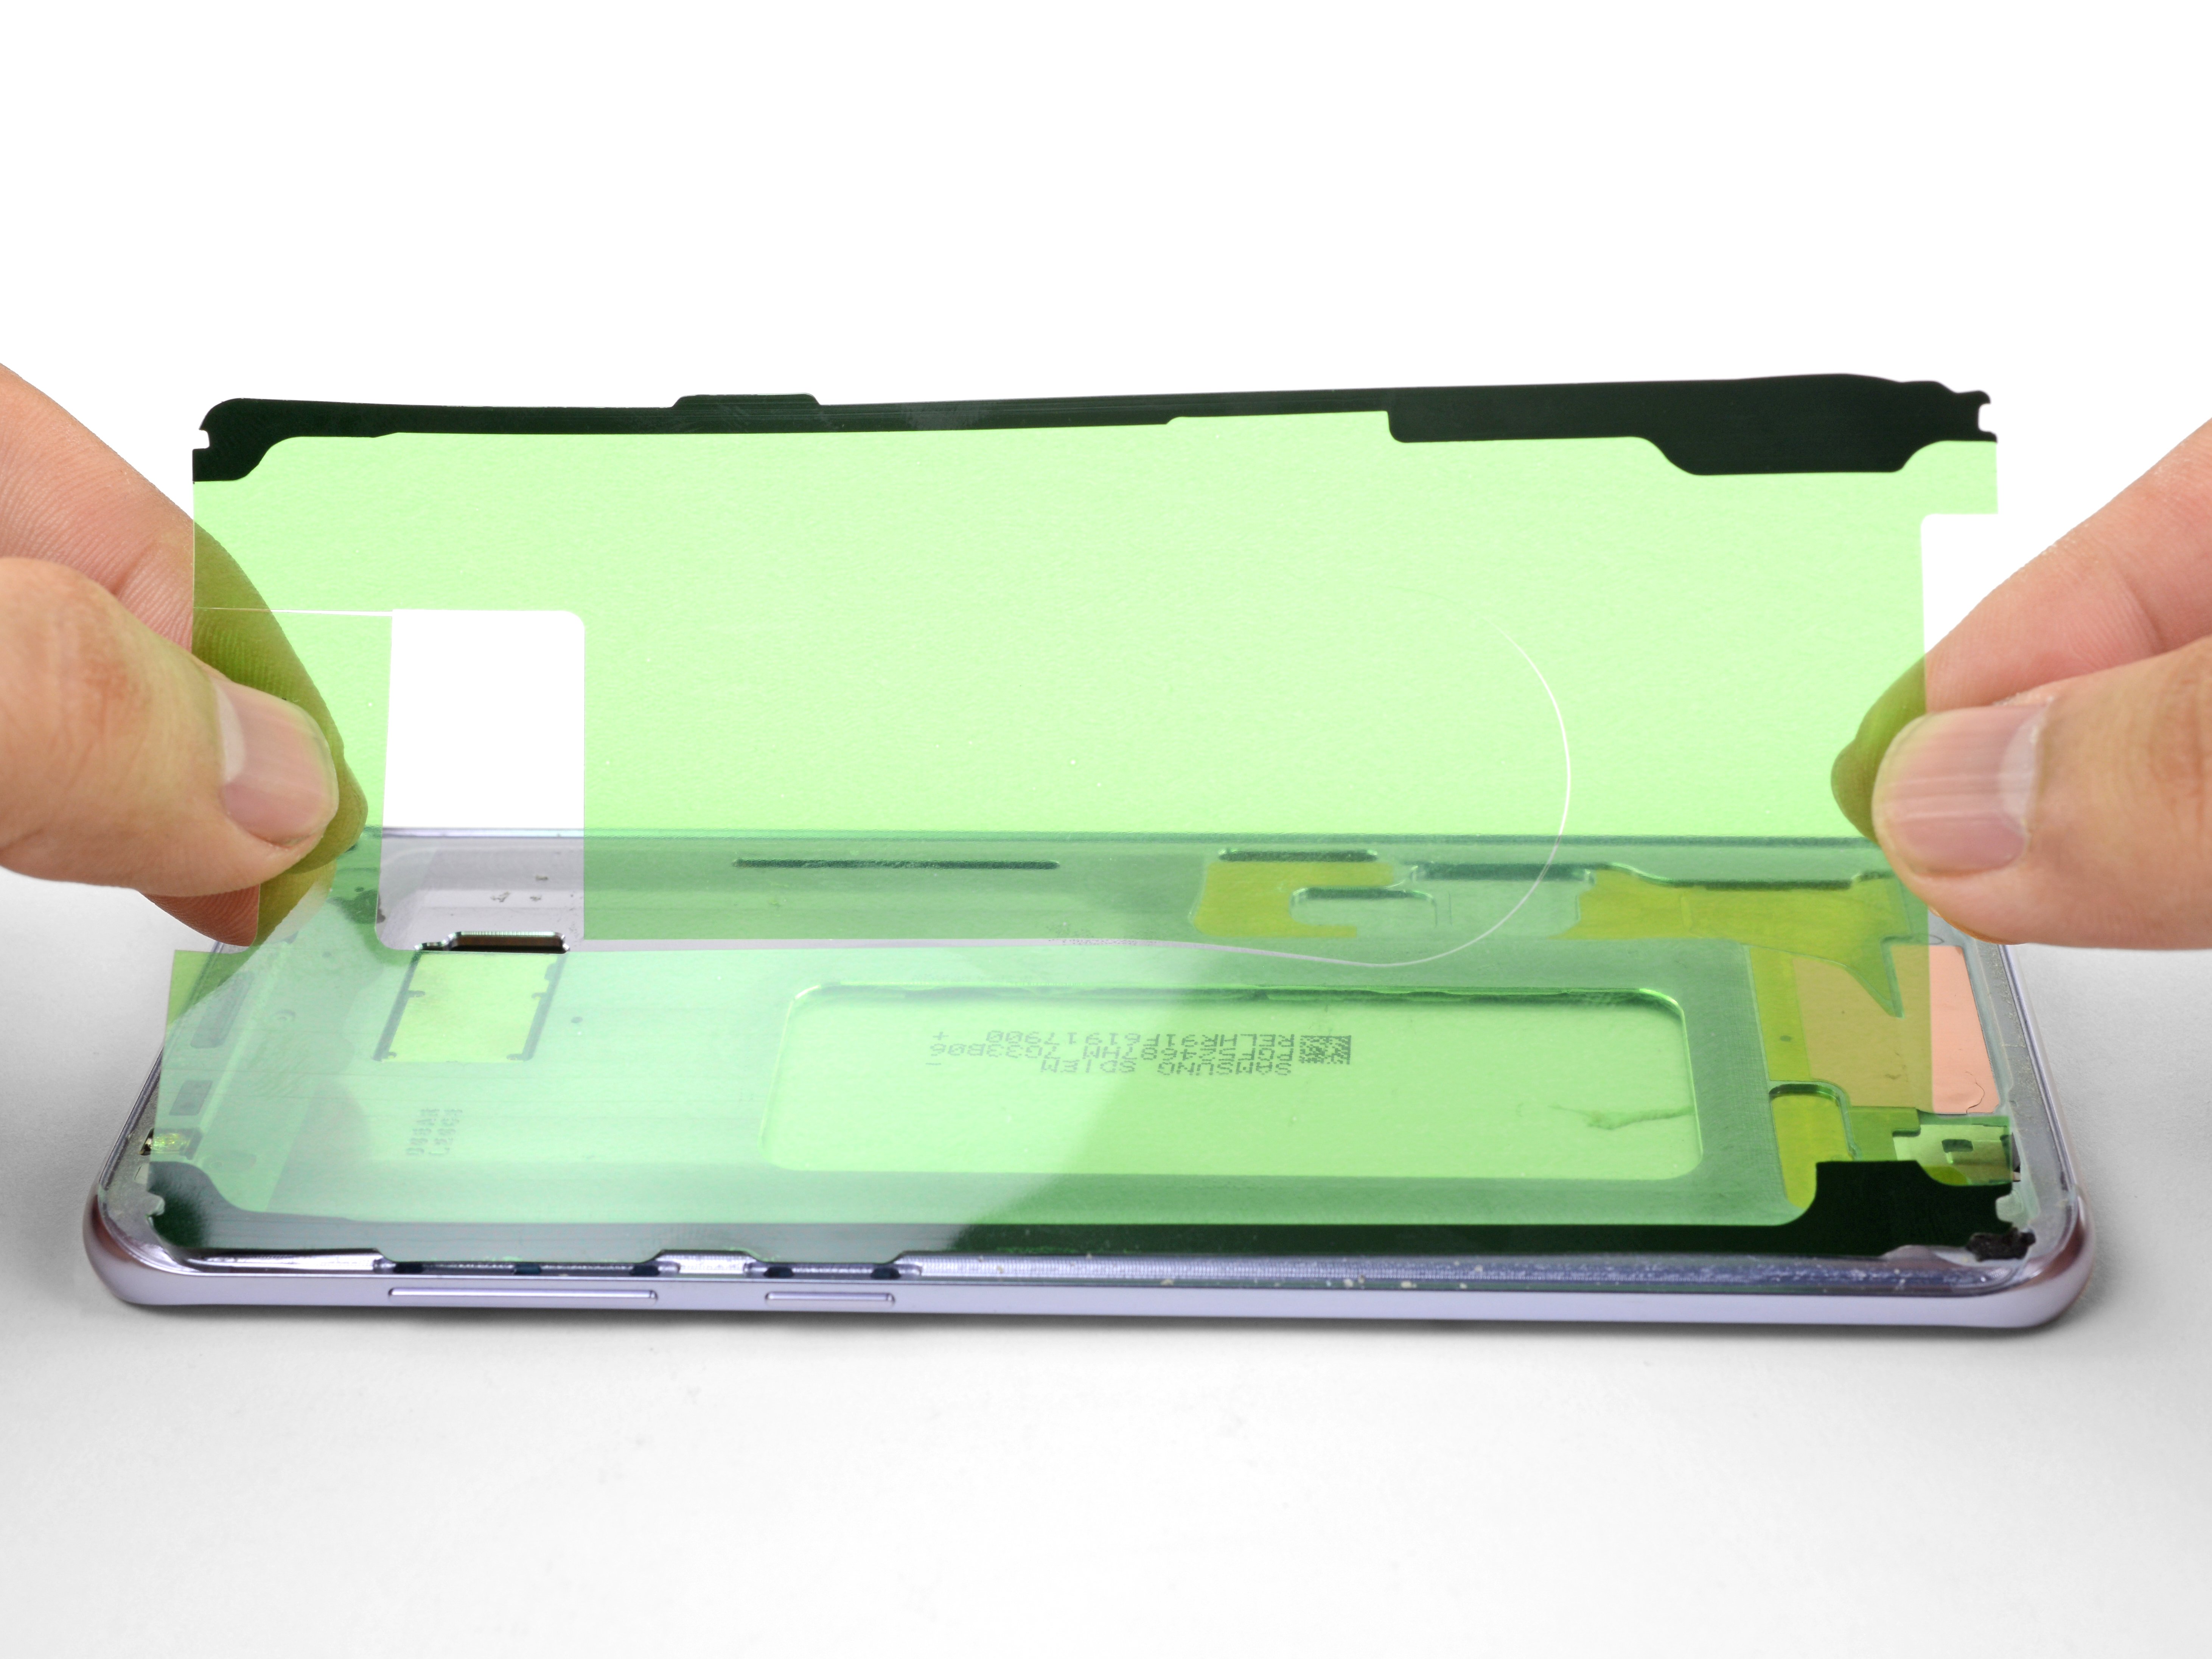
– Once you’ve carefully removed any pesky glue and glass bits, it’s time to give those adhesion spots a spa day with some 90% (or higher) isopropyl alcohol and a lint-free cloth or coffee filter. Remember, swipe in one direction only – no need for a dance-off here!
– To keep that new screen snug as a bug, grab a sheet of custom-cut double-sided tape – your screen’s new best friend! Stick it on the back of the screen, then gently guide the display cable through the frame. Align that screen like a boss, give it a press, and voila – you’ve got this!