DIY Xbox One Optical Drive Laser Replacement Guide
Duration: 45 minutes
Steps: 8 Steps
Yo! This guide’s gonna show you how to swap out the laser in your Xbox One’s optical drive. Think of it as a quick fix for drive issues without needing to replace the whole shebang. It’s like giving your console a fresh set of eyes, right?
Step 1

Ensure that the optical drive is unplugged from any power source and is completely turned off. Let’s keep things safe and sound!
– Alright, time to loosen those screws! Use your trusty Phillips #1 screwdriver to give those four screws on top of the optical drive a little spin.
Step 2

– Gently pry the lid off the optical drive case – it should come off easily with minimal force.
Step 3


– Gently slide the remaining optical drive case off the internal components – it’s like freeing them from their cozy little home!
– Be careful, as the internal components can get caught on some points when you’re removing the optical drive case, so take your time and wiggle it off carefully.
Step 4

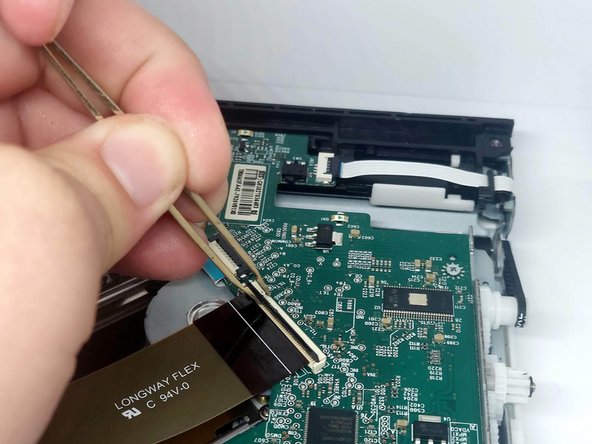
– First up, find those three ZIF connectors hanging out on the optical drive PCB. They’re waiting for you!
– Grab some tweezers and gently lift the tab on each ZIF connector. This will help you free those ribbon cables without breaking a sweat.
– Carefully remove the ribbon cable from each ZIF connector. You’re on a roll!
Tools Used

Step 5

– Remove the trio of Phillips #0 screws that are holding the PCB in place. You’ve got this!
Step 6

When you’re lifting the PCB, just keep an eye out for those sneaky wires connecting it to the motor. We want to keep everything intact and happy!
– Now, give that PCB a gentle lift and set it aside. You’re doing great!
Step 7

– Let’s loosen those screws holding the optical drive laser in place. It’s just three Phillips #0 screws, a piece of cake!
Step 8

– Time to swap out that old optical drive laser! Carefully lift it out of the unit and give its new replacement a warm welcome by placing it in its new home.
Success!


