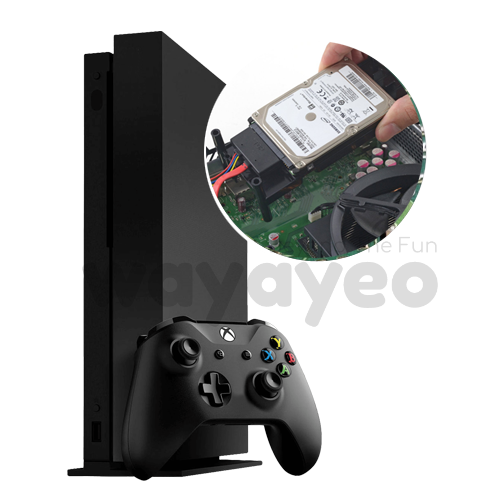
DIY Xbox One S Heatsink Fan Replacement Guide
Duration: 45 minutes
Steps: 18 Steps
Even though the heatsink and fan are two separate components, switching them out is a breeze – they’re basically best buddies attached to the motherboard. So, when it comes to replacing either one, the steps are the same! Let’s make this repair journey smooth and fun together!
Step 1

– Turn the Xbox One S upside down so the bottom of the case is showing off to the world.
Step 2

Watch out for those clips! They might pull a disappearing act when you’re trying to take the bottom off the case.
As you start prying the case open, you might hear some delightful clicking sounds—don’t worry, that’s just the clips letting go! It can be a bit tricky to remove the bottom, but you’ve got this.
Kick things off at the back where you’ll spot the warranty sticker. Gently pry along the rear edge until those clips are free. Next, tackle each side, and once three sides are liberated, begin at the front end opposite the sync button. Remember to take your time and be careful; everything will come apart smoothly without a hitch.
– Let’s start by taking a peek at the back of your device, where the warranty sticker lives. Grab your trusty plastic opening tool and slide it gently between the bottom of the case and the grated top side. You’ll see some clips holding the case together – go ahead and give them a little nudge with the opening tool to pop them loose. Think of it as a friendly little ‘release’ for your phone’s case. The best way to do this is to gently pry the black case away from the bottom.
– Keep using that handy opening tool to pop those clips. Just gently pry the black case away from the bottom – you’ve got this!
Step 3

– Alright, those clips are ready to go! Now, gently pop off the bottom part of the case. You got this!
Step 4


– Let’s get started by removing the six green 50 mm long screws from the metal case labeled F1 through F6 – grab your trusty T10 Torx screwdriver and get to work!
Step 5


– Carefully ease apart the interior case from the sleek white exterior using the right technique.
– Gently pry the white plastic edges outward from the back to detach it from the plastic I/O shield.
Step 6


Time to give that plastic casing around the hard drive a little nudge so it can separate from the rest of the console! Easy peasy!
Just a heads up, some models might need a little extra love with C4 and C5.
– To give your Xbox One S a brand new hard drive, start by flipping it over and removing the two 10 mm T-10 Torx screws, C3 and C5, from the back. This is the beginning of your repair journey, and we’re here to guide you through it. If you need help, you can always schedule a repair
Step 7


– Carefully unplug the hard drive from the motherboard by detaching those two plastic connector buddies. You’ve got this!
Step 8

– Alright, let’s get that optical disc drive out of there! First things first, grab your silver 10 mm T-10 Torx screwdriver and locate the screw marked ‘C4.’ Time to remove it and make some room for your repair magic!
Step 9

– Give that disc drive a little nudge away from the motherboard. Then, gently disconnect the plastic connectors. You got this!
Step 10

– Alright, let’s get that motherboard swapped out! First, you’ll need to take off those three shiny silver 10 mm T-10 Torx screws that are patiently waiting for you, marked ‘C1,’ ‘C2,’ and ‘C6.’
– Next up, it’s time to tackle the four sleek black 8 mm T-8 Torx screws. Look for the labels ‘A1,’ ‘A2,’ ‘A3,’ and ‘A4.’ They are ready to be removed!
Step 11

– Find the shiny rectangular silver clamp chilling on the opposite corner of the power block. It’s waiting for you!
– Gently take off the black bracket that’s hanging out near the fan. You’ve got this!
Step 12

Feel free to give it a little nudge to pop the clamp off that shiny silver casing. Don’t worry, the metal is flexible and can easily be shaped back into place!
– Grab the clamp with your tweezers and gently pull it upward, away from the shiny silver casing. If it feels a bit stubborn, give it a little wiggle back and forth, kind of like shaking loose a pesky tooth.
Tools Used

Step 13

– Let’s get started by removing the four black 8 mm T-9 Torx screws labeled ‘E1,’ ‘E2,’ ‘E3,’ and ‘E4.’
Step 14

– Let’s get those pesky screws out! Carefully take out the three black 8 mm T-9 Torx screws labeled ‘D1,’ ‘D2,’ and ‘D3’ to set the stage for that Mediatek board removal. You’ve got this!
Step 15

– Alright, the clamp is out of the way, so give that motherboard a gentle lift from the edges and pull it out of the metal casing. It should pop right out, no drama!
Step 16
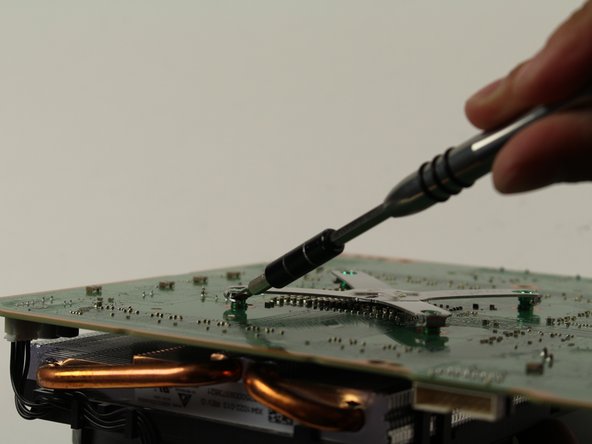


Check out these pics! They show a screwdriver gently lifting the corners of the bracket. Remember to use a spudger or a plastic opening tool to keep that motherboard safe and sound!
– Time to flip that motherboard over to the back side! You’ll see a cool little metal x-shaped bracket hanging out.
– Now grab your trusty spudger or plastic opening tool and gently pry those corners of the bracket off the four tiny green mounts. Easy peasy!
Tools Used

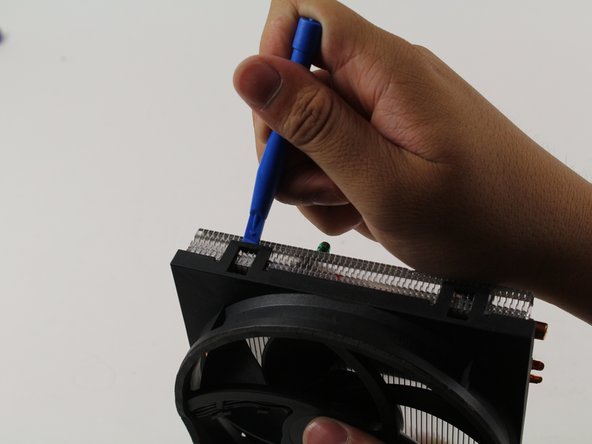
Step 17


– Carefully lift the fan/heatsink off the board by gently tugging on those little plastic white connectors. You’ve got this!
Step 18

Be prepared to use a bit of elbow grease to pry the fan off the heatsink – it might take some gentle yet firm persuasion!
– To put your device back together, just retrace your steps using these instructions in reverse. You’ve got this!
– If things didn’t quite go to plan, no worries—just hit that cancel button.
– And remember, if you ever hit a snag, you can always schedule a repair for some expert help!
Success!