DOPO 10.1 Tablet Battery Replacement
Duration: 45 minutes
Steps: 4 Steps
Get ready to roll up your sleeves! For this project, you’ll want to have some soldering know-how and the right tools on hand. If you’re not sure how to get started, check out this handy guide on soldering skills: How To Solder and Desolder Connections. Remember, if you ever feel overwhelmed, you can always schedule a repair!
Step 1


– Grab those plastic opening tools and scope out a good spot on the back of the tablet to start lifting the back plate. Once you’ve got it loosened, gently work the back off with your fingers—take your time, no rush.
Step 2

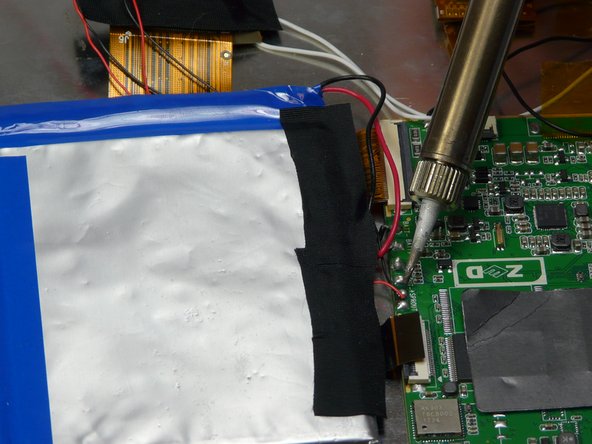
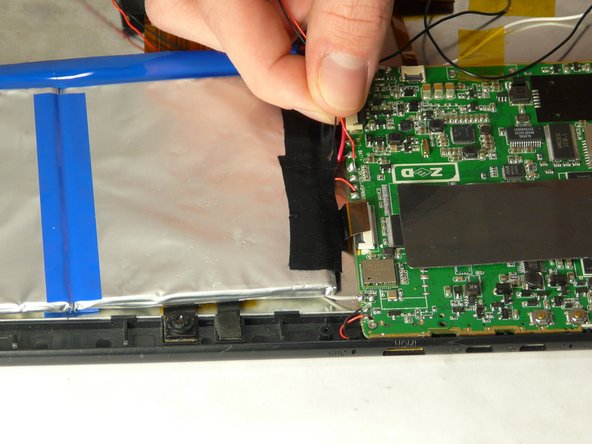
– Find the battery and take a good look at the wires that are connected to it. Let’s see what we’ve got going on here!
Step 3


– Now it’s time to remove the battery – gently does it! Be careful not to put any strain on the connected wires. The battery is stuck to the tablet with adhesive, so take your time and don’t jerk it loose when it starts to come free.
Step 4

– Now, just retrace your steps to put your device back together. You’ve got this!
– If you need help, you can always schedule a repair.
Tools Used

Success!