Ematic FunTab 3 Camera Replacement
Duration: 45 minutes
Steps: 5 Steps
If your photos are looking a bit fuzzy, pixelated, or just plain weird, don’t worry! This guide will walk you through the fun process of swapping out your front-facing and rear-facing camera to get those snaps back to their stunning selves.
Step 1


Before you start, switch that device off – we don’t want any accidental power-ups getting in the way
When you open it up, stick to the side without all the buttons to avoid any potential damage
– Gently slide the hooked end of your trusty plastic opening tool into the little gap between the screen and the back panel, right on the edge of your device. You’ve got this!
– Now, glide that plastic tool down the long side of the device like you’re on a slippery slide—smooth and steady.
– Time for round two! Insert the tool again and slide it down the long side of the case a second time. Keep that momentum going!
Step 2

– Gently ease off the back panel from the screen—no need to wrestle, you’ve got this!
Step 3


– Now it’s time to get rid of that black tape and uncover the wire ribbon connector. Gently peel it off to reveal what’s underneath.
Step 4

– Grab your trusty plastic opening tool and gently nudge up that black retaining tab. You’ve got this!
Step 5

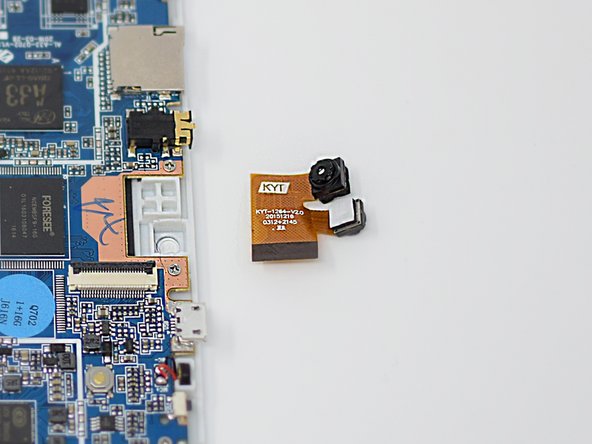
The camera is secured with some adhesive, so you’ll need to bring your A-game and apply a bit of extra muscle.
– Gently wiggle out the wire ribbon that’s connected to the camera. It’s like giving it a little hug before saying goodbye!
– Carefully lift the camera out of your device. It’s time for it to take a break!
– Once you’ve got those ribbons back in place during reassembly, don’t forget to close the black ribbon retaining tabs. It’s their way of saying ‘I’m secure!’
Success!
