Fairphone 4 Charging Port Replacement
Duration: 45 minutes
Steps: 12 Steps
Ready to swap out your Fairphone 4’s charging port? It’s easier than you think! Just follow these steps and you’ll be back to charging in no time. Need a hand? If you’re feeling stuck, you can always schedule a repair.
Step 1


Before diving into the repair, make sure to turn off your phone. Safety first!
– Slide a thumbnail or a prying tool like a spudger into the notch at the bottom right corner of the back cover. Then, gently lift to start loosening the plastic clips holding the cover in place.
Tools Used

Step 2


– Grab your thumbnail or an opening pick and gently slide it along the right side of the phone to loosen those plastic clips. No need to rush – just let the tool do its thing!
Step 3


– Gently glide along the bottom of your phone to pop those plastic clips loose.
Step 4


To put the back cover back on, just press it down firmly until you hear a satisfying snap from those plastic clips. You’re almost there!
– Gently slide your finger along the left edge of the phone to loosen those plastic clips.
– Lift up the back cover to unclip the remaining plastic tabs and take it off.
Step 5


– Slip a fingernail or a prying tool into the marked notch and gently pop the battery up from its spot.
– Carefully lift the battery out of its little home.
– That’s it—the battery is out!
Step 6

– Take out six 4.8 mm-long Phillips screws to get started on this repair.
Step 7


– Grab an opening pick and gently slide it underneath the loudspeaker to get started.
– Then, carefully slide the opening pick towards the right side of the loudspeaker to unclip it from its mount. If you need help, you can always schedule a repair.
Step 8


– Gently slide the opening pick along the left edge of the loudspeaker to pop the clips loose.
– Give the opening pick a gentle twist to lift out the loudspeaker and get it ready for the next step.
Step 9


– Take hold of the loudspeaker and gently flip it downwards to set it free.
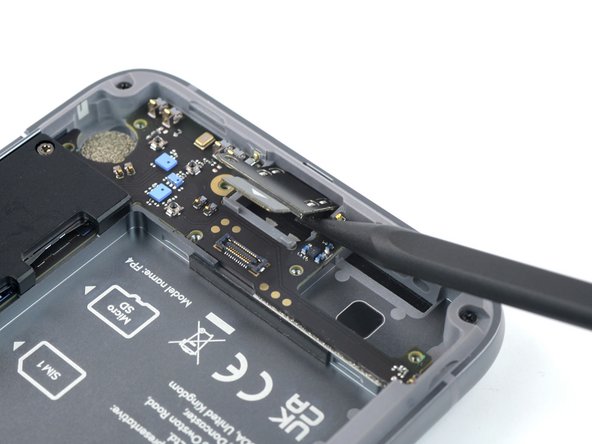
Step 10

– Grab a spudger and gently pry the charging port connector straight up from its socket to disconnect it. Take your time and be careful not to damage anything. If you need help, you can always schedule a repair.
Tools Used
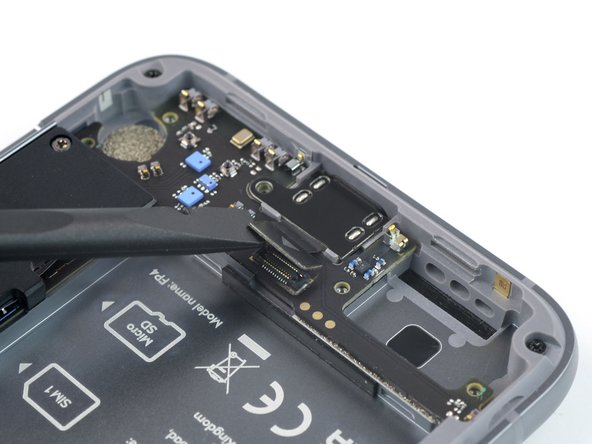
Step 11

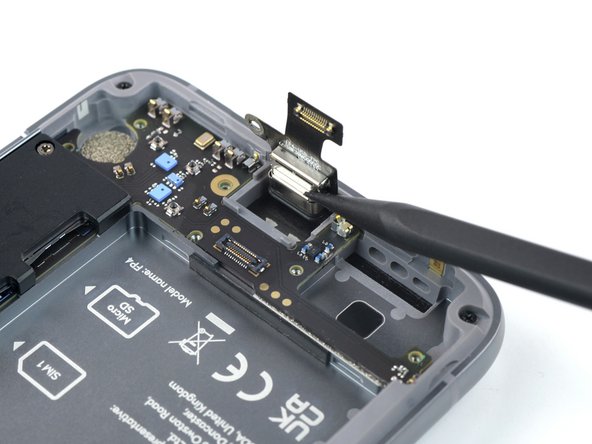
The tiny notch on the other side of the charging port screw hole is your go-to spot for slipping in that spudger. Let’s get to it!
– Gently use the pointy end of your spudger to pop the charging port up and out of its spot.
Tools Used
Step 12


– To put your device back together, just follow these steps in reverse order. It’s like the ultimate undo button.
– Got some e-waste? Do the planet a solid and take it to an R2 or e-Stewards certified recycler. Earth will thank you.
– Things not going as planned? No worries! Try some quick troubleshooting or check out our Answers community for extra tips.
– Need more hands-on help? Don’t sweat it—schedule a repair with us anytime!
Success!