Flatron E2742 Monitor Teardown
Duration: 45 minutes
Steps: 4 Steps
Alright, time to crack open this monitor and do some tinkering. Let’s get to it!
Step 1


– 1 – Unscrew the three screws on the back panel. Set them aside somewhere safe—no one likes a lost screw.
– 2 – Slide an opening pick between the back and the front to start loosening things up.
– 3 – Grab your opening tool and gently work your way around, popping the halves apart. Move the pick along until you hit a stopping point, then use the tool to pry carefully.
Step 2


– There are three connections and six screws that need a quick unscrew and disconnect to get things rolling.
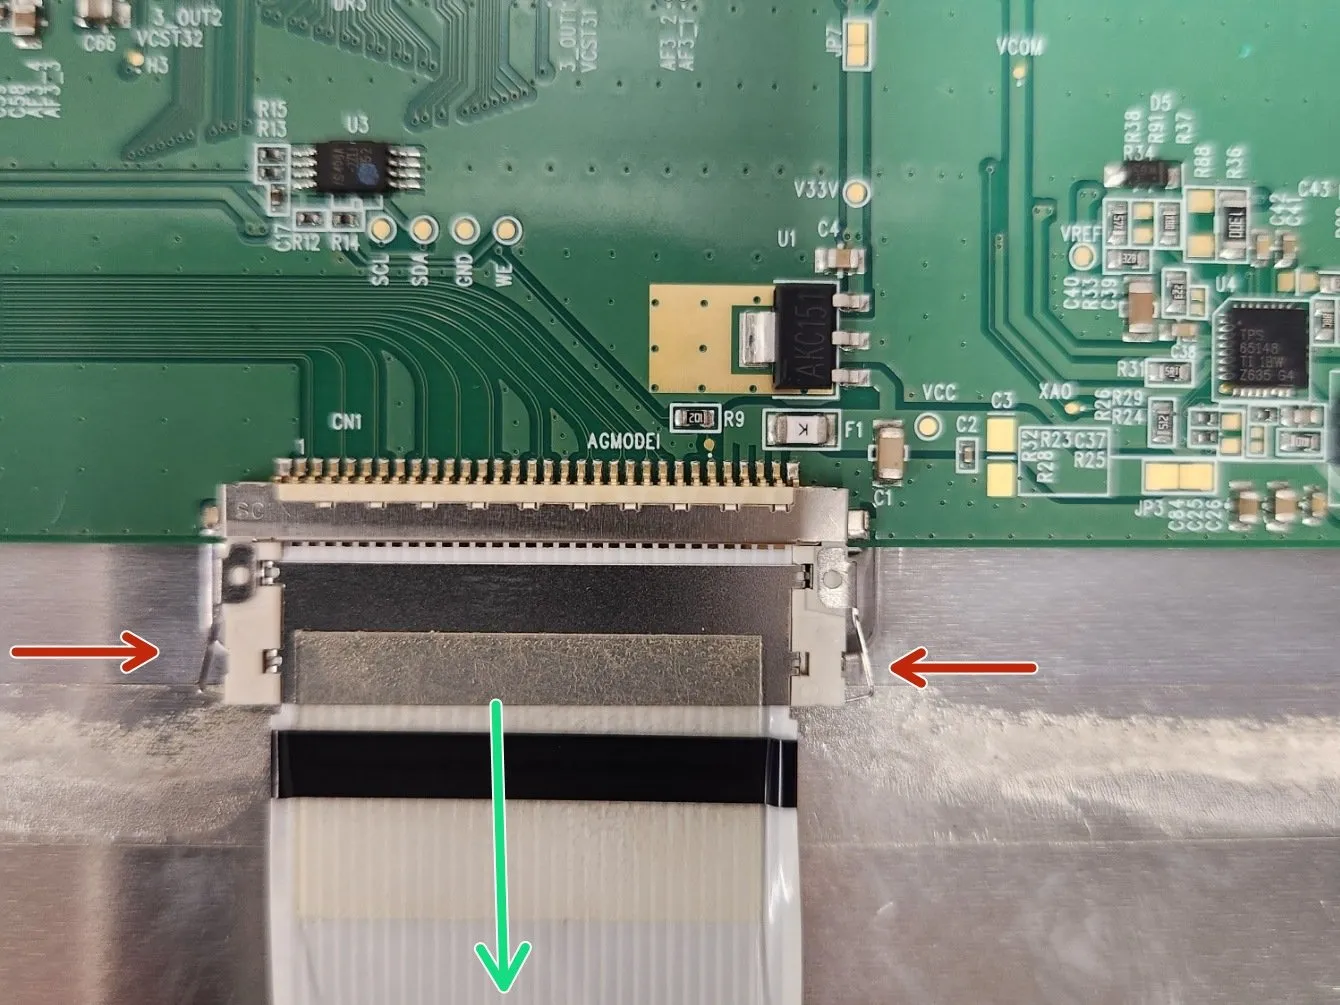
– Start by releasing the top connection—it’s the first thing to go so you can peel back the white tape. Just squeeze those tabs in and pull down gently.
– Before you pull out the clip, pry up the locks on the sides—think of it as unlocking a treasure chest before accessing the goodies inside.
Step 3

– There are a few clips securing the front shroud in place. Gently pry them off to free the shroud and move on with the repair. If you need a hand, you can always schedule a repair.
Step 4

– Take out the two screws and gently pry the sheet metal away from the black tabs to free the LCD module. If you need help, you can always schedule a repair.
Success!