Flowermate Aura Teardown
Duration: 45 minutes
Steps: 4 Steps
The Aura came in with a shattered display. It set us back about 100 euros and was picked up back in 2017. I started figuring out how to open the device, but what began as a simple repair quickly turned into a full-on tear-down. I’m sharing this in hopes that someone else will have better luck! Honestly, I’m glad this brand isn’t too well-known, because tackling this repair can be quite the hassle. If you need help, you can always schedule a repair.
Step 1

– It arrives in a delightful box packed with handy cleaning tools and bonus screens to keep your device looking sharp.
Step 2


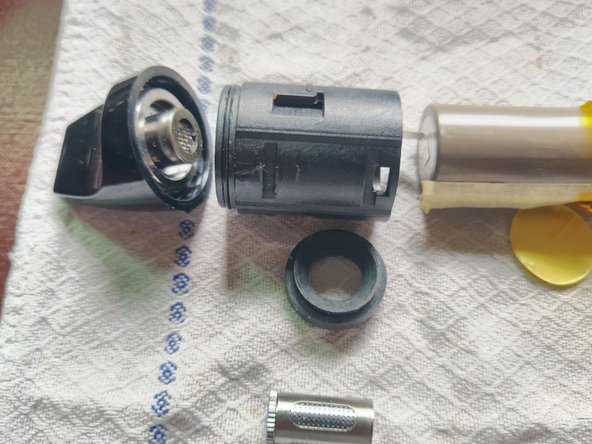
– The mouthpiece pops off easily, giving you access to the herb canister. Once that’s out, you’re ready for the next step.
– The bottom section can be pried open using a thin screwdriver—gentle leverage does the trick here.
– This part marks the beginning of the teardown. Sometimes, it’s tricky to see which components come out next, so take your time and be patient. If you need a hand, you can always schedule a repair.
Step 3

– I decided to stick some paper in the oven and give it a gentle push with a screwdriver towards the bottom. Some parts did break, but honestly, I’m not sure if pushing the other way would’ve been any better.
Step 4

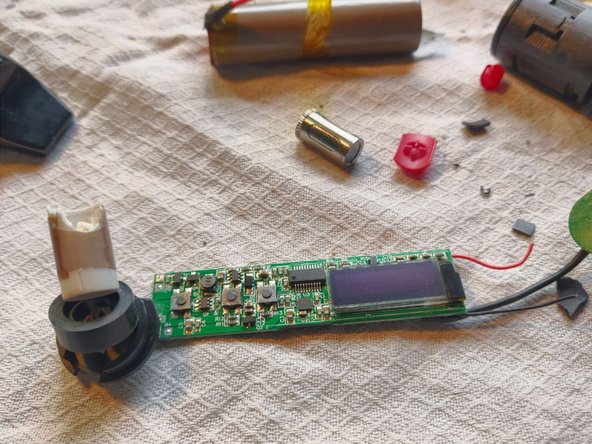
– Starting off, the outer shell of the oven can be gently lifted from the top—just watch out for those snug wires holding everything in place.
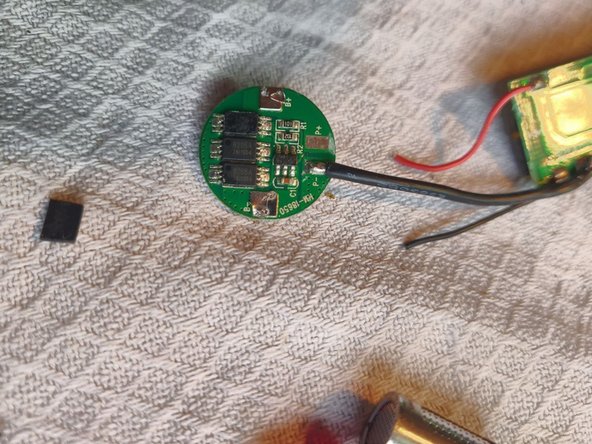
– Take a close look at the PCB; the chip doesn’t have any printing on it, but flip it over and you’ll see ‘s214T-150119A’ stamped on the back. That’s your identification badge.
– Powering the oven are three 8205A MOSFETs, each rated at 5A and 20V—think of them as the oven’s tiny but mighty drivers keeping things running smoothly.
Success!