Fujitsu Lifebook Stylistic Q584 Headphone Jack Replacement
Duration: 45 minutes
Steps: 16 Steps
Got a glitchy or busted headphone jack? No worries! This guide will walk you through the simple steps to swap out your headphone port and get your tunes flowing again. Follow along, take your time, and if you hit a snag, remember you can always schedule a repair with Salvation Repair. Let’s get that audio back in action!
Step 1

– Peel off that sneaky white sticker hiding the screws (if there is one hanging around).
– Grab your PH1 screwdriver and take out the four 2 mm screws from the back of the device. Almost there!
Step 2

– Gently slide the plastic opening tool around the edge of the back cover, working your way along the seam.
– Carefully work the tool along the entire perimeter to pop the clips free and lift the back cover away.
Step 3

– Gently pop off the back cover, then unplug the smartcard ribbon from the motherboard—nice and easy does it!
Step 4

– Grab your PH00 screwdriver and carefully unscrew those ten 3mm screws holding down the shield. You’ve got this—just take your time and keep track of those tiny screws. If you need help along the way, you can always schedule a repair.
Step 5

– Pop off the grey docking station port cover.
Step 6

– Take your plastic opening tool and cruise along the seam, gently popping those clips loose as you go.
Step 7

– Gently lift the shield off the device and carefully disconnect the fingerprint scanner’s ribbon from the motherboard. Take your time, no rush!
Step 8

– Gently lift the cord connecting the battery to the motherboard. It’s a simple move, just give it a little pull to free it up.
Step 9

– Unscrew the seven 1mm screws using a PH00 screwdriver. Easy does it, just take your time and make sure they all come out nice and clean.
Step 10

– Gently disconnect the upper peripheral ribbons from the motherboard, making sure not to force them. Then, carefully detach the left peripheral ribbon from the motherboard. If you need a hand along the way, you can always schedule a repair for expert assistance.
Step 11

– Carefully lift the battery out of its casing. It should come up without much resistance, just give it a gentle nudge.
Step 12

– Grab your PH00 screwdriver and carefully unscrew those two tiny 0.2 mm screws. You’re doing great—keep going!
Step 13

– With your trusty PH00 screwdriver, take out the two 0.2 mm screws.
Step 14

– Grab your ESD-safe spudger and carefully lift the silver piece—just enough to flip it over. But don’t worry, there’s no need to take it off entirely!
Tools Used

Step 15

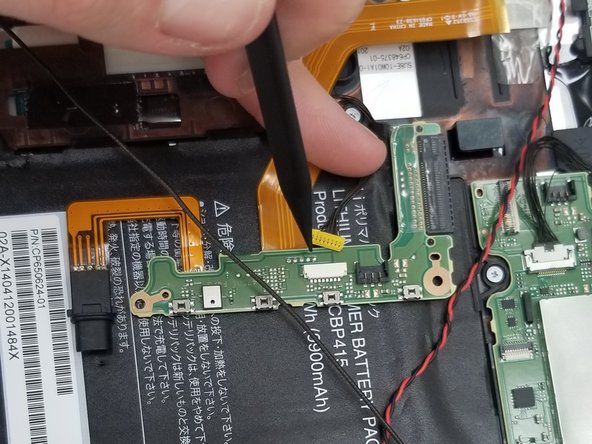
– Grab an ESD-safe spudger and gently nudge that yellow piece out of its cozy white cradle. Nice and easy, no need to rush.
Tools Used
Step 16
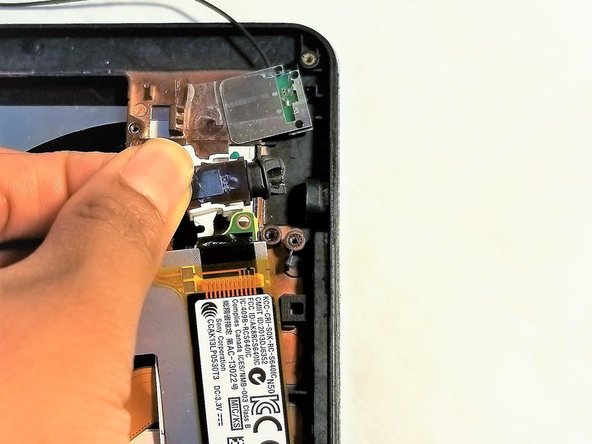

– To take out the headphone jack, just grab the white and black piece with your fingers and give it a gentle pull—it should pop right out!
Success!