
Fujitsu Lifebook Stylistic Q584 Motherboard Replacement
Duration: 45 minutes
Steps: 17 Steps
If your motherboard is toast or you're just looking to give your device a performance boost, you're in the right place! This guide will walk you through the process of replacing or upgrading your motherboard. No need to stress, follow these simple steps and you'll have it sorted in no time. If you hit a tough spot, remember, you can always schedule a repair.
Step 1

- Peel off the white sticker hiding the screws, if your device has one.
- Grab your PH1 screwdriver and unscrew the four tiny 2 mm screws from the back of the device.
Step 2

- Slide the plastic opening tool into the groove of the back case like you're slipping into your favorite pair of shoes.
- Gently glide that tool along the seam, popping those clips loose as you go—it's like unzipping a jacket, but way cooler!
Step 3

- Gently lift off the back cover and detach the smartcard ribbon from the motherboard like a pro.
Step 4

- Grab your trusty PH00 screwdriver and tackle those ten 3mm screws holding the shield in place. You've got this!
Step 5

- Pop off the grey cover on the docking station port like a pro!
Step 6

- Carefully glide the plastic opening tool along the seam, and watch those clips pop free like magic!
Step 7

- Gently lift the shield away from the device, and then carefully detach the fingerprint scanner's ribbon from the motherboard. Take it easy—patience is key!
Step 8

- Gently lift the cable that links the battery to the motherboard.
Step 9

- Grab your trusty PH00 screwdriver and get ready to tackle those seven 1mm screws. A little twist and you'll be good to go!
Step 10

- Unplug those upper peripheral ribbons from the motherboard and give them a little breather.
- Now, let's detach that left peripheral ribbon from the motherboard, ensuring it’s nice and free!
Step 11

- Carefully pry the battery up and out of its cozy spot.
Step 12

- Unscrew the three 3mm screws using a PH00 screwdriver to get things moving.
Step 13

- Gently detach all the ribbon connector cables from the motherboard using an ESD-safe spudger. You're doing great!
Tools Used

Step 14

- Carefully lift the motherboard up with a gentle prying motion.
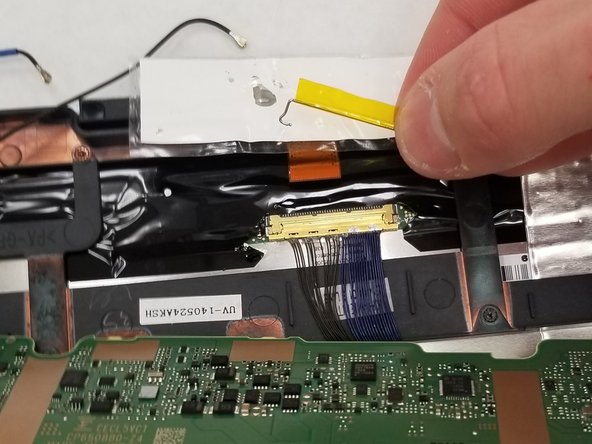
Step 15

- Carefully peel back the foil tape hiding the motherboard connector—gentle hands win this round!
Step 16


- Gently pry up the clip holding the connector in place using an ESD-safe spudger — easy does it!
