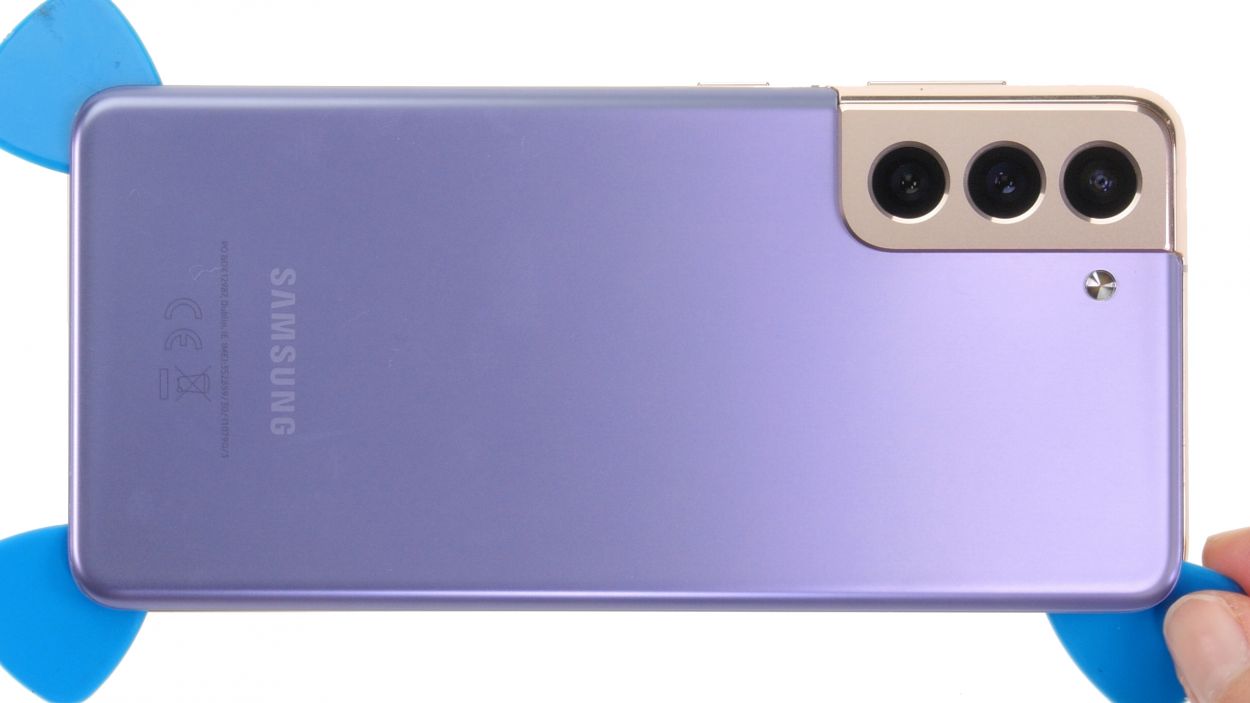
Galaxy S21 5G Camera Replacement Guide: Step-by-Step DIY Tutorial
Duration: 45 min.
Steps: 32 Steps
Hey there! Opening up your device? Just a heads-up: that sweet IP rating (dust and water protection) is going bye-bye! No worries though, we’ve got your back. If you need a hand, you can always schedule a repair
Next up, it’s time to say goodbye to the old camera and welcome a shiny new one into your device! Let’s get that replacement in there and bring your gadget back to life.
Step 1

Before diving into the repair of your Galaxy S21 5G, let’s take a moment to run through our handy checklist. It’s a great way to ensure everything’s working smoothly before you get started, and afterward, you’ll be able to see just how awesome your repair skills are!
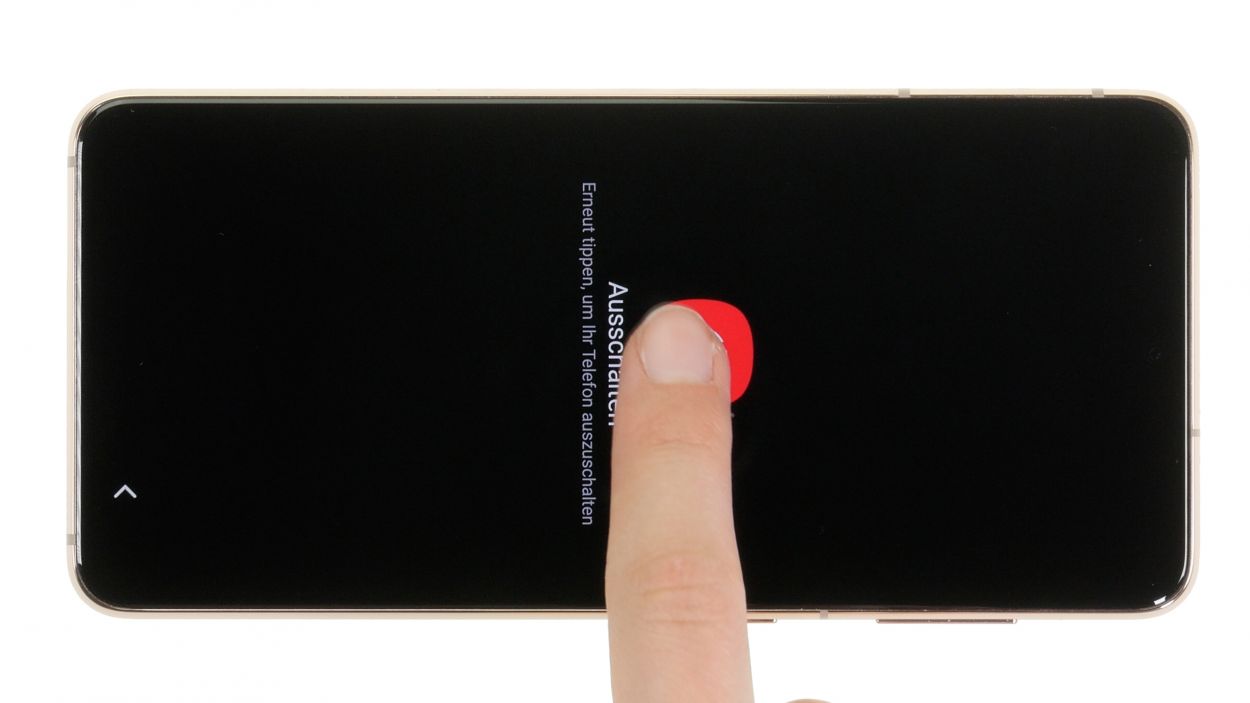
– Hold down the power button and volume down button at the same time – let’s get this party started!
– When the menu pops up, tap “Power off.” Then, use your unlock code to confirm. Piece of cake!

Watch out for those hot fingers! Heat the back cover just enough so it’s warm but still comfy to touch. Keep it cool, and you’ll be golden!
The back cover is glued down pretty well, so let’s give it some love with a little heat! Grab your trusty hot air device—whether it’s a heat gun or a regular hair dryer—and warm it up nicely before getting started. Remember, a little warmth goes a long way!
Tools Used
- heat gun to heat parts that are glued on so they’re easier to remove.
In most cases, you can also use a hairdryer.” rel=”noopener nofollow”>Heat gun
Step 3
To achieve a snug fit between the back cover and display unit, grab a trusty, flat tool. Our top pick is the iFlex, known for its razor-sharp edges that slide in effortlessly.
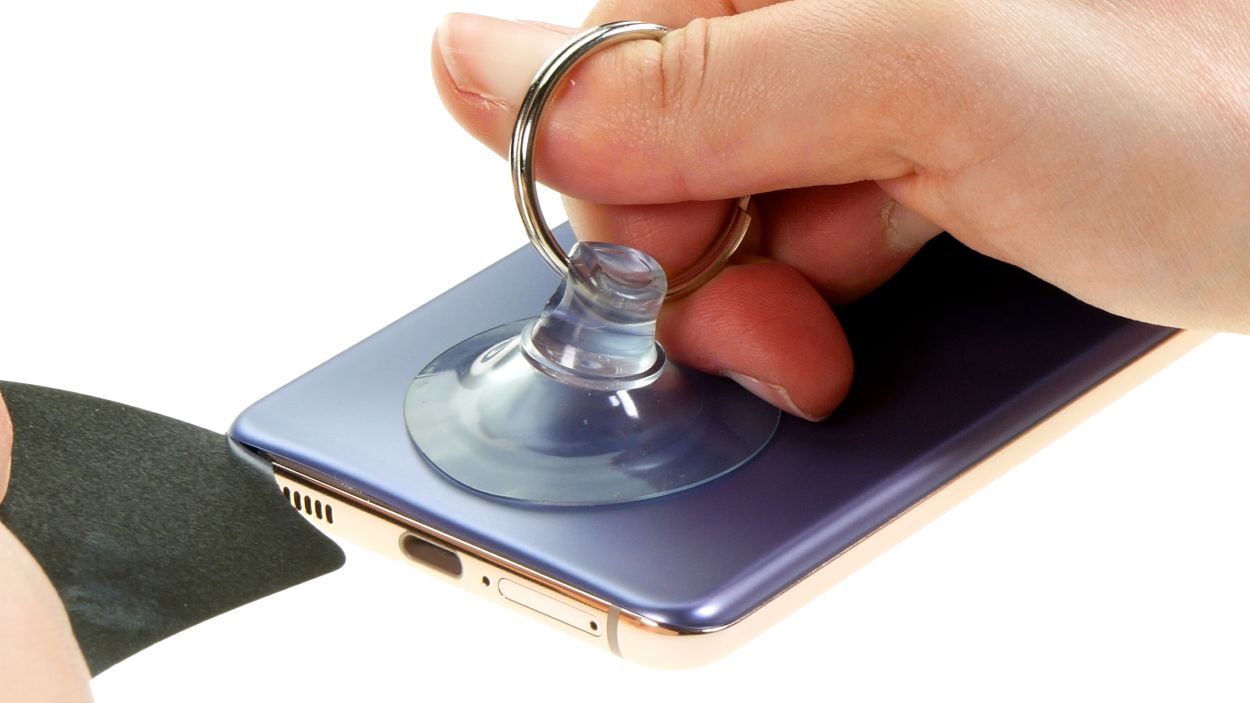
– Attach a suction cup to the lower edge of the back cover and pull it upwards. Insert the iFlex between the display unit and the back cover at the same time.
Tools Used
- screen and the frame. The practical iFlex is made of stainless steel and sits comfortably in the hand. This makes it the perfect assistant for every smartphone repair.” rel=”noopener nofollow”>iFlex Opening Tool
- VAKUPLASTIC Suction Cup
Step 4


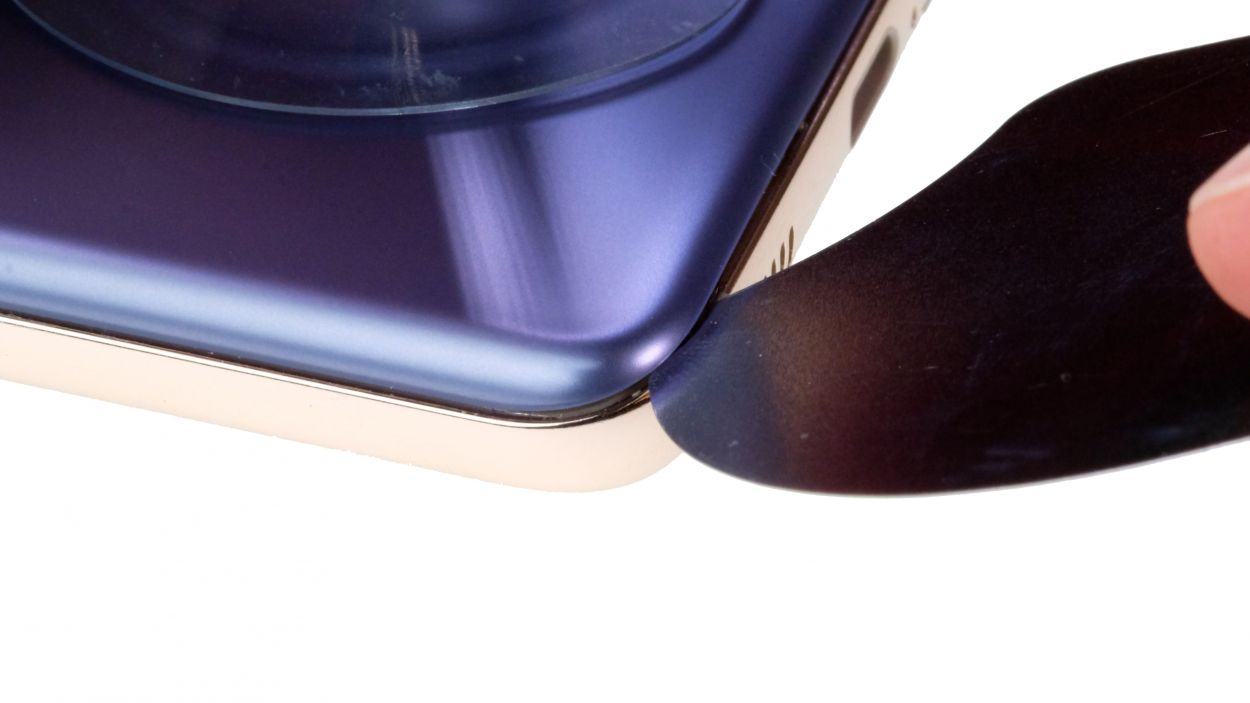
– Gently run your tool all around the edge of the back cover, loosening it a little bit at a time. It’s like giving your device a nice little massage!
– Slip those flat picks under the back cover at regular intervals to keep that pesky glue from sticking again. Think of them as your trusty sidekicks in this repair adventure!
To avoid damaging the camera module, you should not insert your tool too far into the device. We recommend the hard plastic pick at this point. Due to its shape it cannot be inserted too deeply. If you need help, you can always schedule a repair
To keep your device looking sharp and avoid any nicks on the case from the pointy edges of the iFlex, it’s a smart move to switch to a plastic tool like the iPlastix as soon as you can. Your device will thank you!
Tools Used
- heat gun to heat parts that are glued on so they’re easier to remove.
In most cases, you can also use a hairdryer.” rel=”noopener nofollow”>Heat gun - Pick Set
- Flat Picks
- iPlastix Opening Tool
- VAKUPLASTIC Suction Cup
Step 5
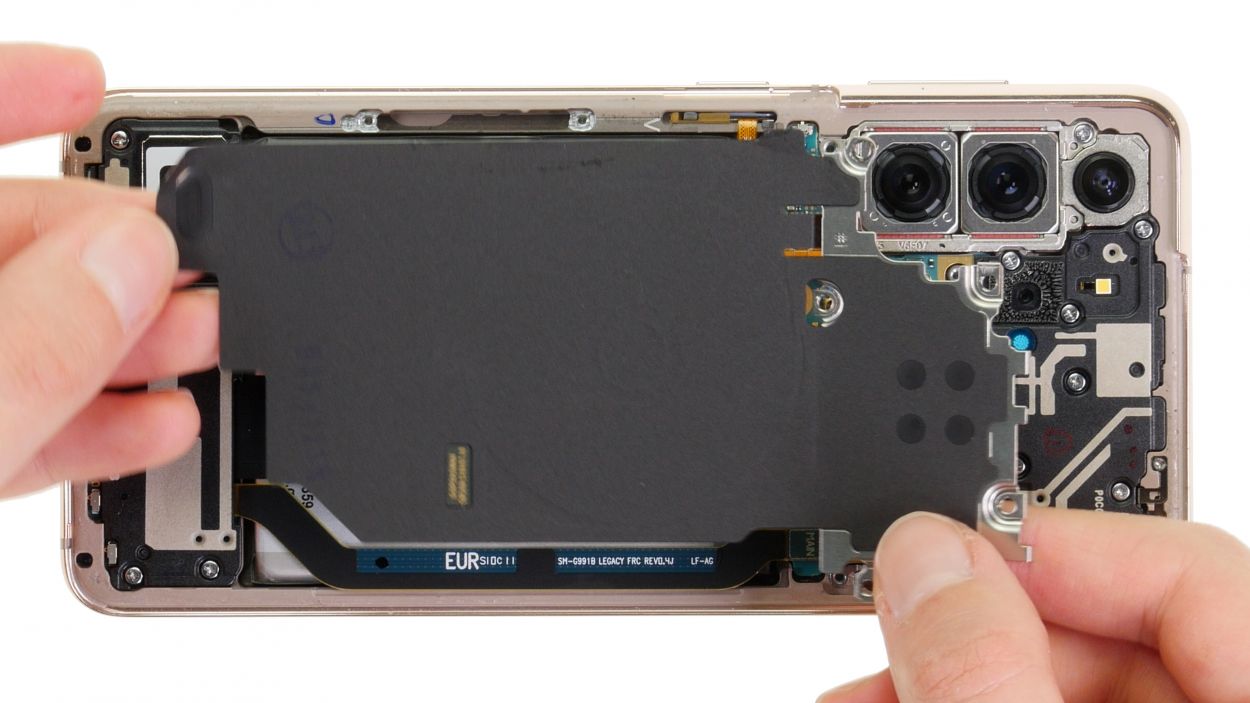
– After you’ve successfully popped off the back cover, the first thing to do is to carefully take out all those plastic picks. They’re like tiny superheroes in your repair adventure!
– Once you’ve got them out, just unfold that cover and set it aside for a moment. You’ve got this!
Step 6
5 × 4.9 mm Phillips
Keep your repair area tidy and worry-free! Grab a handy screw storage solution to easily keep track of all those tiny bits so they don’t wander off. An old sewing box works wonders! And if you want an extra magical touch, our high-quality magnetic pad ensures nothing will go astray!
– Gently unscrew the five Phillips screws holding the charging coil cover in place.
– Once they’re loose, feel free to place them on your magnetic pad for safekeeping.
Step 7

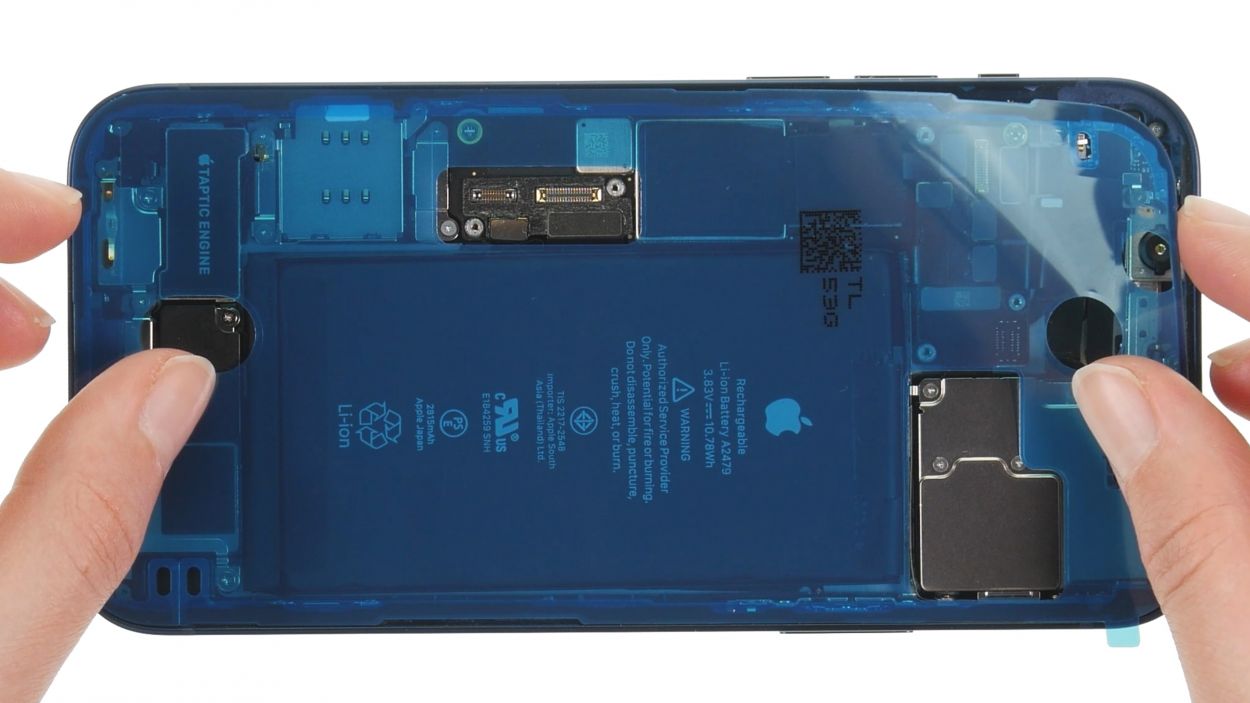
Don’t forget to unplug that battery connector ASAP to keep things from getting a little too shocking!
– Time to jazz up the metal cover of the NFC antenna!
– Gently groove out the orange battery connector underneath from the motherboard using a plastic lever tool. We opt for a plastic spudger for this groovy move.
Tools Used
Step 8

– Next, gently pry off the black connector of the charging coil from the circuit board using a spudger. Take your time and be careful—it’s all about finesse, not force!
Tools Used
Step 9

The bottom part of the charging coil has a little glue holding it in place. Just a gentle reminder to keep it secure while you work your magic!
– Now that you’ve successfully separated those connectors, it’s time to gently detach the charging coil. You’ve got this!
Step 10

7 × 4.9 mm Phillips
– Loosen the seven Phillips screws from the earpiece.
– Then put them on your magnetic pad.
Step 11
– Now separate the connector of the earpiece by carefully levering it off the motherboard with a spudger.
Tools Used
Step 12
– Take the detached earpiece out of your device and put it aside.
Tools Used
Step 13

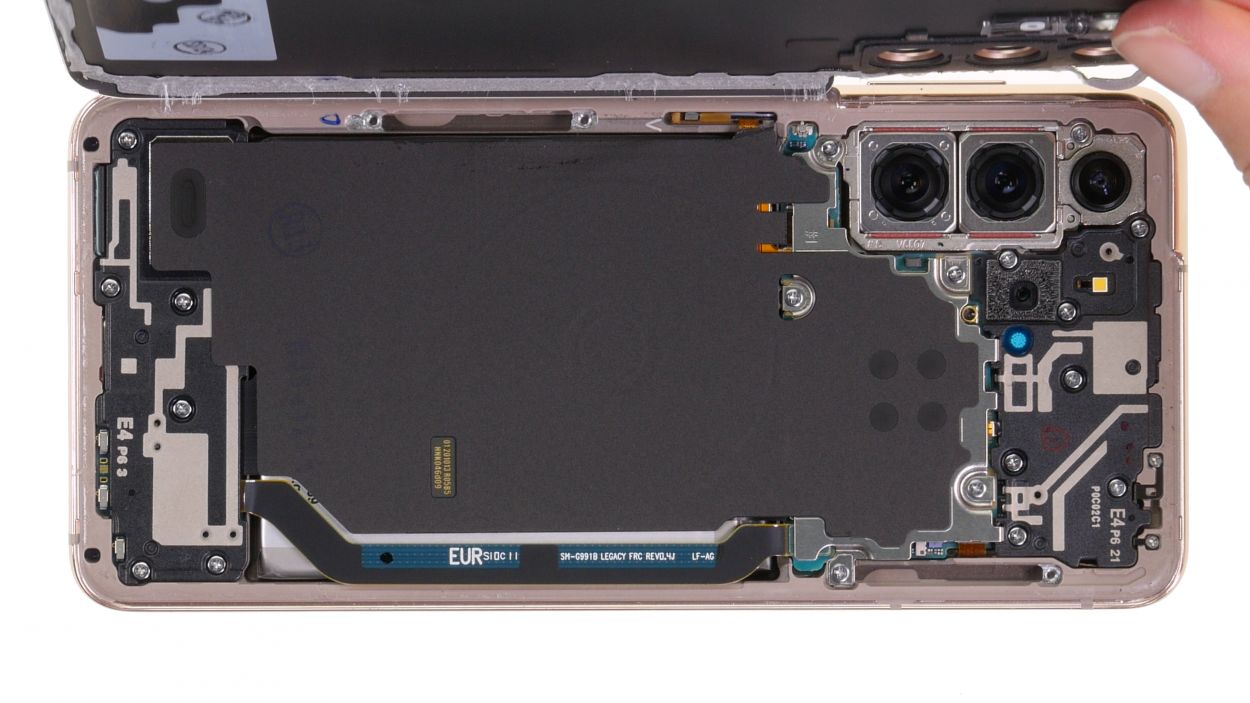
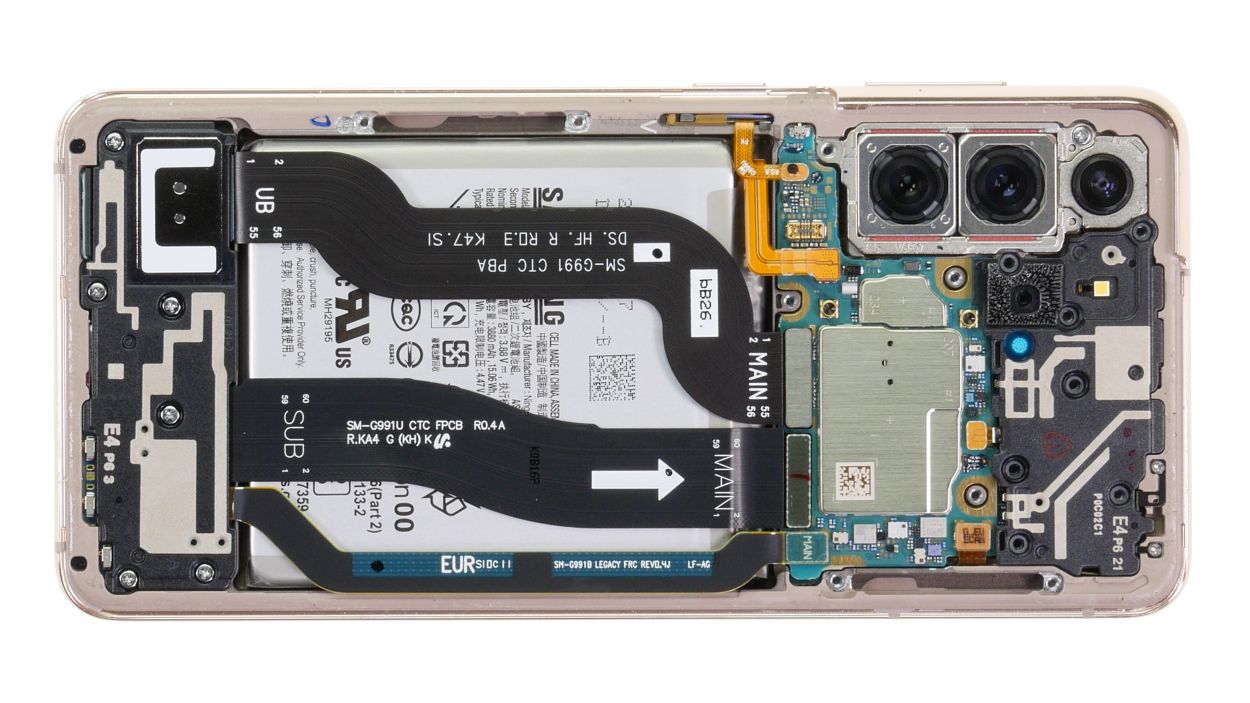
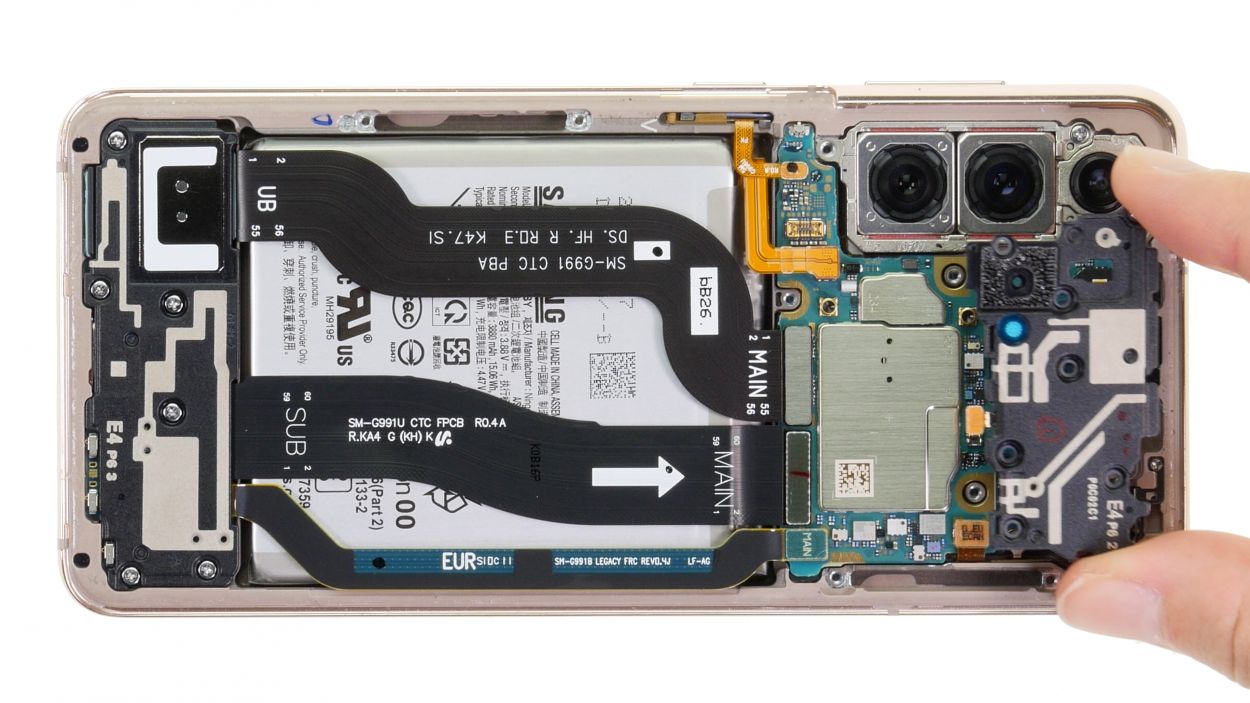
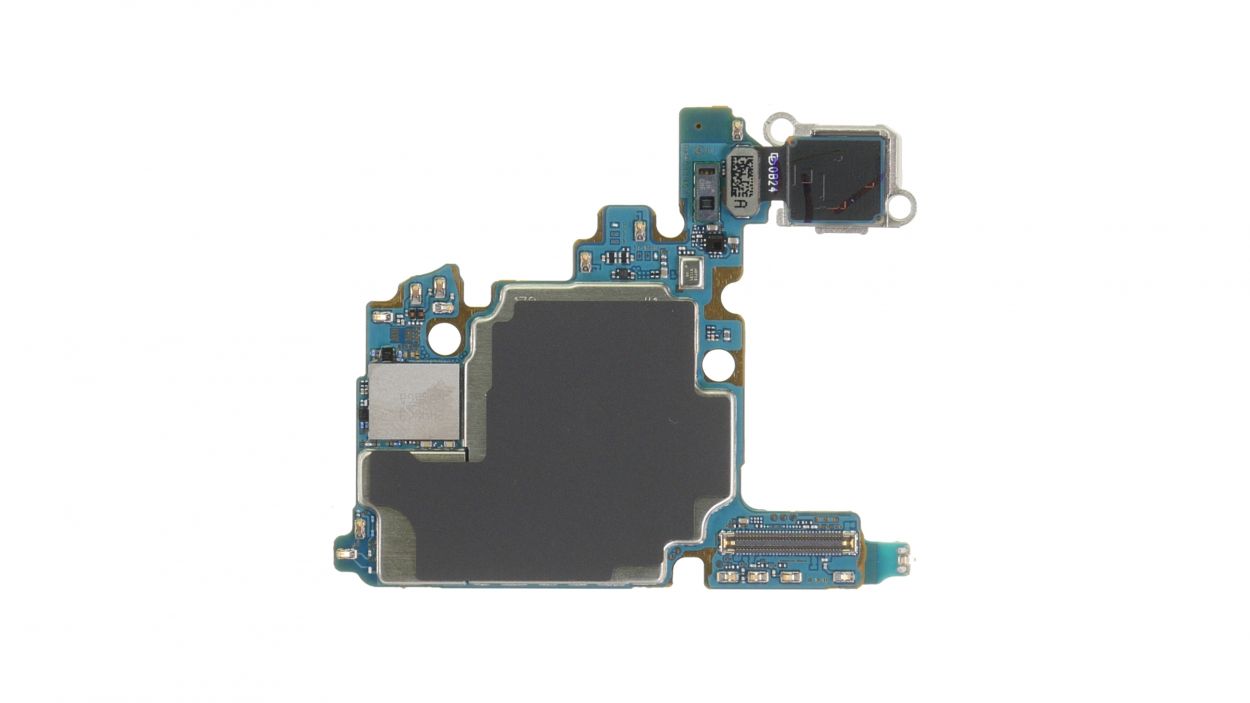
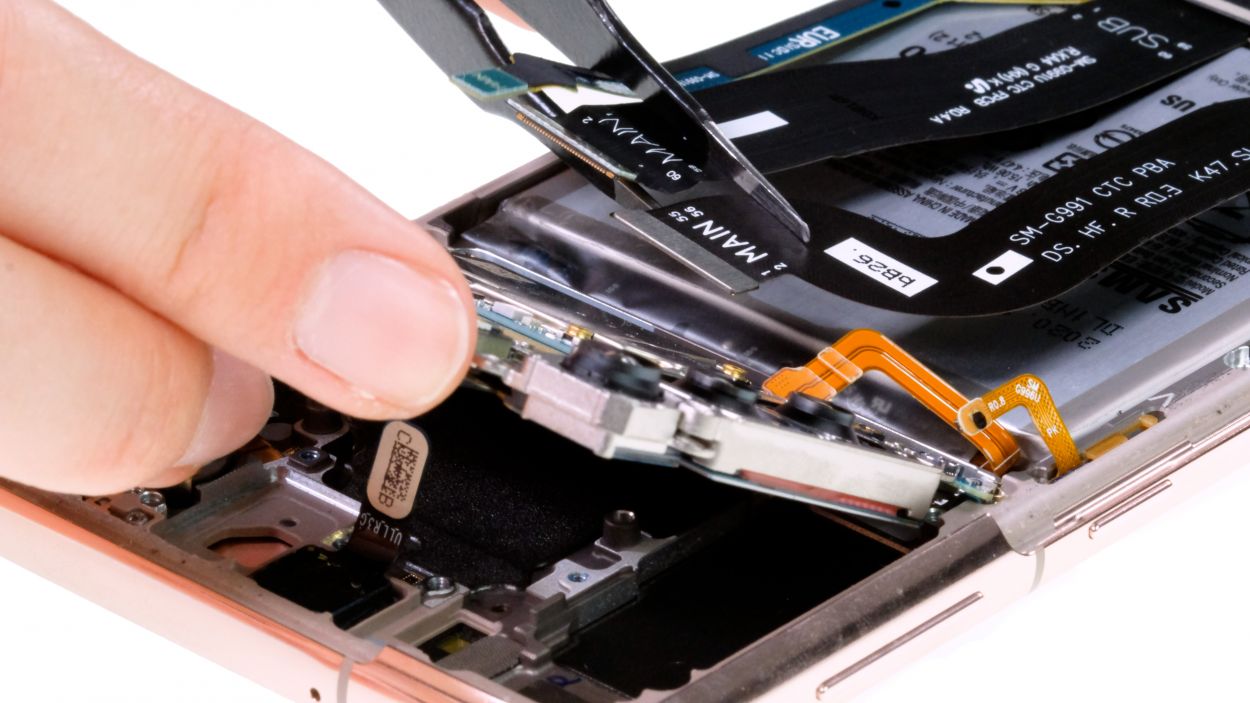
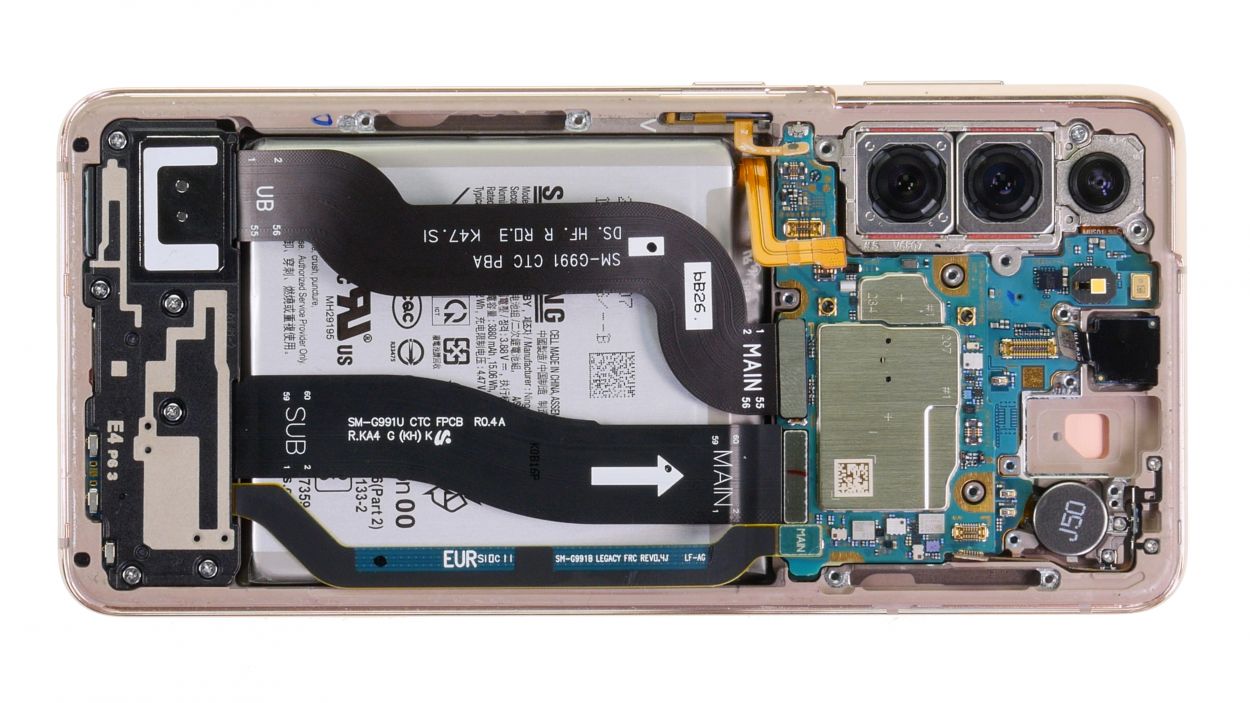
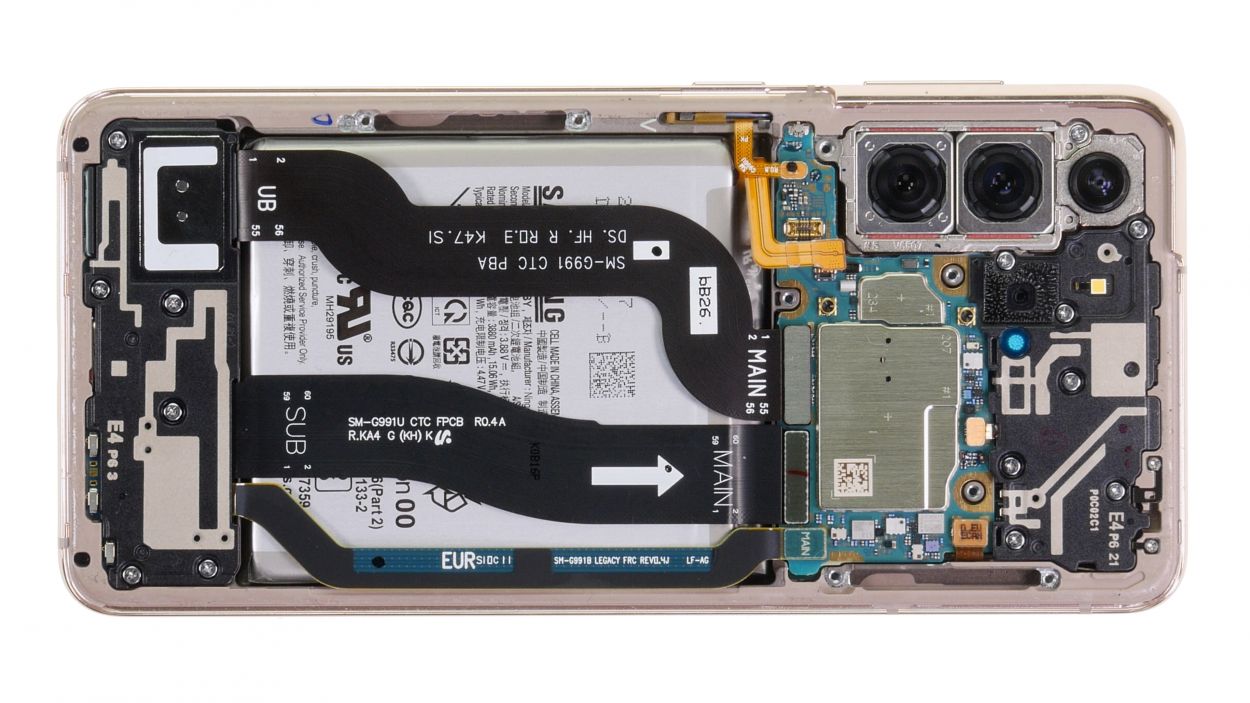
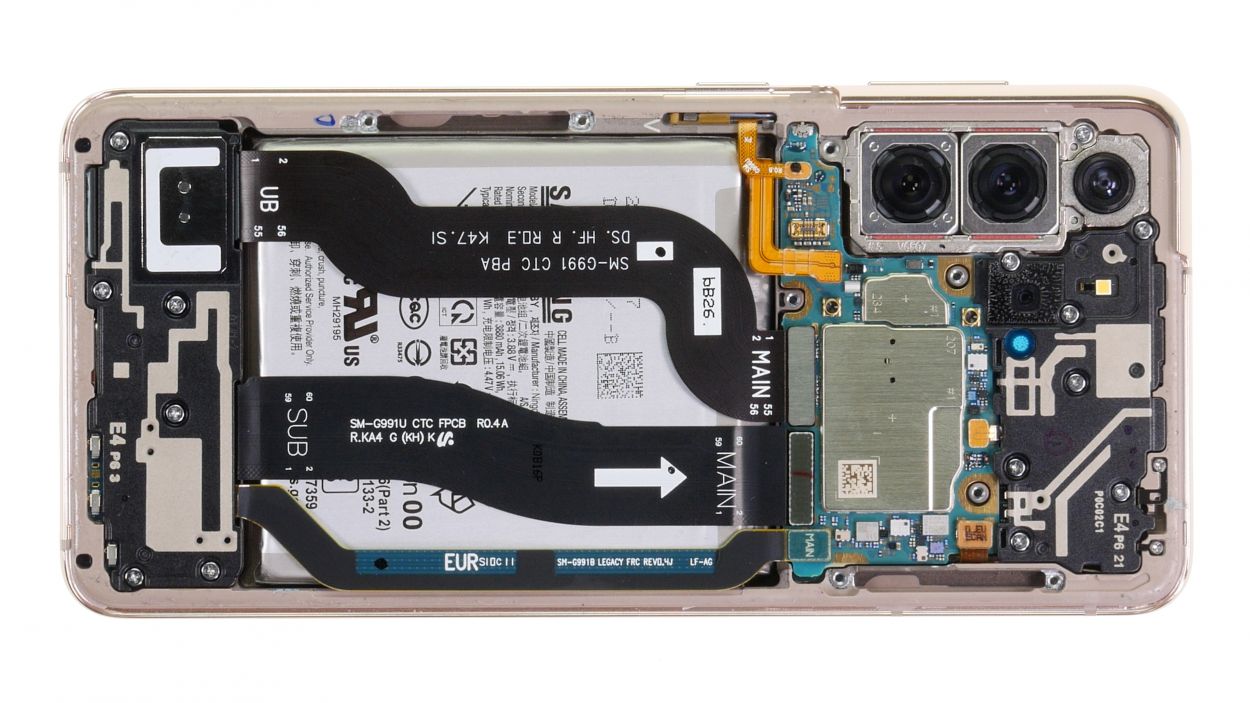
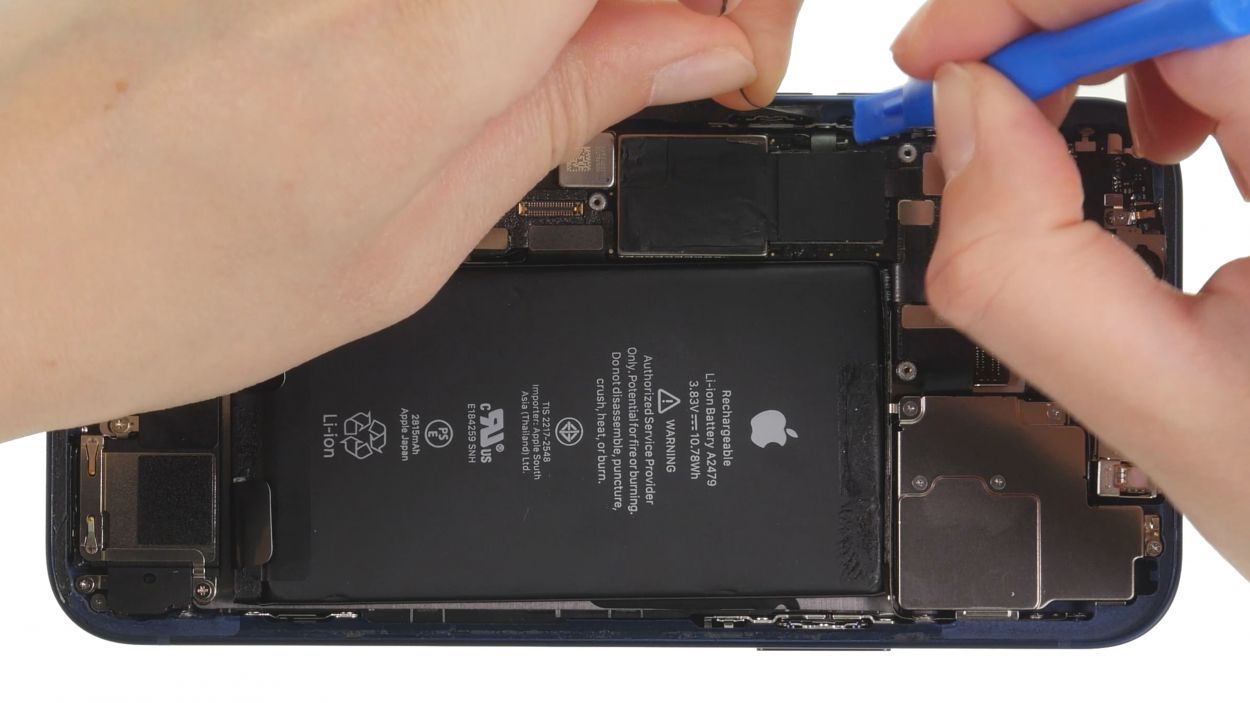
The leftover connectors on the motherboard are for two 5G antennas, the display cable, two connecting cables, and the front camera. Let’s keep things connected and get your device back in action!
– Detach all remaining connectors from the motherboard. Gently wiggle them off using your trusty spudger.
Tools Used
Step 14

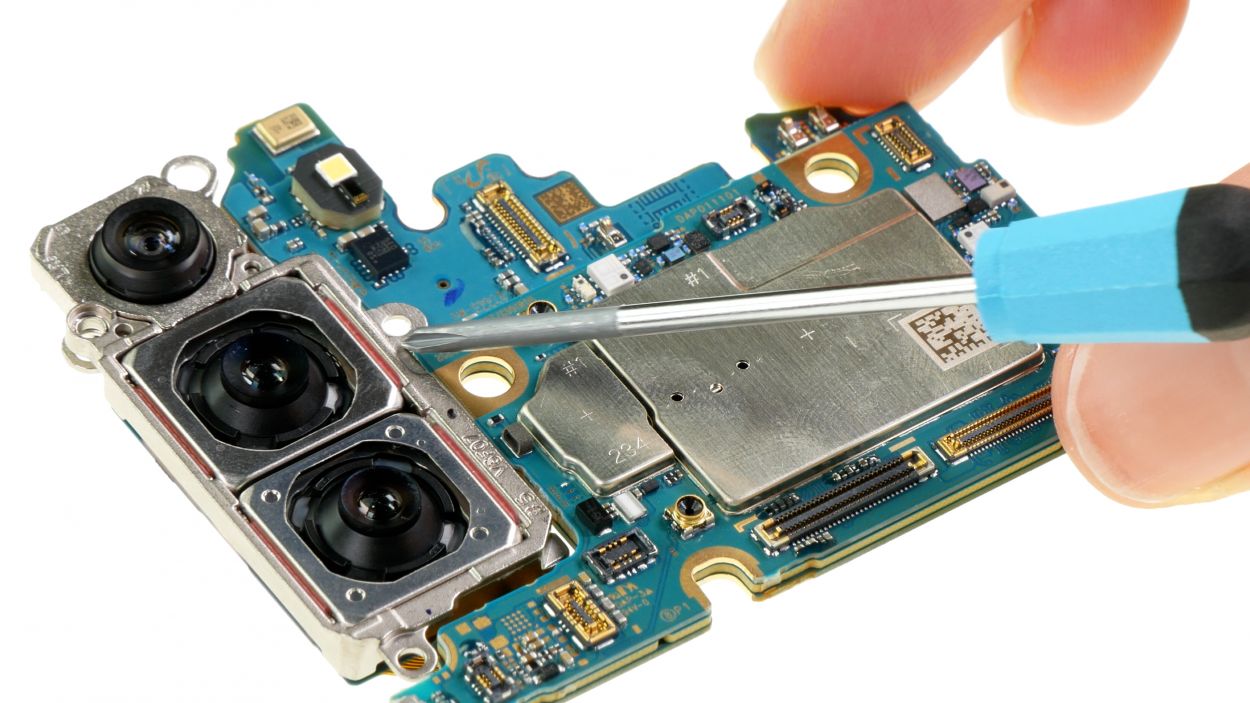
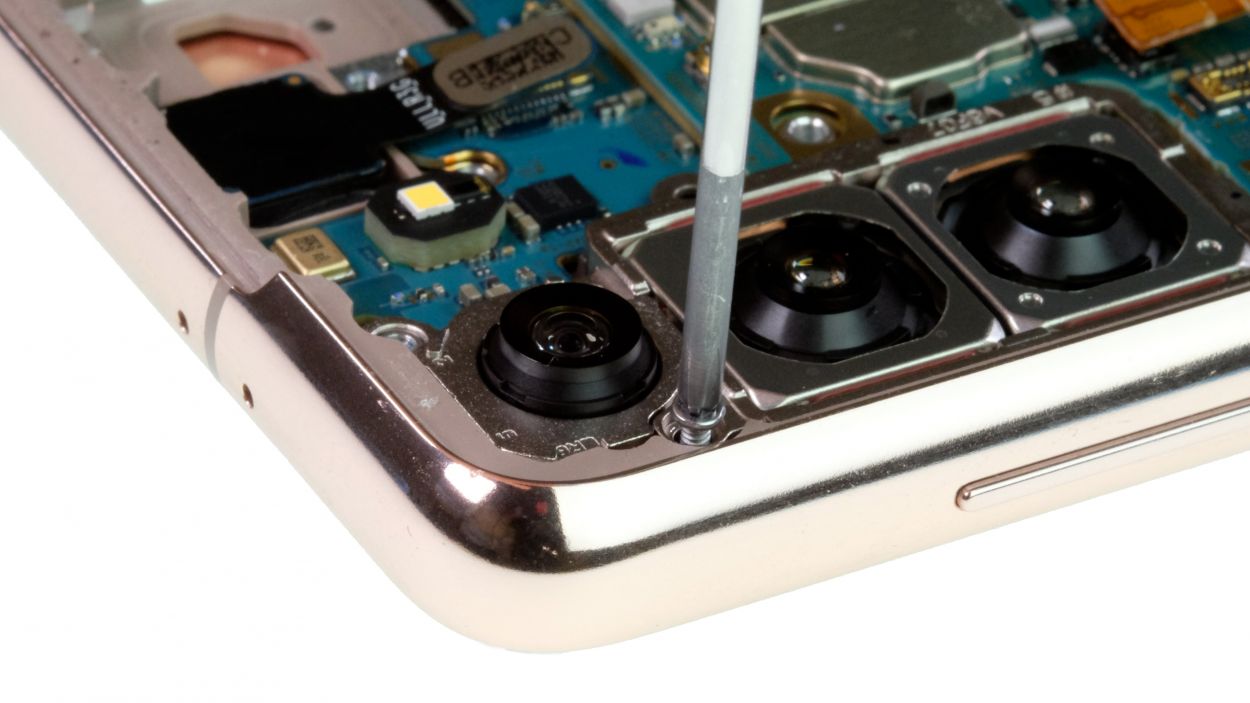
1 × 4.9 mm Phillips
– Let’s loosen that Phillips screw on the camera module – easy peasy!
– Now, gently place it on the magnetic pad. You got this!
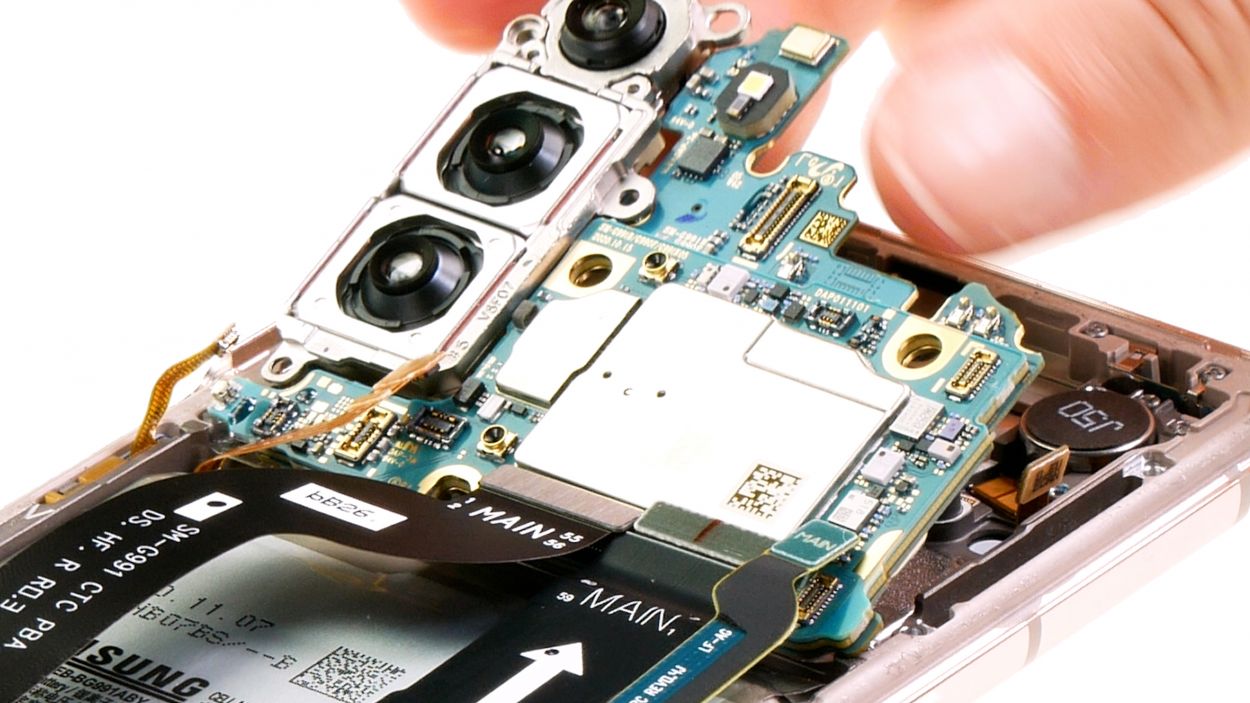
Step 16
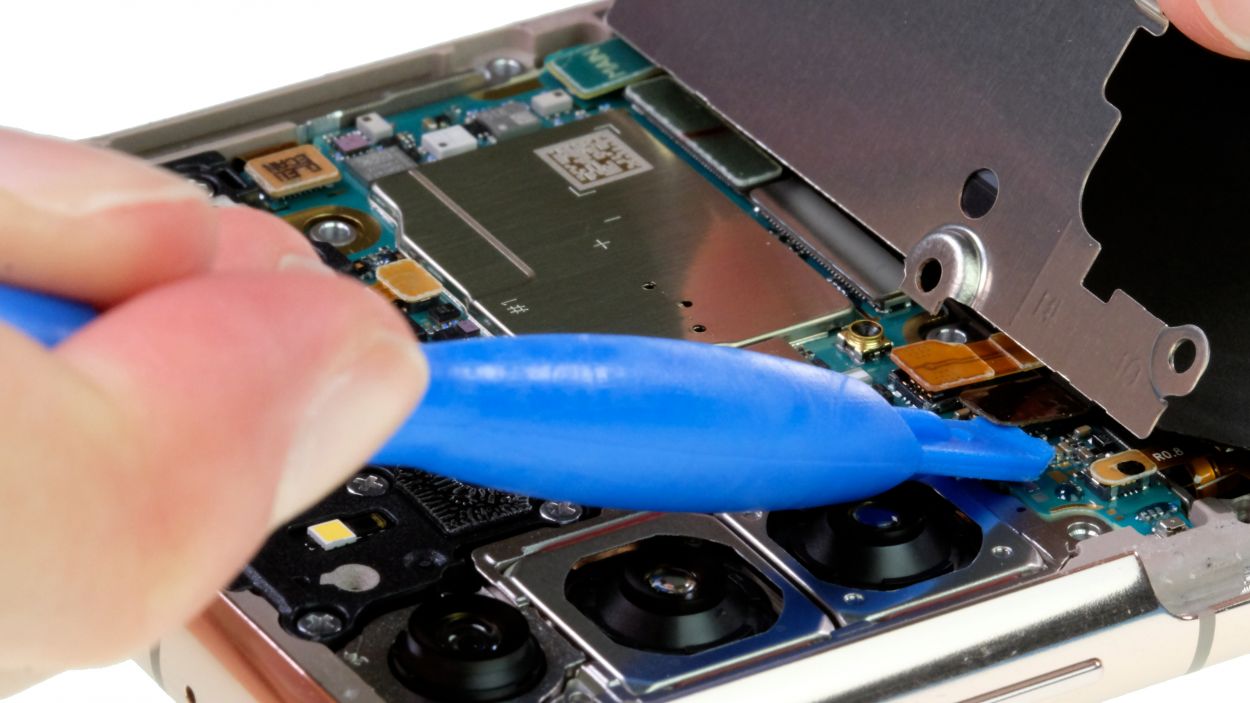
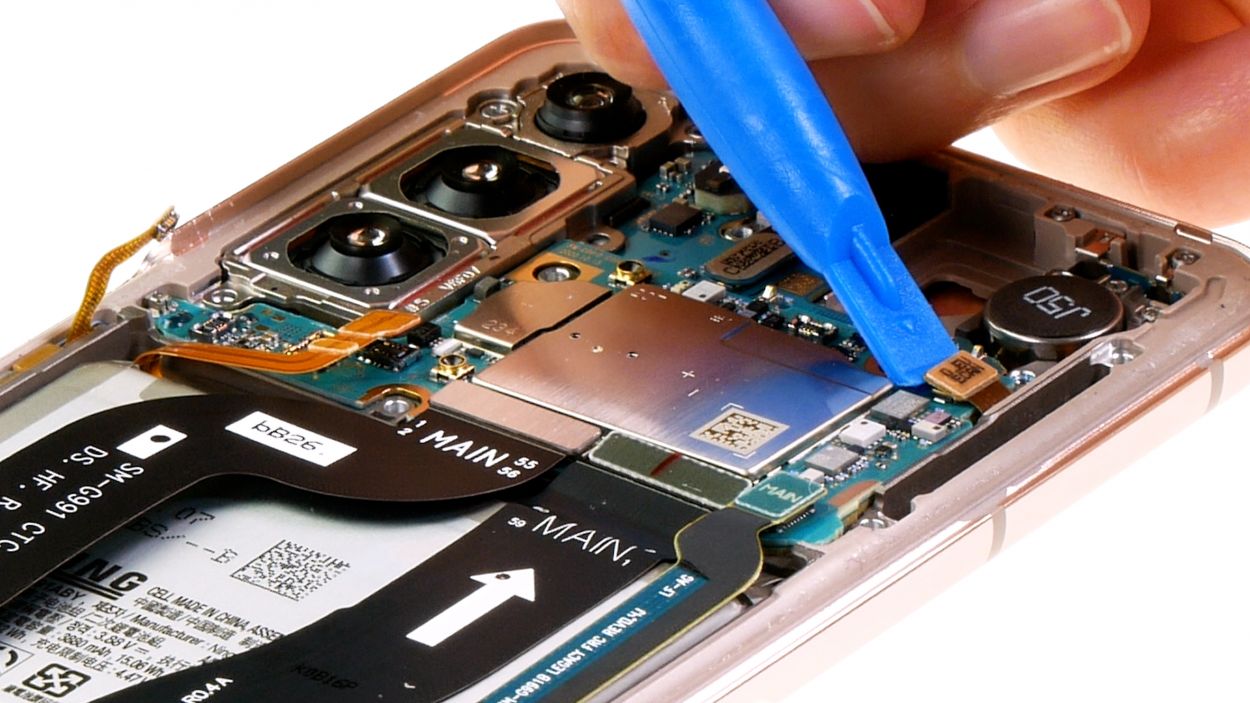
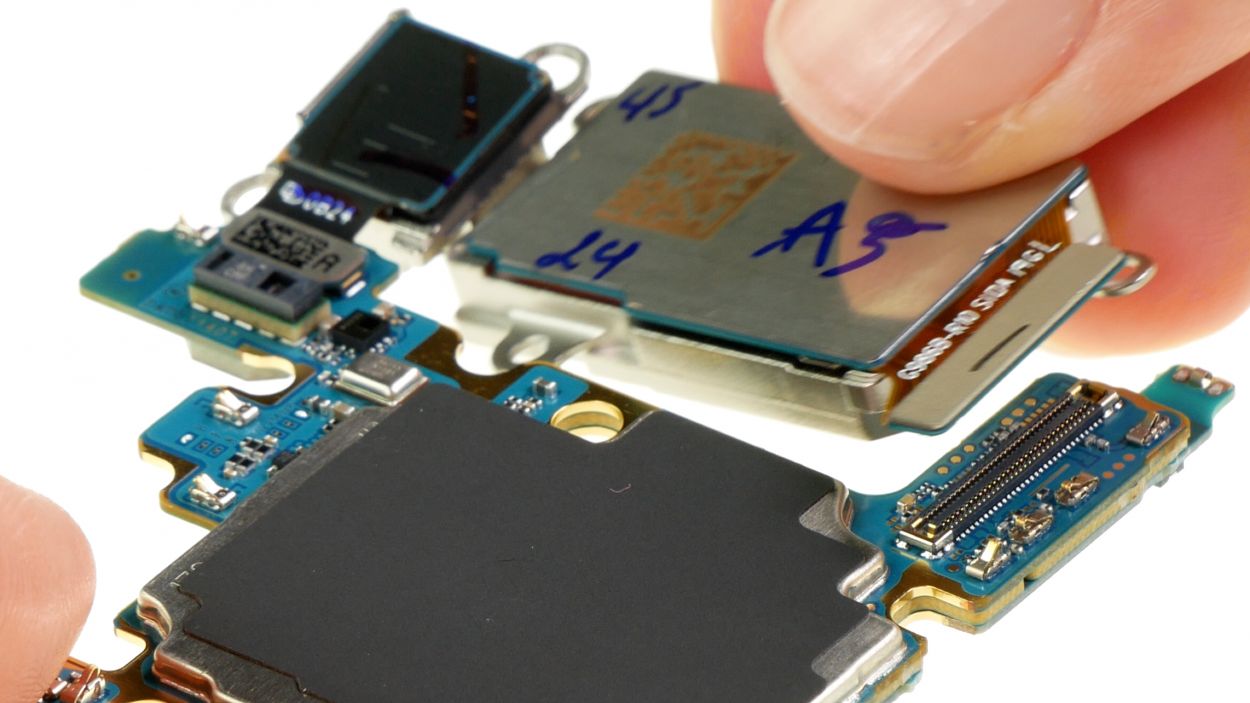
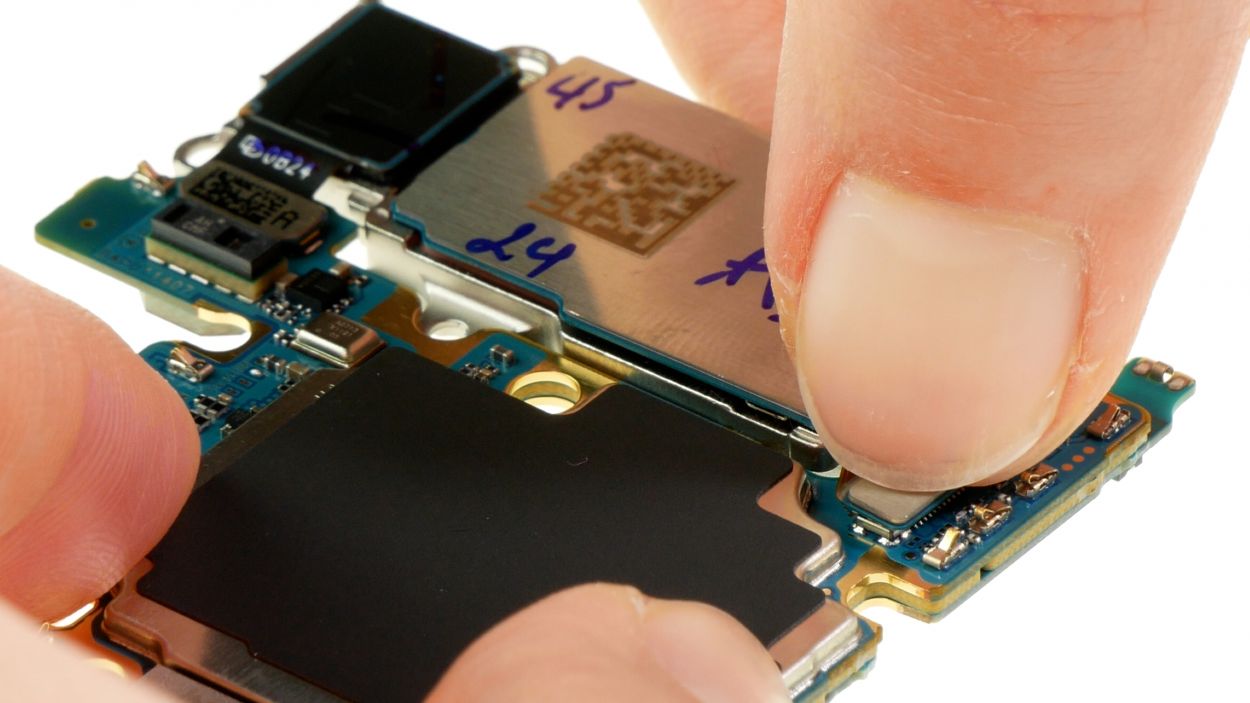
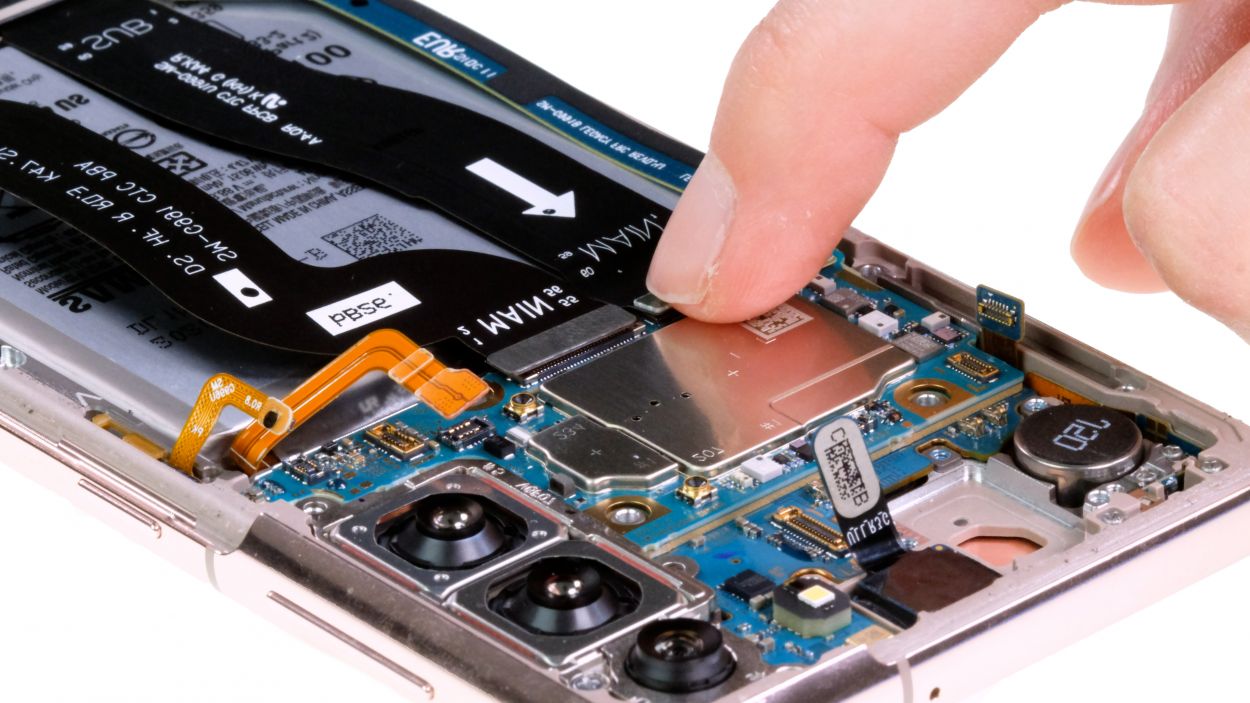
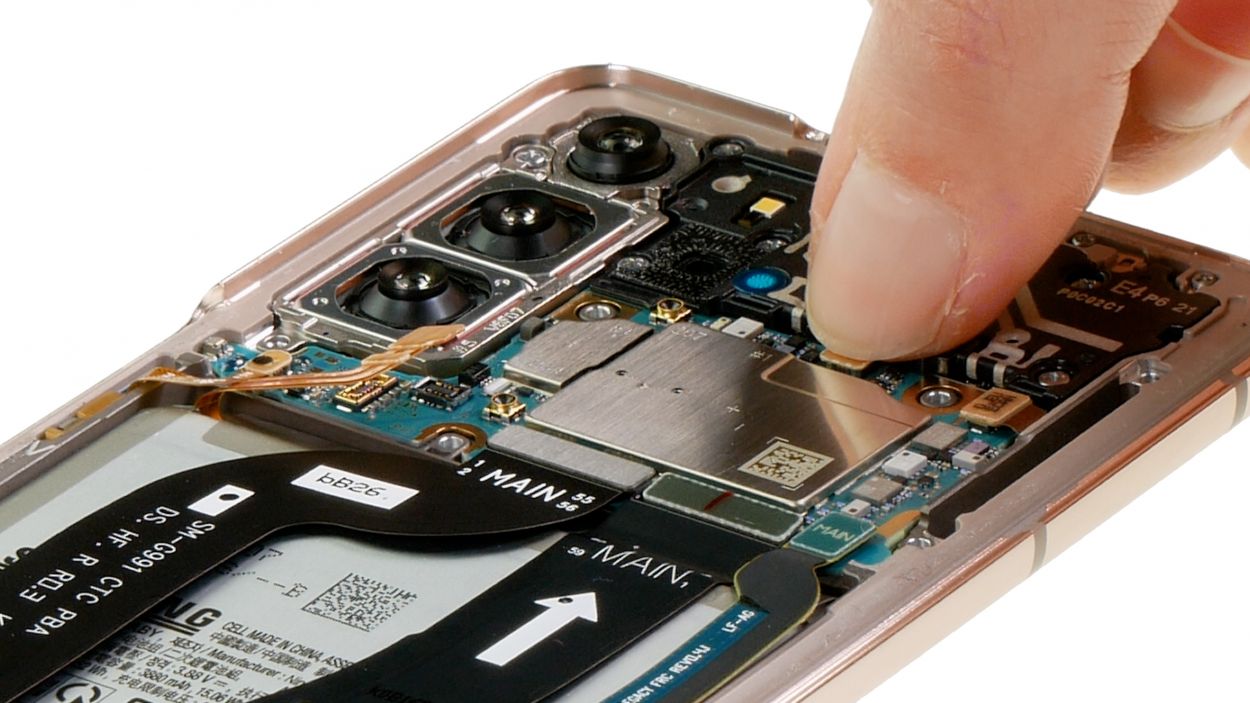
The main camera connector is snugly connected to the back of the motherboard. Just a little reminder: if you find yourself in a pickle, you can always schedule a repair!
– Gently pry the camera connector away from the board using a spudger. Take your time and be careful – you got this!
Tools Used
Step 17
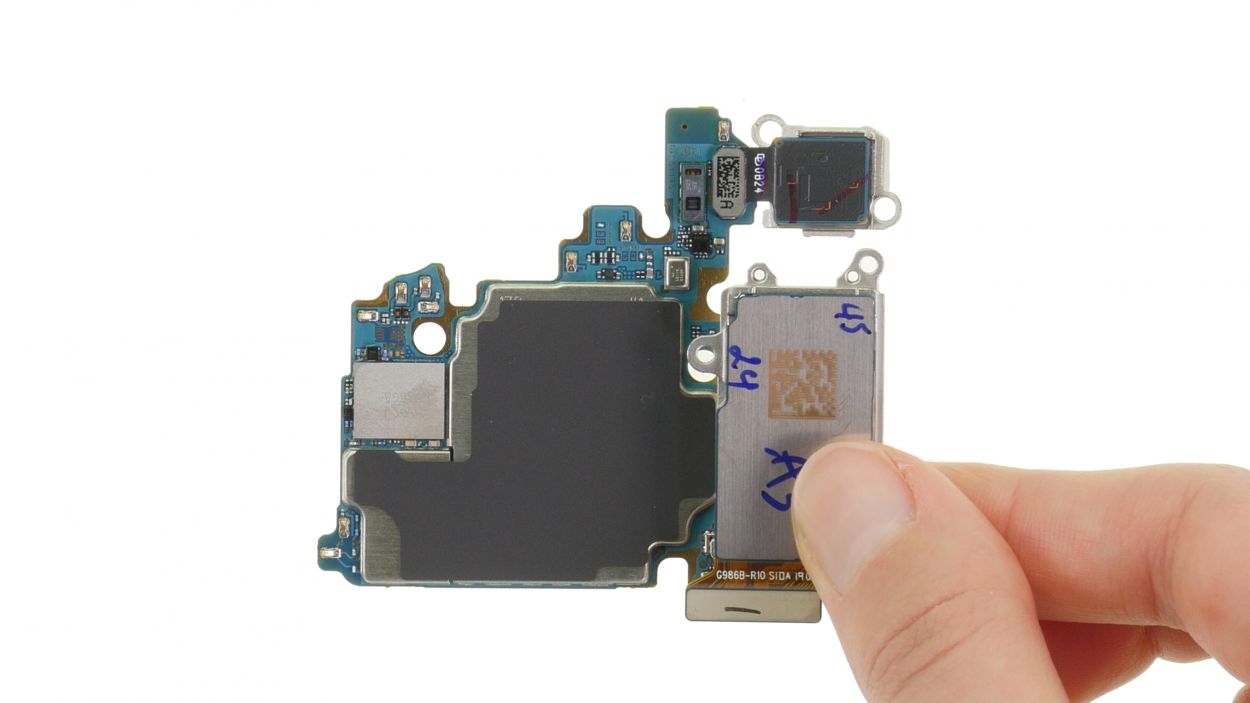
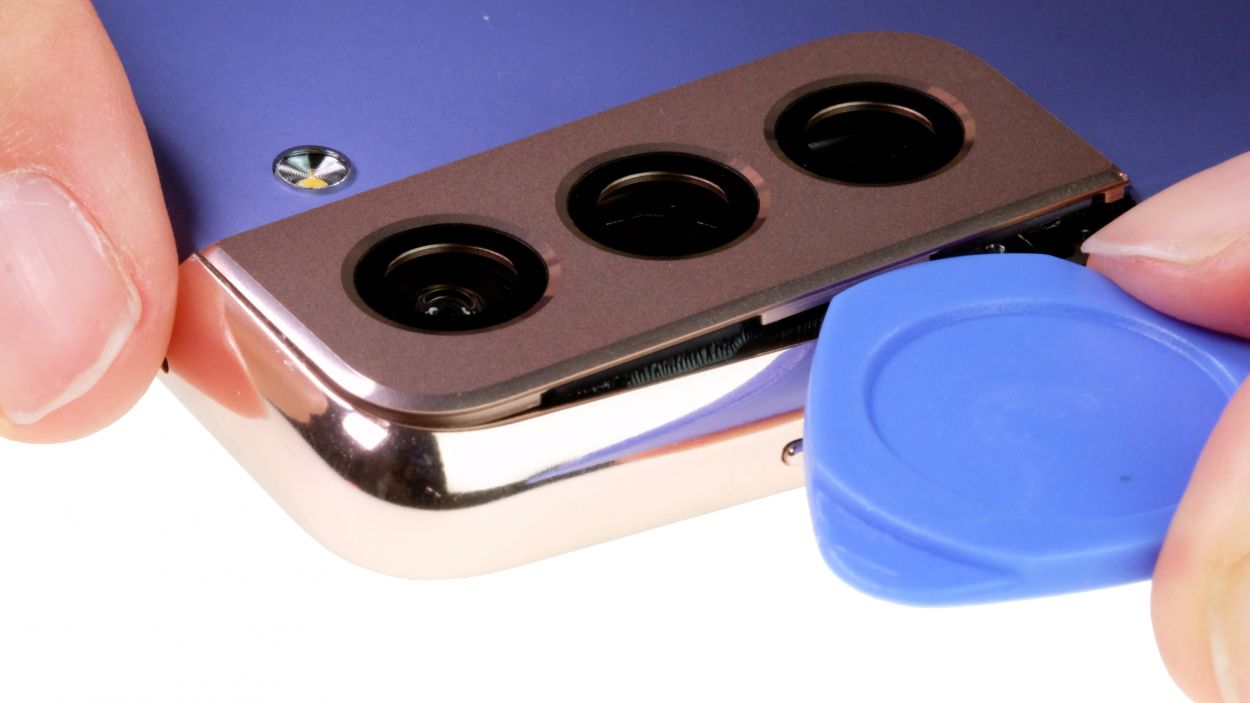
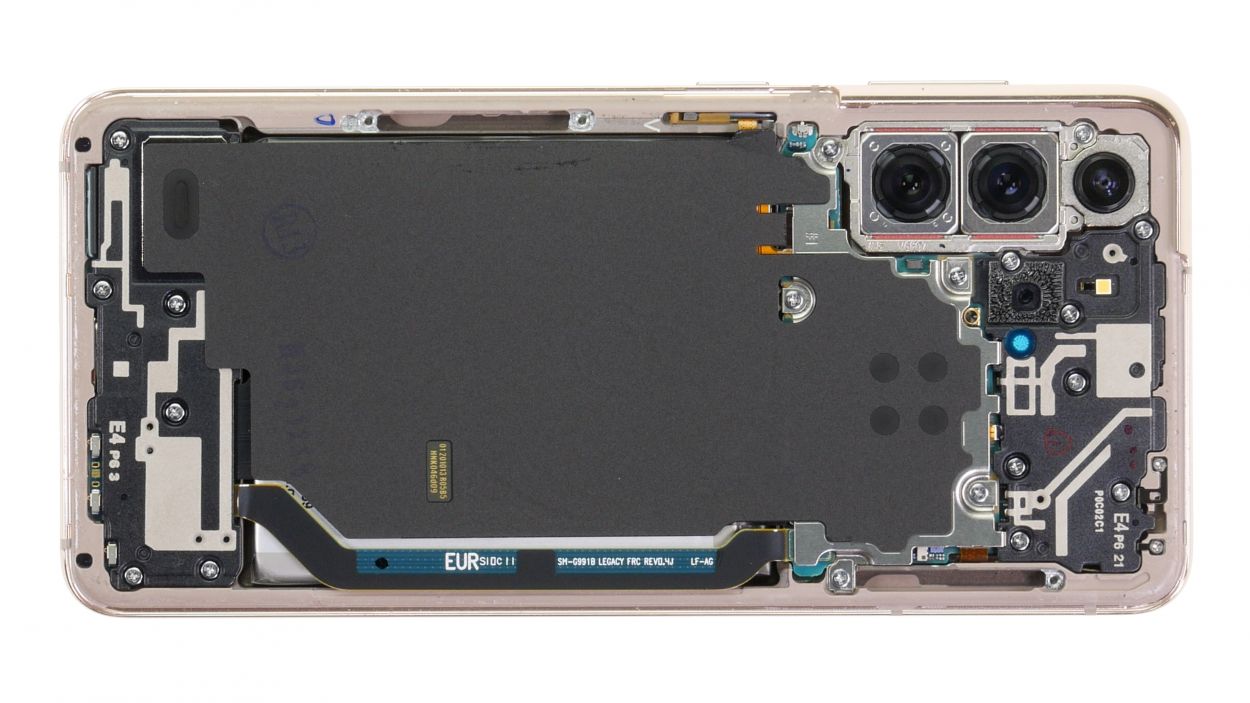
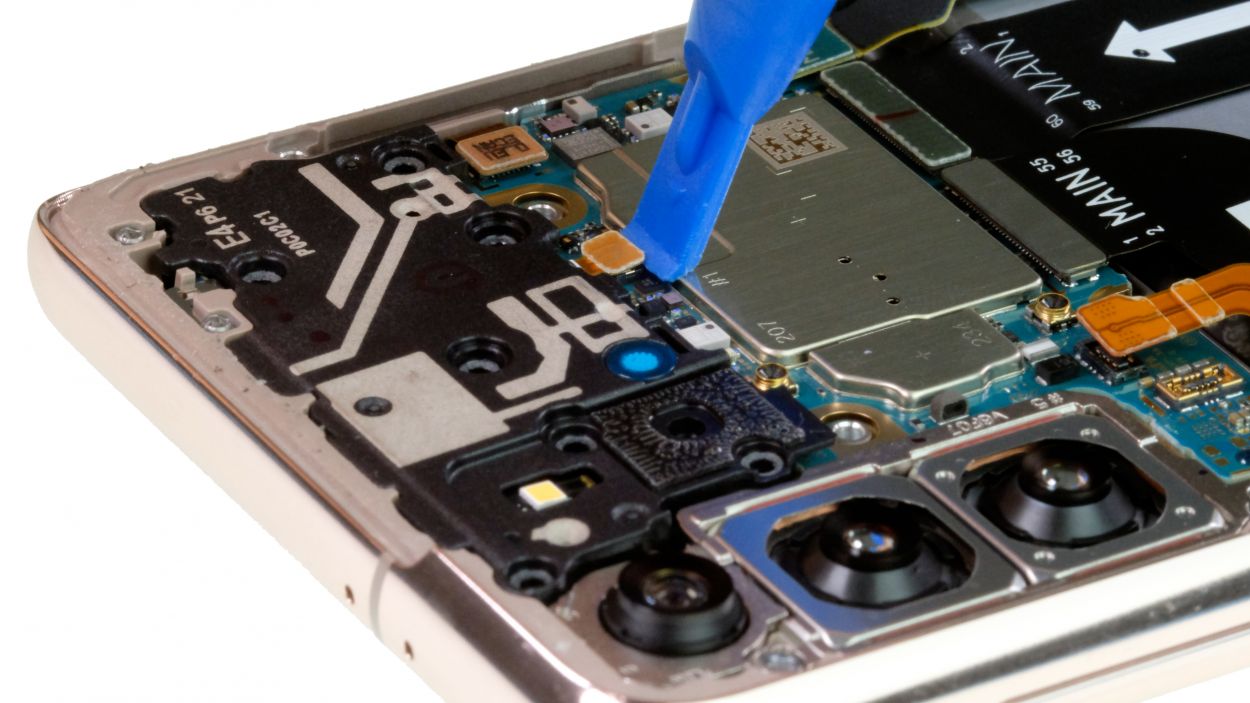
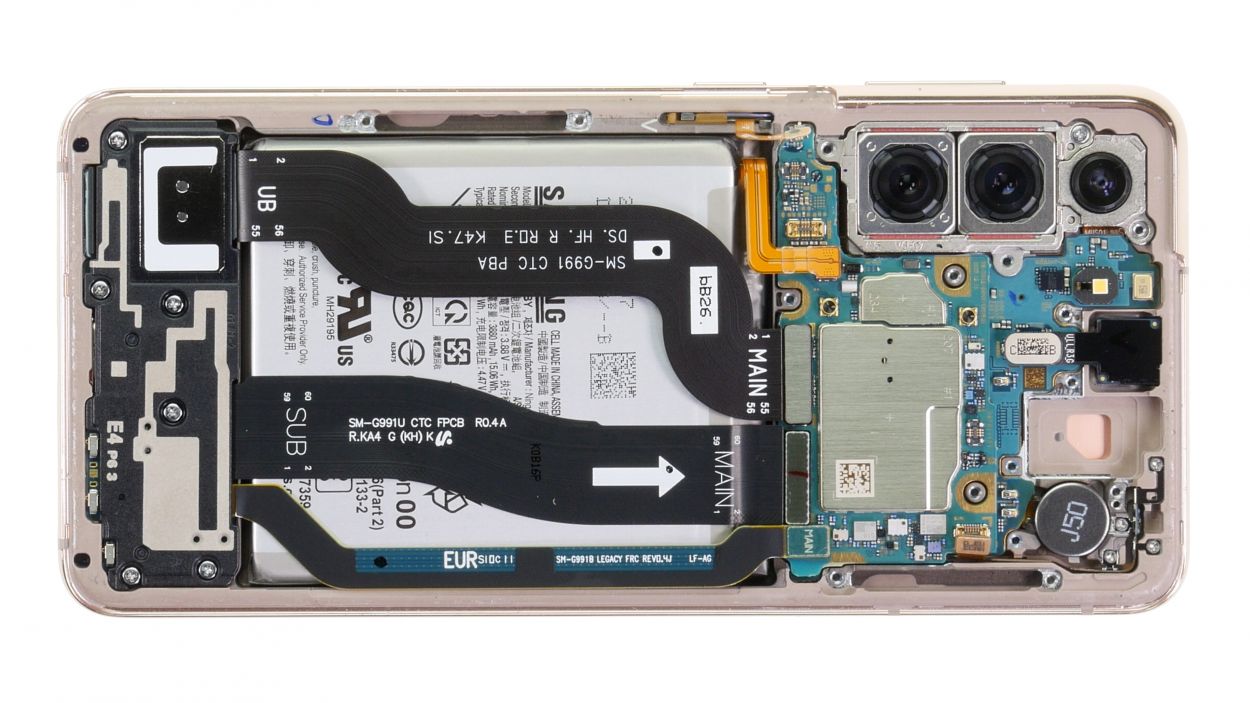
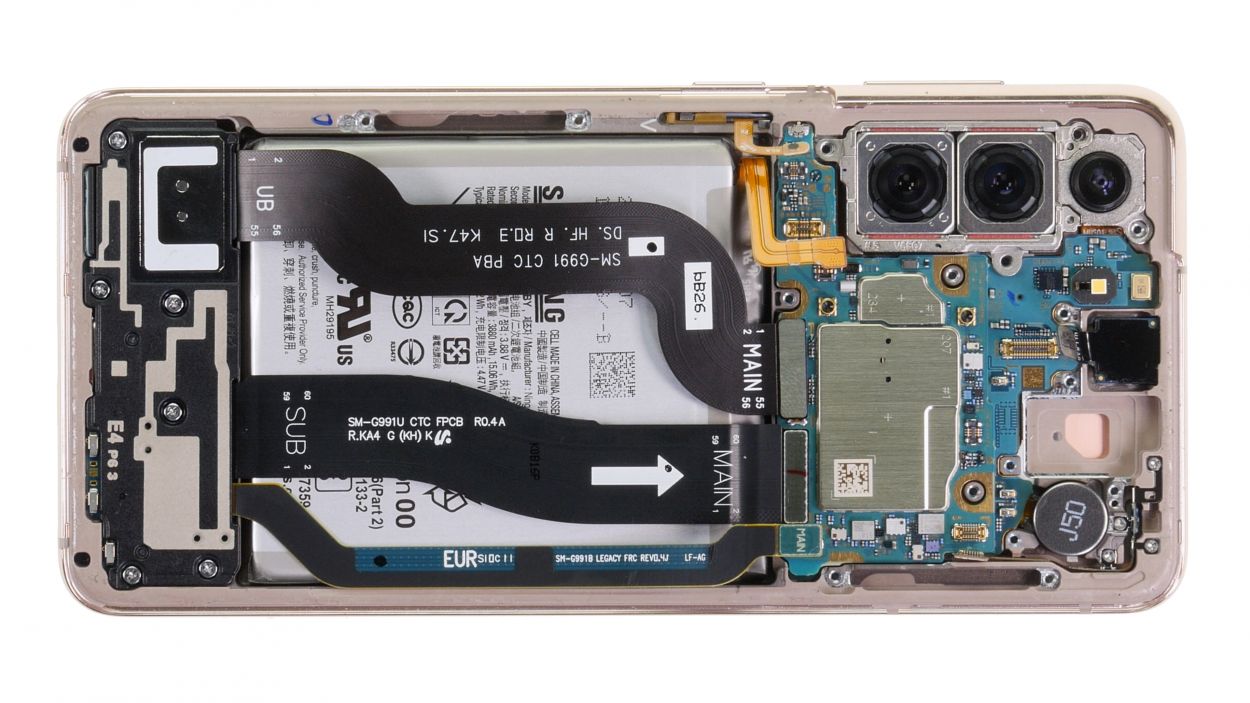
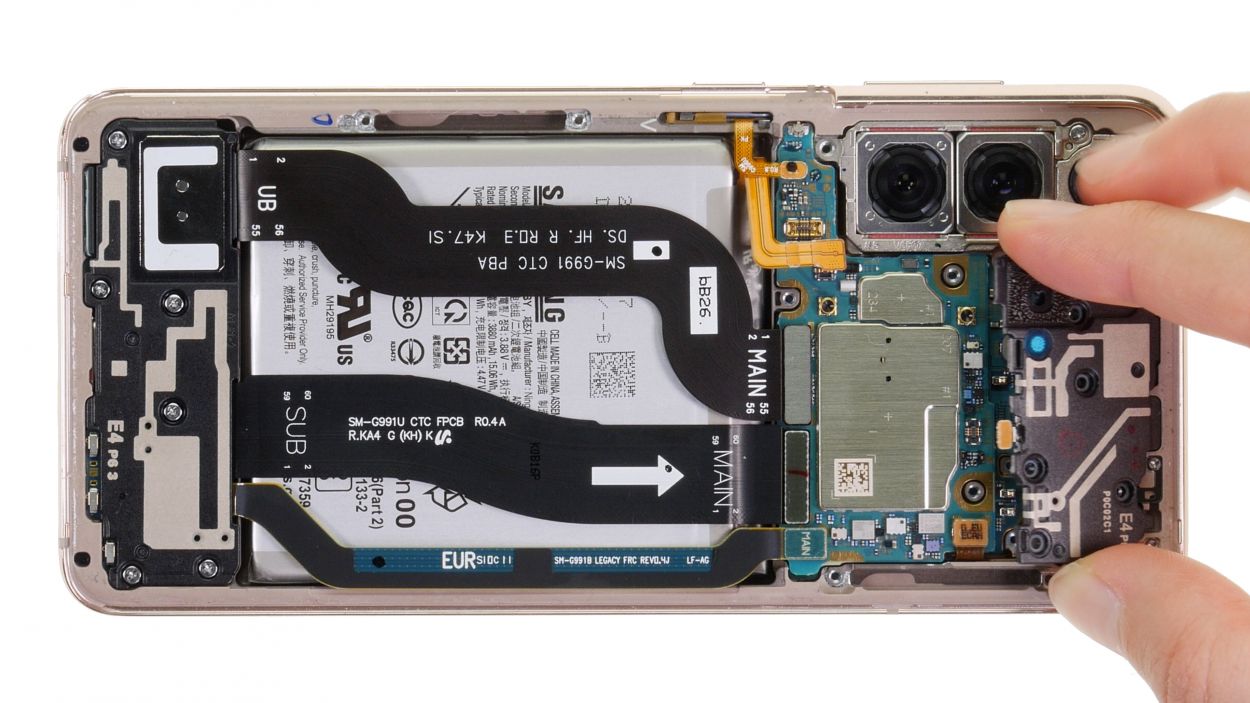
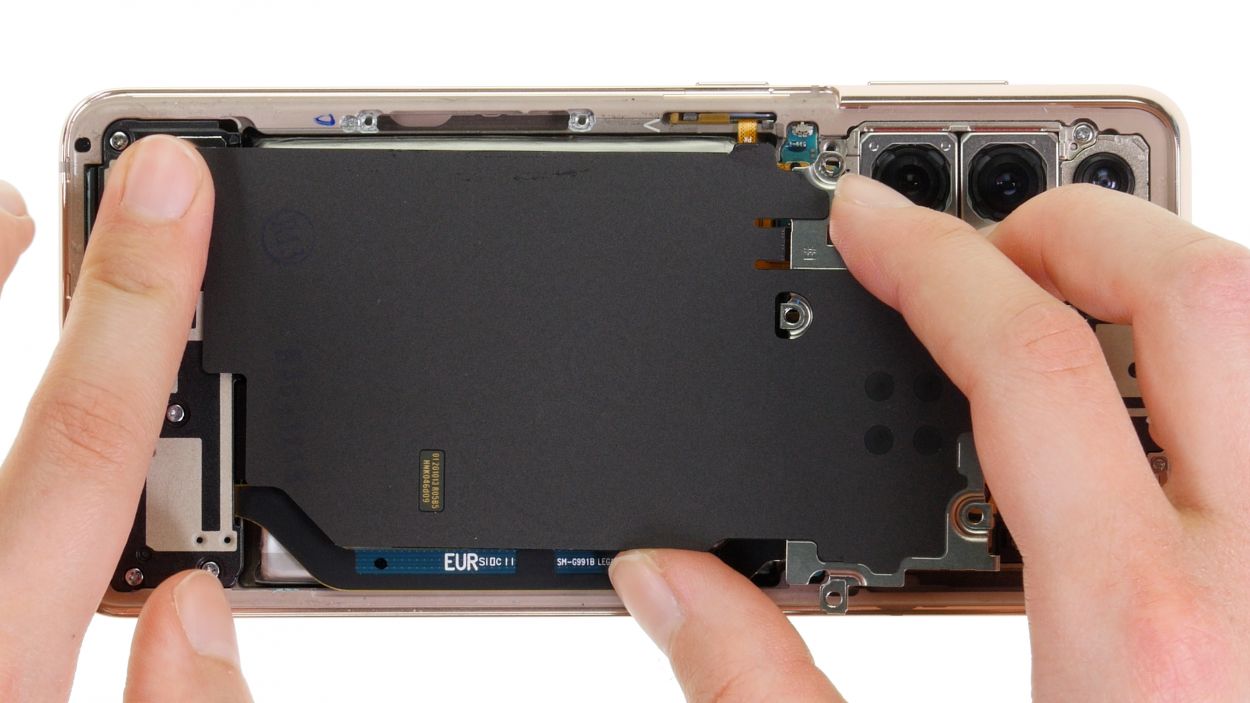
Watch out for that ultra wide camera while you’re taking out the main camera! We wouldn’t want any accidental bumps. You’ve got this!
– Gently take out the camera from your device and set it aside for now.
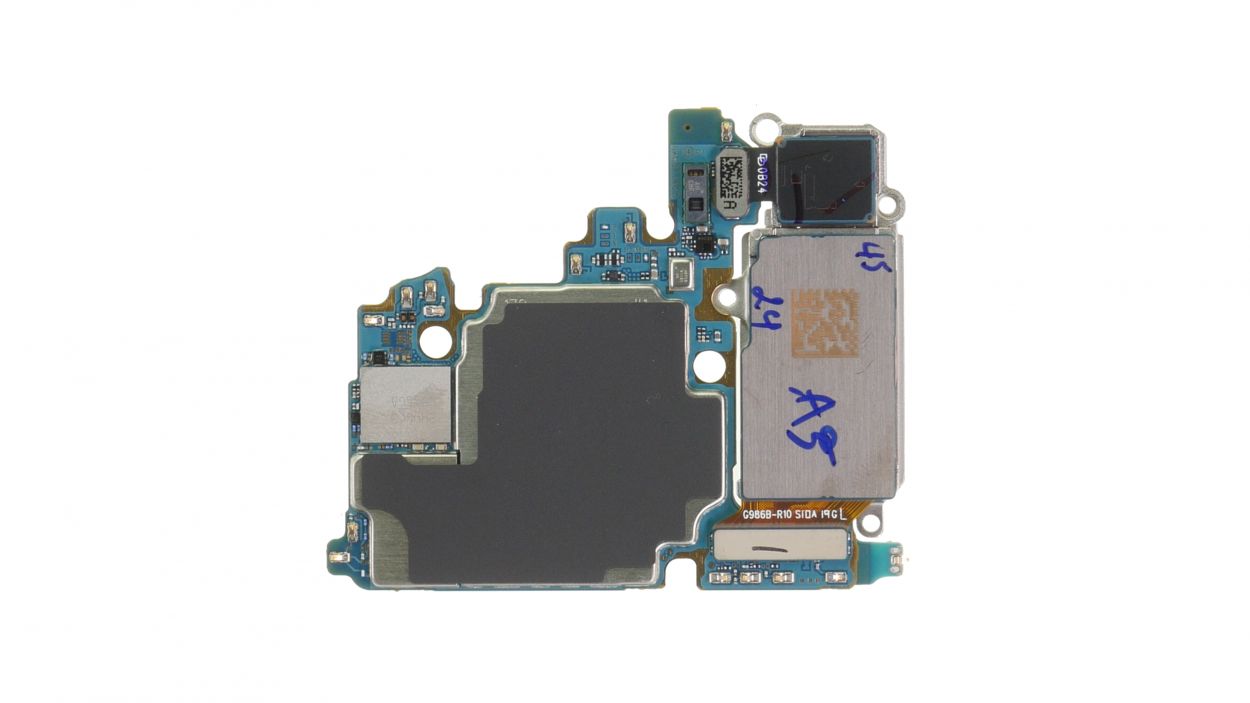
Step 18

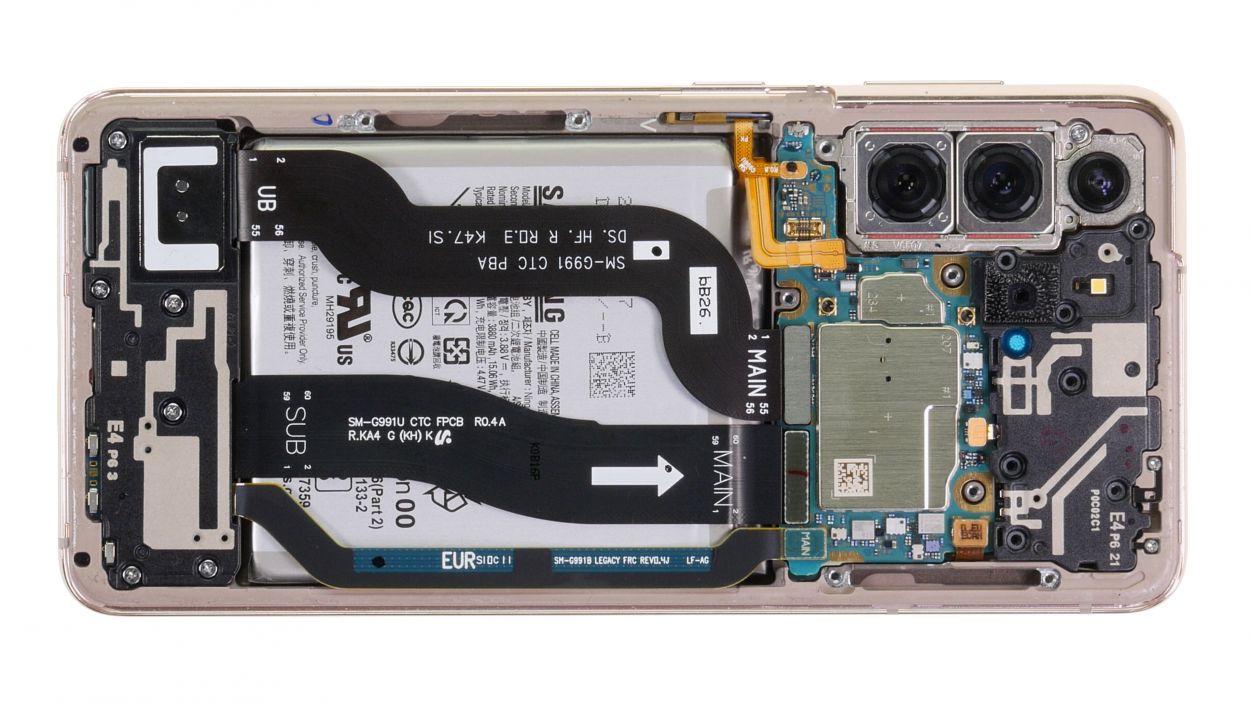
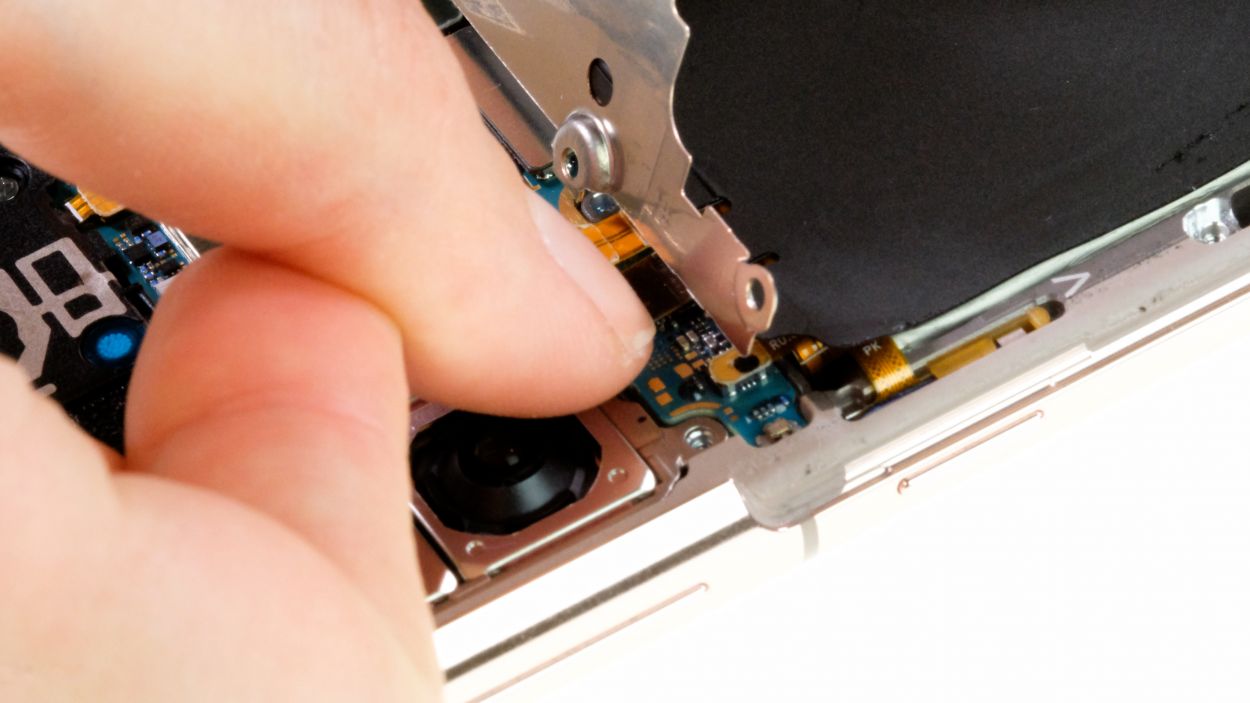
Make sure that tiny little eyelet on the camera module is resting snugly on the top of the motherboard. If it’s not, then the module isn’t quite cozy in its spot inside the screen unit.
– Time to get that new camera snuggled onto the motherboard! Easy peasy.
Tools Used
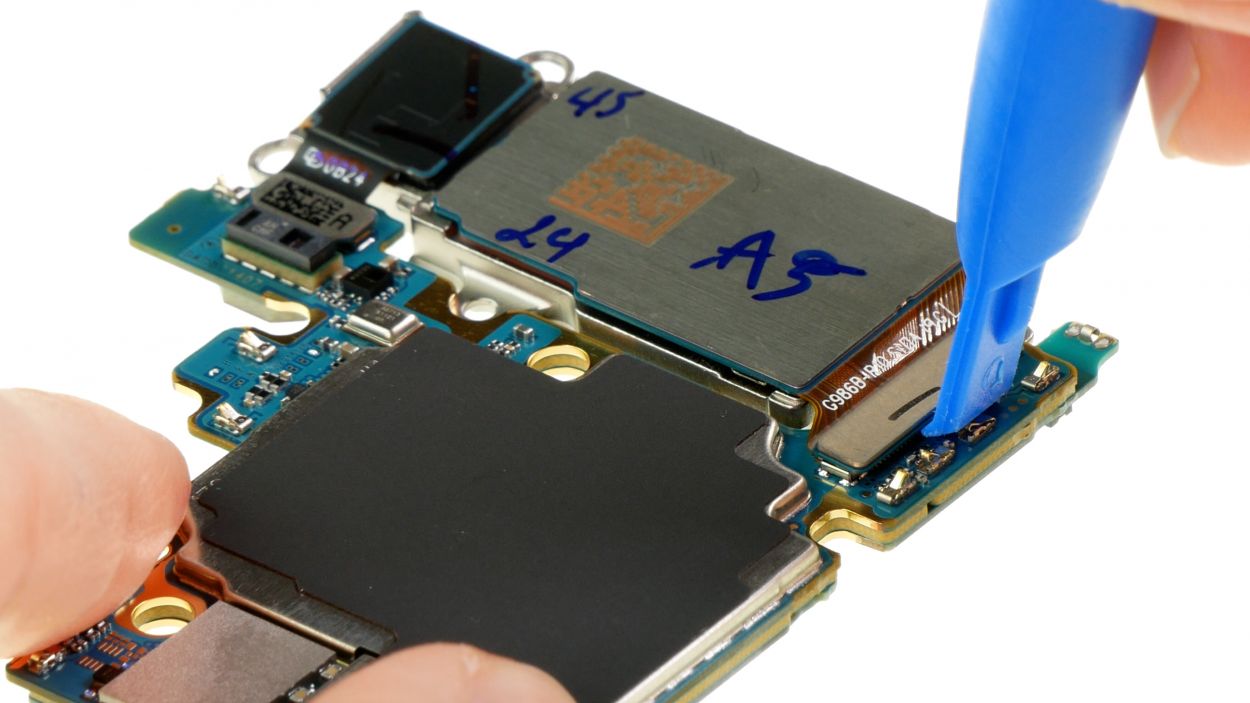
Step 19
Hey there! Just a friendly reminder: never force those connectors together. Doing so could cause some serious damage and make your whole component go kaput! Take it easy and be gentle. If you need help, you can always schedule a repair.
– Gently press the main camera connector down onto the motherboard until you hear and feel that satisfying click. It’s like a little victory dance for your device!
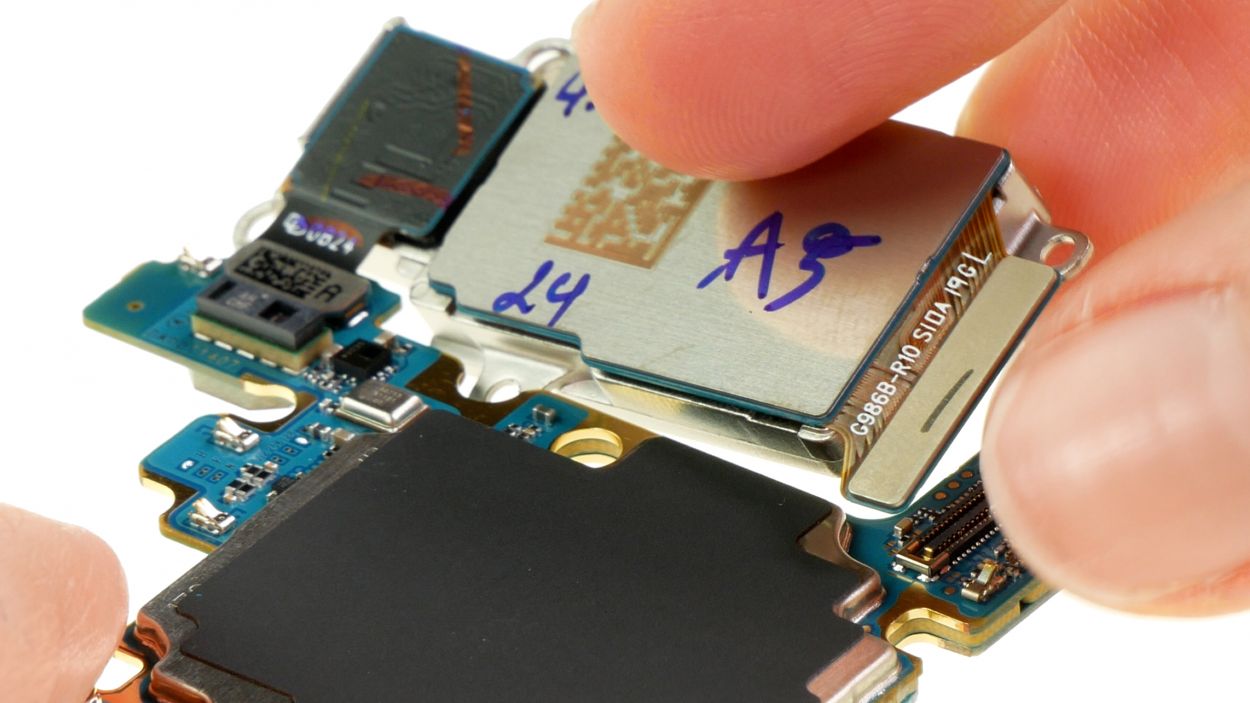
Step 20

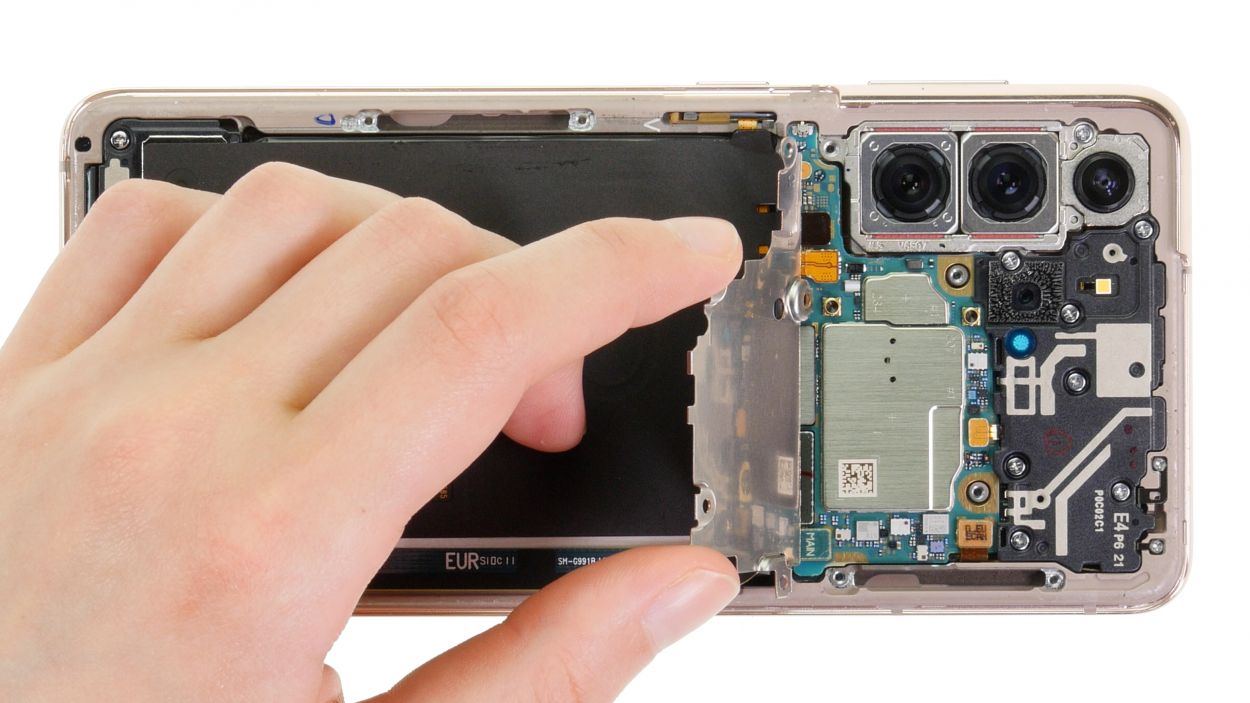
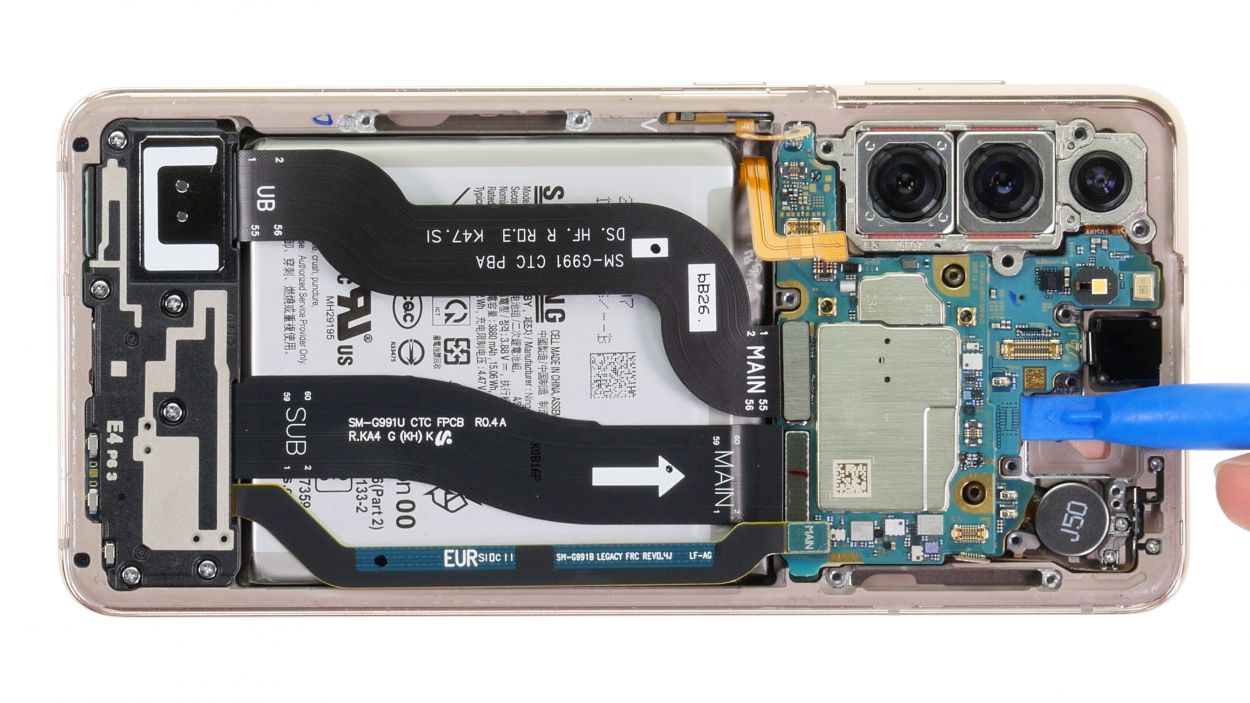
To keep those delicate flex cables safe while you slide in the motherboard, just use tweezers to gently hold them out of the way. You’re doing great—keep it up!
– Gently place the board back in its original spot, just like it was before the adventure began!
Tools Used
Step 21
1 × 4.9 mm Phillips
– Gently place the motherboard back into the screen unit and secure it with screws, making sure it’s snug as a bug!
Tools Used
Step 22
Just a gentle reminder, keep that battery connector at bay for now! Plugging it in too soon might lead to some shocking surprises with a short circuit.
– Gently press down all connectors back onto the motherboard, leaving out the battery and NFC connector. You’re almost there!
Step 24
7 × 4.9 mm Phillips
– Carefully reattach the earpiece by securing it with the seven Phillips screws. You’ve got this!
Tools Used
Step 26
– Reposition the NFC antenna in the screen unit and press its back end slightly to allow the glue to bond again.
Step 27

– Lift up the metal cover of the charging coil to attach its black connector that is located underneath.
Step 28

Remember, always save the battery connector for last! It’s like the cherry on top of your repair sundae—this way, you’ll dodge any pesky short circuits.
– Time to reconnect that orange battery connector to the motherboard! Piece of cake!
Step 29

5 × 4.9 mm Phillips
– Alright, champ! Battery and charging coil all hooked up? Awesome. Now, let’s get that metal cover snug and secure. Easy peasy! If you need a hand, you can always schedule a repair
Tools Used
Step 30
If things aren’t quite right during your testing phase, take a moment to ensure that everything is snugly installed and properly connected. A little check can go a long way!
– Fire up your Galaxy S21 and get ready for some fun!
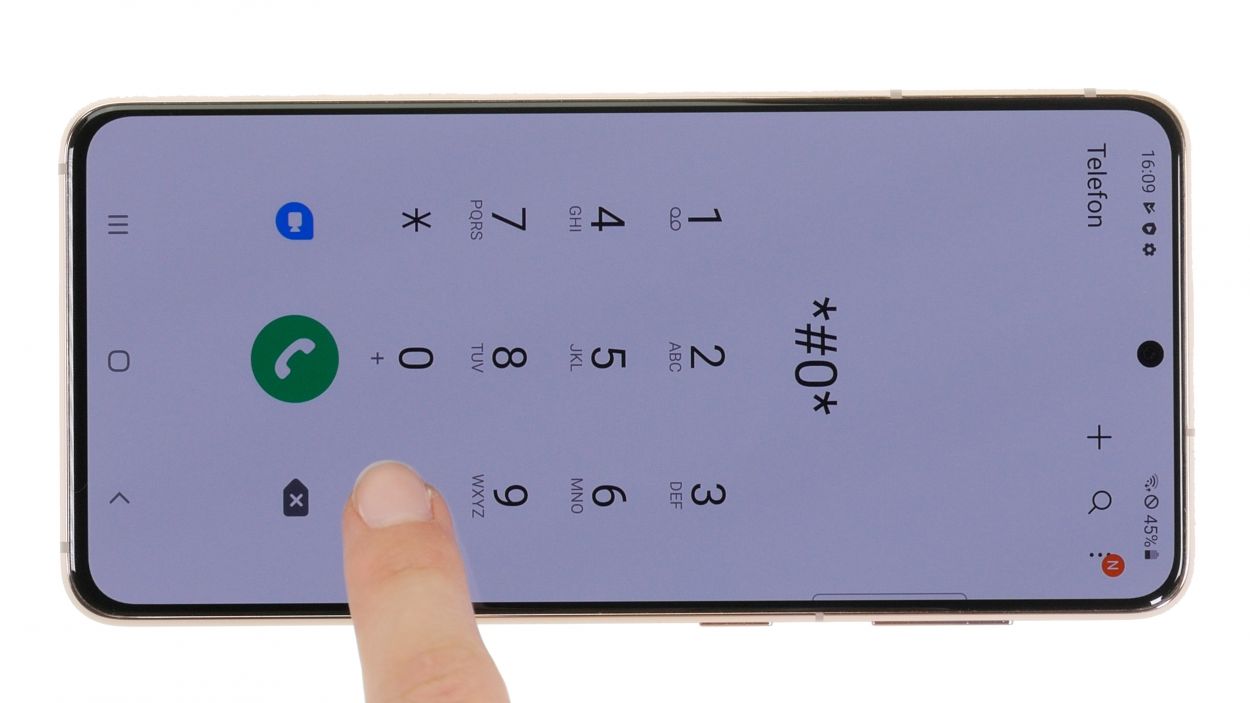
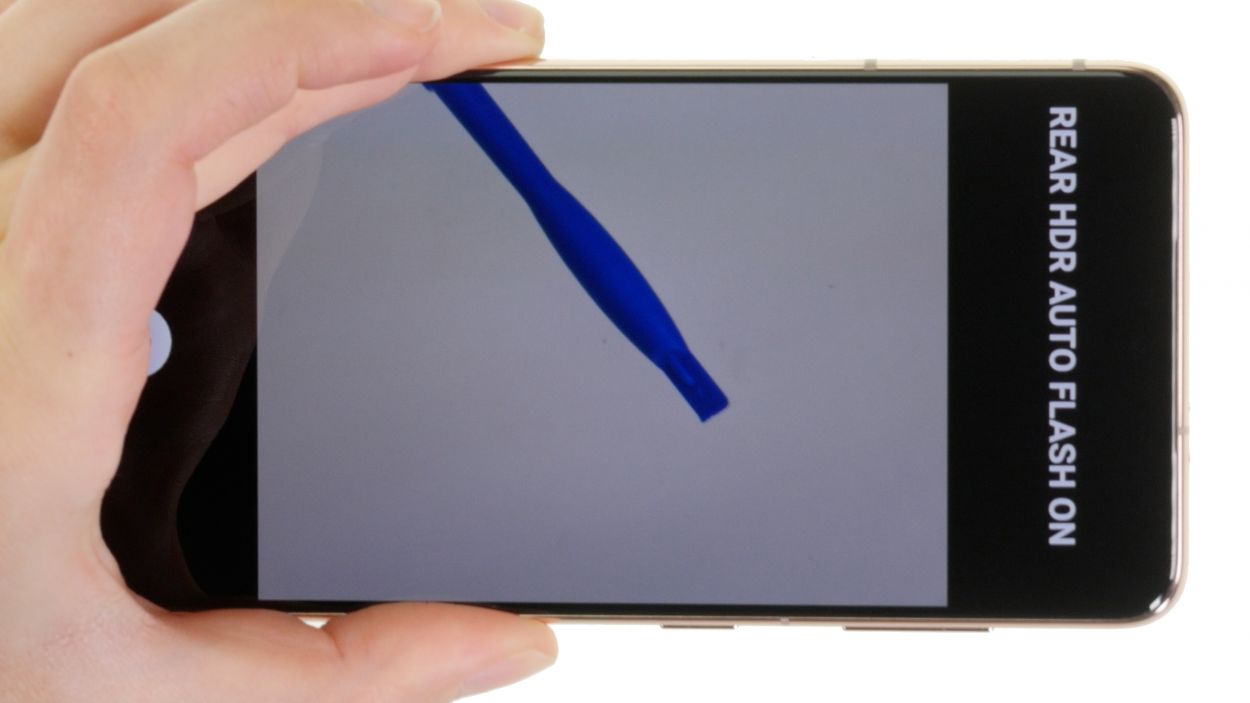
– Dial up the Samsung test menu by entering *#0*# in your phone app to see if your new camera is ready to shine.
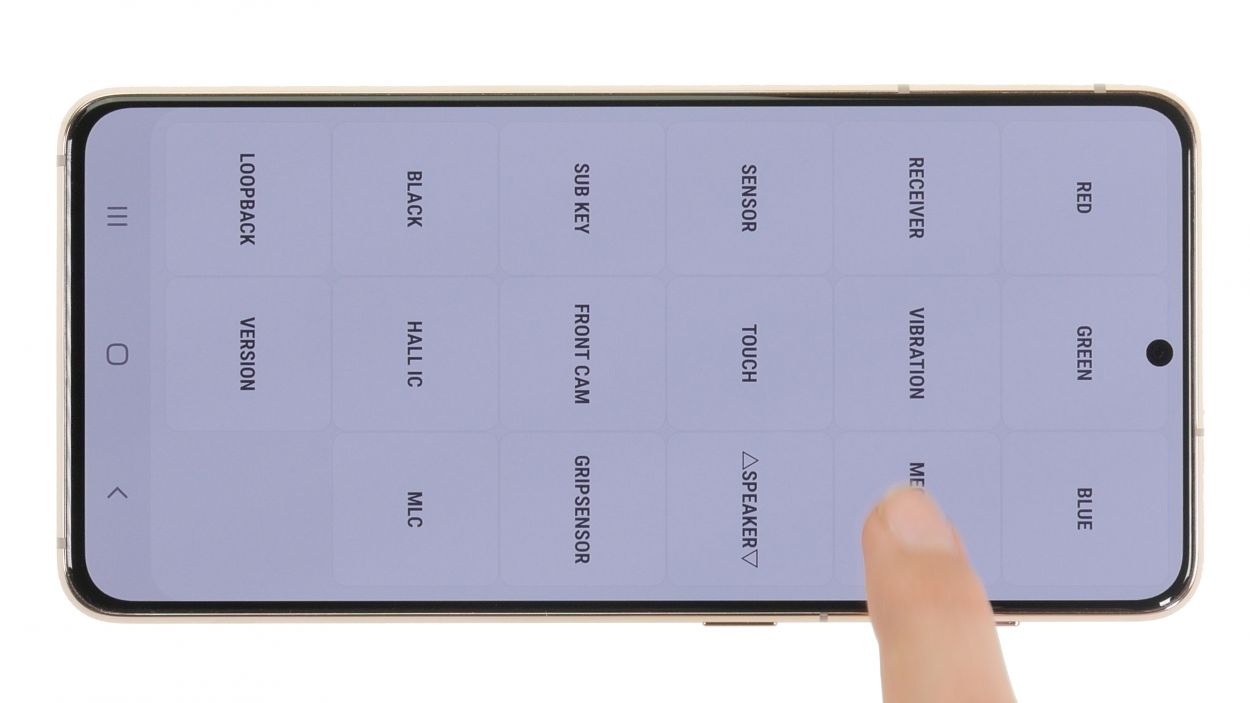
– Explore other features using the test menu. If you prefer, our handy checklist is here to help you out too!
Step 31

Adding a new adhesive frame is totally up to you! If your current one is still holding strong, there’s no need to swap it out. But if it’s looking a bit worse for wear or isn’t sticking like it used to, we suggest going for a fresh adhesive frame. Remember, if you need help, you can always schedule a repair!
– Check out our YouTube video where we walk you through the process of applying a fresh adhesive frame step by step. It’s easier than you think!
Tools Used
Step 32


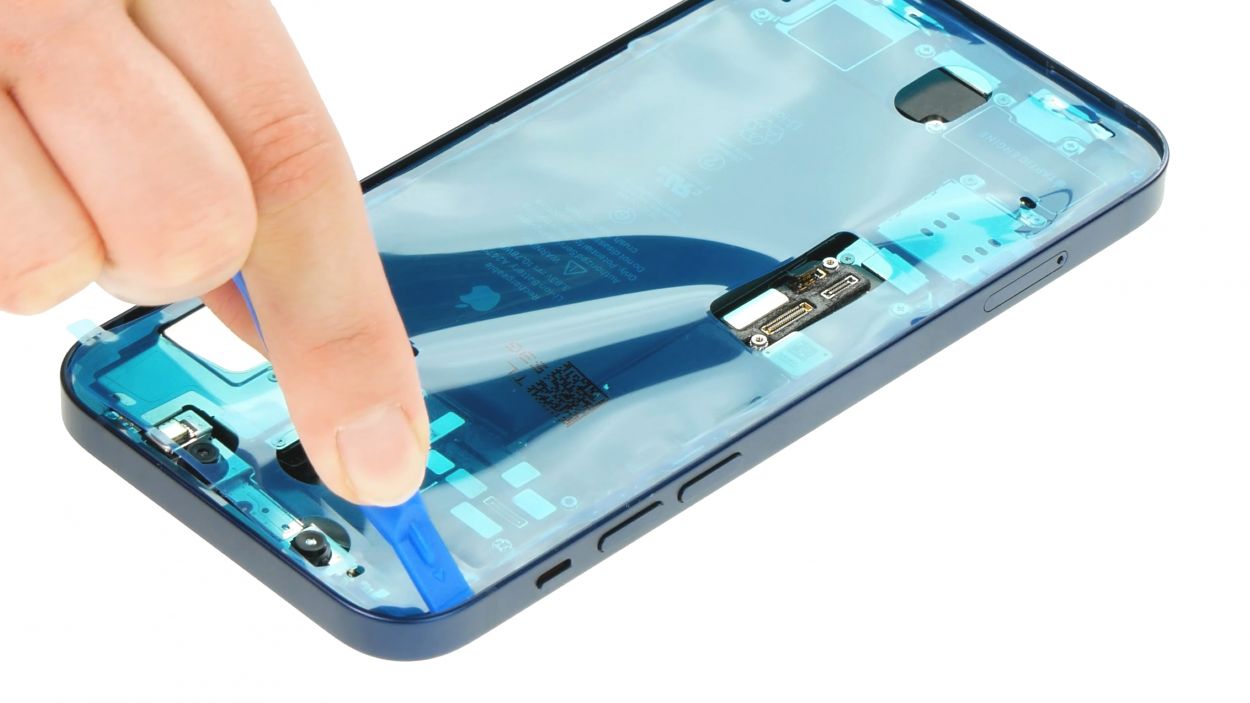
Give that back cover edge a little love with some hot air! This helps the glue stick like it’s meant to. If you want to give it a bit more support, try placing some books on top for a few minutes or use a clamp, just like we showed you in our example. You’ve got this!
– Close your Galaxy S21 5G after the repair by pressing the back cover back onto the display unit.