Game Boy Color Teardown
Duration: 45 minutes
Steps: 8 Steps
Step 1


– Kick things off with a Game Boy Color in hand. Ready to get started? Let’s move on to the next step!
Step 2


– First things first, pop off the battery cover and remove any batteries hanging out inside the device. We don’t need those in the way!
– Next up, grab your screwdriver and unscrew all six tri-wing screws securing the back cover. Two are at the top, two in the middle, and two hiding behind the battery cover at the bottom. Easy peasy!
Step 3

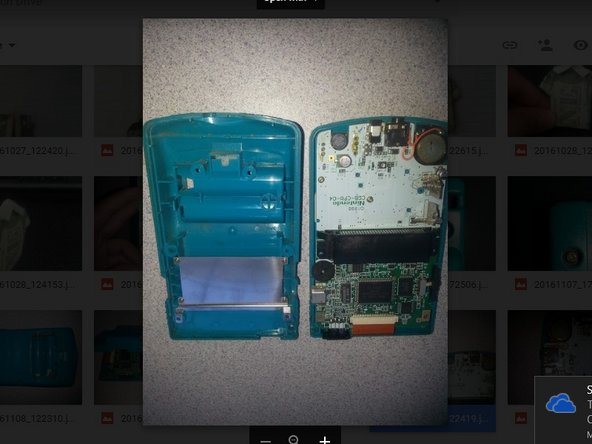
– Once you’ve taken out all the screws, gently lift off the back cover of your Game Boy and set it to the side. You’re doing great!
Step 4


– Now that the bottom cover is removed, you’ll spot three screws waiting to be unscrewed. One sneaky screw is tucked behind the metal piece on the left—it’s a bit tricky to spot, but don’t worry, it’s easy to get out. Keep at it, and if you need a hand, you can always schedule a repair.
Step 5
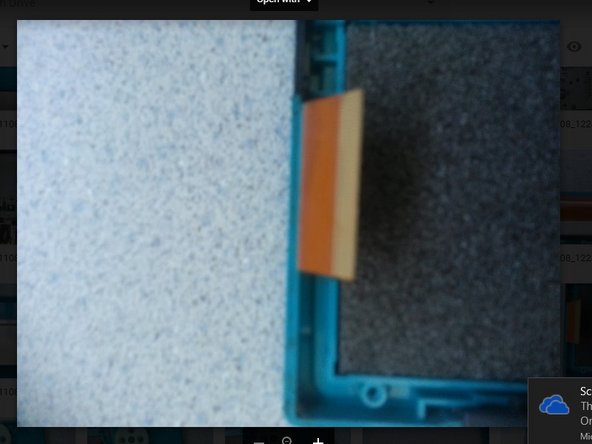

– Hold up! Before you even think about lifting out the motherboard, check out that orange film at the top—yep, that’s the LCD ribbon cable, and it’s got to come out first.
– Take a good look on each side of the cable. You’ll spot two small brown plastic tabs. Loosen them up a bit—they don’t need to come out completely.
– Grab something small and sturdy (a fingernail works, or a plastic/metal tool that won’t bend) and gently nudge those brown tabs toward the orange cable.
– Now just slide the cable out with a little bit of steady pressure. Go slow and steady—no tug-of-war here! You want to avoid bending or tearing the cable as you remove it.
Step 6

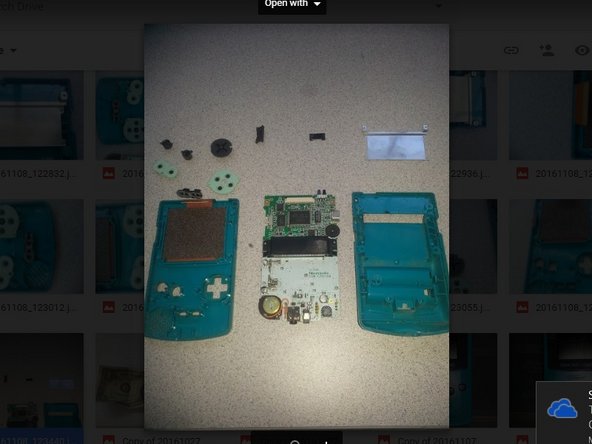
– The buttons might pop out easily, so just be careful when removing them—no need to flip the game boy upside down and let everything spill out!
Step 7

– Alright, time for the grand finale: let’s take off that metal plate from the back piece you set aside earlier.
– Just grab your Phillips screwdriver and remove the four screws holding the plate in place. These screws come out pretty easily—no wrestling required!
Step 8

– Congrats, you’re almost there! Once you’ve wrapped up the last step, it’s time to reverse the magic. Put everything back together by retracing your steps in reverse order. It’s like un-doing a puzzle, piece by piece. If you get stuck or need a hand, you can always schedule a repair.
Success!