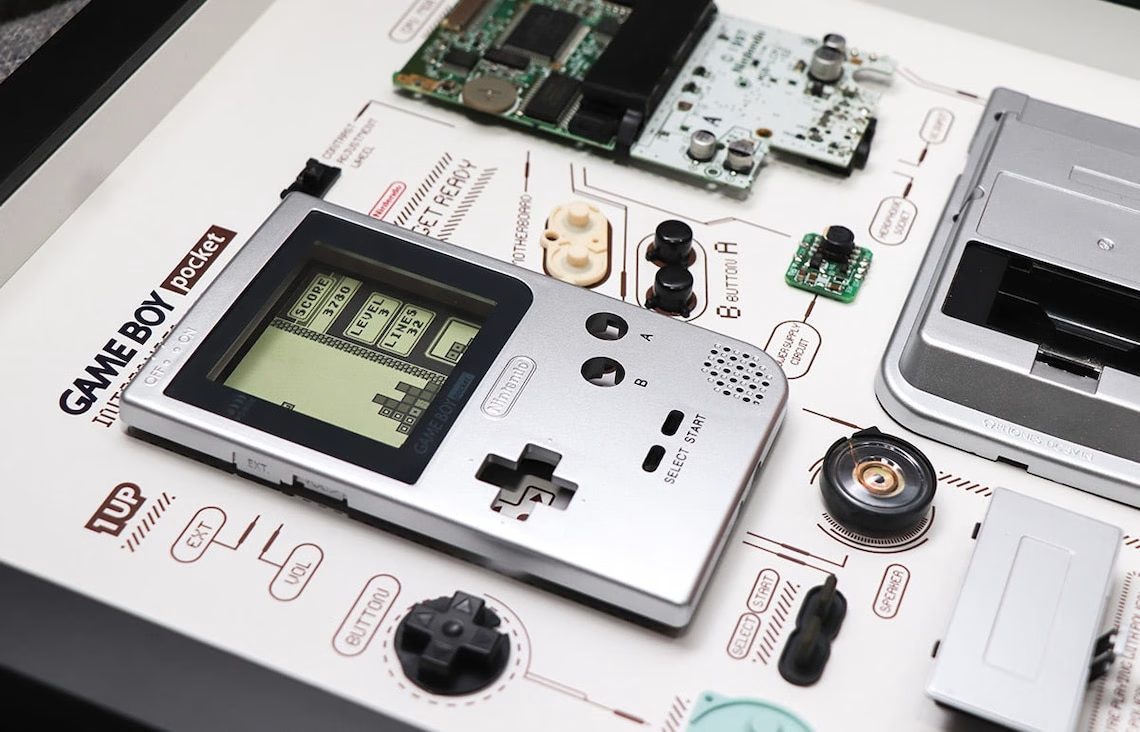
Game Boy Pocket Teardown
Duration: 45 minutes
Steps: 11 Steps
Let’s crack open the Game Boy Pocket and see what’s ticking inside—from the shell to all those retro bits and pieces. Ready to dive in? Let’s get started!
Step 1


– Flip your Game Boy Pocket over and pop off the battery cover—plus the batteries, too.
– If you don’t have a battery cover, don’t sweat it—just carry on!
Step 2


– Grab your Y00 screwdriver and unscrew those 6 screws holding the back panel in place. Keep it steady and remove them carefully to keep everything organized. If you need a hand, you can always schedule a repair.
Step 3

– Pop off the back cover. Give it a little nudge, and it should come off with ease.
Step 4


– Time to take off those screws! Use a JIS000 screwdriver to remove the four screws holding the cartridge panel in place.
– Now that the screws are out, gently pry the cartridge panel off.
Step 5

– Grab your trusty JIS00 screwdriver and unscrew the 3 screws on the motherboard. Take your time, you’re doing great!
Step 6

– Gently press down both of the locking pins holding the screen’s ribbon cable in place, using your trusty spudger.
Step 7
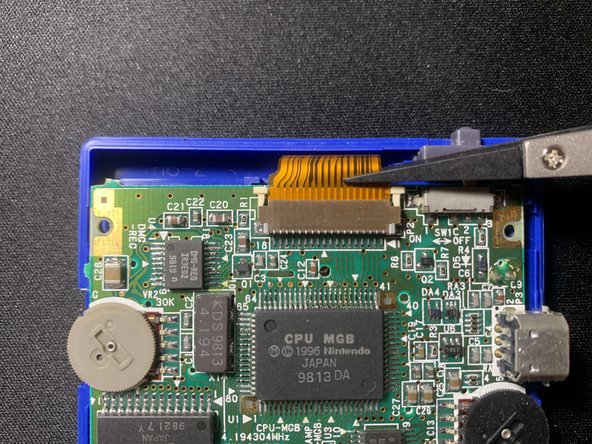


Handle the ribbon cable gently—no scratches or snap attacks!
– Grab a plastic tweezer and gently lift the ribbon cable out of its socket. Easy does it!
Step 8


– Take out the motherboard and set it aside like the VIP it is.
Step 9


– Peel off the button covers.
– Pop out the buttons.
Step 10


Handle with care – we don’t want any cracks in that beautiful display!
– Carefully pry the display away with a spudger, gently working around the edges to loosen it up.
Step 11

– All set! Now, let’s walk through the repair process step by step. If at any point you need a hand, remember you can always schedule a repair. Keep your workspace organized, follow each step carefully, and you’ll have your device back in action in no time. Ready to get started? Let’s do this.
Success!