Google Chromebook Pixel 2 Fan Replacement
Duration: 45 minutes
Steps: 10 Steps
Step 1

Before you get started, be sure to power down and unplug your device. Working on it while it’s still running could give you a shocking surprise, and not the good kind. Stay safe!
– Flip your device so the bottom panel is facing up. Easy does it—you’re just turning it over to get ready for the next step.
Step 2

– Carefully peel off the black rubber strips from the top and bottom of the back panel. Take your time, and don’t rush—these parts can be a little stubborn but they’ll come off with a bit of patience.
Step 3
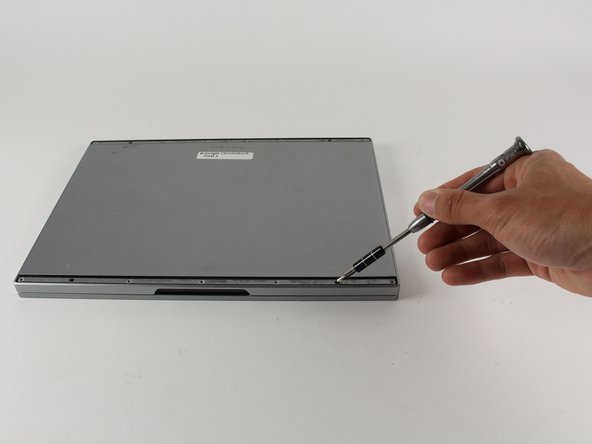

– Remove the fifteen 3 mm Phillips #00 screws from the back panel.
Step 4

– Gently lift the back panel off your device. Take your time, it’s like peeling back the lid of a treasure chest – no rush!
Step 5

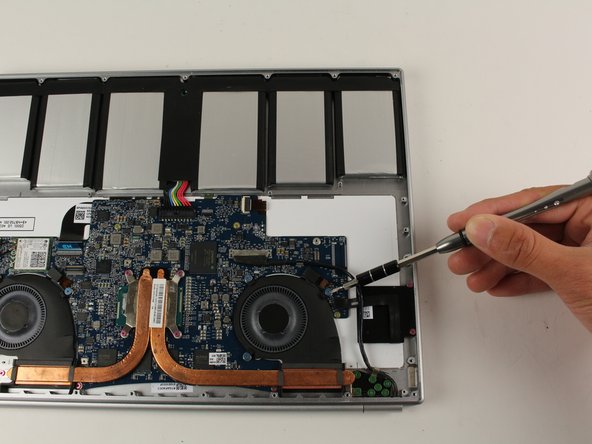
– Unscrew the three blue 4.0 mm Phillips #00 screws from the fan on the right side. It’s a quick task, just a few twists, and you’ll be ready for the next step!
Step 6

– Grab your trusty plastic opening tool and gently slide the right fan’s connector out of its spot on the motherboard. Take it slow—no force needed here!
Step 7

– Gently lift the right fan out of its slot. Take your time and be careful, it should come out smoothly.
Step 8
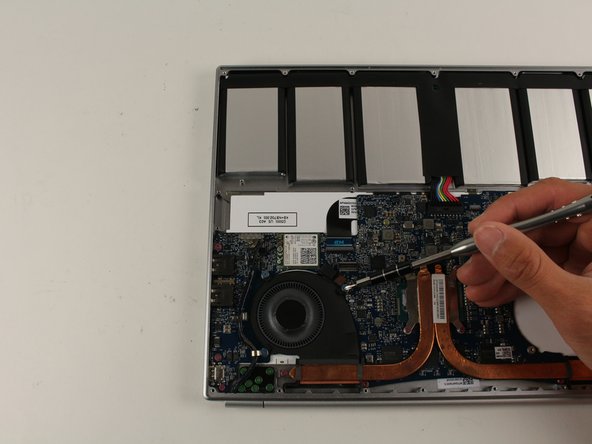

– Take out the three blue 4.0 mm Phillips #00 screws holding down the left fan.
Step 9

– Grab your plastic opening tool and gently slide it under the left fan’s connector to disconnect it.
Step 10

– Carefully lift the left fan out of its cozy little home.
Success!