
Google Home Motherboard Replacement
Duration: 45 minutes
Steps: 6 Steps
Time to get that casing off! Start by carefully removing the o-ring around the edge. Once that’s done, unscrew the casing and get ready to take out the motherboard from the case. Take your time, it’s all about patience!
Step 1


If you whip off the lid too fast, you might just risk giving that little interconnect cable a tear! So, take it easy and be gentle.
– Gently detach the magnetically secured base and set it aside like a boss.
– Grab your trusty Torx T6 screwdriver and unscrew those four sneaky 1.7mm Torx screws hiding deep in the speaker recess so you can lift the lid off.
– Once you’ve freed all four screws, give that lid a pop to unveil the inner workings of the device.
Step 2

– Gently grab the interconnect cable with a pair of tweezers and carefully lift it away. Go slow and steady—you got this!
Tools Used

Step 3

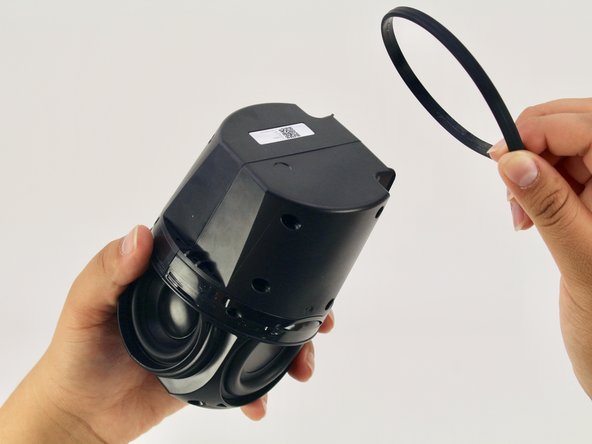
– Gently peel off the O-ring that circles the device—it’s keeping the switch panel snug and secure.
Step 4


– Grab your Torx T6 screwdriver and unscrew the four black 1.7mm Torx screws. They’re not too tricky, just give them a gentle twist.
– Next up, carefully remove the panel and mute button switch. If all goes smoothly, you should now be looking at the device’s guitar-shaped motherboard. You’re on the right track!
Step 5
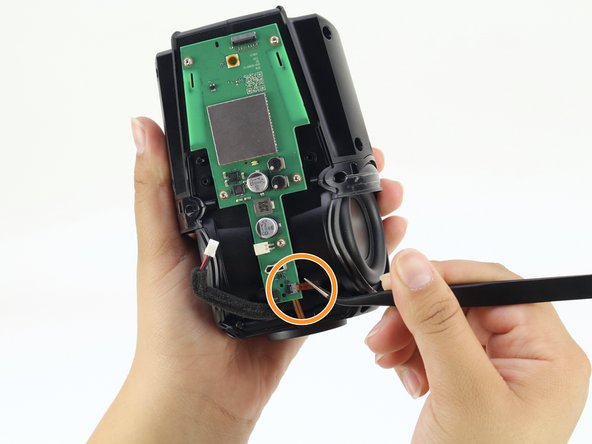

– Gently detach the cozy foam-padded red and black cable linking the motherboard to the sound driver. Just give that tab a little squeeze and pull it out with confidence!
– Next up, it’s time to disconnect the orange interconnect cable that connects the bottom of your device to the motherboard. Simply tug on that orange tab and pull straight out like a pro!
Step 6
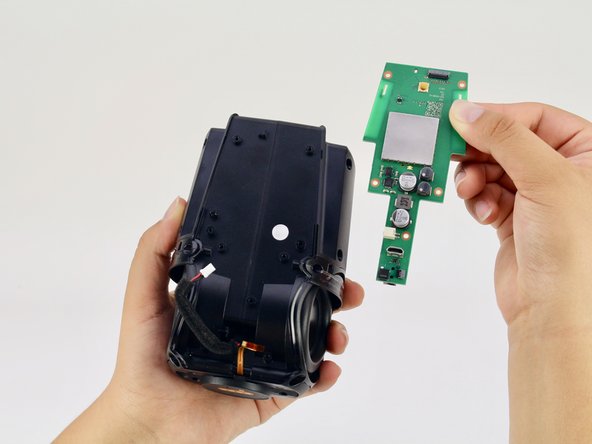

– Grab your Torx T6 screwdriver and carefully unscrew the five shiny 1.7mm Torx screws holding the motherboard in place. Once those are out, gently lift and remove the motherboard to continue with your repair. If you need help along the way, you can always schedule a repair.
Success!
