Google Home Sound Driver Replacement
Duration: 45 minutes
Steps: 9 Steps
Is your sound feeling a little off? It might be time to swap out the sound driver for a fresh one. This guide will walk you through the process of carefully taking apart your device to remove the old driver and replace it with a shiny new one. Ready to get that audio back to top form? Let’s dive in!
Step 1


Go slow when lifting the lid—yanking it up too fast might rip the interconnect cable connecting the base and lid. Easy does it!
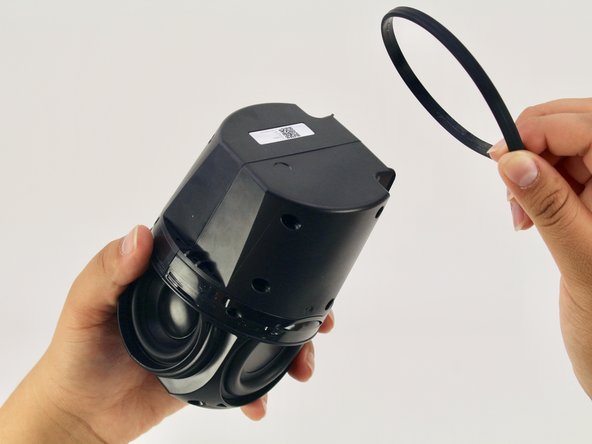
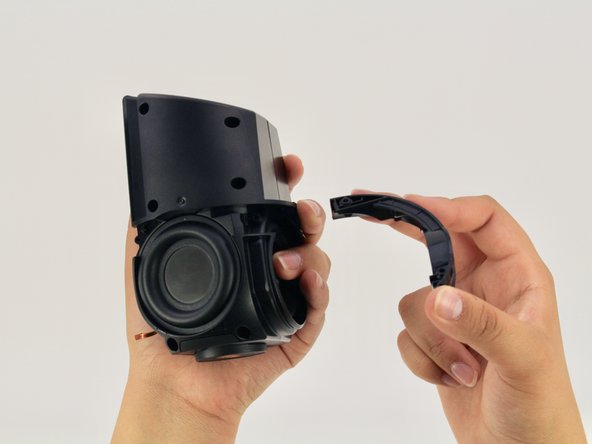
– Start by gently pulling off the base – it’s magnetically attached, so it should come off with a little tug. Set it aside for now.
– Grab a Torx T6 screwdriver and unscrew the four 1.7mm screws hiding deep in the speaker recess. This will let you lift off the lid.
– Once the screws are all out, just pop the lid off to reveal the inside – it’s like opening a little capsule!
Step 2

– Gently lift out the interconnect cable with a trusty pair of tweezers. You’ve got this!
Tools Used

Step 3

– Gently remove the O-ring that’s keeping the switch panel in place. It’s there to hold everything together, so just give it a little love and slide it off carefully.
Step 4


– Grab your trusty Torx T6 screwdriver and loosen the four black 1.7mm screws. Easy does it!
– Next, gently pop off the panel and mute button switch. If you’ve got it right, you’ll now be staring at the device’s guitar-shaped motherboard. Nice work!
Step 5
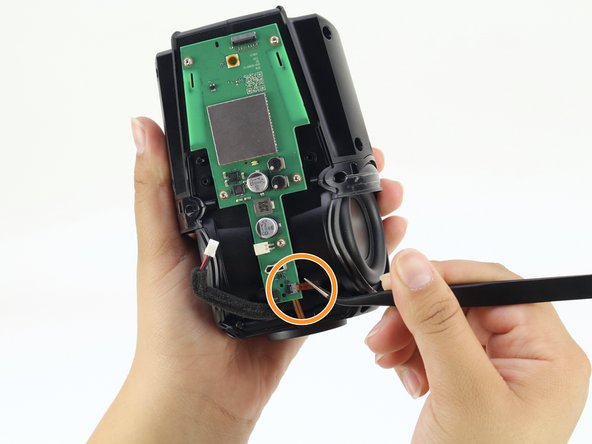

– Unplug the foam-padded red and black cable from the motherboard by giving the tab a gentle squeeze and a smooth pull—don’t worry, it’s tougher than it looks.
– Next up: take hold of the orange tab on the interconnect cable at the bottom of your device and pull it straight out from the motherboard. Nice and easy!
Step 6
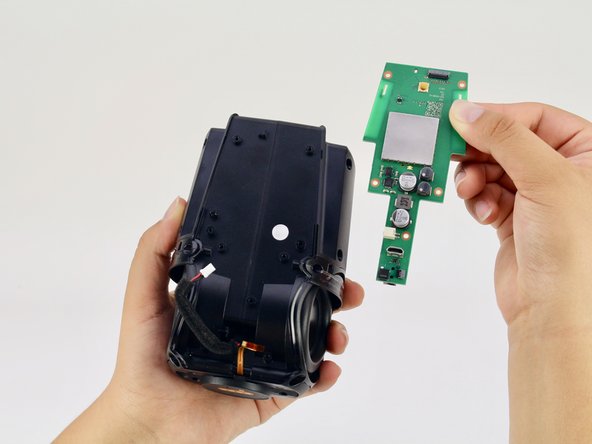

– Grab your Torx T6 screwdriver and unscrew the five silver 1.7mm Torx screws that are holding the motherboard in place. Nice and easy!
– Once those screws are out, gently remove the motherboard. You’re doing great!
Step 7

Grab a T6 screwdriver with an extra-long shaft for this move—the screws are tucked in deep!
– Grab your trusty Torx T6 screwdriver and let’s get to work! Unscrew those four black 1.7mm Torx screws patiently waiting at the bottom of your device. You’ve got this!
Step 8

– Grab your trusty Torx T6 screwdriver and unscrew the six black 1.7mm Torx screws along the side of your device. They’re just waiting to be loosened, so let’s get to it!
Step 9


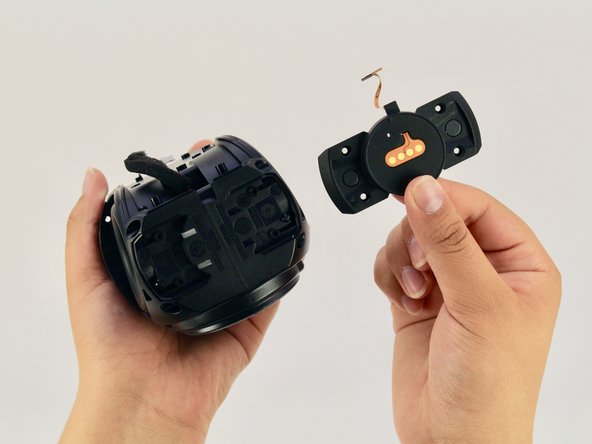
– Gently pry apart the black casing to uncover the sound driver. Don’t rush, take your time!
– Carefully remove the sound driver and set it aside. Keep it safe for the next steps!
Success!