Google Pixel 3 Fingerprint Sensor Replacement Guide
Duration: 45 minutes
Steps: 13 Steps
This repair guide comes to you from the talented team at Salvation Repair and hasn’t gotten the official thumbs-up from Google. Curious for more? Check out our awesome repair guides here.
Get ready to breathe new life into your Pixel 3 with this easy-to-follow repair guide from Salvation Repair. We’ll walk you through the process of removing and replacing a defective fingerprint sensor. Just remember, after you’ve swapped out the sensor, be sure to recalibrate the reader so everything works smoothly. If you need help or want some expert guidance, you can always schedule a repair.
Step 1

– Warm up an iOpener and place it on the bottom of your phone for about a minute. You’ve got this!
Tools Used

Step 2


Oh no! Don’t pry with metal tools or that sleek glass back might end up in smithereens! If it’s stuck, just give it some more love with a hair dryer or heat gun. If you’re feeling a bit stuck, you can always schedule a repair!
Got a back cover that’s looking like it survived a battle? No worries! A little clear packing tape can work wonders and let your suction cup stick like it’s meant to.
If your phone is a bit vintage, it might take some extra oomph to get things moving. If you’re running into trouble, heat things up a bit more and give it another go. You’ve got this!
– First, attach a suction cup to the bottom edge of the back cover – it’s been heated up to make this step a breeze.
– Now, use that suction cup to gently pry the cover open with some steady force. You got this!
– Next, take an opening pick and carefully insert it into the gap you just created. You’re making great progress! If you need help, you can always schedule a repair
Step 3

When you’re slipping an opening pick above the power button, just be gentle and don’t push it in too far – you don’t want to accidentally damage that fingerprint sensor cable. If you need help, you can always schedule a repair


Step 5


This adhesive can be a bit sticky! Don’t worry, just use a pick like a saw. Go back and forth to help cut through it.
– Let’s warm things up! Use your iOpener to heat the right edge, then gently loosen that adhesive with your opening pick. It’s like a little dance for your phone!
Tools Used
Step 6


Hey, when you’re slicing above the power button, be a little careful with that pick! Don’t go jamming it all the way in. You might accidentally snag that fingerprint sensor cable, and we don’t want to mess that up, right? Just keep it to about halfway and you’ll be good to go. If you need help, you can always schedule a repair.
– Keep that heat going and glide your tool along the edge of the phone. Pop a pick into each corner to keep that pesky adhesive from sticking back together. You’ve got this!
Step 7


Hold up, partner! Don’t go ripping off that back cover just yet. It’s still holding on tight with the fingerprint sensor cable. You don’t wanna mess that up, so take it easy! If you need help, you can always schedule a repair.
– Start by slicing around the edge of your phone like you’re cutting a delicious piece of cake. Once that’s done, gently lift the left side of the back cover—it’s like opening a treasure chest!
– Now, flip that back cover over along its long side and let it rest comfortably, making sure the fingerprint sensor cable isn’t feeling stressed. We want that cable to be happy, too!
Step 8

– Let’s pop off that fingerprint connector bracket! Give those two 4.1 mm-long Phillips screws a little spin to loosen them up.
– Remember, it’s like playing a game of memory with screws – keep track of where they go so you can put them back where they belong.
– As you put things back together, don’t go wild with those screws! Over-tightening can make your screen grumpy, so be gentle. If you need help, you can always schedule a repair
Step 9


– Time to get that fingerprint connector bracket out from under the NFC coil – use the point of a spudger to gently slide it out.
– Now, carefully remove the fingerprint connector bracket. If you need help, you can always schedule a repair
Tools Used

Step 10


Those little connectors can be a bit delicate. Be careful not to accidentally bump any of the tiny components around the socket when you disconnect it. You got this! If you need help, you can always schedule a repair
– Grab your trusty spudger and gently pry up to disconnect the fingerprint connector from its cozy socket. Easy peasy!
– When it’s time to reconnect, simply align those connectors like a pro! Start by pressing down on one side until you hear that satisfying click, then repeat the magic on the other side. Remember, no middle pressing—let’s keep those pins safe and sound to avoid any bending mishaps that could lead to permanent damage.
Tools Used
Step 11


– Let’s get started by removing the back cover. Easy does it!
– Before you put on a new back cover, make sure to clean up any leftover adhesive from the phone frame. Grab an opening tool and some high concentration isopropyl alcohol to get the job done.
– If you’re reusing the old back cover, give it a good cleaning to get rid of any leftover adhesive, and then apply some fresh back cover adhesive to get it sticking like new again.
– If you’re installing a brand new back cover, take a minute to compare it to the original part and transfer over any extra bits, like the flash diffuser, to your shiny new replacement.
– To get that new back cover adhesive on just right, follow our simple guide and you’ll be golden. And if you need help, you can always schedule a repair with the pros at Salvation Repair.
Tools Used

Step 12
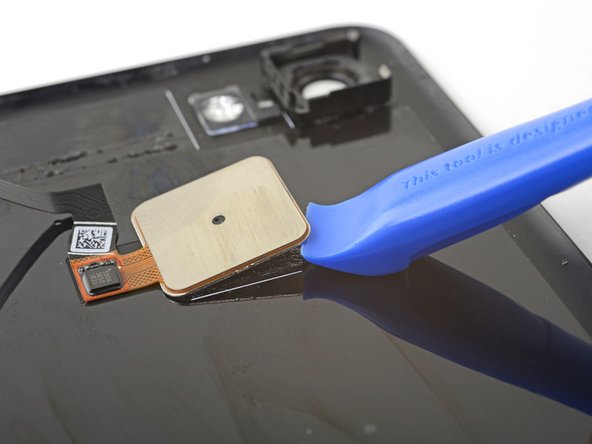

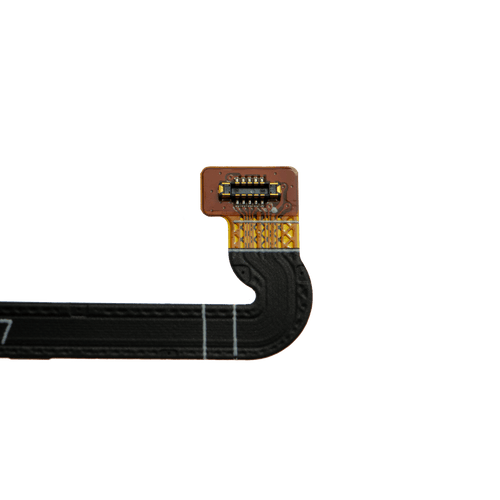
– Let’s get that fingerprint sensor feeling the heat! Warm up an iOpener and give the back of the sensor a nice, cozy minute-long hug. That’ll loosen up the glue holding it in place.
– Now, grab your opening tool (you got this!) and gently slide the tip under the edge of the fingerprint sensor. Give it a little wiggle to help it pop free from the back cover. You’re doing great!
Tools Used
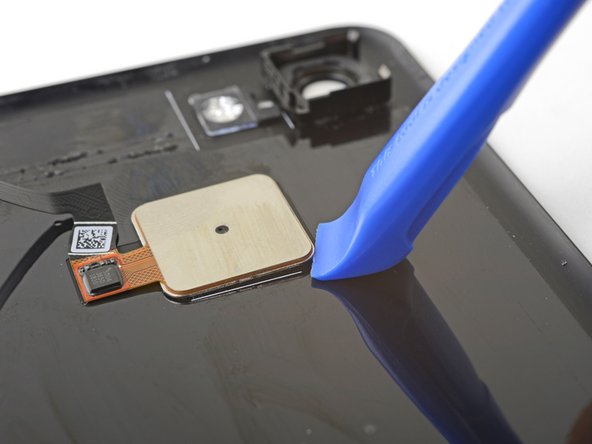
Step 13

– Pop out the fingerprint sensor.
– Stick the fingerprint sensor back onto the cover using custom pre-cut adhesive or double-sided tape like Tesa tape.
