Google Pixel 3a Screen Replacement
Duration: 45 minutes
Steps: 13 Steps
Welcome to Salvation Repair’s step-by-step guide. We’ve put together this easy-to-follow guide to help you repair your device. For more information about our repair guides, check out our website.
Be careful when handling the Pixel 3a’s display panel – it’s pretty fragile and can break easily. If you need help, you can always schedule a repair
Hey there! This guide comes to you from the awesome team at Salvation Repair, and while it hasn’t received the official Google stamp of approval, it’s packed with helpful tips just for you. Is your Pixel sporting a cracked screen? No worries, we’ve got you covered! Just remember, the Pixel 3a’s display is a bit on the delicate side, so if you’re reusing the screen, take a moment to heed the warnings in the opening steps. If you need help, you can always schedule a repair!
Step 1


– Let’s get started by checking out the two seams on your phone:
– Before you dive in, take a closer look at these key areas on the screen:
– Screen seam: This is the spot where the screen meets the rest of the phone – it’s where you’ll want to focus your prying efforts.
– Frame seam: This is where the plastic frame connects with the back cover, held together with screws. Be careful not to pry here, or you might damage something.
– Keep an eye out for the screen flex cable – don’t pry too deep, or you risk causing some damage.
– Adhesive perimeter: When prying, make sure to stay within the narrow perimeter and angle your pick just right to avoid damaging the display panel. If you need help, you can always schedule a repair
Step 2

You can skip this step if you’re feeling brave! The Pixel 3a’s screen adhesive isn’t the strongest, so heating it up could help prevent cracking. But hey, if you’re not comfortable with that, no worries! It’s all about what makes you feel good. If you need help, you can always schedule a repair.
– Let’s get started by warming up that iOpener and applying it to the right edge of the display for about a minute. If you need help, you can always schedule a repair
Tools Used

Step 3


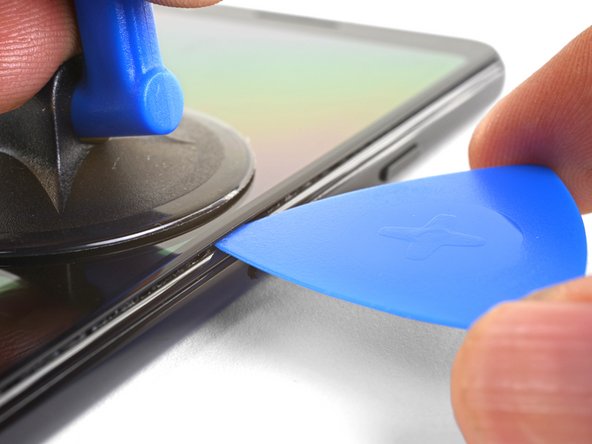
– Grab a suction cup and place it right by the edge of the screen, like it’s getting ready for a fun adventure.
– Now, give that suction cup a good, steady pull – think of it as a gentle tug-of-war!
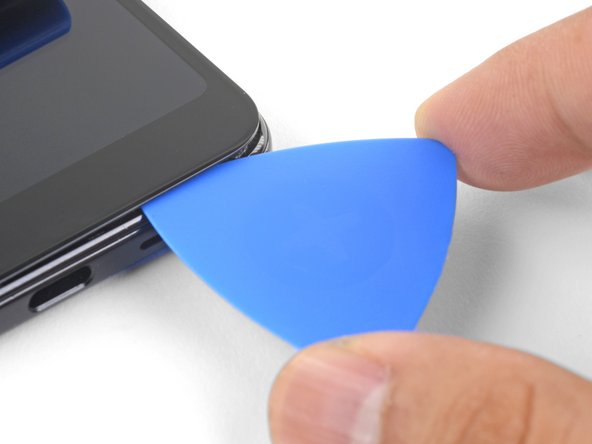
– Slide the pick into the tiny gap, but keep it chill and don’t go deeper than 1 mm.
Step 4

Whoa there, pick pal! You might’ve hit a ridge that’s close to the OLED panel, oops! Gently move the pick and give it another go, alright?
Alright, let’s get this pick in there without hurting the OLED panel. You’ll be slicing the long edges of the phone soon, so it’s important to get this step right. Don’t worry, we’ve got you covered. If you need help, you can always schedule a repair.
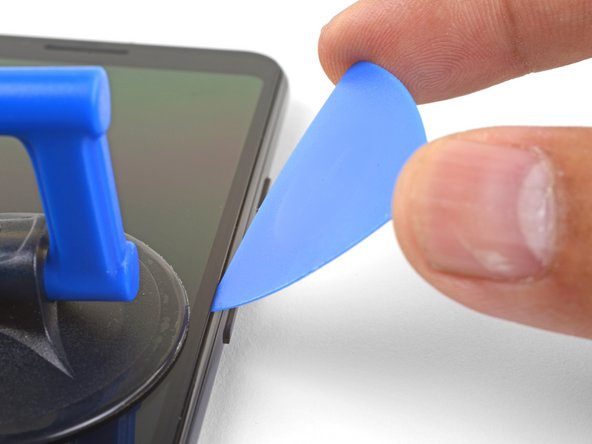
– Get that pick in there – insert it 1 mm into the gap and then pivot it upwards to a nice steep angle. You got this!
– Now, carefully push the pick into the gap about 1/4″ (6 mm). It should slide in smoothly below the OLED panel. If you need help, you can always schedule a repair
Step 5


Keep that pick under 1/4″ (6 mm) or you might accidentally tango with the screen’s flex cable, and nobody wants that dance disaster!
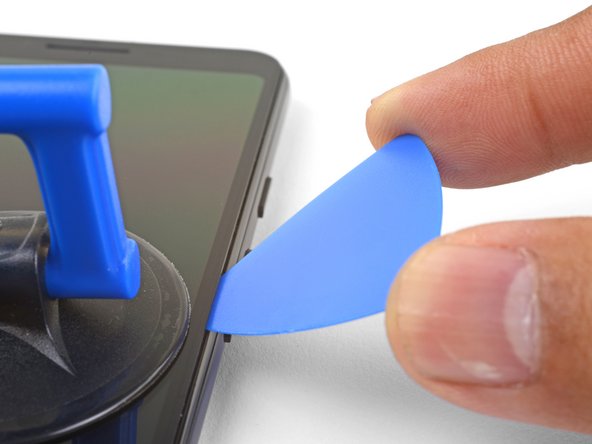
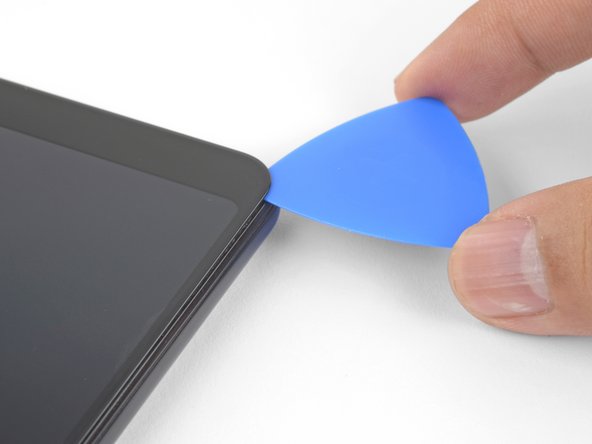
– Gently glide the pick along the right edge, cutting through that sticky adhesive like a pro.
– Keep a pick in place to stop the adhesive from sealing back up. You’ve got this!
Step 6

Carefully slice around the bottom edge of your phone, but don’t insert the pick more than 1/4″ (6 mm) – we don’t want any accidents!
Having trouble slicing through a corner? Try applying a heated iOpener to the area for about a minute and then give it another shot. If you need help, you can always schedule a repair
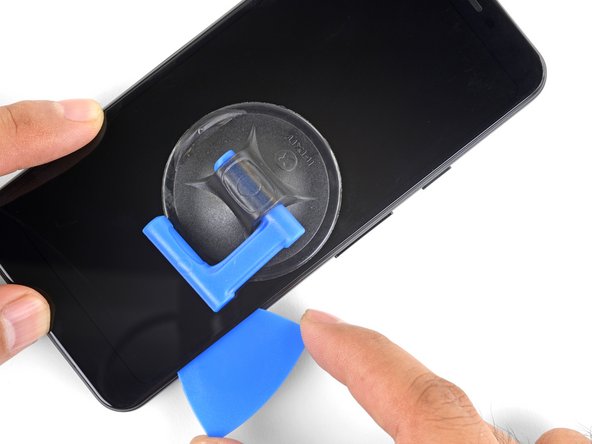
– Let’s get this party started by sliding the pick around the bottom right corner. We’re gonna cut through that adhesive like butter!
– Now, keep that pick moving along the bottom edge of the phone and around the left corner. You’re doing great!
Tools Used
Step 7


– Let’s get this phone open! Slide your pick along the left edge of the phone, carefully angling it below the OLED panel. Don’t go too deep – just about 1/4 inch (6 mm) is perfect.
– Need to angle the pick right? No worries! Insert the point of the pick about 1 mm, angle it upwards, and then slowly push it in that 1/4 inch. You got this!
Step 8


– Alright, let’s get this party started! Carefully slice along that top edge, but keep your pick at a cool 5/16″ (8 mm) deep. Don’t get too excited, just slide it along smoothly! 😉
Step 9


Be careful not to remove the screen just yet – it’s still connected to the phone by a flex cable located near the left edge. If you need help, you can always schedule a repair
– With all the edges cut, gently open the right edge of the screen like you’re opening a present (but be careful!).
– Use your trusty opening pick to snip through any stubborn adhesive left behind.
Step 10


– Now that you’ve cut through all the adhesives, let’s flip that screen glass over so it’s resting glass-side down on your phone. Just make sure the screen flex cable is gently arched and not too tight!
Step 11

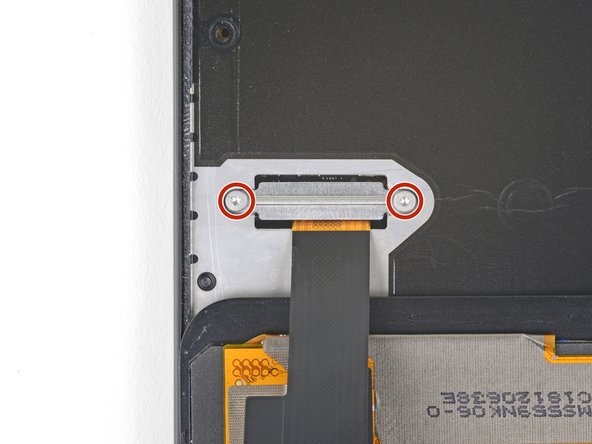

– Let’s get started by carefully peeling off the black tape that’s covering the screen connector bracket – it’s time to set it free!
– Next, remove the two 4.4 mm long T3 screws that are holding the screen connector bracket in place. You’re making great progress!
– Now it’s time to remove the screen connector bracket itself. Take your time and be gentle, we don’t want any accidents!
– If the tape is still in good condition, you can definitely reuse it when you’re reassembling everything. If not, don’t worry – just replace it with some fresh electrical tape. And if you need help along the way, you can always schedule a repair with the experts at Salvation Repair.
Step 12


When you’re unplugging connectors like these, just a friendly reminder to watch out for those tiny surface-mounted components hanging out around the socket. They can be a bit shy and might get knocked loose if you’re not careful!
– Time to give that screen flex cable a little nudge! Use the tip of your spudger to gently pry it up and disconnect it.
– Alright, let’s reconnect that press connector! Line it up perfectly and give one side a gentle press until you hear a click. Then, repeat on the other side. Don’t press on the middle, though, or you might bend the pins. That’s not cool, right? If you’re not sure about this part, you can always schedule a repair.
Tools Used

Step 13


– First things first, let’s get that screen off! Remove the screen with care.
– Now, it’s time for some detective work! Take a good look at your replacement screen and compare it to your original part. You might need to move over a few extra bits and bobs (like the speaker mesh) to the new screen.
– Ready to put the screen back on? Here’s how:
– Once you’ve reassembled everything, your screen will go through a calibration dance during boot-up. Just a heads up: keep your hands off the screen while it calibrates. Touching it could lead to some touchy problems later on.
– If you’re using custom-cut adhesives, be sure to check out this guide for some handy tips.
– And if double-sided tape is your go-to (like Tesa tape), don’t forget to follow this guide as well.