Google Pixel 4 Grip Sensor Replacement Guide: DIY Repair Tutorial
Duration: 45 minutes
Steps: 43 Steps
A heads up from the team at Salvation Repair: we put this guide together to help you fix your device, but it’s not officially endorsed by Google.
Before you start, make sure your battery is below 25% to avoid any accidents.
Keep in mind that this procedure will likely remove the Pixel 4’s grip sensors, so proceed with caution.
Be careful:
Warning: if you’re not comfortable with this process, don’t worry – you can always schedule a repair and let the pros handle it.
Hey there! This repair guide is brought to you by the fantastic iFixit team, and it’s not affiliated with Google. Curious about our repair steps? Check them out here! In this guide, we’re diving into replacing the right grip sensor and flex cable in your Google Pixel 4. Quick safety tip: make sure your battery is under 25% charged before you start. This little trick helps prevent any pesky thermal surprises if the battery gets damaged during repairs. Just a heads up, replacing the Pixel 4’s grip sensors is likely to be a messy business—they’re really stuck to the midframe and might break apart. So, before you get started, ensure you have your replacement parts ready! Also, a friendly reminder: Google points out that taking apart the front laser assembly could expose you to invisible infrared laser fun—check their safety tips here. And a quick warning: if your battery looks banged up or misshaped, don’t even think about reusing it—swap it out for a fresh one. Safety first, folks!
Step 1


– Ready to pop that SIM card out? Let’s do it! Find the little hole on the left side of your phone for the SIM tray. Grab your SIM eject tool (or a paperclip in a pinch!) and gently push it in. You’ll feel a little click, and then you can slide that tray right out. Piece of cake, right?
Step 2

You can also use a hair dryer, heat gun, or hot plate to help loosen the glue, but be careful not to get things too toasty! The display and battery are a little sensitive to heat. If you need help, you can always schedule a repair
– Get ready to unlock your device’s full potential – start by heating up an iOpener and applying it to the bottom edge of the back panel for about a minute. If you need help, you can always schedule a repair
Tools Used

Step 3


Hey there, if your phone’s back glass is super cracked, you might need to get creative with the suction cup. A little clear packing tape can help it stick, or try a strong tape instead of the suction cup altogether. If that doesn’t work, a little superglue could do the trick! Of course, if things get too tricky, you can always schedule a repair.
– Now it’s time to get a grip on that back panel. Apply a suction cup to the heated edge, pressing down firmly to create suction – try to get it as close to the edge as possible. If you need help, you can always schedule a repair
Step 4


Depending on how old your phone is, this might be a bit tricky. If you find yourself struggling, feel free to crank up the heat a little more on the edge and give it another shot!
– Get a grip on that suction cup and pull up with some steady force – you’re aiming to create a gap between the back panel and the frame, and it’s gonna be a beautiful thing!
– Now it’s time to bring in the opening pick – carefully insert the point into the gap you just created, and you’ll be one step closer to fixing your device. If you need help, you can always schedule a repair
Step 5


– Let’s loosen up that adhesive! Slide the opening pick along the bottom edge towards the left corner, gently slicing through the adhesive. It’s like a little dance!
– Keep the pick in place and slide it from the bottom left corner over to the right corner, making sure you cut through all that adhesive. High five for getting this far!
– Leave the pick in the bottom right corner. That way, the adhesive won’t try to sneak back together. You’ve got this!
Step 6

– Get your iOpener ready and place it on the left edge of the phone for about a minute. You’re doing great!
Tools Used
Step 7


– Let’s get that back panel off! Insert a second opening pick underneath the back panel right above the charge port.
– Now, give that pick a little slide to the bottom left corner of the phone. You got this!
Step 8


Hey, this adhesive can be a little tricky, but with some groovy moves, you’ll have it sliced in no time! Push your pick in and out like it’s a dance move and you’ll be hitting those iPad repair goals in the blink of an eye. Need help? You can always schedule a repair!
– Gently slide the opening pick around the bottom left corner and glide it up the left side of your phone to carefully cut through the adhesive. Keep it steady and smooth!
– When you reach the top left corner, right by the camera, pause for a moment and leave the pick in place. You’re doing great!
Step 9

– Grab your trusty iOpener and gently place it on the right edge of your phone. Give it a minute to work its magic!
Tools Used
Step 10


– With the first two opening picks still in their cozy spots, slide in a third pick on the lower right side.
– Gently glide the opening pick upwards towards the top of the phone, cutting through the adhesive on the right side like a pro.
– Pause when you hit the top right corner, and keep that pick in place for now.
Step 11


– Let’s get this party started! Slide the third opening pick around the top right corner and across the top side of the phone, slicing the final strip of adhesive. We’re almost there! If you need help, you can always schedule a repair.
Step 12


– Now that you’ve sliced around the phone’s perimeter, gently pry the right edge of the back cover open – think of it like opening a book. Be careful, though!
– Don’t try to completely remove the panel just yet, as it’s still connected to the phone. If you need help, you can always schedule a repair
Step 13


– Keep on swinging that back panel open until it’s resting nice and easy on the left side of your phone. Just be mindful of that ribbon cable, you don’t want to put any pressure on it!
– Hey, this is a great time to power up your phone and test everything out before sealing things back up. Make sure to shut it down completely before you move on to the next step. You’re doing awesome!
Step 14

Remember where your screws came from, buddy. They’re like puzzle pieces for your device. Keep them organized, and you’ll have a smooth sailing repair.
– Let’s get started by removing the five T3 Torx screws that hold the battery connector shield in place:
– You’ll need to take out four 4.0 mm screws
– And one 2.1 mm screw – don’t worry, it’s an easy one! If you need help, you can always schedule a repair


Step 16


Hey, be careful when using the spudger near the battery. You don’t want to poke a hole in it, right? If you need help, you can always schedule a repair.
– Using the pointed end of a spudger, gently lift the battery connector straight up from the motherboard to disconnect the battery. It’s like giving the battery a little high five!
– To reconnect the connector, carefully align it and press down on one side until it clicks into place. Then, repeat on the other side. Don’t press down on the middle, or you might bend the pins. We wouldn’t want to cause any permanent damage! If you need help, you can always schedule a repair.
Tools Used

Step 17


– With your trusty spudger, carefully fold the battery cable over so it doesn’t get in the way while you’re working your magic. You’re doing great! If you need help, you can always schedule a repair
Tools Used
Step 18

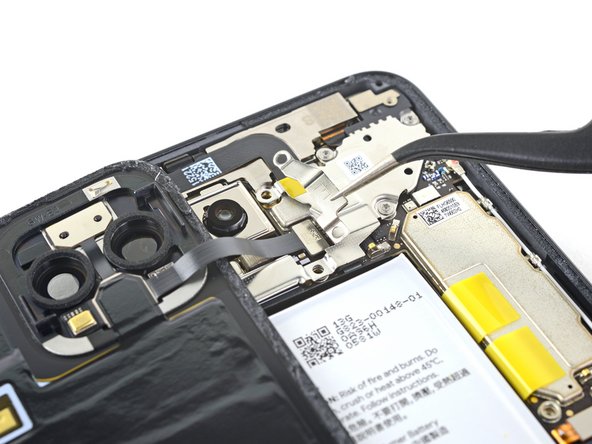
– Grab your trusty T3 Torx driver and get ready to tackle those two 4 mm screws holding down the back panel connector cover. You’ve got this!


Step 22


Having trouble getting those adhesive pull tabs to stretch? No worries, just fill a plastic dropper or syringe with some high-concentration isopropyl alcohol (we’re talking 90% or higher) and add a few drops under the left edge of the battery. Give it a minute to work its magic and loosen up that adhesive.
If the adhesive starts to get stubborn, don’t stress – just wrap it around a spudger and keep on pulling. It might take a bit of elbow grease, but you’ve got this!
Be prepared for a bit of a workout, as this step can require some serious force. But don’t worry, you’re making progress!
A heads up: these adhesive pull tabs can be pretty fragile, so be gentle and pull slowly to avoid any snaps. If you need help, you can always schedule a repair
– Give that yellow pull tab a nice steady tug on the adhesive strip—let’s get this party started!
– Keep that momentum going and pull up firmly on the adhesive strip. If you have a spudger handy, give it a little spin now and then to keep the exposed part of the pull tab nice and short.
– Keep it up with each of the three pull tabs until they’ve all come out or decided to take a break by snapping in half!
Tools Used
Step 23


Keep that opening pick away from the grip sensor cable and anything below it! We don’t want to accidentally give the charge port flex cable a surprise it didn’t sign up for, especially since it’s chilling under the battery.
If you managed to remove all three adhesive pull tabs, you might still find it helpful to use an opening pick to gently coax the battery out of its spot. If you need help, you can always schedule a repair
– If those pesky battery tabs decided to snap while you’re pulling them out, don’t fret! Just slide an opening pick into the upper right edge of the battery and give that adhesive a little slice underneath. You’ve got this!
Step 24


Hey, don’t try to reuse that battery if it’s looking a little worse for wear! A bent or damaged battery can be a safety risk. It’s always best to just pop in a fresh one. If you need help, you can always schedule a repair.
Alright, let’s make sure we’re all dried up! If there’s any alcohol solution left hanging around in your phone, gently wipe it off with a lint-free cloth or give it some air time to dry out before you pop in that battery. No worries, it’s a quick and easy step! If you need help with this or any other part of the repair, you can always schedule a repair.
– Time to say goodbye to that old battery! Gently lift it up and away from the phone to remove it. You might need to peel it away from any leftover adhesive tabs – don’t worry, it’s easier than it sounds.
– Ready for a brand new battery? Let’s get started with the installation process.
– If you’re using stretch release adhesive, apply it to the new battery. Otherwise, add some double-sided tape or pre-cut